

Last Updated on August 26, 2026 by Mason Reed
Your tent floor takes direct pressure from grit, roots, sticks, and rough ground every time you camp. A correctly sized Tyvek footprint adds a lightweight abrasion layer and keeps the underside of the tent cleaner. The basic DIY version is simple: measure the tent floor, mark the Tyvek slightly smaller, cut it, and test the fit. Glue, folded seams, and grommets are optional upgrades rather than requirements.
Quick Answer
To make a Tyvek tent footprint, pitch or measure your tent floor, mark a footprint 1–2 inches smaller on every side, and cut it cleanly. Test that no Tyvek sticks out beyond the floor. Reinforce corners and add grommets only if you need attachment points; otherwise, a basic cut sheet works without glue or sewing.
Key Takeaways
- Cut the footprint slightly smaller than the tent floor on every side so exposed material cannot catch rainwater.
- Tyvek HomeWrap is a lightweight, water-resistant HDPE sheet; it is not an absolute waterproof membrane under every condition.
- The simplest footprint needs only measuring, marking, cutting, and a test pitch.
- Grommets, folded edges, adhesive, and reinforced corners are optional upgrades for campers who want attachment points.
- Tyvek is recyclable as flexible HDPE where an appropriate local recycling facility accepts it, but it is not compostable.
At a Glance
| Time Required | About 30–60 minutes for a basic cut-only footprint; roughly 1–2 hours for a reinforced version, plus any adhesive cure time required by the product label. |
| Difficulty | Easy |
| Tools Needed | Tape measure, permanent marker, straight edge, and sharp scissors or a utility knife; optional grommet tools and adhesive for reinforcement. |
| Cost | Varies by sheet size and source. A basic footprint costs less if you can buy a cut sheet or offcut; grommets, adhesive, and reinforcement add to the total. |
What’s in This Article
- Why You Need a Tent Footprint
- Material Selection and Preparation
- What You’ll Need
- Measurement and Design
- How to Cut and Assemble the Footprint
- How to Test and Finalize Your Footprint
- How to Reduce Tyvek Footprint Noise
- Tips for Windy Conditions
- Common Mistakes to Avoid
- Troubleshooting
- Frequently Asked Questions
Disclosure: As an Amazon Associate I earn from qualifying purchases. Some links on this page are affiliate links, at no extra cost to you.
Why You Need a Tent Footprint
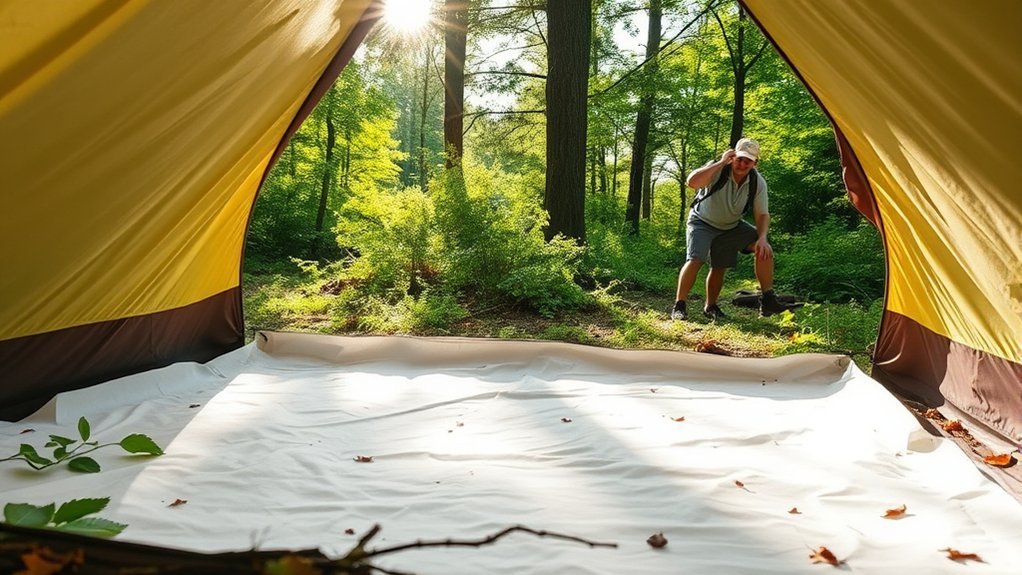
A tent footprint sits between the tent floor and the ground. Its main jobs are to reduce abrasion, help protect against sharp debris, and keep dirt and mud off the underside of the tent. It can be especially useful on gravel, rocky campsites, hard-packed soil, and other abrasive surfaces.
A footprint is not mandatory for every trip. On soft grass, sand, or other low-abrasion surfaces, some campers choose to leave it at home. REI’s guidance similarly notes that the value of a footprint depends on where and how often you camp.
The most important rain rule is simple: the footprint must stay underneath the tent floor. If Tyvek sticks out beyond the floor perimeter, rain running from the tent can land on the exposed sheet and travel underneath the shelter.
Note: A footprint does not waterproof a damaged tent floor or replace seam sealing. It is primarily an abrasion and cleanliness layer with useful resistance to ground moisture.
Material Selection and Preparation
Tyvek is a nonwoven high-density polyethylene material. DuPont describes Tyvek HomeWrap as a vapor-permeable water-resistive barrier that resists bulk-water penetration while allowing water vapor to pass through. Its current product sheet lists a basis weight of 1.8 oz/yd².
Choosing Tyvek Material
Two Tyvek styles are commonly considered for DIY groundsheets. Tyvek HomeWrap is the stiffer construction-grade option and is widely available through building-material suppliers. Tyvek 1443R is a lighter soft-structure Tyvek style; DuPont lists it at 43 g/m².
HomeWrap is a practical choice when abrasion resistance, availability, and low cost matter most. A softer Tyvek style can be easier to pack, but availability and price vary. Whichever material you choose, order or obtain a piece large enough to cover the tent floor before trimming.
| Material | Main Strength | Trade-Off | Best Fit |
|---|---|---|---|
| Tyvek HomeWrap | Durable, lightweight, water resistant, easy to cut | Stiff and crinkly when new | General DIY camping footprints |
| Tyvek 1443R | Lighter, softer structure | Harder to source in some areas | Campers prioritizing packability |
| Thin plastic film / polycro-style sheet | Very light and simple | Typically less resistant to abrasion and punctures | Ultralight use on relatively smooth ground |
| Coated nylon or polyester | Can provide durable, purpose-built ground protection | Weight, price, and water resistance vary by fabric and coating | Custom sewn or commercial-style footprints |
Safety Handling Precautions
Cut Tyvek on a flat, stable surface. Keep fingers away from the cutting path and use a metal straight edge when guiding a utility knife. A Sharpie or other permanent marker makes the cut line easy to see.
Warning: If you use solvent-based contact cement, read the exact product label and Safety Data Sheet first. Some formulas produce flammable vapors and require strong ventilation. Keep them away from cigarettes, flames, pilot lights, heaters, sparks, and other ignition sources. Gloves can also help keep adhesive off your skin.
Water does not ordinarily damage Tyvek’s physical properties, but storing leftover material clean and dry keeps dirt, adhesive residue, and moisture from other gear from becoming a storage problem. Keep it away from excessive heat and prolonged unnecessary UV exposure.
Optional Durability Enhancements
A basic cut edge is sufficient for many DIY footprints because Tyvek is nonwoven. If you want attachment points, reinforce the corners before punching holes or installing grommets. Fold the Tyvek into multiple layers at each corner or bond on a small reinforcing patch first so the grommet is not pulling against a single thin layer.
Extra patches can also protect small high-wear areas, but avoid adding unnecessary material around the entire footprint. The finished edge still needs to remain inside the tent floor perimeter.
What You’ll Need
Estimated time: About 30–60 minutes for the basic cut-only version. A reinforced version can take 1–2 hours of active work, plus whatever cure time your chosen adhesive requires.
Essentials:
- Tyvek sheet slightly larger than your tent floor before trimming
- Tape measure
- Metal straight edge or ruler
- Sharpie or other permanent marker
- Utility knife or sharp scissors
- A flat cutting surface
Optional for a reinforced footprint:
- Graph paper for a tapered or unusual floor plan
- Masking tape to hold measurements or templates in position
- Tyvek-compatible adhesive or contact cement
- Grommet kit with hole punch and setting tools
- Small Tyvek scraps for reinforcing corners
- Protective gloves
- Short loops of shock cord or guyline for attachment points
Measurement and Design
Accurate sizing matters more than any other part of this project. Measure the actual tent floor—not the rain fly. You can use the manufacturer’s floor dimensions, but pitching the tent and measuring the real floor is safer when the shelter has tapered sides or an unusual shape.
Note: Make the finished footprint about 1–2 inches smaller than the tent floor on every side. REI’s footprint guidance recommends a slightly undersized footprint so rainwater cannot pool between the footprint and tent.
Worked Sizing Example
If a rectangular tent floor measures 84 × 60 inches and you want a 2-inch inset on every edge, subtract 4 inches from each overall dimension. Your target footprint would be about 80 × 56 inches.
For a tapered floor, pitch the tent on top of an oversized Tyvek sheet and trace the floor outline. Then mark a second line 1–2 inches inside the traced perimeter. Cut along the inner line, not the outer trace.
If you want a small “porch” near the door, treat it as an optional vestibule extension. It must remain fully protected beneath the vestibule or other weather coverage. If rain can land directly on it, fold the extension underneath the tent rather than leaving it exposed.
Pro Tip: Before making any permanent cut on an unusual tent shape, pitch the shelter over the Tyvek and mark the actual outline. It is easier to see a sizing mistake while the sheet is still oversized.
How to Cut and Assemble the Footprint
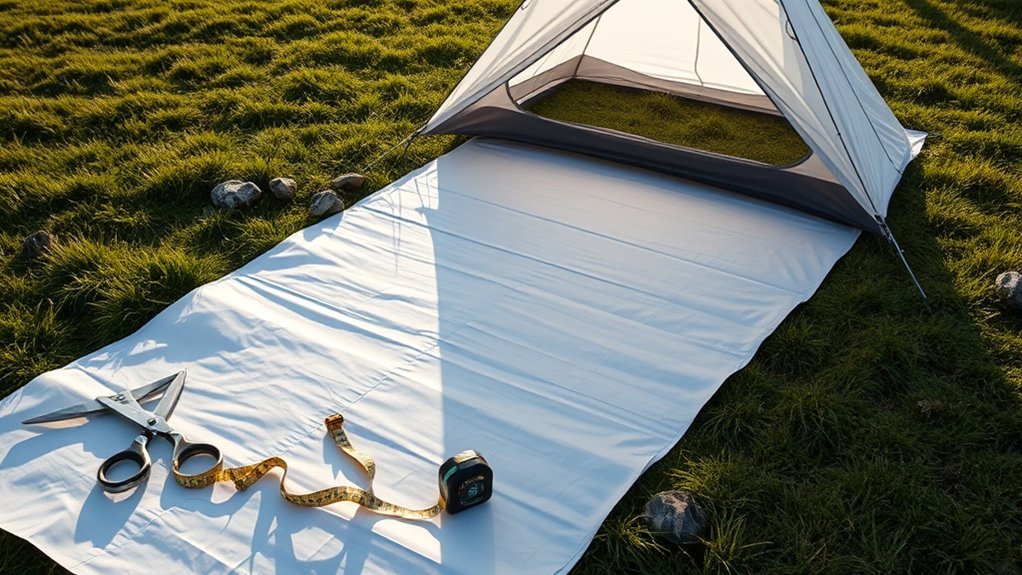
Basic Cut-Only Method
- Lay out the Tyvek. Place the sheet flat on a clean, stable surface and smooth major creases.
- Measure or trace the tent floor. Use the manufacturer’s floor dimensions or pitch the tent on the Tyvek and trace its actual outline.
- Mark the inset. Draw a second cut line about 1–2 inches inside every edge of the tent-floor outline.
- Cut along the inner line. Use sharp scissors or guide a utility knife along a metal straight edge.
- Test the fit. Pitch the tent over the footprint. No Tyvek should stick out beyond the tent floor.
For many campers, that is the entire project. There is no need to glue the perimeter simply to stop the material from fraying.
Optional Reinforced Version
- Plan the reinforced edges and corners. Leave enough extra material in your original layout for any folds or reinforcing tabs while still making sure the final finished footprint is smaller than the tent floor.
- Pre-fold the reinforcement. Crease the intended folds before adding adhesive so the finished shape stays accurate.
- Test the adhesive on a scrap. Tyvek can be glued, but adhesive formulas vary. Confirm that your chosen product bonds properly without damaging or excessively stiffening the material.
- Apply adhesive according to its label. Do not assume every contact cement has the same open time or application method.
- Press the reinforced areas firmly. Align the pieces carefully before joining contact-type adhesives because repositioning may be difficult.
- Allow the required cure time. Follow the manufacturer’s stated handling and full-cure instructions before punching holes or taking the footprint into the field.
- Add optional grommets. Punch through reinforced corners rather than a single layer of Tyvek.
How to Test and Finalize Your Footprint
Lay the footprint flat and pitch the complete tent on top of it. Walk around the entire perimeter. If you can see Tyvek extending beyond the tent floor, mark the exposed area and trim it or fold it underneath.
Check the ground underneath for stones, sticks, cones, sharp roots, or other pressure points. A footprint adds protection, but it is not puncture-proof and should not replace basic campsite preparation.
If you installed grommets or cord loops, attach them without pulling the Tyvek so tightly that the corners distort. The goal is to stop excessive movement, not to tension the footprint like a rain fly.
| Task | Purpose | Correct Outcome |
|---|---|---|
| Lay out footprint | Check shape and cut quality | Edges lie flat |
| Pitch tent over it | Confirm final size | No Tyvek is exposed beyond the tent floor |
| Inspect anchor points | Check reinforcement | No tearing or excessive tension |
| Check ground | Remove sharp pressure points | Tent floor sits on a smoother surface |
How to Reduce Tyvek Footprint Noise

Fresh HomeWrap can sound stiff and crinkly. The simplest way to soften it without introducing detergent or heat is to repeatedly crumple the sheet by hand, open it flat, and repeat until it feels less paper-like.
Pro Tip: Crumple and flatten new HomeWrap several times before your first trip. It softens the sheet mechanically and avoids the uncertainty of washing a construction product that was not sold as camping fabric.
- Keep the footprint flat and fully underneath the tent so exposed material cannot flap.
- Remove folds and bunches before pitching the tent.
- Use optional attachment loops only when movement is a real problem.
- A small reinforcement patch under a known high-wear area can add protection, but a full second layer is usually unnecessary.
Some campers pre-wash Tyvek as a DIY softening method. DuPont publishes cool-water, low-agitation laundering guidance for certain Tyvek protective garments, but that guidance is not specifically a HomeWrap footprint instruction. If you choose to experiment with washing HomeWrap, use cool water, minimal mild detergent, gentle agitation, and air drying; avoid hot drying and ironing.
Tips for Windy Conditions
Wind can move an uncovered Tyvek sheet quickly, so position the footprint immediately before pitching the tent. Once the tent and gear are on top of it, movement is usually much easier to control.
Secure With Grommets
Grommets are optional, but they can provide useful anchor points. Put them mainly at reinforced corners rather than spacing unnecessary holes around the entire perimeter. A folded Tyvek corner or bonded reinforcement patch spreads the load and lowers the chance of the hole tearing.
Use Weights for Stability
When you are setting up and the tent is not yet on top of the footprint, place gear, filled water containers, permitted rocks, or other temporary weights on the corners. Pull the sheet flat before weighting it. Remove or reposition temporary weights once the tent is pitched so they do not create pressure points beneath the floor.
If you use a vestibule extension, keep it fully sheltered. In rain, fold any exposed section underneath the tent rather than allowing it to catch runoff.
Choose Windbreak Locations
Where campsite rules allow, choose a durable established site with natural terrain protection from prevailing wind. Avoid dead branches, loose debris, exposed ridgelines, drainage channels, and depressions that can collect water.
- Prefer level or gently draining ground rather than a hollow where rain can pool.
- Remove small sharp debris that could press into the tent floor.
- Orient the tent according to the manufacturer’s wind guidance when available.
- Do not rely on a footprint as a substitute for properly staking and guying the tent itself.
Common Mistakes to Avoid
- Cutting the footprint too large. If Tyvek extends beyond the tent floor, it can catch rainwater and channel it underneath the shelter.
- Measuring the rain fly instead of the floor. The finished footprint should be based primarily on the tent-floor perimeter.
- Overbuilding a simple project. Folded seams, glue, and grommets are optional. A correctly sized cut sheet works for many campers.
- Punching grommets through one thin layer. Reinforce anchor points first so tension is spread over more material.
- Ignoring the adhesive label. Contact-cement formulas have different application, open, bond, and cure times.
- Using solvent adhesive near ignition sources. Some contact cements release flammable vapors.
- Leaving a vestibule “porch” exposed. Any extension that can catch rain should be folded underneath the tent.
- Assuming the footprint makes a leaking tent waterproof. Repair damaged coatings, seams, or holes separately.
- Leaving sharp debris underneath. Tyvek is tough, but concentrated pressure from a sharp object can still damage the footprint or tent floor.
Troubleshooting a Tyvek Tent Footprint
Water Is Collecting Between the Footprint and Tent
The footprint is probably exposed beyond the tent floor or positioned incorrectly. Dry the area, fold every visible edge underneath, and trim the footprint smaller before the next trip.
The Footprint Slides During Setup
Place temporary weights on the corners while pitching the tent. Once the tent and gear are on top, the sheet usually stays in place. If movement remains a problem, add reinforced corner loops rather than punching unreinforced holes.
A Grommet Is Starting to Tear Out
Stop tensioning that point. Remove the damaged hardware if necessary and rebuild the corner with a larger folded or bonded Tyvek reinforcement before installing a new grommet.
The Tyvek Is Too Noisy
Crumple and flatten it repeatedly at home. Also make sure the sheet is flat beneath the tent rather than wrinkled or sticking out where wind can move it.
The Footprint Is Already Too Large
You do not necessarily need to start over. Pitch the tent on top of it, mark the correct inset, and trim the perimeter. On a trip, fold exposed material underneath as a temporary fix.
Frequently Asked Questions
Can I use a Tyvek footprint with any tent brand?
Yes. A DIY Tyvek footprint is not brand-specific. What matters is fitting it to the actual floor shape of your tent and keeping the finished edges slightly inside the floor perimeter.
How do I clean my Tyvek footprint after use?
Shake or brush off loose dirt first. For remaining grime, wipe or rinse the sheet with cool water and a small amount of mild soap, then air-dry it completely before storage. Avoid ironing or exposing it to unnecessary high heat.
Is Tyvek recyclable or compostable?
Tyvek is made from high-density polyethylene and is recyclable at facilities that accept suitable flexible HDPE materials. Availability varies by location, so check your local program first. Tyvek is plastic-based and is not compostable. DuPont provides additional Tyvek recycling information.
Can I use a Tyvek footprint on rocky terrain?
Yes, and abrasive ground is one of the situations where a footprint can be most useful. Still, clear loose sharp stones, sticks, and other concentrated pressure points before pitching. Tyvek is tough but not puncture-proof.
How do I store my Tyvek footprint when it’s not in use?
Clean off dirt, let the footprint dry, then fold or roll it and store it with your camping gear in a cool place away from excessive heat and prolonged direct sunlight.
Which side of Tyvek should face up?
For a simple DIY groundsheet, correct fit matters more than the printed side. DuPont notes that the physical properties, including water resistance, are broadly similar on both sides of relevant Tyvek styles. Test the sheet under your tent and use the orientation that lies flat and behaves best with your floor fabric.
Do I need grommets on a Tyvek tent footprint?
No. Many DIY footprints work as simple cut sheets held in place by the pitched tent and its occupants. Add grommets or cord loops only if you need easier positioning or extra control in wind, and reinforce the attachment points first.
Will a Tyvek footprint make my tent waterproof?
No. A footprint adds abrasion protection and helps separate the tent floor from wet or dirty ground, but it does not repair worn waterproof coatings, leaking seams, or holes in the tent floor.
Conclusion
A useful Tyvek footprint does not need to be complicated. The most important step is sizing it correctly: keep every finished edge slightly inside the tent floor so rain cannot land on exposed Tyvek and run underneath the shelter.
Start with the basic cut-only version. Add reinforced corners, grommets, cord loops, or adhesive only when your camping style actually benefits from them. Before your first trip, pitch the tent over the finished footprint at home, check every edge, remove any pressure points underneath, and correct the fit before you reach the campsite.
With proper sizing and sensible campsite preparation, Tyvek can provide a lightweight, reusable layer that reduces abrasion and keeps your tent floor cleaner without adding much complexity to your setup.
Sources
- DuPont Tyvek HomeWrap Product Information Sheet — HomeWrap composition, basis weight, tear resistance, water resistance, and vapor permeability.
- DuPont Tyvek FAQs — water behavior and general Tyvek material properties.
- DuPont Tyvek 1443R Datasheet — 1443R basis weight and physical properties.
- REI Co-op: What Is a Tent Footprint? — footprint purpose, correct sizing, and when a footprint is useful.
- DuPont: What Is Tyvek? — HDPE composition, toughness, and recyclability.
- DAP Original Contact Cement Product and Safety Documents — adhesive-use information and access to manufacturer safety documentation.

1 Comment
Pingback: Tent Denier Explained: How To Choose Tent Fabric 2026