
Last Updated on July 23, 2026 by Mason Reed
You set up camp, the rain starts, and water creeps across your tent floor. The moisture may be coming through a failed seam, a worn floor coating, a puncture, pooled water under the tent, or condensation inside it. The right repair depends on the cause, so inspect and test the tent before applying a sealer or waterproofing spray.
Quick Answer
To stop a tent floor from leaking, first find whether the water is entering through a seam, tear, or worn coating. Use a sealer made for the tent’s exact coating, patch holes with compatible repair tape, pitch on higher ground, and place a footprint under the floor. Let every repair cure fully before testing or packing the tent.
Key Takeaways
- Do not assume every wet floor is leaking. Condensation can drip and collect inside a fully waterproof tent.
- Silicone-coated and polyurethane-coated fabrics require different sealers.
- Exterior waterproofing spray restores water beading but does not rebuild a failed tent-floor coating.
- A fitted footprint protects the floor from abrasion and wet soil, but it must not extend beyond the tent.
- Cure times vary by product. Follow the label rather than using one fixed 24-hour rule.
- Store the tent completely dry and loose in a cool, breathable location.
At a Glance
| Time Required | About 30 to 90 minutes of active work, plus the full cure time listed on the repair product |
| Difficulty | Easy for small seam leaks and patches; moderate for a full floor recoating |
| Tools Needed | Soft cloth, sponge, compatible cleaner, correct seam sealer or floor coating, repair tape, gloves, and painter’s tape for marking leaks |
| Cost | Usually limited to one compatible repair product; a badly delaminated floor may make replacement more practical |
What’s in This Article
- What You’ll Need
- Identify the Cause of the Leak
- Leak or Condensation?
- Steps to Stop the Leak
- Prepare the Campsite
- Use a Ground Tarp or Footprint
- Seal Leaking Seams
- Repair Worn Coating and Tears
- Clean and Reproof Exterior Fabric
- Regular Tent Maintenance
- Storage and Transportation
- Troubleshooting Common Mistakes
- Frequently Asked Questions
- Conclusion
- Sources
Disclosure: As an Amazon Associate I earn from qualifying purchases. Some links on this page are affiliate links, at no extra cost to you.
What You’ll Need
The exact supplies depend on the leak. Check the tent manual or ask the manufacturer whether the leaking surface is polyurethane coated, silicone coated, or made from cotton or canvas before buying a repair product.
- A footprint made for your tent or a waterproof tarp cut slightly smaller than the tent floor
- A seam sealer compatible with the coating on the repair side
- A polyurethane floor-coating product if the existing polyurethane layer is peeling or worn
- Silicone sealant if the repair surface is silicone coated or made from silnylon or silpoly
- Compatible tent repair tape or patches for holes and tears
- A tent-safe cleaner or the cleaner recommended by the tent manufacturer
- Soft cloths, a nonabrasive sponge, gloves, and painter’s tape
- A ventilated, dust-free place where the tent can remain open until the repair is fully cured
Warning: Follow the tent and repair-product instructions. Work in a ventilated area, wear gloves when the label recommends them, and keep sealants away from sparks and flames. Do not use a hair dryer, heater, or open flame to speed curing.
Understanding the Causes of Tent Floor Leaks
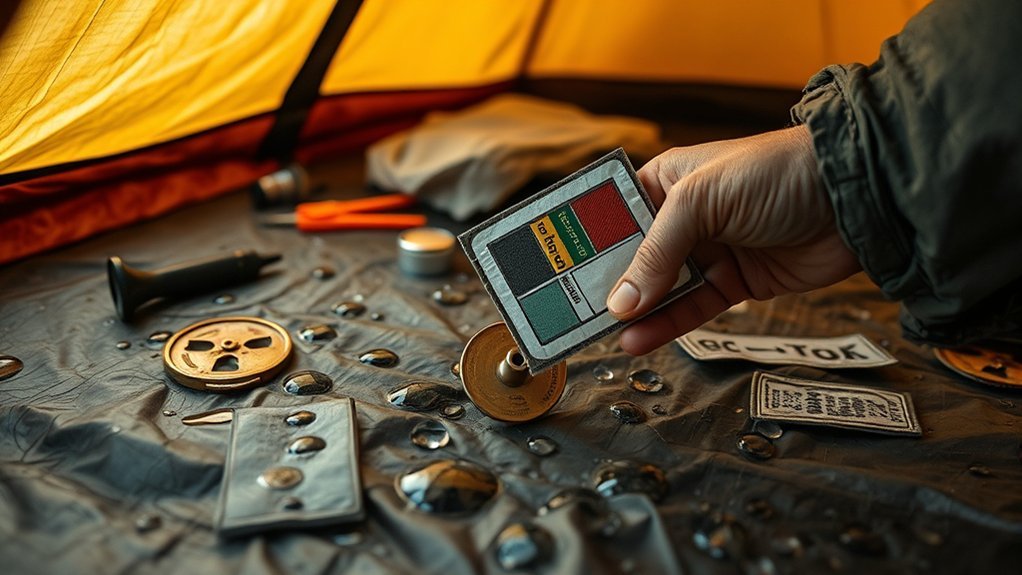
A wet tent floor can have several causes. Common problems include damaged seam tape, unsealed stitching, punctures, a peeling waterproof coating, pooled water under the tent, and condensation dripping from the walls or rainfly.
| What You Notice | Likely Cause | Best Fix |
|---|---|---|
| A narrow wet line follows stitching | Failed seam tape or sealant | Clean and reseal with a compatible product |
| One small wet spot appears over a visible hole | Puncture or tear | Apply compatible repair tape or a fabric patch |
| Large areas feel sticky, smell bad, peel, or flake | Deteriorated polyurethane coating | Remove loose coating and apply a compatible floor coating, or replace the tent if deterioration is severe |
| Water appears only when the ground is saturated | Pooling, high water pressure, or widespread floor wear | Move to better-drained ground, use a footprint, and inspect the full coating |
| Droplets cover walls and collect across the floor | Condensation | Increase ventilation and remove wet gear from the sleeping area |
Thin fabric is not automatically defective, but lightweight floors may be easier to puncture and may depend more heavily on careful site selection and a footprint. The important factors are the condition of the waterproof barrier, the fabric’s resistance to water pressure, and whether water is allowed to pool underneath.
How to Pinpoint the Leak
- Set up the clean, dry tent in a shaded or indoor work area.
- Inspect the inside of the floor for peeling, sticky, chalky, or missing coating.
- Look closely at corners, stitching, pole attachment areas, and places where factory seam tape is lifting.
- Check the outside for holes, cuts, abrasion, or compressed areas.
- Place dry towels or paper towels inside the suspected area.
- Apply a small amount of water to one exterior section at a time. Do not use a pressure washer or force water against the fabric.
- Wait several minutes, inspect the towels, and mark confirmed leaks with painter’s tape.
For a seam, a flashlight can help reveal open needle holes or gaps in old seam tape. Light alone does not prove that a seam leaks, so confirm the location with a controlled water test.
Leak or Condensation? How to Tell the Difference
Condensation forms when warm, moist air inside the tent reaches a colder surface. Moisture from breathing, humid ground, wet clothing, and cooking near the shelter can collect on the rainfly or walls and later drip onto the floor.
A leak usually appears repeatedly in one place during a water test. Condensation is more likely to appear as widespread droplets on the inside walls, roof, or rainfly, including areas far from seams and holes.
To reduce condensation:
- Open opposing vents and use the largest safe ventilation gap the weather allows.
- Stake the rainfly taut so air can move between the fly and tent body.
- Keep wet boots, rainwear, and towels in the vestibule when safe to do so.
- Pitch on higher, drier ground instead of a damp hollow.
- Avoid touching sleeping bags or clothing against wet tent walls.
Note: Condensation can occur even in a new, fully waterproof tent. Seam sealer and waterproofing spray will not eliminate moisture produced inside the shelter.
Steps to Stop the Leak
- Dry and inspect the tent. Find the exact source before applying any repair product.
- Identify the fabric coating. Check the manual, product page, care label, or manufacturer. Do not guess between silicone and polyurethane.
- Improve the campsite. Move away from dips, runoff channels, and saturated ground.
- Place a correctly sized footprint underneath. Fold or cut it so no material extends beyond the tent floor.
- Repair the specific problem. Reseal failed stitching, patch holes, or restore a worn floor coating with the correct product.
- Allow the repair to cure fully. Some products cure in a few hours, while others require overnight drying or longer.
- Test the repair at home. Use a controlled, low-pressure water test before relying on the tent during a trip.
- Dry the tent completely before storage. Store it loose in a cool, dry location.
Note: Seam sealer fixes leaking stitching and some small holes. Exterior DWR treatment improves water beading. Neither one replaces a missing floor coating or permanently repairs a large tear.
Preparing Your Campsite for Optimal Setup
Choose an established, level tent site that is not in a low or sunken area. The National Park Service recommends avoiding low ground because rainwater can collect there.
Before pitching:
- Look uphill for channels that could direct runoff toward the tent.
- Avoid dry creek beds, ravines, depressions, and the bottom of slopes.
- Remove loose sticks, stones, pinecones, and sharp debris without digging or damaging vegetation.
- Use an established tent pad where one is provided.
- Keep the tent away from dead branches, cliff edges, fire rings, and cooking areas.
- At exposed sites, including some high-altitude hiking camps, protect the tent from prolonged UV exposure and strong wind.
Do not dig drainage trenches around a tent. They damage campsites and are unnecessary when you choose naturally well-drained ground.
The Importance of Using a Ground Tarp or Footprint
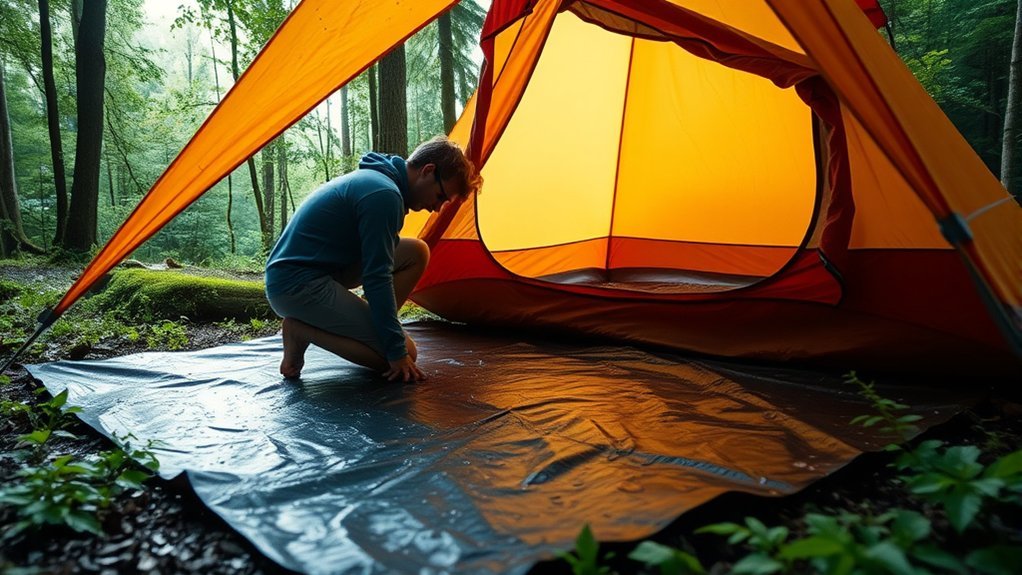
A footprint is a sacrificial layer between the tent floor and the ground. It helps protect the waterproof coating from grit, sharp debris, mud, and repeated abrasion. It can also keep wet soil from sitting directly against the floor.
How a Footprint Protects the Tent Floor
| Feature | Practical Benefit |
|---|---|
| Abrasion layer | Takes wear that would otherwise damage the coated tent floor |
| Puncture protection | Reduces contact with small stones, sticks, and rough tent pads |
| Moisture separation | Keeps wet soil and mud from resting directly against the floor |
| Cleaner packing | Keeps much of the dirt on a removable groundsheet instead of the tent |
A footprint offers little meaningful thermal insulation. Use a sleeping pad with a suitable insulation rating when you need protection from cold ground.
Why It Is Worth the Extra Weight
A fitted footprint adds some packed weight, but it can extend the life of a lightweight tent floor. It is especially useful on gravel pads, rocky soil, damp ground, and campsites with abrasive sand.
A regular waterproof tarp can work when a fitted footprint is unavailable. Fold all excess material underneath so rain cannot land on the exposed tarp and run between it and the tent floor.
Pro Tip: Set the tent on top of the tarp before trimming or folding it. The finished groundsheet should sit just inside the floor outline on every side.
Seam Sealing Techniques to Prevent Leaks

Seam sealing blocks water that enters through stitching, worn sealant, or lifted factory seam tape. The first step is choosing a product that bonds to the coating on the repair side.
| Repair Surface | Product Type | Important Check |
|---|---|---|
| Polyurethane-coated nylon or polyester | Compatible urethane seam sealer | Confirm whether the coating is on the inside or outside |
| Silnylon, silpoly, or another silicone-coated surface | Silicone seam sealer | Urethane products generally will not bond correctly to silicone |
| Mixed construction | Product matched to the coating on the repair side | Contact the manufacturer when the coating is unclear |
Gear Aid’s sealant compatibility guide explains that silicone-coated and polyurethane-coated fabrics require different products.
How to Reseal a Tent Seam
- Set up the tent or lay the leaking section flat in a ventilated, well-lit area.
- Remove only seam tape that is already loose or peeling. Leave firmly bonded tape in place unless the manufacturer directs otherwise.
- Clean the seam using the method recommended by the tent and sealer manufacturers.
- Let the repair surface dry completely unless the product specifically allows damp application.
- Apply a thin, even layer of compatible sealer over the leaking stitching.
- Seal the side recommended by the product instructions. Do not automatically coat both sides.
- Keep the seam flat and untouched for the full listed cure time.
- Inspect the repair and perform a low-pressure water test before the next trip.
Cure time is product specific. Current tent sealers can require roughly 2 hours, 3 to 6 hours, 8 to 12 hours, or longer depending on their formula and the repair conditions.
Repairing Worn Floor Coating and Tears
How to Restore a Polyurethane Floor Coating
A floor that feels sticky, smells unpleasant, or sheds flakes may have a deteriorating polyurethane coating. A spray-on exterior DWR product is not the correct repair for this problem.
- Confirm that the floor is polyurethane coated.
- Lay the clean, dry floor flat with the coated side facing upward.
- Remove loose, deteriorated coating according to the tent or coating-product instructions.
- Clean away residue without aggressively thinning or stretching the fabric.
- Apply one thin, even layer of a compatible polyurethane floor-coating product.
- Remove runs or pools before they dry.
- Allow the coating to cure for the full period on the label.
- Test the floor before packing it for a trip.
A product such as Gear Aid Seam Grip TF is designed for restoring polyurethane coatings, but it must not be used on silicone-coated fabric or silnylon.
How to Repair a Pinhole or Tear
- Clean and dry the damaged area.
- Lay the fabric on a firm, flat surface without stretching it.
- Round the corners of the repair tape so they are less likely to lift.
- Make the patch extend beyond every edge of the damage.
- Press firmly from the center toward the edges to remove trapped air.
- For a larger tear, patch both sides if the repair-product instructions recommend it.
- Allow adhesives or sealants to cure before folding the floor.
Use repair tape designed for the tent’s fabric. Standard repair tape may not bond permanently to silicone-coated materials, which often need a silicone-specific patch.
Temporary Repair at Camp
Move bedding away from the wet area, dry the fabric as well as possible, and apply tent repair tape to the cleanest, driest side you can reach. Duct tape can serve as a short emergency patch when no better option is available, but remove it after the trip and complete a proper repair at home.
Warning: A floor with widespread delamination, brittle fabric, many leaks, or damage around structural attachment points may no longer be dependable. Contact the manufacturer about repair or replacement instead of covering the entire floor with unrelated products.
Enhancing Exterior Water Repellency With Nikwax Products
Nikwax Tent & Gear products can help clean and restore the water-shedding performance of suitable tent fabric. They should not be confused with seam repair, tear repair, or replacement of a failed floor coating.
Nikwax Tent & Gear SolarWash Benefits
Nikwax Tent & Gear SolarWash is a cleaner for weatherproof tent and equipment fabrics, including synthetic, cotton, and canvas materials. It removes dirt that can interfere with water repellency and adds UV protection.
Use it according to the label rather than washing the tent with standard laundry detergent. Conventional detergents and harsh household cleaners can leave residue or damage water-repellent finishes.
Applying Nikwax Tent & Gear SolarProof
Nikwax Tent & Gear SolarProof is intended for exterior synthetic tent fabric. It restores durable water repellency and adds UV protection. It does not rebuild a peeling polyurethane floor coating or seal an open seam.
- Clean the synthetic fabric first with the recommended cleaner.
- Erect the tent or lay the fabric flat over a protected work surface.
- Apply SolarProof evenly to the exterior of clean, wet fabric from the distance listed on the bottle.
- Wait about two minutes, then remove excess treatment with a damp cloth.
- Check for missed areas, drips, or pooled product.
- Air-dry the tent completely before using or storing it.
For cotton, polycotton, or canvas tents, use a compatible cotton treatment such as Nikwax Cotton Proof rather than synthetic Tent & Gear SolarProof.
According to Nikwax, two weeks of continuous UV exposure can reduce the strength of some synthetic tent fabrics by up to half. Avoid leaving a tent set up in direct sunlight for longer than necessary.
Pro Tip: Apply exterior DWR treatment after cleaning and while the synthetic fabric is still wet when the product instructions call for wet application. Wipe away excess treatment to prevent visible marks.
Warning: Test cleaners, coatings, sealers, and waterproofing treatments on a hidden area first. Stop if the fabric changes color, becomes sticky, or shows another unexpected reaction.
Regular Maintenance to Extend Tent Lifespan
Inspect the floor, corners, seams, and rainfly before the first major trip of each season and after trips that expose the tent to heavy rain, sand, salt, mud, or strong sunlight.
- Brush away grit before it abrades the floor.
- Spot-clean stains with a tent-safe method.
- Repair small holes before they spread.
- Touch up failed seams when sealant cracks or factory tape lifts.
- Refresh exterior DWR when clean synthetic fabric no longer beads water.
- Inspect sticky, smelly, or flaking areas for coating breakdown.
- Clean dirt from the zipper and use appropriate tent zipper lubrication instead of oily household products.
Do not reapply every product on a fixed calendar. Treat the problem you can see and follow the tent and product manufacturers’ recommended intervals.
Best Practices for Tent Storage and Transportation
Moisture left in storage can encourage mildew and contribute to polyurethane coating breakdown. Dry the tent completely after every trip, even when it seemed dry at the campsite.
- Shake out dirt and remove sharp debris before packing.
- If you must pack a wet tent for the journey home, unpack and dry it as soon as possible.
- For long-term storage, place the tent loosely in a breathable bag, mesh sack, or clean pillowcase.
- Store it in a cool, dry room rather than a hot attic, damp basement, or vehicle trunk.
- Keep stakes and poles in their own bags so hard edges do not rub against the fabric.
- Do not compress the tent tightly in its backpacking stuff sack for months at a time.
There is no universal rule that rolling is always better than folding or stuffing. Dry, loose, cool storage matters more than the exact packing method.
Troubleshooting and Common Mistakes
- Repairing before finding the cause: Widespread condensation will continue even after you reseal a random seam.
- Using the wrong sealer: Urethane products may not bond to silicone-coated fabric, and silicone sealer is not the correct choice for every polyurethane surface.
- Using exterior DWR on a failed floor coating: DWR helps water bead on exterior fabric but does not rebuild the structural waterproof layer inside the floor.
- Sealing dirty or wet-from-rain seams: Dirt, oil, moisture, and loose old coating can prevent reliable adhesion.
- Applying too much product: Thick pools can stay tacky and cure unevenly. Use a thin layer unless the label says otherwise.
- Assuming every product needs 24 hours: Cure times vary widely. Follow the exact label.
- Letting a tarp extend beyond the floor: Exposed edges can catch rain and direct it underneath the tent.
- Packing before the repair cures: Folding can bond surfaces together or damage uncured sealant.
- Using household detergent: It may leave residue or weaken water-repellent performance.
- Ignoring an extensive coating failure: Repeated spot repairs may not make a badly degraded floor dependable.
Frequently Asked Questions
Can I use a regular tarp instead of a footprint?
Yes. Use a waterproof tarp and fold or cut it slightly smaller than the tent floor. No edge should stick out, because exposed tarp can catch rain and direct it beneath the tent.
How often should I reapply seam sealer?
Inspect seams before each camping season and after hard use. Reseal when the existing product cracks, separates, or allows water through. Do not apply more sealer only because a fixed amount of time has passed.
Is waterproofing spray safe for all tent materials?
No. Synthetic, silicone-coated, polyurethane-coated, cotton, polycotton, and canvas materials can require different products. Check the tent manual and treatment label, then test a hidden area before treating the full tent.
What should I do if my tent is already leaking at camp?
Move bedding away from the water, improve drainage without digging trenches, and dry the damaged area. Apply compatible tent repair tape as a temporary patch when possible. Complete a proper seam, tear, or coating repair after the trip.
Can I fix a tent leak with duct tape?
Duct tape can provide a short emergency patch on clean, dry fabric. Tent repair tape is usually a better choice because it is made for flexible outdoor material. Remove temporary duct tape after the trip and make a compatible permanent repair.
Will waterproofing spray stop a tent-floor leak?
Not when the leak comes from a tear, failed seam, or missing floor coating. Exterior DWR spray improves water beading on suitable fabric. Structural floor problems need a compatible seam sealer, patch, or floor-coating product.
When should I replace the tent instead of repairing it?
Replacement may be safer when the floor fabric is brittle, the coating is widely delaminated, several structural areas are damaged, or repairs cost nearly as much as a dependable replacement. Ask the manufacturer whether a replacement floor, body, or professional repair is available.
Conclusion
Most tent-floor leaks can be traced to one clear problem: failed stitching, damaged fabric, worn coating, poor drainage, or condensation. Diagnose the source before buying a product. Choose a sealer or patch that matches the tent’s coating, use a footprint that stays inside the floor outline, and let every repair cure fully.
Exterior waterproofing treatments can restore water beading and UV protection, but they are not substitutes for repairing a damaged floor. Keep the tent clean, dry, ventilated, and loosely stored, and small problems are less likely to become trip-ending leaks.
Sources
- National Park Service: Finding and Setting Up a Campsite — campsite drainage, debris removal, and footprint placement
- Gear Aid: Which Sealant Should I Use? — silicone and polyurethane sealant compatibility
- Gear Aid: How to Waterproof and Seam Seal a Tent — seam repair and polyurethane floor-coating restoration
- Nikwax Tent & Gear SolarWash — tent-safe cleaning and UV-protection instructions
- Nikwax Tent & Gear SolarProof — synthetic-fabric DWR and UV-treatment instructions
- REI Co-op: How to Waterproof a Tent — differences between seam sealing, floor coating, and exterior DWR renewal
