
Last Updated on July 24, 2026 by Daniel Globe
A leaking tent rainfly does not always need the same repair. Water can enter through a damaged seam, a peeling inner polyurethane coating, a hole, or fabric whose exterior water-repellent finish has worn down. The steps below help you identify the failed layer, clean the rainfly safely, choose a compatible treatment, and test the repair before your next trip.
Quick Answer
First identify the leak. Seal leaking seams with a product made for the fly’s coating, restore peeling polyurethane panels with a fabric coating such as Seam Grip TF, and refresh poor exterior beading with a tent-specific DWR spray. Clean first, follow the product’s cure time, and test the fly before packing it.
Key Takeaways
- Poor water beading usually points to a worn or dirty exterior DWR finish, not automatically to failure of the inner waterproof coating.
- Flaking, stickiness, or a strong odor on the underside can indicate a deteriorating polyurethane coating.
- Use polyurethane-compatible products on PU-coated fabric and silicone sealant on silicone-treated nylon or polyester.
- Seam sealing, full-panel recoating, and DWR restoration are different jobs and should not be combined into one generic step.
- Follow the selected product’s cure instructions and store the rainfly only when it is completely dry.
At a Glance
| Time Required | About 30–60 minutes of active work, plus roughly 2–24 hours for drying or curing depending on the treatment |
| Difficulty | Easy for DWR or seam work; moderate for removing and restoring a failed panel coating |
| Tools Needed | Gear cleaner, soft sponge, brush or applicator, clean cloths, compatible sealant, and optional isopropyl alcohol for failed PU removal |
| Cost | Usually about $15–$40 in supplies, depending on whether you need one sealant or a cleaner, full-fabric coating, and DWR treatment |
What’s in This Article
- Diagnose the Rainfly Problem
- What You’ll Need
- Prepare and Clean the Rainfly
- Remove a Failed PU Coating
- Apply the Correct Treatment
- Cure and Finish the Repair
- Choose the Right Sealant
- Common Mistakes to Avoid
- Test the Rainfly
- Store the Tent Properly
- Maintain the Rainfly Long-Term
- Frequently Asked Questions
- Conclusion
- Sources
Disclosure: As an Amazon Associate I earn from qualifying purchases. Some links on this page are affiliate links, at no extra cost to you.
Diagnose the Rainfly Problem Before Resealing

A rainfly normally uses more than one layer of protection. Seams may be taped or sealed, the inner face may have a polyurethane or silicone treatment, and the exterior may have a Durable Water Repellent finish. Diagnose the symptom before applying anything.
| What You See | Likely Problem | Typical Treatment |
|---|---|---|
| Water spreads across or darkens the exterior but does not drip through | Dirty or worn exterior DWR finish | Clean the fly and apply a tent-specific DWR treatment if beading does not return |
| Drips or damp lines follow stitching | Failed seam tape or seam sealant | Remove loose tape and apply a compatible seam sealer as directed |
| The underside is peeling, flaking, sticky, or unusually smelly | Deteriorating polyurethane coating | Remove the failed material and apply a compatible full-fabric PU coating |
| Water enters through one visible puncture or tear | Physical fabric damage | Patch the damage and seal the patch edges with a compatible repair product |
Check the tent manufacturer’s specifications before choosing a treatment. Most conventional rainflies use nylon or polyester with a polyurethane coating, while some lightweight shelters use silicone-treated nylon or polyester. The base fabric alone does not tell you which sealant will bond correctly.
Warning: Polyurethane sealers generally do not bond correctly to silicone-treated fabric, and silicone sealers are not intended for standard PU-coated panels. Check the care label, product page, manual, or tent manufacturer before proceeding.
What You’ll Need
You may not need every item below. Gather supplies after you identify whether you are cleaning, seam sealing, recoating a failed panel, repairing damage, or restoring the exterior DWR.
- Outdoor-gear cleaner: A residue-free product such as Revivex Pro Cleaner, or the cleaner approved by the tent manufacturer.
- Non-abrasive sponge or soft cloth: For ordinary cleaning without stripping a healthy coating.
- Soft dry brush: For loosening material that is already peeling from a failed PU coating.
- Isopropyl alcohol: Used only when deliberately removing a deteriorated PU coating or cleaning a small repair area.
- Compatible seam sealer or fabric coating: Choose it according to the coating type and repair area.
- Small brush or built-in applicator: For controlling seam sealer or fabric coating.
- Clean rags: For removing loosened residue and wiping excess product.
- Tent-specific DWR treatment: Use a product that expressly lists synthetic tents or rainflies, such as Nikwax Tent & Gear SolarProof.
- Repair patch: Useful for pinholes and tears that cannot be fixed with liquid sealant alone.
- Protective equipment: Follow the product label regarding gloves, eye protection, ventilation, temperature, and ignition hazards.
- Talcum powder: Optional only after a compatible PU fabric coating has fully dried and remains slightly tacky.
Estimated active time: About 30–60 minutes for a typical rainfly. Drying or curing can take from roughly 2 hours to a full day, depending on the product and repair.
Prepare and Clean the Rainfly
Read the tent-care label and sealant instructions before cleaning. Some manufacturers may also ask you to contact them before removing factory seam tape or applying an aftermarket coating, especially while the tent is under warranty.
How to Clean the Rainfly
- Shake off loose debris: Remove sand, needles, leaves, and dry mud before wetting the fabric.
- Spot clean first: Use water and a soft sponge on lightly dirty areas.
- Hand wash when necessary: Place the rainfly in a clean tub or basin with cool or lukewarm water and the amount of gear cleaner directed on its label.
- Agitate gently: Use your hands or a non-abrasive sponge. Do not twist, wring, machine wash, or scrub aggressively.
- Rinse thoroughly: Remove all cleaner residue because residue can interfere with DWR performance and sealant adhesion.
- Dry according to the next treatment: Seam sealers and PU fabric coatings normally require a clean, dry surface. Some spray-on DWR products are designed for clean, wet fabric, so follow that product’s directions.
Warning: Do not use bleach, a washing machine, a clothes dryer, or an unapproved household detergent. Do not scrub the coated underside during normal cleaning unless that coating has already failed and you are intentionally removing it.
Why Surface Condition Matters
Seam sealer cannot bond well over dirt, oil, loose seam tape, or flaking coating. Inspect the clean rainfly in bright light and mark the areas that need treatment. A broad panel with healthy, smooth coating should not be stripped merely because the exterior no longer beads water.
- Check seams: Look for lifting tape, cracks, gaps, and pinholes along stitching.
- Check the coated face: Look for flakes, bubbles, stickiness, or areas that rub away easily.
- Check the fabric: Hold the fly up to indirect light to locate punctures, thinning, and tears.
- Test compatibility: Apply the selected product to a hidden area when the manufacturer recommends a patch test.
Remove a Failed Polyurethane Coating

Remove old coating only when the polyurethane layer is visibly peeling, flaking, gummy, or no longer attached to the fabric. This process normally targets the coated underside of the rainfly, not the exterior DWR face.
Inspect the Coating and Fabric
- Test a small area: Gently rub a hidden section with a dry cloth. Healthy coating should not readily crumble or peel away.
- Check the extent of failure: A few worn areas may be practical to restore. Widespread delamination, brittle fabric, severe odor, or large structural damage may justify a replacement fly.
- Separate tears from coating failure: Repair holes and tears before applying a broad coating.
- Check the warranty: Contact the manufacturer before removing factory material if warranty coverage may still apply.
How to Remove the Failed Coating
- Lay the rainfly flat: Place the coated side upward on a clean, protected surface.
- Brush away loose flakes: Use a soft, dry brush or cloth without grinding healthy material.
- Work in small sections: Dampen a cloth or sponge with the cleaning mixture recommended by the coating-product manufacturer. Gear Aid’s Seam Grip TF guidance uses isopropyl alcohol, water, and a small amount of mild soap for deteriorated PU removal.
- Lift failed material gently: Remove coating that is already loose. Avoid thinning or stretching the base fabric.
- Wipe away residue: Use clean cloths and repeat only where failed coating remains.
- Let the surface dry completely: Alcohol and water must evaporate before a new PU coating is applied.
Note: Do not strip a silicone-treated fly using this PU-restoration process. Silicone-coated fabric requires silicone-compatible repair materials and manufacturer-specific care.
Apply the Correct Treatment

Work in a clean, well-ventilated area and follow the selected product’s instructions. Treatment location, thickness, temperature, humidity, and cure time vary by formula.
How to Seal Seams on PU-Coated Fabric
- Pitch the tent or spread the rainfly so the seams are accessible and not folded.
- Remove only seam tape that is already loose or peeling. Do not pull away securely bonded tape.
- Clean the repair line and allow it to dry.
- Apply a thin, continuous layer of a non-silicone seam sealer, such as Seam Grip WP or Seam Grip FC, when compatible with the tent.
- Cover the stitching and the edges of the failed tape without coating a larger area than necessary.
- Keep treated surfaces apart until the product has fully cured.
How to Restore a Peeling PU Panel Coating
- Confirm that the old failed coating has been removed and the fabric is clean and dry.
- Place the coated underside upward on a flat surface.
- Shake or prepare the coating as its instructions require.
- Apply one thin, even film of a full-fabric coating such as Seam Grip TF.
- Blend the edges into sound coating without leaving thick ridges or pools.
- Keep the treated surface from touching itself while it dries.
How to Seal Silicone-Treated Fabric
- Confirm that the fabric is silicone-treated nylon or polyester.
- Clean and dry the seam or small repair area.
- Apply a thin bead of silicone-compatible sealant such as Seam Grip SIL.
- Spread it evenly across the stitching with the supplied brush or applicator.
- Leave the fly open and undisturbed for the full cure time shown on the label.
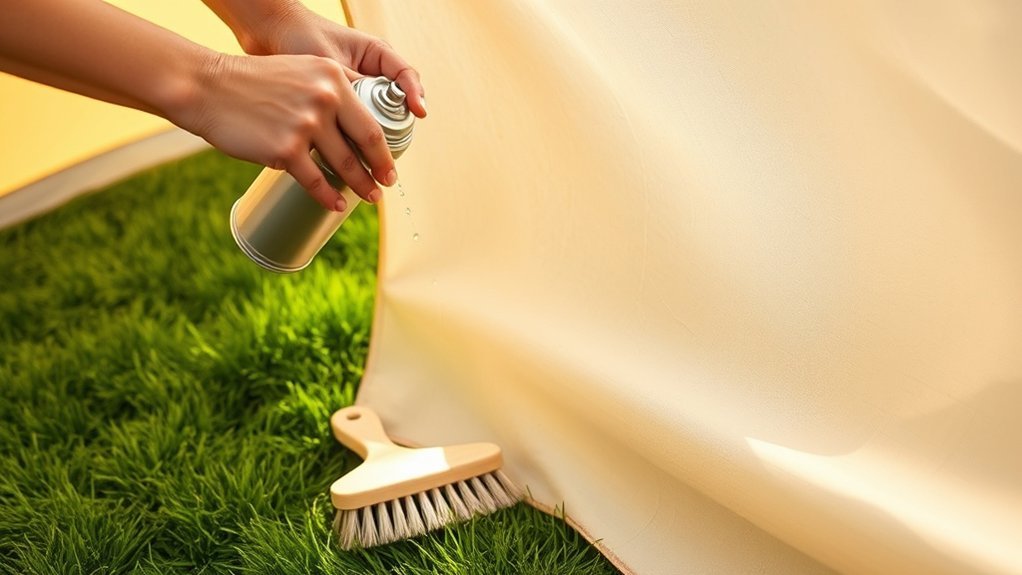
How to Refresh the Exterior DWR
Restore DWR only when the exterior no longer beads water after proper cleaning. DWR is applied to the outside of the rainfly and does not replace seam sealing or a failed inner coating.
- Set up the rainfly or lay it flat with the exterior facing upward.
- Prepare the fabric as the DWR label directs. Some tent-specific treatments are applied while the fabric is clean and wet.
- Spray the exterior evenly without soaking one area.
- Wait for the period shown on the product label.
- Remove excess treatment with a damp cloth so it does not dry in streaks or patches.
- Air dry the rainfly completely before testing or storing it.
Pro Tip: More product is not automatically better. A thin, even application normally bonds and dries more reliably than a heavy layer. Apply a second treatment only when the product instructions or a later leak test shows that it is needed.
Cure and Finish the Repair
Do not use one cure time for every product. Current manufacturer-listed times vary by formula and conditions:
- Seam Grip FC: Approximately 2 hours.
- Seam Grip SIL: Approximately 3–6 hours.
- Seam Grip TF: Approximately 4 hours to dry at room temperature, with up to 24 hours allowed before folding or long-term storage.
- Seam Grip WP: Approximately 8–12 hours.
- DWR treatment: Air dry fully according to the product instructions before use or storage.
Temperature, humidity, application thickness, and airflow can change the actual drying time. The treated area should feel dry and stable, not wet, gummy, or transferable, before the fabric is folded.
- Inspect the finish: Look for missed seams, bubbles, thick pools, or areas where coating has stuck to another surface.
- Address limited tackiness: If a fully dried Seam Grip TF coating remains slightly tacky, its manufacturer permits a light dusting of talcum powder. Do not powder wet or partly cured sealant.
- Refresh DWR only when needed: Do not add an exterior spray merely because you sealed a seam. Use it when the clean exterior still wets out.
- Test before travel: Complete both the bead test and a controlled leak test after the repair has cured.
Choose the Right Sealant
The correct choice depends on both the existing coating and the size of the repair. “Synthetic fabric” is not specific enough because nylon and polyester rainflies may use either polyurethane or silicone treatments.
| Product Type | Best Use | Do Not Use For | Approximate Listed Cure |
|---|---|---|---|
| Seam Grip WP | Seams, stitching, pinholes, and small repairs on compatible non-silicone fabric | Silnylon, silpoly, or broad full-panel recoating | 8–12 hours |
| Seam Grip FC | Fast seam sealing on compatible nylon, polyester, canvas, or vinyl | Silicone-treated fabric or broad peeling panels | About 2 hours |
| Seam Grip TF | Restoring a worn or peeling polyurethane coating across a rainfly or tent-floor panel | Silnylon or other silicone-treated fabric | About 4 hours to dry; allow longer before storage |
| Seam Grip SIL | Seams, pinholes, and small tears on silicone-treated nylon or polyester | Standard PU-coated fabric | 3–6 hours |
| Tent-specific DWR spray | Restoring water beading on the clean exterior | Seam leaks, holes, or peeling inner coating | Air dry according to the label |
When the fabric type is unknown, contact the tent manufacturer before applying a permanent treatment. A wrong product may fail to bond and can make later repair more difficult.
Common Mistakes to Avoid
- Treating every leak as failed DWR: Exterior beading does not reveal whether a seam or inner coating leaks.
- Using a seam sealer as a full-panel coating: Choose a fabric-coating product when broad PU delamination is the actual problem.
- Using PU sealant on silicone-treated fabric: The products are not interchangeable.
- Scrubbing a healthy underside: Aggressive cleaning can damage coating that did not need removal.
- Sealing over loose tape or flakes: New material will bond to the failing layer instead of the fabric.
- Applying a heavy coat: Thick pools take longer to cure and may remain tacky.
- Applying DWR to the wrong side: DWR belongs on the exterior face, while a PU restoration coating normally goes on the coated underside.
- Packing too soon: Partly cured surfaces can stick together and tear when reopened.
- Ignoring manufacturer guidance: Fabric construction and warranty rules vary among tent brands.
- Using high-pressure water for testing: A strong jet can force water through areas that would not leak under normal rain.
Test Your Rainfly After Resealing
Test the rainfly at home after all treated areas have cured. Use gentle water pressure that resembles rainfall rather than a concentrated hose jet.
Exterior Water-Bead Test
- Pitch the rainfly tightly so water cannot collect in loose folds.
- Mist or sprinkle clean water over several exterior panels.
- Watch whether water forms beads and rolls away.
- If the clean fabric wets out but does not leak, refresh the exterior DWR rather than adding more seam sealer.
Seam and Panel Leak Test
- Direct a gentle shower of water over one area at a time.
- Check the underside with a dry cloth or paper towel.
- Follow any wet line back to its source. Water can travel along fabric before dripping.
- If moisture follows stitching, let the fly dry and touch up the missed seam.
- If a broad panel seeps and its underside coating is visibly failing, inspect whether more PU coating must be removed and restored.
- If water enters through a puncture, patch the damaged fabric rather than adding a broad coating.
Note: Condensation can be mistaken for a rainfly leak. During testing, keep the tent ventilated and check whether moisture appears directly beneath sprayed areas or forms more generally on cool interior surfaces.
Store Your Tent Properly
Let the rainfly dry completely before long-term storage. Moisture can promote mildew and contribute to deterioration of polyurethane coatings.
- Choose a cool, dry location: Avoid prolonged storage in a hot attic, damp basement, or vehicle trunk.
- Store it loosely: A cotton pillowcase, mesh sack, or other breathable storage bag gives the fabric more room than a tightly compressed backpacking sack.
- Avoid direct sunlight: UV exposure weakens synthetic fabric and degrades water-repellent performance over time.
- Prevent repeated hard creases: Roll, fold differently, or loosely stuff the fly rather than forcing the same fold lines every time.
- Keep chemicals separate: Do not store the rainfly against fuel, insect repellent, oils, or leaking toiletries.
Note: A breathable bag is appropriate in a dry room. If the only storage location is humid, place the completely dry tent in a clean protective container and inspect it periodically for trapped moisture.
Maintain Your Tent Long-Term
Do not automatically strip or recoat the rainfly every season. Inspect it before a major trip and treat the problem that is actually present.
- Clean when needed: Remove dirt, salt, sap, and oil after dirty trips, but avoid unnecessary deep washing.
- Dry after every trip: Even a rain-free trip can leave condensation beneath the fly.
- Inspect seams: Look for lifting tape and cracks while the fly is clean and easy to examine.
- Check exterior beading: Clean first, then restore DWR only if water still spreads across the exterior.
- Repair small damage early: Patch pinholes and tears before repeated tension makes them larger.
- Watch for replacement signs: Consider a replacement rainfly when fabric is brittle, extensively delaminated, badly stretched, or damaged beyond a reliable field repair.
Frequently Asked Questions
How often should I re-waterproof my tent rainfly?
Treat it according to condition rather than a fixed schedule. Inspect before major trips. Restore DWR when clean exterior fabric no longer beads, seal seams when they leak, and recoat a PU layer only when it is peeling, sticky, or otherwise failing.
Can I use any sealant on my tent rainfly?
No. The sealant must match the existing treatment. Standard PU-coated fabric normally needs a polyurethane-compatible product, while silnylon or silpoly needs silicone-compatible sealant. Check the manufacturer’s specifications when the coating is unknown.
Do I need to strip the entire rainfly?
Usually not. Remove coating only where the PU layer has failed or where the chosen coating manufacturer directs you to prepare the full panel. Do not strip healthy material merely because the exterior DWR has stopped beading.
What should I do if the rainfly has a hole or tear?
Clean and dry the damaged area, align the torn edges, and apply an outdoor-gear repair patch compatible with the fabric. Seal the patch edge when the patch or tent manufacturer recommends it. Contact the tent manufacturer for large tears, damaged attachment points, or structural fabric failure.
How do I know whether the DWR or inner coating has failed?
Poor beading on the outside usually indicates dirty or worn DWR. Flaking, gumminess, peeling, or a strong odor on the coated underside points to PU deterioration. Water following a stitched line normally indicates a seam problem.
Can I re-waterproof a rainfly that has mold on it?
Clean the mold according to the tent manufacturer’s care instructions and let the fly dry fully before evaluating it. If the coating remains sticky, flaky, strongly odorous, or structurally weak, recoating may not provide a dependable repair and replacement may be safer.
Why does the rainfly still leak after resealing?
The leak may come from a missed seam, a puncture, failed panel coating, poor adhesion, or an incompatible product. Let the fly dry, test one area at a time, and trace the moisture from the first wet point rather than adding more product across the entire fly.
Conclusion
Successful rainfly waterproofing starts with diagnosis. Restore exterior DWR when clean fabric stops beading, seal a leaking seam with a compatible seam product, and use a full-fabric PU coating only when the inner coating is actually peeling or deteriorating.
Clean gently, remove only failed material, follow the product’s application and cure instructions, and test the repair at home. Store the rainfly completely dry in a cool location so the restored coating has the best chance of lasting through future trips.
Sources
- REI Co-op: How to Waterproof a Tent — explains the differences between seam sealing, restoring urethane coating, and refreshing DWR.
- Gear Aid: How to Waterproof and Seam Seal a Tent — supports cleaning, coating removal, product selection, application, and drying guidance.
- Gear Aid: Seam Grip TF Tent Fabric Sealant — supports broad polyurethane-coating restoration and product compatibility.
- Nikwax: Tent & Gear SolarProof — supports tent-specific exterior water-repellency treatment and application guidance.
- REI Co-op: How to Store a Tent — supports complete drying and loose storage in a cool, dry location.
