
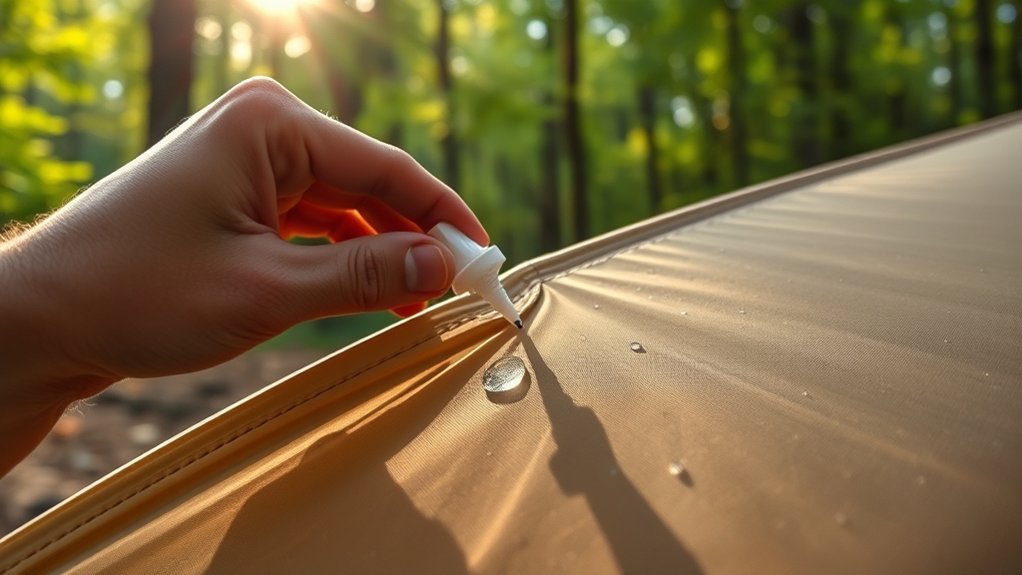
Last Updated on July 30, 2026 by Mason Reed
How often you need to seam seal a tent depends on how it was made, how often it is used, and whether the seams are beginning to fail. Most factory-taped tents do not need liquid seam sealer every year. Inspect them regularly and reseal only when you find leakage, peeling tape, cracks, gaps, or another manufacturer-approved reason to do so.
Quick Answer
Inspect your tent seams before each camping season, before a long trip, and after severe weather or heavy use. Do not automatically reseal them every year. Seal a new tent only when its manufacturer requires it, and reseal an older tent when you find leaks, gaps, cracks, or failing seam tape.
Key Takeaways
- Annual inspection is sensible, but annual seam sealing is usually unnecessary.
- Some factory-taped tents are ready for rain, while certain silicone-coated tents must be sealed by the owner.
- Match the sealant to the fabric coating. Silicone and polyurethane products are not interchangeable.
- Confirm that water is entering through a seam before applying sealant; condensation and failed fabric coatings need different solutions.
- Follow the product label for application temperature and cure time, then water-test the tent before your next trip.
At a Glance
| Time Required | About 30–60 minutes of active work, plus the cure time listed on the sealant |
| Difficulty | Easy for spot sealing; moderate for removing widespread failed tape |
| Tools Needed | Compatible seam sealer, disposable gloves, clean rag, applicator brush, drop cloth, and manufacturer-approved cleaner |
| Cost | Low for a DIY repair; usually one tube of the correct seam sealer |
Disclosure: As an Amazon Associate I earn from qualifying purchases. Some links on this page are affiliate links, at no extra cost to you.
Understanding the Importance of Seam Sealing
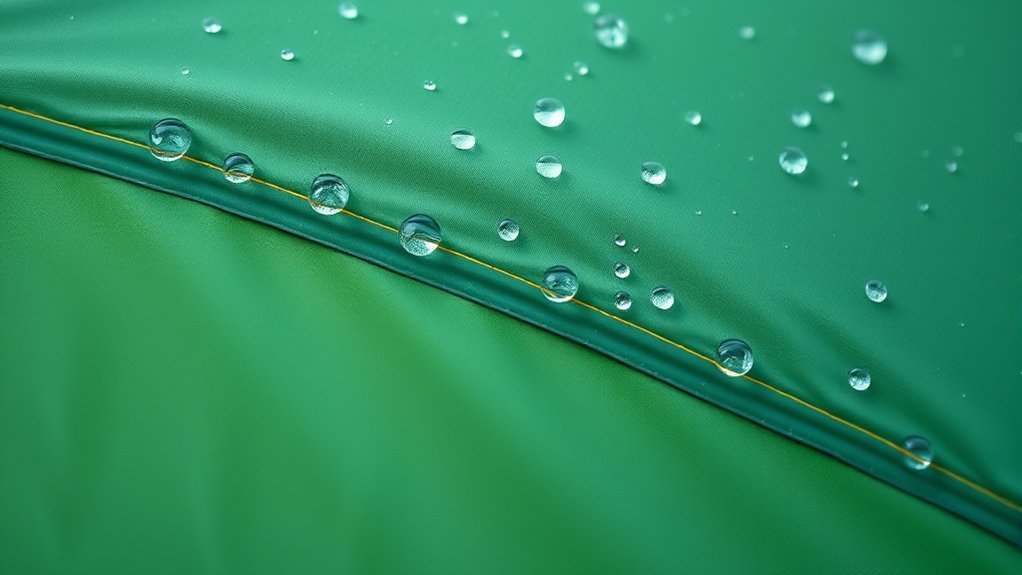
Every needle hole in a stitched seam can provide a path for water. Tent manufacturers control this risk with heat-applied seam tape, liquid sealant, bonded construction, or a combination of methods. The correct maintenance process depends on which system your tent uses.
A properly sealed seam helps stop rain from passing through stitching around the rainfly, tent floor, corners, pole attachments, vents, and guyline points. It does not repair every type of tent leak. Water can also enter through a puncture, worn floor coating, damaged zipper, failed rainfly coating, or an opening that is touching wet fabric.
Many tents arrive with the necessary seams factory taped. For example, Big Agnes states that its factory-taped tents do not need liquid seam sealer when new. Other shelters use silicone-coated fabric that cannot be treated in the same way. Tarptent explains that many of its silicone-coated shelters require silicone seam sealing, while some factory-bonded or taped models do not.
Inspect seams on a schedule, but apply sealant according to the tent’s construction and condition—not simply because another year has passed.
When to Seam Seal a New Tent
Do not assume that every new tent needs seam sealer or that every new tent is ready for heavy rain. Read the care instructions, product page, hangtag, or manual before the first trip. Using the wrong product can create a weak repair, stain the fabric, or affect warranty coverage.
Initial Seam Inspection
Pitch the tent at home and inspect it before relying on it in the backcountry. Work in bright light and check the rainfly, floor, corners, vents, pole attachments, and guyline points.
- Look for unsealed stitching: Identify needle holes or stitched joints with no tape, bonding, or liquid sealant.
- Check seam tape: Look for lifting edges, bubbles, wrinkles, cracks, or sections that did not bond evenly.
- Inspect the thread: Stitches should be intact and reasonably even, without broken or badly frayed sections.
- Read the manual: Confirm whether the shelter is factory sealed, requires owner sealing, or has specific seams that need treatment.
- Test before travel: After following the manufacturer’s setup instructions, use gentle hose spray to check for water entry.
If a new factory-sealed tent leaks or has obvious manufacturing defects, contact the manufacturer or retailer before applying an aftermarket product. A DIY alteration may complicate a warranty claim.
Manufacturer’s Recommendations
| Tent Construction | What to Do When New |
|---|---|
| Factory-taped or factory-sealed | Inspect and test it. Do not add liquid sealant unless the instructions or a leak indicate that it is needed. |
| Silicone-coated and sold unsealed | Seal the specified seams with a silicone-compatible product before wet-weather use. |
| Bonded, welded, or fully taped | Follow the manufacturer’s care instructions; extra sealant may be unnecessary or unsuitable. |
| Construction unknown | Find the model manual or ask the manufacturer before choosing a product. |
Note: “Nylon” or “polyester” alone does not identify the correct sealant. You also need to know whether the fabric is silicone treated, polyurethane coated, or made with another waterproof construction.
Signs Your Tent Needs Seam Sealing

Inspect seams before each camping season and after long trips, hard storms, prolonged sun exposure, or rough handling. The following signs indicate that a closer repair assessment is needed:
- Water follows a stitched line: During a controlled water test, droplets form directly beneath a seam.
- Seam tape is lifting: Edges peel away, bubbles spread, or pieces of tape flake off.
- Liquid sealant is cracked: The old coating has split, worn thin, or separated from the fabric.
- Needle holes are visible: Light or water passes through stitching that should be sealed.
- Thread is damaged: Broken or badly frayed stitching may require sewing or professional repair before sealing.
- High-stress points leak: Corners, guyline attachments, pole clips, vents, and floor junctions often show wear first.
Confirm That It Is a Seam Leak
Moisture inside a tent does not always mean the seams have failed. Identify where the water begins before adding sealant.
| What You See | Likely Cause | Correct Response |
|---|---|---|
| Drops form along one stitched line | Failed or unsealed seam | Use the correct seam sealer after inspection and preparation. |
| Fine droplets cover broad interior surfaces | Condensation | Increase ventilation, keep wet gear outside, and avoid touching the inner wall. |
| The inner coating peels, flakes, smells foul, or feels sticky | Widespread coating breakdown | Ask the manufacturer whether recoating, replacing the fly, or replacing the tent is appropriate. |
| Rain no longer beads on the fly, but water does not pass through | Worn durable water repellent treatment | Clean the fly and refresh its water-repellent treatment if the manufacturer allows it. |
| Water enters at one small point away from stitching | Puncture or tear | Patch or repair the damaged fabric rather than coating an entire seam. |
Annual Inspection of Tent Seams
An annual inspection is a useful minimum for a tent that sees occasional use. Frequent campers should check seams more often. The goal is to catch a small failure before it becomes a leak during a trip—not to add another layer of sealant every time you inspect.
Use this practical schedule:
- When the tent is new: Read the instructions, pitch it, inspect it, and perform a gentle water test.
- Before each camping season: Check the rainfly, floor perimeter, corners, vents, and attachment points.
- Before a remote or rainy trip: Repeat the inspection even if the annual check was recent.
- After heavy use: Inspect after extended sun exposure, wind, abrasive soil, repeated packing, or severe rain.
- Before long-term storage: Clean as needed and confirm that the tent is completely dry.
If one short section is leaking but the rest of the seam tape remains sound, spot sealing may be enough. If many seams are cracking or the tape is failing throughout the tent, a complete reseal or manufacturer evaluation may be more sensible.
Pro Tip: Inspect and water-test the tent several days before a trip. This leaves enough time to clean the fabric, apply sealant, allow a full cure, and correct any missed spots.
The Role of Wear and Tear in Seam Integrity

Pitching, folding, abrasion, moisture, heat, and sunlight gradually stress tent materials. Damage often develops first at corners, floor junctions, pole attachments, guyline points, and other areas that carry tension.
Causes of Seam Damage
- Repeated setup and packing: Folding and tensioning flex the tape, stitching, coating, and fabric.
- UV exposure: Long periods in direct sunlight can weaken fabric and waterproof treatments.
- Damp storage: Packing a wet tent encourages mildew, odor, and coating deterioration.
- Dirt and abrasion: Sand, grit, branches, and rough ground wear high-stress areas.
- Heat: Hot vehicles, attics, and storage sheds can accelerate adhesive and coating damage.
- Age and hydrolysis: Some polyurethane coatings eventually become sticky, flaky, or foul-smelling as they break down.
- Wrong repair products: An incompatible sealant may fail to bond or create a difficult cleanup problem.
Importance of Regular Inspections
| Inspection Area | Signs of Deterioration | Recommended Action |
|---|---|---|
| Stitching | Loose, broken, or badly frayed thread | Repair the stitching before applying sealant. |
| Seam tape | Peeling edge, bubble, split, or missing section | Check the warranty, remove only failed material as directed, and reseal with a compatible product. |
| Liquid sealant | Cracking, gaps, lifting, or thin worn areas | Clean and apply a thin repair coat if permitted. |
| Fabric coating | Widespread flaking, stickiness, or strong odor | Ask the manufacturer about recoating or replacement. |
| High-stress attachments | Distortion, tearing, loose stitching, or leakage | Use a reinforced repair or professional service rather than sealant alone. |
Repairing Delaminated Seams
“Delamination” can describe several different failures. A short lifting edge of seam tape may be repairable at home. Tape peeling from most seams, widespread coating flakes, sticky fabric, or structural separation points to a larger problem.
- Identify the affected area: Mark where the peeling or leakage starts and ends.
- Check the rest of the tent: One failed section may be isolated, but widespread deterioration changes the repair plan.
- Review warranty instructions: Contact the manufacturer before altering a relatively new tent or a possible material defect.
- Handle loose tape carefully: Remove only sections the manufacturer or sealant instructions tell you to remove. Do not tear sound tape from the fabric.
- Repair the underlying structure first: Restitch or reinforce damaged seams before coating them.
- Replace when necessary: A badly degraded fly or floor may not be worth recoating if the fabric itself is weak.
How to Properly Apply Seam Sealer
Good adhesion depends on three things: the correct product, a clean and dry surface, and enough undisturbed cure time. Read both the tent instructions and the sealant label before beginning.
Choose the Correct Seam Sealer
| Fabric or Coating | Sealant Guidance |
|---|---|
| Silicone-treated nylon or polyester | Use a silicone-compatible seam sealer approved by the tent manufacturer. Gear Aid Seam Grip SIL is designed for silicone-treated fabrics. |
| Compatible nylon, polyester, canvas, or vinyl without silicone treatment | Use the urethane or other product specified by the manufacturer. Gear Aid Seam Grip WP is one example but is not for silnylon. |
| Bonded, welded, DCF, UltraTNT, or unfamiliar laminate | Do not guess. Use the repair product and method specified for that exact shelter. |
Warning: Wear suitable gloves, work with good ventilation, keep uncured sealants away from children and ignition sources, and follow every safety and disposal direction on the product label. Do not apply a solvent-based product inside an occupied tent.
Step-by-Step Seam Sealing Process
- Check the manual and warranty. Confirm the coating, approved sealant, repair side, and any restrictions before changing the tent.
- Choose suitable conditions. Work in a dry, well-ventilated area within the sealant’s stated temperature and humidity range. Gear Aid currently lists a 60–100°F application range for its WP and SIL products, but other products may differ.
- Pitch the tent taut. Tensioned seams are easier to coat evenly. For an underside rainfly repair, mounting the fly inside out may improve access.
- Protect the work area. Place a drop cloth beneath the repair and keep the fabric away from dirt, leaves, hair, and dust.
- Clean the seam. Remove dry debris. Use only the cleaner recommended by the tent or sealant manufacturer. If isopropyl alcohol is approved, apply it lightly with a clean rag and let the area dry.
- Address old material. Trim or remove only loose, failed sealant or tape as directed. Leave securely bonded tape in place unless the manufacturer tells you otherwise.
- Apply a thin, even coat. Work the compatible sealer over the needle holes and slightly beyond both sides of the stitched line. Avoid thick ridges and puddles.
- Give stress points careful coverage. Check corners, floor junctions, guyline anchors, pole attachments, and vent seams without flooding the surrounding fabric.
- Keep the repair level and separated. Prevent wet seams from touching other fabric while they cure.
- Allow a complete cure. Use the label time rather than a universal 24-hour rule. For example, Gear Aid lists approximately 8–12 hours for Seam Grip WP and 3–6 hours for Seam Grip SIL under suitable conditions.
- Inspect the finished seal. Look for missed needle holes, gaps, lifted edges, or areas that remain unusually soft.
- Water-test the tent. After the full cure, pitch the tent and apply gentle hose spray from above. Do not use a pressure washer. Check the interior and mark any remaining leak.
REI’s tent-waterproofing instructions also recommend identifying failed sections, cleaning the seams, applying the correct product, and allowing it to dry completely.
Note: The underside of the rainfly and inside of the tent body are common application areas, but tape residue, fabric design, and manufacturer instructions can change the correct side. Follow the directions for your tent and sealant.
Spot Sealing Versus Full Resealing
Spot seal when one or two short areas leak and the surrounding tape, coating, and stitching remain sound. This uses less product and avoids unnecessary buildup.
Consider a complete reseal when several seams have begun failing, the original liquid sealant is cracking throughout the shelter, or the manufacturer recommends treating every seam after the first failure appears.
Seek professional or manufacturer help when the fabric is torn at a structural attachment, most tape is peeling, the coating has become sticky or foul-smelling, or the tent may still qualify for warranty service.
Alternatives to Seam Sealing
Seam sealer is useful only when water is passing through a seam or when the manufacturer requires sealing. Choose the solution that matches the actual problem:
- Improve ventilation for condensation: Open vents and doors when conditions allow, keep wet equipment out of the sleeping area, and avoid pressing bedding against the walls.
- Refresh the rainfly’s water repellency: If rain stops beading but does not penetrate the fabric, clean and restore the durable water repellent treatment with an approved product.
- Restore a compatible fabric coating: A worn polyurethane barrier may need a coating product rather than a narrow seam repair.
- Patch punctures and tears: Use a compatible patch or repair tape when the damage is away from the stitched seam.
- Repair stitching: Loose or broken thread must be stabilized before sealant can provide a dependable waterproof finish.
- Use manufacturer service: This is often the safest route for structural damage, widespread delamination, unusual laminates, or a possible warranty defect.
- Replace badly degraded components: A replacement rainfly or tent may be more reliable than trying to coat fabric that is weak throughout.
Maintenance Tips for Prolonging Tent Life
- Dry it completely: Never store a damp tent. Pitch or hang it in a shaded, well-ventilated place until every layer is dry.
- Clean gently: Shake out dirt and use a cleaner approved for outdoor waterproof fabrics. Harsh detergents, bleach, abrasive brushes, and machine washing can damage coatings.
- Store it loosely: At home, use a breathable oversized bag instead of leaving the tent tightly compressed in its stuff sack.
- Choose a cool location: Avoid hot trunks, attics, sheds, heaters, and direct sunlight.
- Limit prolonged UV exposure: Pitch in shade when practical and take the shelter down when it is not needed.
- Protect the floor: Clear sharp objects from the site and use a properly sized footprint when recommended.
- Keep zippers clean: Remove grit before it damages the slider, teeth, or nearby fabric.
- Do not over-tension: A firm pitch is useful, but excessive force strains seams and attachment points.
- Record repairs: Note the date, product, and location so you can monitor how the repair ages.
Common Mistakes to Avoid With Seam Sealing
- Sealing every year without evidence of failure: Extra layers add weight and mess without guaranteeing better waterproofing.
- Skipping the manufacturer instructions: Tent constructions and warranty rules differ.
- Using the wrong chemistry: A urethane product may not adhere to silicone-treated fabric, and silicone products are not intended for every polyurethane-coated tent.
- Sealing condensation: Moisture spread across broad interior surfaces is often condensation, not a seam leak.
- Applying to dirt or moisture: Contamination weakens adhesion and traps debris in the repair.
- Using too much product: Thick beads cure slowly, collect dirt, and may remain tacky.
- Ignoring damaged stitching: Sealant cannot restore the strength of a torn structural seam.
- Removing sound seam tape: Pulling bonded tape can damage the coating beneath it.
- Working outside the label conditions: Cold, heat, or unsuitable humidity can change application and curing behavior.
- Packing too soon: Uncured seams can bond to other panels and create a larger repair problem.
- Skipping the water test: A small missed area is easier to fix at home than during a storm.
Frequently Asked Questions
Can I use any adhesive for seam sealing my tent?
No. Use a flexible waterproof seam sealer approved for your tent’s coating. Silicone-treated fabric needs a silicone-compatible product, while compatible polyurethane-coated fabrics generally require a different formulation. Ordinary household glue may become brittle, fail to bond, damage the coating, or create a difficult repair.
How long does seam sealant last after application?
There is no dependable universal lifespan. Longevity depends on the product, application quality, fabric, UV exposure, folding, heat, moisture, and frequency of use. Inspect the repair before each season and after demanding trips, then reapply only when cracking, lifting, gaps, or leakage return.
Is seam sealing necessary for all tent materials?
No. Many factory-taped or bonded tents need no additional treatment when new. Some silicone-coated shelters require owner-applied silicone sealer, while certain bonded laminates have their own repair methods. Follow the instructions for the exact tent model.
Can I seam seal a tent in cold weather?
Only when the product label permits the application temperature and humidity. Some cured sealants remain flexible in freezing conditions but still need warmer conditions during application. Move the clean, dry tent to a ventilated indoor workspace if outdoor temperatures are outside the approved range.
Will seam sealing affect my tent’s breathability?
Properly sealing the narrow stitched seams should not materially reduce normal tent ventilation. It also will not prevent condensation. Continue using the tent’s vents, doors, mesh panels, and proper pitching practices to manage moisture.
Should tent seam sealer go inside or outside?
The underside of a rainfly and the inside of a tent body are common locations, but this is not universal. Existing tape, coating type, UV exposure, and the manufacturer’s design can change the correct side. Follow the directions for both the tent and sealant.
Can I apply seam sealer over old seam tape?
You may be able to repair a small lifting section while leaving firmly bonded tape in place, but widespread tape failure may require removal and full resealing. Check the warranty and product instructions first. Do not pull sound tape away from the fabric without a clear repair procedure.
Conclusion
Inspect your tent seams regularly, but do not reseal them automatically every year. A factory-taped tent may go several seasons without needing liquid sealer, while an unsealed silicone-coated shelter may require treatment before its first rainy trip. The tent manual, fabric coating, and condition of the seams should guide the decision.
When a seam does fail, confirm the source of the leak, choose a compatible product, prepare the surface carefully, apply a thin coat, and allow the complete label-specified cure. A controlled water test before travel is the final step. Proper drying, cool storage, gentle cleaning, and limited UV exposure will also help the repair—and the rest of the tent—last longer.
Sources
- Big Agnes: Seasonal Tent Maintenance — factory seam tape, condition-based resealing, tape failure, and storage.
- Tarptent: Seam-Sealing FAQ — silicone-coated shelters, silicone-only sealants, and factory-taped exceptions.
- Gear Aid: Seam Grip WP Sealant — compatible materials, cure time, application range, and silnylon exclusion.
- Gear Aid: Seam Grip SIL Silicone Sealant — silicone-fabric compatibility, cure time, and application conditions.
- REI Co-op: How to Waterproof a Tent — leak diagnosis, seam preparation, tape handling, and waterproof-coating maintenance.
- NEMO Equipment: How to Re-Waterproof Your Gear — thin application, material compatibility, curing, and general tent waterproofing maintenance.
