

Last Updated on July 27, 2026 by Mason Reed
If your tent is leaking in the rain, the first job is to figure out where the water is actually coming from. Failed seam tape, worn waterproof coatings, holes, poor rainfly setup, and water collecting under the floor can all cause real leaks. Condensation can look almost identical. Once you identify the pattern, most tent leaks can be repaired at home.
Quick Answer
Tents usually leak because seam tape or sealant has failed, the waterproof coating has deteriorated, or the fabric has been punctured or torn. Poor rainfly tension and water collecting underneath can also cause trouble. Moisture spread evenly across the inside is more likely condensation than a true leak.
Key Takeaways
- Follow the water to its source before applying waterproofing products. A seam leak, coating failure, tear, and condensation all need different fixes.
- Exterior DWR, the waterproof coating on the underside of the fabric, and seam tape or sealant are separate parts of a tent’s weather protection.
- Moisture caused by touching a wall is often transferred condensation or contact between the inner tent and wet rainfly, not water suddenly penetrating sound coated fabric.
- Match repair products to the fabric. Silicone-treated materials need different sealants from many polyurethane-coated tents.
- Reproof according to the condition of the tent and the manufacturer’s directions rather than following a fixed calendar schedule.
At a Glance
| Time Required | About 20–60 minutes for inspection and minor repairs, plus the sealant or coating’s full curing time |
| Difficulty | Easy to moderate |
| Tools Needed | Clean cloth, water, fabric-compatible seam sealer or repair tape, and waterproofing treatment only when needed |
| Cost | Usually about $10–$40 for common DIY repair supplies, depending on what you already own and which part has failed |
Disclosure: As an Amazon Associate I earn from qualifying purchases. Some links on this page are affiliate links, at no extra cost to you.
Common Causes of Tent Leakage
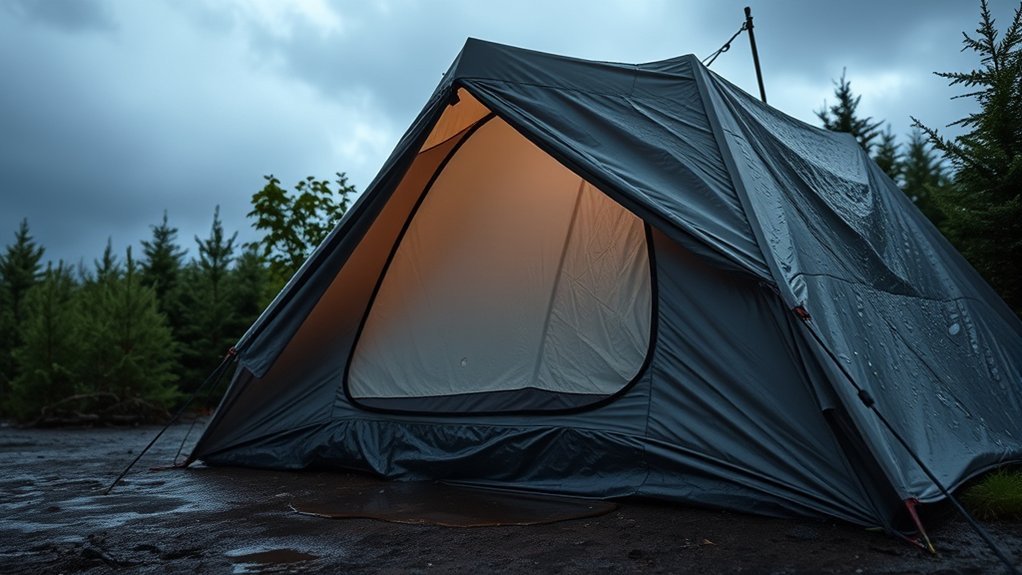
When a tent gets wet inside, don’t assume the entire fabric has stopped being waterproof. Start with the location and pattern of the moisture.
- Water following a stitched line: seam tape or seam sealant may be failing.
- Water entering one isolated spot: look for a pinhole, abrasion, puncture, or tear.
- Peeling, flaky, sticky, or gummy material on the underside: the waterproof coating may be deteriorating.
- Rain no longer beads on the outside: the exterior durable water-repellent finish, or DWR, may need cleaning or refreshing.
- Fine droplets spread over much of the inside: condensation is more likely.
- Water around a doorway or vent: check rainfly tension, wind direction, zipper coverage, and whether the opening was exposed to blowing rain.
Modern tents often combine several defenses against water: an exterior DWR treatment helps rain bead and roll away, a waterproof polyurethane or similar coating provides the primary fabric barrier, and seam tape or liquid seam sealant blocks water around needle holes. REI’s information on tent waterproofing products also makes clear that refreshing surface repellency is not the same job as rebuilding a failed waterproof coating.
Note: Hydrostatic head is a laboratory measure of how much water pressure a fabric can resist before water penetrates it. A higher number indicates greater resistance under the test, but there is no single rating that guarantees a dry tent in every storm. Seams, age, pitch, floor pressure, wind and fabric condition also matter.
How to Diagnose a Tent Leak at Home
Testing the tent before your next trip is much easier than troubleshooting it at 2 a.m. in a storm.
- Pitch the tent correctly. Install the rainfly, stake the corners and tension the fly according to the manufacturer’s instructions.
- Check the spacing. On a double-wall tent, the rainfly should not sag against large areas of the inner tent.
- Inspect seams and coating. Look for peeling seam tape, loose stitching, pinholes, flaking coating, sticky areas and obvious tears.
- Wet one area at a time. Use gentle hose spray or rain to wet the roof, walls and floor zones separately. Do not use a pressure washer.
- Watch inside. Trace each drop upward because water often travels along stitching or fabric before dripping somewhere else.
- Let the tent dry completely. Make repairs only under the conditions required by the repair-product instructions.
- Retest after curing. A second controlled water test confirms whether you actually fixed the source.
Warning: If a nearly new tent leaks despite being pitched according to its instructions, check the manufacturer’s warranty or support guidance before stripping seam tape or applying permanent coatings. Altering a new tent unnecessarily can complicate a warranty claim.
The Impact of Touching the Interior Walls
Keeping sleeping bags, packs and clothing away from tent walls is still good advice, but the reason needs some nuance. On a modern coated tent, simply touching sound waterproof fabric does not normally make that coating stop working. The more common problem is moisture transfer.
Your sleeping bag may touch condensation on a single-wall tent, or gear can push the inner wall of a double-wall tent against the wet rainfly. Either situation can leave your belongings damp even though rain has not penetrated directly through intact waterproof fabric.
What Contact With Wet Fabric Actually Does
Water can move along fibers, stitching and contacting surfaces, but “breaking the tent’s surface tension” is not a reliable explanation for leaks in every modern tent. Coated nylon and polyester depend mainly on their waterproof coating and sealed construction.
Contact becomes a practical problem when it transfers existing moisture, pushes two wet layers together, or presses against an already damaged area.
Why Wall Contact Still Causes Wet Gear
Condensation often forms on the cool side of tent fabric overnight. A sleeping bag pressed against that surface can absorb the moisture. In a double-wall shelter, a pack leaning on the inner wall may also push it into the rainfly, allowing moisture on the fly to transfer inward.
The effect is especially noticeable in small tents where there is little space between the sleeper, inner body and rainfly.
Space Management Tips
Keep sleeping bags and clothing a few inches away from the walls when space allows. Store packs where they do not deform the inner tent, and keep vents unobstructed. Re-tension a rainfly after it becomes wet if the fabric has started to sag.
Good space management will not repair a failed seam or coating, but it can prevent condensation and fly contact from being mistaken for a waterproofing failure.
Pro Tip: During a storm, move your sleeping bag and clothing away from the wet area and place an absorbent cloth below a drip rather than pressing gear against the tent wall. Mark the suspected leak location so you can inspect and repair it once the tent is dry.
Wear and Tear of the Polyurethane (PU) Coating
Many synthetic tents use a waterproof polyurethane coating on the underside of the fly or floor. That coating is different from the water-repellent treatment on the exterior surface.
UV exposure, abrasion, dirt, age and damp storage all shorten the useful life of tent materials. Nikwax states that synthetic tent fabric exposed continuously to sunlight for two weeks can lose up to half its tear strength, which is one reason long-term UV exposure should be minimized. The company also notes that storing coated fabric damp contributes to coating deterioration. See the manufacturer’s Tent & Gear SolarProof guidance.
Importance of Regular Maintenance
Instead of treating the whole tent on a fixed schedule, inspect it and repair the layer that is actually failing:
- Check water beading: If clean outer fabric wets out instead of beading, the DWR may need refreshing.
- Inspect the underside: Peeling, flakes, stickiness or a gummy texture point toward failure of the inner waterproof coating.
- Inspect seam tape: Look for lifting edges, cracks or sections that have detached.
- Check the manufacturer’s fabric specification: Determine whether the tent is PU-coated, silicone-treated or uses another construction before choosing sealant.
- Store it completely dry: Dry both the tent and rainfly before long-term storage.
Reproofing Techniques and Tips
“Reproofing” can mean two different jobs, so choose the treatment based on the symptom.
If water stops beading on otherwise sound fabric: clean the tent first and refresh the exterior DWR with a tent-compatible treatment. Nikwax Tent & Gear SolarWash is formulated to clean weatherproof tent materials while reviving water repellency and adding UV protection. Its current manufacturer instructions should be followed for application.
Nikwax instructs users to apply Tent & Gear SolarProof evenly to clean fabric and air dry it rather than relying on a generic “dry, sunny day” rule. The manufacturer says regular SolarProof treatment can provide DWR and UV protection and can double the effective life of treated equipment.
If the inner waterproof coating is peeling or sticky: an exterior DWR spray will not rebuild that layer. The deteriorated coating must be restored with a compatible tent-fabric coating or the affected fly or tent may need replacement.
Warning: Do not assume every tent uses polyurethane. Silicone-treated fabrics require different repair products, and a product designed for PU-coated nylon may not bond correctly to silnylon or silpoly. Check the tent maker’s specifications before applying permanent sealant or coating.
Deterioration of Tent Seams

Every sewn seam contains needle holes, so manufacturers normally protect vulnerable seams with seam tape, seam sealant or another construction method. Those treatments can eventually wear, peel or crack.
- Inspect the entire seam: Look for lifting tape, cracked sealant or staining that follows the stitching.
- Confirm the leak: During a controlled water test, watch whether moisture appears directly along that seam.
- Clean the repair area: Follow the sealant manufacturer’s preparation instructions.
- Choose a compatible product: Silicone-treated tent fabrics require silicone-compatible seam sealers; many PU-coated fabrics use a different formulation.
- Apply only where directed: Some products go on the coated side, others are used on the outside or underside of a fly. Follow the product and tent manufacturer’s instructions.
- Allow a full cure: Never pack the tent while seam sealer is still wet or tacky.
If factory seam tape is failing across most of an older rainfly rather than in one isolated area, inspect the coating itself. Widespread seam-tape failure and widespread coating deterioration often occur together as materials age.
Rips and Tears at the Base of the Tent
Even perfect seams cannot stop water from entering through a punctured floor. Rocks, twigs, grit and repeated abrasion can create pinholes or larger tears, especially when body weight presses the floor against rough ground.
Before pitching, remove loose sharp debris without excavating or altering the campsite. A properly sized footprint adds abrasion protection. It should stay within the perimeter of the tent floor; a tarp sticking out beyond the floor can catch rain and funnel it underneath.
Here’s a better repair guide:
| Issue | Repair Technique | Prevention |
|---|---|---|
| Small rip or puncture | Tent-compatible repair tape or patch with rounded corners | Use a correctly sized footprint and clear sharp debris |
| Larger tear | Reinforced patch; professional sewing may be appropriate for structural damage, followed by waterproof sealing | Avoid dragging the tent and inspect high-wear areas |
| Frayed edge | Trim only loose fibers as appropriate and reinforce with a fabric-compatible patch before the damage spreads | Keep the floor away from rocks, roots and sharp gear |
A quick patch is much easier than dealing with a soaked sleeping system, so inspect the floor whenever you clean and dry the tent.
Distinguishing Between Condensation and Leakage

Condensation forms when warm, moist air meets colder tent fabric. Breathing, wet clothing, damp ground and humid weather all add moisture to the air inside or beneath the rainfly.
Use these clues to tell condensation from a real leak:
- Location: A concentrated wet trail beneath a seam, hole or zipper area suggests a leak. Condensation is more likely to cover a broad surface.
- Droplet pattern: Many fine droplets spread across the underside of a fly or wall usually indicate condensation.
- Timing: Condensation often becomes most noticeable overnight or early in the morning. A leak often appears soon after rain begins hitting the affected area.
- Weather: Cold, still and humid nights can create significant condensation even when it is not raining.
- Ventilation: Use vents as the tent manufacturer recommends and keep wet clothing out of the sleeping area when practical.
- Repeatability: If the same seam starts dripping each time that area is sprayed during a home test, you have stronger evidence of a true leak.
Ventilation can reduce condensation in many conditions, but extremely humid or rainy weather can still leave a well-ventilated tent damp inside. That does not automatically mean its waterproofing has failed.
The Role of Heavy Rainfall in Tent Leaks
Heavy rain exposes weaknesses that a brief shower may never reveal. Water can remain against the fly longer, wind can drive rain toward doors and vents, and saturated ground can put additional pressure on the floor.
A hydrostatic-head specification can help compare fabrics, but it does not describe the whole shelter. Seam construction, rainfly coverage, coating condition, floor design, wind and pitch all affect real-world performance.
Heavy rain also makes campsite selection critical. Instead of pitching where runoff can collect, choose higher, well-drained ground and avoid depressions or channels that may funnel water through the site. Keep the existing guidance about pitch and tent setup in mind, but prioritize drainage and a stable, correctly tensioned shelter over trying to sleep on a noticeable slope.
Check that the rainfly is taut, guy out the shelter when conditions require it, and orient exposed doors away from wind-driven rain when the design allows.
Effective Solutions for Fixing Tent Leaks
Once you know where the water is entering, match the repair to the failure instead of spraying the whole tent indiscriminately.
- Repair holes and tears: Clean and dry the damaged area, then apply fabric-compatible repair tape or a patch with enough overlap to stay secure.
- Seal leaking seams: Remove only loose, failed material as directed and apply a seam sealer made for the tent’s fabric and coating.
- Refresh DWR when needed: If clean exterior fabric has stopped beading water but the waterproof backing is intact, apply a compatible tent DWR treatment according to its label.
- Restore a failed waterproof coating separately: Peeling or sticky PU requires a coating-restoration product designed for that job; exterior DWR alone will not fix it.
- Correct the setup: Tension the fly, use guylines as required, maintain separation between fly and inner tent, and keep doors protected from blowing rain.
- Protect the floor: Use a footprint that does not extend beyond the tent floor.
- Retest: After every product has fully cured, pitch the tent and repeat a controlled water test.
Nikwax states that one application of Tent & Gear SolarProof can double the effective life of suitable treated fabric by providing UV protection and DWR. That is a manufacturer claim for that product, not evidence that every spray will repair every type of tent leak.
Regular Maintenance Tips for Preventing Future Leaks
The best maintenance schedule is based on condition rather than a fixed number of years.
- Inspect before important trips: Pitch the tent at home and check the fly, floor, seams, zippers and guy points.
- Clean gently: Dirt can interfere with water repellency. Follow the tent manufacturer’s cleaning instructions and avoid harsh household detergents unless specifically approved.
- Refresh DWR when performance drops: If clean fabric no longer beads water, use a tent-compatible treatment.
- Watch the inner coating: Peeling, flakes, stickiness, gummy areas or persistent coating-related odor can signal deterioration that DWR spray will not repair.
- Dry before storage: Never store a tent damp for extended periods.
- Limit unnecessary UV exposure: Do not leave a tent pitched in strong sun for weeks when it is not being used.
- Protect the floor: A fitted footprint reduces abrasion without creating a rain-catching skirt around the tent.
- Maintain the pitch: Recheck rainfly tension after weather changes, especially if wet fabric begins to sag.
With those habits, you address small failures before they turn into a night of dripping seams and soaked gear.
Frequently Asked Questions
Can I use any waterproofing spray on my tent?
No. Check the tent manufacturer’s fabric and coating specifications first. Exterior DWR treatments, PU recoating products and silicone-compatible sealants do different jobs, and using the wrong chemistry can produce a poor bond or damage the existing finish.
How often should I reapply waterproofing treatments?
There is no universal one-to-three-year schedule. Clean and inspect the tent regularly, then refresh exterior water repellency when clean fabric stops beading water or when the manufacturer recommends treatment. Heavy use, dirt, abrasion and UV exposure can shorten the interval.
What materials are best for tent repairs?
Use repair tape, patches, seam sealers and coatings specifically compatible with the tent’s fabric. Small tears often respond well to adhesive patches. Larger or structural tears may require reinforced or professional repair, followed by appropriate waterproof sealing.
Is it safe to use my tent in heavy rain?
A sound tent designed for the expected conditions should handle rain when it is pitched correctly. Inspect it first, tension the rainfly, use required guylines and choose higher, well-drained ground. Avoid depressions, drainage channels and sites where runoff can collect around the floor.
How do I know if my tent is beyond repair?
Replacement becomes reasonable when the waterproof coating is deteriorating across large areas, the floor or fly is extensively torn, fabric has become badly weakened, or leaks continue across multiple areas after appropriate seam and coating repairs. A sticky, gummy or extensively peeling coating is a strong warning sign.
Why does my tent leak only during heavy rain?
Long or wind-driven rain can expose small seam failures, worn coatings, poor fly tension, vulnerable openings or water collecting around the floor that a short shower never reveals. Test the tent in sections at home so you can identify the exact entry point.
Should I seam-seal a brand-new tent?
Not automatically. Many tents arrive with factory-taped or otherwise waterproofed seams, while some specialized shelters require user seam sealing. Read the manufacturer’s instructions first. If a new tent leaks despite correct setup, contact the manufacturer before making permanent alterations.
Conclusion
A leaking tent is frustrating, but replacing the whole shelter is rarely the first step. Follow the moisture, determine whether you are dealing with condensation, a seam, a hole, failed DWR, deteriorated coating or poor setup, and then repair that specific problem.
Inspect the tent before trips, keep it clean and dry in storage, protect the floor, and use products that match its fabric. Those simple habits can keep your camping trips comfortable through many wet nights without wasting money on treatments the tent does not need.
Sources
- Nikwax Tent & Gear SolarProof — manufacturer guidance on DWR treatment, UV protection, application and tent-fabric care
- Nikwax Tent & Gear SolarWash — manufacturer guidance on cleaning, DWR revival, UV exposure and damp-storage effects
- REI: Nikwax Tent & Gear SolarProof — product specifications and current waterproofing-treatment information
