

Last Updated on July 28, 2026 by Caleb Warren
To use backpack compression straps effectively, loosen them before packing, put bulky lightweight gear near the bottom, and place dense, heavier items in the pack’s core close to your back. Once everything is packed, tighten the compression straps evenly until the load feels compact and does not sway. Then adjust the hipbelt, shoulder straps, load lifters, and sternum strap as a separate fit system. Use built-in attachment straps for external backpacking gear, and recheck the fit during your hike as food, water, and clothing move in or out of the pack.
Quick Answer
Loosen compression straps before packing. Put soft, bulky gear low and heavier items in the pack’s core close to your spine. After packing, tighten the compression straps evenly until the load stops shifting without deforming the pack. Then fit the hipbelt, shoulder straps, load lifters, and sternum strap.
At a Glance
| Time Required | About 2–5 minutes after packing |
| Difficulty | Easy |
| Tools Needed | None; just your loaded backpack |
| Cost | $0 if the straps are built into your pack |
Disclosure: As an Amazon Associate I earn from qualifying purchases. Some links on this page are affiliate links, at no extra cost to you.
Understanding Compression Straps
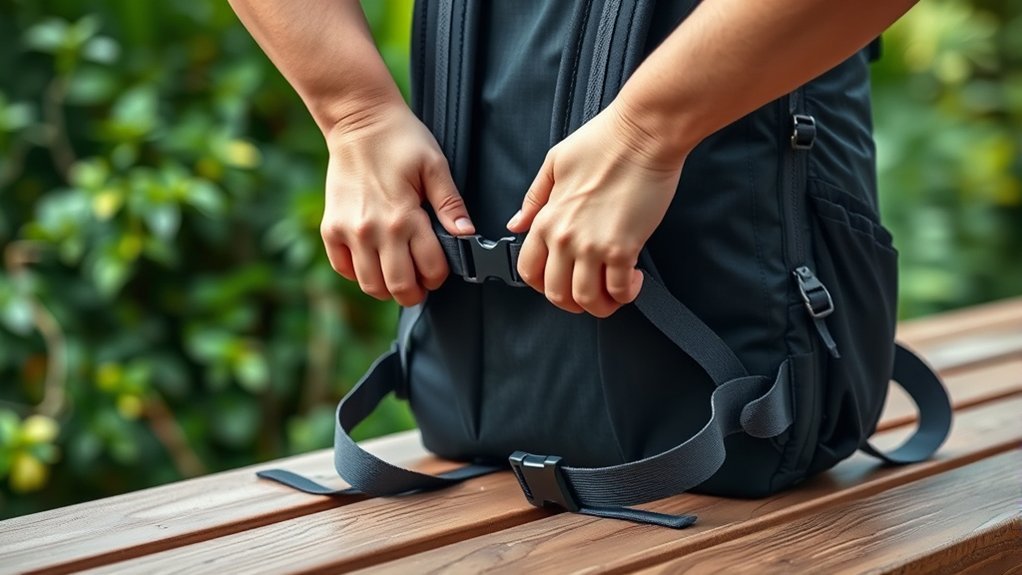
Compression straps are adjustable webbing straps that squeeze a backpack’s contents into a smaller, more stable shape. Side compression straps are especially common, although some packs also have compression straps across the front, top, or bottom. Their main job is to reduce empty space and keep the contents from shifting as you walk.
Compression straps are different from the pack’s suspension straps. The hipbelt, shoulder straps, load lifters, frame, and sternum strap control how the pack fits your body and transfers its load. Compression straps mainly control the load inside or against the pack.
This distinction matters. Tightening a loose side compression strap can stop a half-full pack from slumping or swaying, but it cannot correct an incorrectly sized torso, poorly positioned hipbelt, or badly packed heavy item.
Key Takeaways
- Put bulky, lightweight gear low in the pack and keep dense, heavy items in the core close to your back.
- Compression straps stabilize and compact the load; the hipbelt and suspension system handle most of the weight transfer.
- Tighten compression straps evenly until the load stops shifting, but do not crank them so hard that the pack or its contents deform.
- A load-lifter angle near 45 degrees is common, but the correct angle varies with pack design and torso fit.
- Recheck compression and fit straps whenever your load changes substantially during the day.
Preparing Your Pack
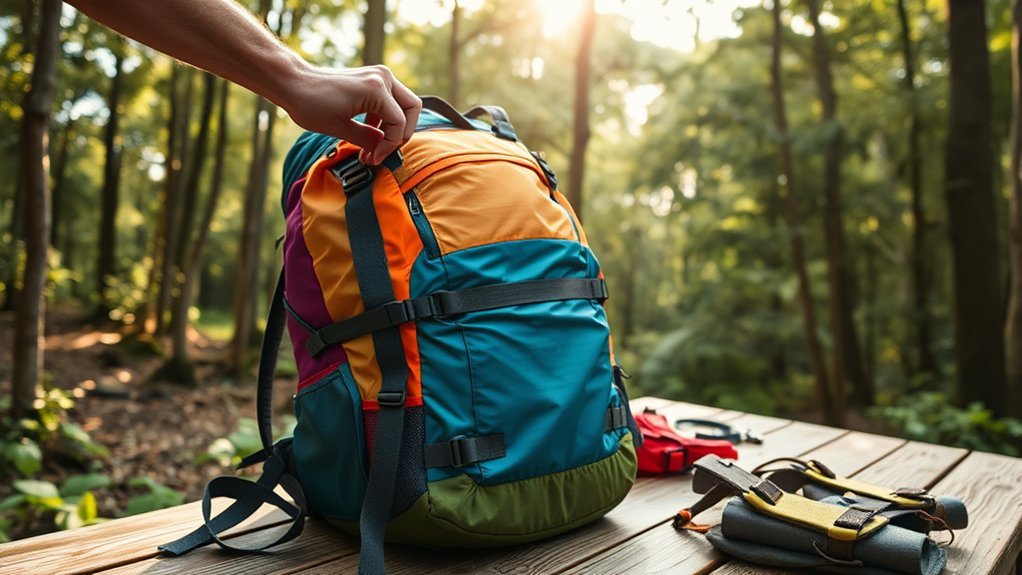
Before packing, loosen the compression straps enough to let the main compartment expand. This makes it easier to fill the pack evenly instead of forcing gear into a space that has already been cinched down.
Pack by zones rather than simply putting the heaviest gear at the bottom. According to REI’s backpack-loading guidance, soft and bulky items such as a sleeping bag or camp clothing work well in the bottom zone. Dense items such as food, water, a cook kit, or a bear canister belong in the core of the pack, centered and close to your back. Frequently needed items can ride higher or in accessible pockets.
Fill empty spaces around dense items with clothing or other soft gear so the contents cannot shift from side to side. Try to keep the left and right sides balanced.
If you need to carry a sleeping mat, tent poles, or another bulky object outside the pack, use straps or attachment points designed for that purpose. Compression straps can secure some external gear, but keep outside carry to a minimum because exposed equipment can snag branches or scrape rocks.
Pro Tip: Fit matters as much as compression. Gregory measures backpack torso length from the C7 vertebra at the base of the neck toward the iliac-crest reference point. If the pack’s torso setting is wrong, pulling harder on the straps will not create a proper fit.
How to Use Backpack Compression Straps Step by Step
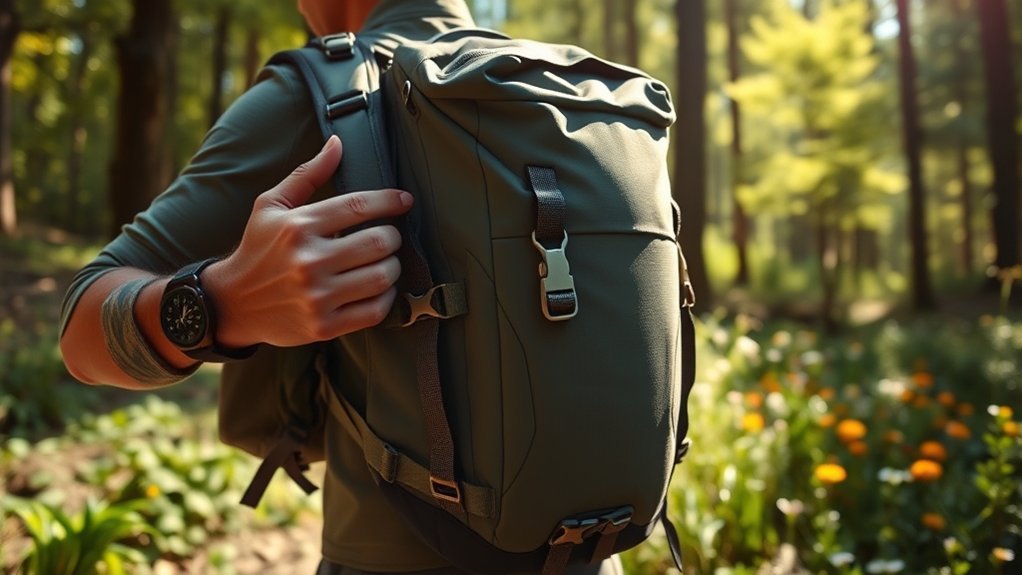
Once your gear is packed in stable zones, use the compression straps to remove excess volume and lock the load in place.
- Loosen the straps before packing: Give the pack enough room to expand so you can position gear correctly.
- Pack light, bulky items low: Sleeping gear and other soft equipment can fill the bottom zone without making the pack sag.
- Center dense items in the core: Keep heavier gear close to your back and balanced from left to right.
- Fill empty spaces: Use soft clothing or similar items around harder gear so nothing can slide around.
- Buckle the compression straps: Make sure the webbing is flat and not twisted through the buckle.
- Tighten both sides gradually: Alternate from one side to the other instead of fully tightening one side first. The pack should remain centered rather than being pulled into a lopsided shape.
- Check the load: Gently rock or lean with the pack. If the contents noticeably sway, add a little more tension or repack the loose area.
- Secure loose webbing: Tuck or roll long strap tails so they do not flap, catch on vegetation, or interfere with your arms.
How Tight Should Compression Straps Be?
Compression straps should be snug, not maximally tight. Tighten them until the load feels compact and stops moving independently of your body. There is no useful universal tension number because pack fabrics, buckles, strap layouts, and loads vary.
Stop tightening if the pack body visibly twists, soft gear is being crushed unnecessarily, a buckle is being forced sideways, or the zipper line becomes distorted. More tension is not automatically more stable.
Techniques for Balanced Weight Distribution
After compressing the contents, put on the backpack and adjust its suspension. Start with the hipbelt. REI recommends that the majority of a properly fitted backpack’s load rest on the hips and notes that 80% or more is a common target for backpacking packs. The exact feel will vary with pack design, body shape, and load.
Next, snug the shoulder straps so they follow your shoulders without carrying the entire load. Then adjust the load lifters and sternum strap. These adjustments work with the hipbelt to control how the pack rides against your body; they are not substitutes for the side compression straps that stabilize the contents.
Proper Strap Tightening Techniques
- Start with the hipbelt: Position it so the padding wraps the top of your hip bones or sits as the pack manufacturer specifies. Tighten it securely without pinching.
- Adjust the shoulder straps: Pull them snug enough for the harness to follow your shoulders while leaving most of the load supported by the hipbelt on a load-bearing backpack.
- Set the load lifters: Tighten them until the upper pack sits comfortably close to your body. A roughly 45-degree angle is common, but the correct geometry depends on the pack.
- Set the sternum strap: Position it at a comfortable height across the chest, often roughly an inch below the collarbones, and tighten only enough to stabilize the shoulder straps without restricting breathing.
Walk for several minutes after the first adjustment. Small changes made while moving are often more useful than pulling every strap as tight as possible while standing still.
Adjusting Load Lifters Effectively
Load lifters connect the upper shoulder harness to an anchor near the top of the pack. Tightening them brings the upper pack closer and changes how pressure is shared between the shoulders and hips.
REI describes roughly 45 degrees as an ideal load-lifter angle on many backpacking packs, while Osprey’s current fitting guidance notes that properly fitted load lifters may naturally fall in roughly the 30- to 60-degree range. That means the visible angle is a reference, not a universal pass/fail measurement.
Warning: Do not overtighten load lifters just to force a particular angle. Excess tension can pinch around the shoulder area and create a gap where the shoulder harness should follow your body. Use snug tension and follow the fitting instructions for your specific backpack.
Maintaining Stability During Your Hike
Compression straps are most noticeable when the pack is partly full or when you are moving over uneven terrain. A compact load moves with you instead of lagging from side to side.
- Watch for sway: If the pack shifts noticeably when you step over rocks or turn your torso, check for a loose compression strap or an empty space inside the pack.
- Keep the load balanced: Avoid carrying a dense object on only one side. Compression cannot fully correct a badly unbalanced load.
- Control external gear: Anything attached outside should be held at more than one point when the pack design allows it so it cannot swing freely.
- Minimize snag hazards: External gear can catch branches or scrape rock. Keep dense, fragile, and essential gear inside whenever practical.
- Use the whole system: Compression straps stabilize the contents while the hipbelt, harness, frame, load lifters, and sternum strap stabilize the pack on your body.
Reassessing Strap Tightness
Your pack’s shape changes during a hike. You may drink water, eat food, remove a layer, add a rain shell, or move equipment between pockets. When the volume changes, a compression strap that was snug in the morning may become loose.
Recheck the compression straps after major breaks or whenever you notice new swaying. You do not need to loosen and retighten every strap on a schedule. Instead, look for visible slack, shifting contents, a lopsided pack body, or a strap that has crept through its buckle.
If a strap repeatedly loosens, inspect the webbing for unusual wear and make sure it is routed correctly through the buckle. Dirt or debris around hardware can also interfere with smooth adjustment. If the buckle is cracked or the webbing is damaged, follow the manufacturer’s repair or replacement guidance rather than relying on extra tension.
Tips for Different Pack Types
Compression straps perform the same basic job across many backpacks, but how aggressively you use them depends on the pack’s construction and load.
- Traditional framed hiking packs: Use upper and lower side compression straps to control the main compartment, especially when the pack is not completely full. Fit the hipbelt and suspension separately so the frame can transfer the load as designed.
- Ultralight backpacks: Compression is especially useful when a large, soft-sided pack is underfilled. Tighten only enough to remove excess volume; lightweight fabrics and minimalist hardware do not need unnecessary force.
- Daypacks: Side straps often serve mainly to keep a small load close and stable. A simple webbing hipbelt may provide stability without transferring as much weight as a padded backpacking hipbelt.
- Travel backpacks: Compression straps may primarily control volume or hold clothing in place. Their purpose can differ from the suspension system on a trekking pack.
- Packs carrying external gear: Some manufacturers deliberately design compression straps to capture trekking poles or secure accessories. Use only attachment arrangements appropriate for your model and keep the load balanced.
Common Mistakes to Avoid
Most compression-strap problems come from packing incorrectly first and trying to solve the problem by pulling harder afterward. The straps work best when the load is already balanced.
Over-tightening Compression Straps
Over-tightening can distort the pack, crush soft or fragile items, pull buckles at awkward angles, and make access harder without producing a meaningful stability benefit.
- Aim for snug: Remove slack and stop once the load no longer shifts.
- Watch the pack’s shape: The body should stay centered rather than twisting toward one side.
- Repack before cranking harder: If something still moves, an empty pocket or badly placed dense item may be the real problem.
Ignoring Load Distribution
Compression straps cannot rescue a poorly balanced load. Putting dense items too low can make the pack sag, while placing heavy items too far from your back can pull your center of gravity backward. An uneven left-to-right load can also make the pack feel unstable even when every strap is tight.
Keep dense gear centered in the core and close to your spine, surround hard items with softer gear where practical, and use the hipbelt and suspension according to the pack manufacturer’s fit instructions.
Neglecting Strap Adjustments
Your first adjustment is not necessarily your final adjustment. Reassess the fit after walking, after consuming food or water, and after moving clothing or equipment.
- Check compression straps: Remove new slack when the pack volume decreases.
- Check the hipbelt: Make sure it remains correctly positioned instead of sliding down.
- Check shoulder and load-lifter tension: Relieve pressure points rather than continually tightening everything.
- Check the sternum strap: It should stabilize the harness without restricting breathing or arm movement.
Using Compression Straps for the Wrong Job
Not every strip of webbing on a backpack is designed to suspend bulky or heavy gear. Compression straps may double as attachment straps on some models, but other packs provide dedicated sleeping-pad straps, trekking-pole loops, ice-tool attachments, or lash points.
Check your pack’s instructions before hanging substantial equipment from a strap, and avoid treating a compression strap as a lifting handle unless the manufacturer specifically designed it for that purpose.
Note: If the hipbelt cannot stay correctly positioned, the shoulder harness has a persistent gap, or the load lifters only work when pulled extremely tight, check the pack’s torso length and size. REI and Gregory both emphasize that strap adjustments cannot fully compensate for an incorrectly fitted suspension.
Frequently Asked Questions
Can compression straps be used with any backpack?
Use built-in compression straps when the backpack includes them. Aftermarket straps require suitable attachment points and are not automatically compatible with every pack. Avoid routing added straps where they can crush zippers, interfere with pockets, or pull against hardware that was not designed for the load.
How do I clean my backpack compression straps?
Follow your pack manufacturer’s instructions. For many hiking packs, a damp sponge or cloth with mild soap is appropriate, followed by a thorough rinse and complete air drying away from direct heat. Clean dirt from buckles and webbing instead of putting the pack in a dryer.
What materials are compression straps typically made from?
Compression straps generally use durable synthetic webbing, with nylon and polyester common in backpack construction. The exact fiber, width, stitching, coating, and buckle material vary by manufacturer and model, so check the pack’s specifications when material details matter.
Are there weight limits for compression straps?
There is no single weight limit that applies to every backpack compression strap. Strap width, stitching, buckle strength, attachment points, and pack design all vary. Treat compression straps primarily as load-stabilizing features and follow the manufacturer’s instructions before using them to support substantial external gear.
Can compression straps damage my gear?
Yes. Excessive tension can crush delicate items, distort containers, or press hard objects into softer equipment. Tighten only until the load is stable, and reposition fragile gear instead of relying on heavy compression to make it fit.
How tight should backpack compression straps be?
They should be snug enough that the load does not noticeably sway or shift when you move. Stop tightening once the pack is compact and stable. If the body twists, buckles are pulled sideways, or gear is being crushed, back off the tension and check the packing arrangement.
Can I use compression straps to carry a tent or sleeping pad?
Often, yes, when your backpack’s compression or accessory straps are designed for external equipment. Keep the item tight against the pack and balanced from side to side. Dense gear is usually better carried inside, and external items should be minimized because they can snag vegetation or scrape against rocks.
Conclusion
Mastering your backpack’s compression straps starts with packing correctly. Put soft, bulky gear low, keep dense items in the core and close to your back, fill empty spaces, and then tighten the compression straps evenly until the contents stop shifting.
After the load is stable, adjust the hipbelt and the rest of the suspension to fit your body. Do not use extra strap tension to compensate for poor packing or the wrong torso size. Recheck the pack as food, water, and clothing change throughout the day, and keep external gear secure and minimal from trailhead to camp.
Sources
- REI Expert Advice: Backpacks — Fit & Torso Size Guide — hipbelt positioning, load-lifter angle, sternum-strap position, and fitting sequence
- REI Expert Advice: How to Pack and Hoist a Backpack — correct bottom/core packing zones, compression straps, load balance, and external-gear precautions
- Osprey Backpack Size & Fit Guide — hipbelt-first fitting sequence and the approximately 30- to 60-degree load-lifter range used on properly fitted Osprey packs
- Gregory Pack Fit & Sizing Guide — C7-to-iliac torso measurement, hipbelt positioning, and pack-sizing guidance
- Gregory Care & Cleaning Guide — mild-soap cleaning, buckle rinsing, and proper air drying

