Last Updated on July 28, 2026 by Caleb Warren
If you’re a shorter traveler, finding a backpack that fits well can feel like a guessing game. Packs made for longer torsos may ride too low, pull away from your shoulders, or place the hipbelt in the wrong spot. The solution is to separate two decisions: choose the harness by your torso and hip measurements, then choose capacity by what you need to carry.
Quick Answer
Choose a backpack by torso length and hipbelt fit, not by height alone. Measure from your C7 vertebra to your iliac crest, then match that number to the maker’s chart. Capacity depends on the trip: about 15–30L for day use, 30–50L for short overnights, and 50–80L for typical multiday trips.
Key Takeaways
- Torso length determines the pack’s harness size; liters determine how much gear it holds.
- Measure hip circumference around the iliac crest, not around the widest part of your hips or your normal pants beltline.
- Fit ranges differ by brand and model, so never rely on one universal small, medium, or large chart.
- Adjust the hipbelt first, followed by the shoulder straps, load lifters, sternum strap, and stabilization straps.
- Test the pack with 10–20 pounds or your expected trip load; an empty pack cannot reveal pressure points or poor balance.
At a Glance
| Time Required | 10–15 minutes to measure and fit; longer if comparing models |
| Difficulty | Easy, though a second person improves measurement accuracy |
| Tools Needed | Flexible tape measure, the backpack, and a 10–20 lb. test load or your normal gear |
| Cost | $0 to measure and test a pack you already own or try one in a store |
Disclosure: As an Amazon Associate I earn from qualifying purchases. Some links on this page are affiliate links, at no extra cost to you.
Importance of Torso Length in Backpack Selection
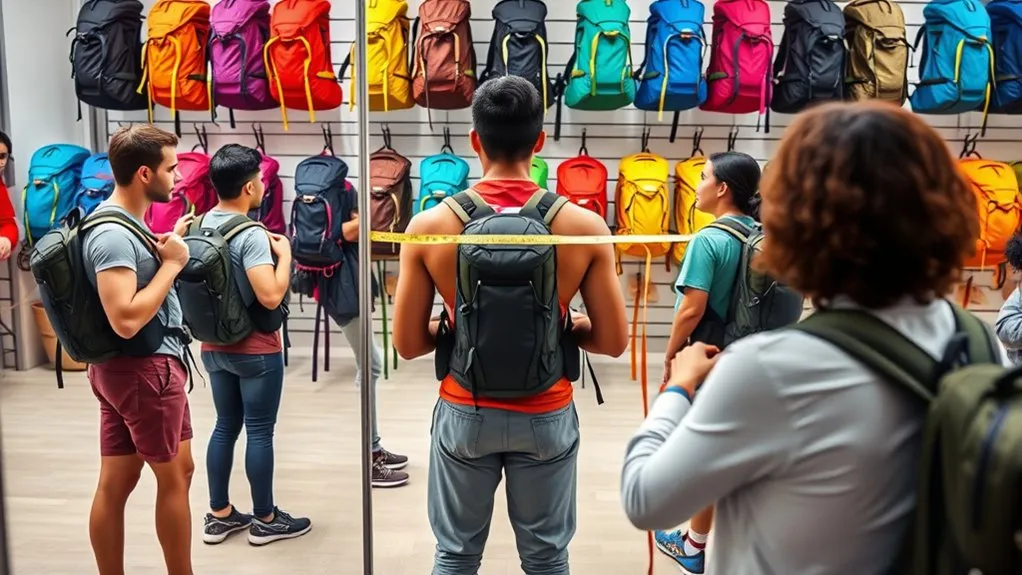
Your torso length is the distance between the base of your neck and the top of your hip bones. It determines where the shoulder harness and hipbelt sit, making it more useful than overall height when you choose a framed hiking or travel pack.
Two people who are both 5 feet 2 inches tall may need different pack sizes because one may have a longer torso and shorter legs. A shorter traveler can also use a 50- or 60-liter backpack when the harness fits correctly. The liter rating describes storage space; it does not describe the wearer’s body size.
Manufacturers publish model-specific torso ranges, and those ranges often overlap. Use your measurement with the exact product chart rather than assuming every “small” pack fits the same. The REI backpack fit guide also recommends physically trying both sizes when your torso falls near the edge of a range.
Measuring Your Torso Length Accurately

- Find the C7 vertebra: tilt your head forward and feel for the prominent bony bump where your neck meets your shoulders.
- Find the iliac crest: place your hands on top of your hip bones with your fingers pointing forward and your thumbs pointing toward your spine.
- Mark the lower point: imagine a level line joining the tips of your thumbs across your lower back.
- Measure the torso: stand naturally while another person runs a flexible tape from the C7 vertebra down the spine to that imaginary line.
- Repeat the measurement: take it two or three times and use the most consistent result.
Do not convert the result directly into a universal small, medium, or large size. Torso ranges vary between models, even within the same brand. Match the number to the current size chart for the exact pack you are considering.
Pro Tip: Have another person take the measurement. Reaching behind your back or bending to read the tape can change your posture and shorten or lengthen the result.
Understanding Hip Circumference and Hipbelt Fit
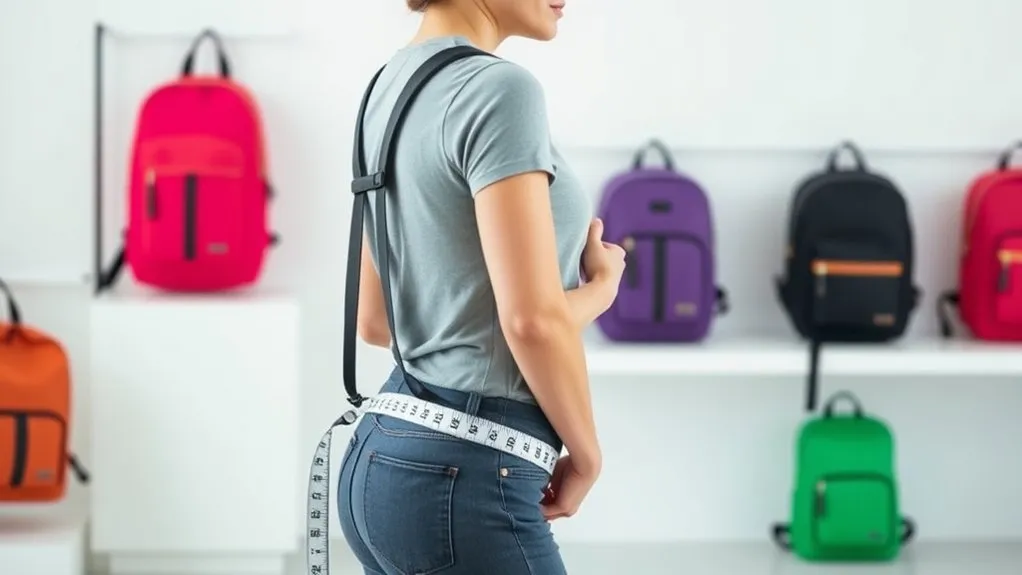
For a framed backpack, the hipbelt should transfer most of the load to the pelvis instead of leaving the shoulders to carry it. The useful measurement is hip circumference around the iliac crest, not hip width and not necessarily your pants-waist size.
Importance of Hip Measurement
- Measure at the iliac crest: wrap the tape around the top of your hip bones, which is usually slightly higher than a normal pants belt.
- Keep the tape level: it should stay horizontal around your body without sagging at the back.
- Compare the correct specification: check the pack’s listed waist or hip range for the exact torso size you plan to buy.
- Check padding coverage: the padded wings should wrap around the sides of your hips without meeting at the buckle or ending too far behind you.
The Osprey size and fit guide recommends leaving usable webbing between the padded hipbelt and the buckle so the belt can be tightened as clothing layers and pack loads change.
Impact on Fit
There is no universal table that converts hip circumference into a small, medium, or large backpack. Use these fit checkpoints instead:
| Fit Check | Good Fit | Warning Sign |
|---|---|---|
| Hipbelt | Padding is centered over the iliac crest and stays in place while walking. | The belt slides down, pinches the stomach, or reaches maximum tightness before becoming secure. |
| Shoulder straps | Straps wrap smoothly over the shoulders without a large gap. | Straps begin too far down the back, gap behind the shoulders, or carry most of the weight. |
| Harness anchors | The shoulder-strap anchor points sit roughly 1–2 inches below the tops of the shoulders. | They sit far below the shoulder blades or pull upward from above the shoulders. |
| Load lifters | They angle back from the shoulder straps toward the upper pack, commonly around 30–60 degrees. | They run downward, pull the straps off the shoulders, or must be overtightened to control the load. |
Adjustable Hip Belts
Adjustable and interchangeable hipbelts give shorter travelers more ways to fine-tune the fit:
- Confirm the adjustment range: make sure the belt can tighten securely without reaching the end of its webbing.
- Look for useful padding coverage: padding should support the front and sides of the hip bones instead of stopping behind them.
- Consider interchangeable components: some backpacking packs let you pair a smaller torso harness with a different hipbelt size.
- Test under load: a belt that feels acceptable on an empty pack may slip or create hot spots after weight is added.
Pack Frame Types and Shorter Torsos
Internal-frame packs are the most common choice for hiking and backpacking. They hold the load close to the body and are widely available with adjustable or shorter torso ranges. However, the published fit range matters more than the frame label itself.
External-frame packs can provide ventilation and support bulky loads, but there are fewer models and fewer short-torso choices. Test one carefully because the frame may extend higher or farther from the back than an internal frame.
Frameless packs can work well for light day trips or experienced ultralight travelers. They provide less structure for transferring weight to the hips, so they become less forgiving as the load grows.
Choose Backpack Capacity by Trip, Not Height
Backpack capacity is measured in liters and should match the length of the trip, climate, equipment, food, and water you need to carry. A shorter torso may require a shorter pack body or adjustable harness, but it does not automatically require fewer liters.
| Typical Use | Useful Capacity Range | What It Commonly Holds |
|---|---|---|
| Commute or light day trip | 15–25L | Water, food, a compact layer, small electronics, and personal items |
| Long day hike or city travel | 20–30L | Extra clothing, rain gear, camera equipment, food, and emergency supplies |
| Weekend trip, 1–3 nights | 30–50L | Compact shelter, sleeping gear, clothing, cooking equipment, food, and water treatment |
| Multiday trip, 3–5 nights | 50–80L | A full backpacking kit with additional food, clothing, or group gear |
| Extended or winter trip | 70L or more | Bulkier insulation, winter shelter, more food, and specialized equipment |
The ranges are starting points, not requirements. Lightweight gear may let you use a smaller pack, while cold weather, children, photography equipment, or long water carries may require more room. Check the pack manufacturer’s recommended load range as well as its volume.
Note: Airline personal-item and carry-on limits are based on the bag’s exterior dimensions, not its liter rating. The TSA confirms that limits vary by airline, so check the operating carrier’s current measurements before every trip.
Key Features to Look for in a Backpack
Proper Torso Length
- Published fit range: your measured torso should fall inside the range for the selected pack size.
- Adjustable suspension: a sliding or hook-and-loop harness can fine-tune the back length and may help when you fall between sizes.
- Shoulder-strap anchors: they should sit close to the upper shoulder blades, generally about 1–2 inches below the shoulder tops.
- No forced compensation: you should not need to overtighten every strap to keep the hipbelt in the correct position.
Comfortable Hip Belt
Look for a hipbelt that centers its padding over the iliac crest and wraps far enough around the hips to spread pressure. It should tighten securely while leaving room for adjustment over thin or bulky clothing. On heavier-load packs, firm supportive padding is often more useful than very soft padding that collapses under weight.
Adjustable Shoulder Straps
- Contoured fit: the straps should follow the shoulders and upper chest without a large gap, edge pressure, or rubbing near the neck.
- Load lifters: these run from the top of the shoulder straps to the upper frame and pull the load closer to the body.
- Sternum strap: it should stabilize the shoulder straps without restricting breathing or pulling them into the neck.
- Harness shape: some people prefer narrower shoulder spacing or S-shaped straps, but the “women’s” or “unisex” label does not guarantee a better fit.
- Accessible adjustments: you should be able to make small changes while wearing the pack.
Popular Backpack Brands for Short Individuals
Several current packs offer short torso ranges, adjustable suspensions, women-specific harnesses, or interchangeable fit components. The following are examples rather than one-size-fits-all recommendations:
| Current Example | Why It May Suit a Shorter Torso |
|---|---|
| Osprey Aura AG 50 | Available in women’s torso-specific sizes with an adjustable harness and hipbelt system. |
| Gregory Deva 60 | Offers an adjustable women’s harness and supportive hipbelt for multiday loads. |
| REI Co-op Flash 55 Women’s | Includes an adjustable torso and multiple torso/hipbelt combinations, including an XS torso option. |
| The North Face Women’s Trail Lite 50 | Uses an adjustable torso-height system and a women-specific harness. |
| Kelty Asher 55 | Provides a quick-adjust torso system with a published fit range that begins at 15.5 inches. |
Model names, fit ranges, and available sizes can change. Measure first, open the current manufacturer size chart, and confirm both the torso and hipbelt ranges before ordering.
Tips for Trying on Backpacks in Store
A pack that feels fine empty can feel completely different once it carries real weight. Always test the suspension under a realistic load.
- Add weight: use 10–20 pounds for an initial test or load the pack with the equipment you normally carry.
- Loosen the straps: loosen the hipbelt, shoulder straps, load lifters, and sternum strap before putting the pack on.
- Set the hipbelt: center it over the iliac crest and tighten it before adjusting the shoulders.
- Adjust the harness: check for smooth shoulder contact and correct anchor-point placement.
- Walk for at least 10 minutes: use stairs, bend, reach, and turn to expose sliding, rubbing, or balance problems.
- Compare nearby sizes: when your torso falls between two ranges, test both rather than assuming the larger one will be more comfortable.
When buying online, check the return policy before loading the pack outdoors. Test it indoors with clean gear so you can exchange it if the hipbelt slips, the harness gaps, or pressure points appear.
Adjusting Your Backpack for Optimal Comfort
- Load the pack: add a realistic load and tighten the pack’s compression straps enough to stop the contents from shifting.
- Loosen the harness: loosen the hipbelt, shoulder straps, load lifters, sternum strap, and hipbelt stabilizers.
- Position the hipbelt: place the middle of the padding over the iliac crest, buckle it, and tighten it evenly.
- Snug the shoulder straps: pull down and back until the straps wrap the shoulders without lifting the hipbelt.
- Set the load lifters: tighten them gently so the upper pack moves closer to your body. A common working angle is about 30–60 degrees.
- Fasten the sternum strap: place it at a comfortable upper-chest height and tighten only enough to stabilize the shoulder straps.
- Adjust the stabilizers: snug any straps connecting the hipbelt to the lower pack body, then walk and make small changes as needed.
A good adjustment lets the hips support most of the weight while the shoulder straps keep the pack stable. The pack should remain close to the back without limiting normal breathing, arm movement, or circulation.
Warning: Do not overtighten the shoulder straps, sternum strap, or load lifters to compensate for the wrong torso size. Numbness, tingling, restricted breathing, slipping, or persistent pressure points are signs to stop and refit the pack.
Additional Considerations for Packing Essentials
What you carry should match the route, weather, remoteness, trip length, and your personal needs. The National Park Service Ten Essentials provide a stronger starting point than packing only water and snacks:
- Navigation: map, compass, GPS device, or downloaded offline map, plus backup power where appropriate.
- Sun protection: sunglasses, sunscreen, protective clothing, and a hat.
- Insulation: a compact light jacket, rain layer, hat, or gloves based on conditions.
- Illumination: headlamp or flashlight with spare power.
- First aid: a kit matched to the group and activity.
- Fire: an emergency fire starter where fires are legal and appropriate.
- Repair supplies and tools: a knife or multitool, tape, and equipment-specific repair items.
- Food: lightweight, non-perishable snacks plus extra food for delays.
- Water: enough water for the route and a treatment method when relying on natural sources.
- Emergency shelter: an emergency blanket, bivy, tarp, or other protection appropriate for the trip.
Also include medication, allergy supplies, identification, communication equipment, and other personal items you cannot safely go without.
How to Load the Backpack for Better Balance
- Place light, bulky gear at the bottom: sleeping gear or soft clothing can fill the lower section.
- Keep dense weight close to the back: food, water, and other heavy items should sit near the spine rather than pulling backward.
- Balance the sides: avoid loading one bottle pocket or side compartment much more heavily than the other.
- Keep essentials accessible: rain gear, navigation, snacks, first aid, and water should not be buried.
- Compress the load: use compression straps to stop items from shifting as you walk.
A compact, balanced load is especially helpful on a shorter frame because gear that hangs far behind or below the body creates more leverage and makes the pack feel heavier.
Frequently Asked Questions
Can I use a regular-sized backpack if I’m short?
Yes. Labels such as regular, women’s, unisex, or short are less important than the actual torso and hipbelt ranges. A regular-sized pack can work when your torso falls inside its range, the hipbelt centers over the iliac crest, and the shoulder harness wraps correctly under load.
Does a shorter person need a smaller-capacity backpack?
Not necessarily. Capacity depends on the trip and equipment, while torso size determines harness fit. A short traveler may need a 50–80L pack for a multiday trip, but the pack should be available in a suitable torso length and hipbelt range.
What are the consequences of poor backpack fit?
A poor fit can concentrate pressure on the shoulders, neck, lower back, or front of the hips. It may also let the load sway, alter your posture, cause rubbing, or create numbness. Stop and readjust if discomfort keeps increasing instead of improving after small strap changes.
How much weight should a short person carry in a backpack?
A commonly used starting guideline is no more than about 10% of body weight for day hiking and about 20% for backpacking. These are broad ceilings, not targets. Reduce the load when terrain, heat, elevation, fitness, pain, medical considerations, or the pack’s own load rating call for less.
Are women’s-specific backpacks better for shorter torsos?
They can be. Women’s-specific packs often use shorter torso ranges, narrower shoulder spacing, contoured straps, and differently shaped hipbelts. However, body proportions vary, so compare women’s and unisex models and choose the one that fits your measurements and feels stable when loaded.
What should I do if my torso is between two sizes?
Try both sizes with weight inside. Compare hipbelt position, shoulder-strap contact, harness-anchor placement, and load-lifter angle. An adjustable-torso model may cover both ranges, but it still needs a hipbelt that fits securely.
Can a short adult use a youth backpack?
Possibly, but check more than torso length. Youth packs may have narrower hipbelts, shorter shoulder straps, lower load ratings, and smaller capacities. Test the pack with the intended load and confirm that the belt and harness fit an adult body comfortably.
How often should I adjust my backpack while hiking?
Make small adjustments whenever the load shifts or pressure builds. Loosening the shoulder straps slightly can move more weight to the hips, while gently tightening the load lifters can bring the upper pack closer. Recheck the fit after adding water, removing clothing, or completing a long climb or descent.
Conclusion
Torso length, not height, determines whether a backpack’s harness matches your body. Measure from the C7 vertebra to the iliac crest, check hipbelt circumference separately, and compare both numbers with the exact manufacturer’s chart. Then choose liter capacity according to the trip rather than assuming a shorter person needs a smaller bag.
Finally, test the backpack with real weight and adjust it from the hips upward. When the hipbelt stays centered, the shoulder straps wrap cleanly, and the load remains close to your back, the pack feels less like luggage and more like an extension of your body.
Sources
- REI Co-op — Backpacks: Fit and Torso Size Guide — C7-to-iliac-crest measurement, hip measurement, and harness adjustment
- REI Co-op — How to Choose a Backpack — capacity ranges by trip length and the distinction between fit and volume
- REI Co-op — How Much Should Your Pack Weigh? — general day-hiking and backpacking load guidance
- Osprey — Backpack Size Chart and Sizing Guide — hipbelt placement, weighted fitting, and load-lifter angles
- Gregory Mountain Products — Pack Fit Guide — hipbelt, shoulder harness, sternum strap, and loaded fitting guidance
- National Park Service — Ten Essentials — recommended systems for outdoor trip preparation