Last Updated on July 24, 2026 by Caleb Warren
A backpack strap that keeps loosening can make a short commute uncomfortable and leave a hiking pack unstable on the trail. The problem usually comes from incorrect buckle threading, dirt, worn webbing, damaged hardware, or an improper fit. Start by identifying which part is moving, then work through the checks below from the simplest adjustment to hardware replacement.
Quick Answer
To stop backpack shoulder straps from loosening, check that each webbing strap lies flat and follows the correct path through its ladder-lock buckle. Fit the loaded pack correctly, clean dirt from the webbing and buckle, and test for creep. If it still slips, add a compatible triglide stopper or replace the worn buckle.
Key Takeaways
- The ladder-lock buckle, not a typical D-ring, is the part that controls shoulder-strap length.
- Twisted, incorrectly threaded, dirty, worn, or mismatched webbing can slide through the buckle.
- Fit a hiking pack with its normal load and tighten the hipbelt before the shoulder straps.
- Rolling the loose strap tail keeps it tidy but does not repair a buckle that creeps under load.
- Replace cracked or polished hardware instead of relying on tape, glue, knots, or heat.
At a Glance
| Time Required | 10 to 30 minutes |
| Difficulty | Easy for cleaning and adjustment; moderate for buckle replacement |
| Tools Needed | Soft brush, mild soap, clean cloth, ruler, and an optional Phillips screwdriver |
| Cost | Usually free; a low-cost keeper or replacement buckle may be needed |
What’s in This Article
- Why Do Backpack Straps Keep Slipping?
- How to Properly Adjust Your Backpack Straps
- D-Ring vs. Ladder-Lock: Know Your Hardware
- Why Webbing Condition and Friction Matter
- How to Clean, Rethread, and Test the Strap
- Securing Loose Webbing Ends
- Adjustability vs. Stability
- Should You Remove a D-Ring or Buckle?
- When to Replace the Buckle or Webbing
- Regular Maintenance and Inspection
- Common Fixes to Avoid
- Frequently Asked Questions
Disclosure: As an Amazon Associate I earn from qualifying purchases. Some links on this page are affiliate links, at no extra cost to you.
Why Do Backpack Straps Keep Slipping?
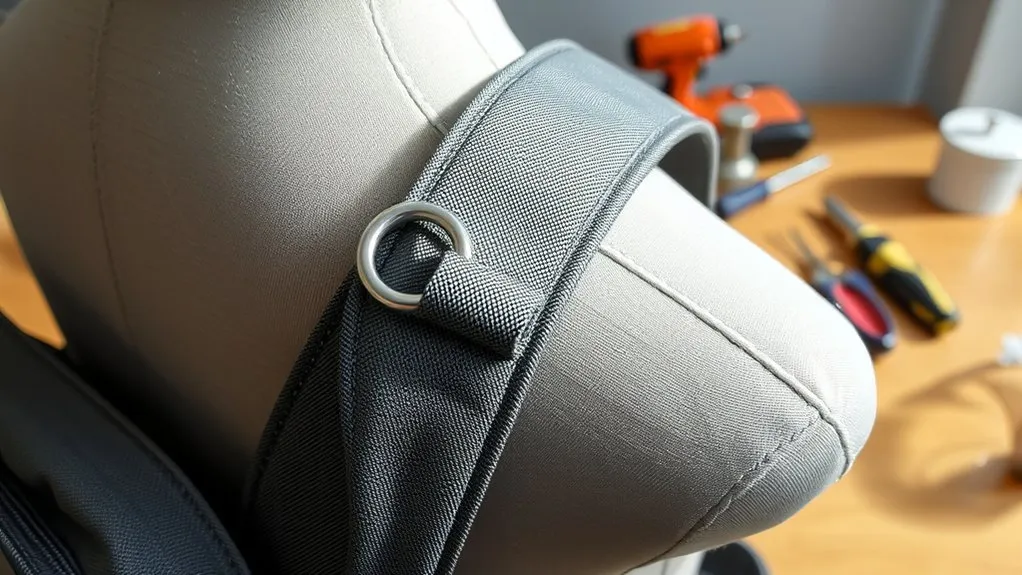
Before changing anything, determine what is actually moving. Put the backpack on with your normal load and note where each loose webbing tail exits its buckle. Walk for five to ten minutes, then compare the positions.
- The free tail becomes shorter: Webbing is feeding backward through the adjustment buckle. This is true buckle creep.
- The strap length stays the same, but the padded straps move outward: The pack may be the wrong size, the sternum strap may be loose, or the load may be shifting.
- Only one side loosens: That side may be threaded differently, twisted, contaminated, worn, or paired with damaged hardware.
- Both sides loosen only with a heavy load: The buckle may not grip the webbing firmly enough, or the pack may be loaded beyond its intended range.
Common causes include:
- Webbing routed through the ladder-lock in the wrong direction
- A folded or twisted strap passing through the buckle
- Dirt, body oil, sunscreen, soap residue, or fine sand on the contact surfaces
- A cracked, rounded, polished, or distorted buckle bar
- Frayed, glazed, stretched, or unusually smooth webbing
- A replacement buckle that does not match the webbing width or thickness
- A poor torso fit or unstable load that repeatedly pulls against the adjuster
A visible kink in the strap is not proof that it has developed a useful “memory.” The buckle should hold because the webbing is routed correctly and the hardware has enough friction and structure to resist creep.
How to Properly Adjust Your Backpack Straps
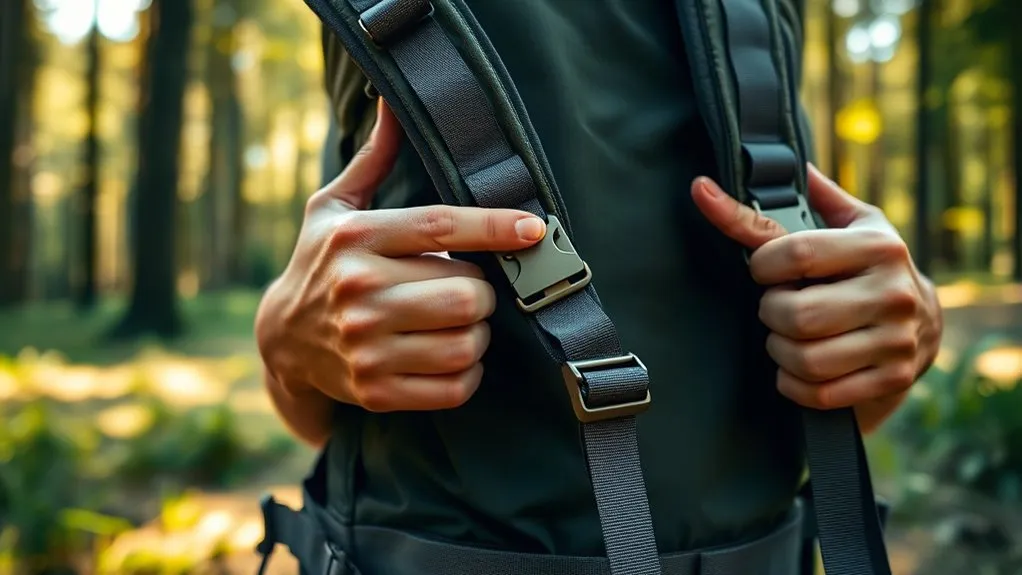
A correct fit reduces the forces that pull the shoulder webbing backward through its buckles. For a framed hiking backpack, follow the fitting sequence recommended in Osprey’s pack-fitting guidance.
- Load the backpack normally. Add the gear, water, and clothing you expect to carry. Do not add extra weight just to condition the straps.
- Loosen the main adjustments. Loosen the hipbelt, shoulder straps, load lifters, and sternum strap before putting the pack on.
- Position and tighten the hipbelt first. On a load-bearing hiking pack, center the padded belt over the hip bones and tighten it evenly.
- Tighten the shoulder straps. Pull the webbing down and slightly back until the padded harness follows the shoulders without gaps. The straps should feel secure without restricting movement.
- Adjust the load lifters, if present. Tighten them enough to bring the upper pack closer to your body without lifting the shoulder straps away from your shoulders.
- Fasten the sternum strap. Place it at a comfortable height across the upper chest and tighten it just enough to keep the shoulder straps positioned.
- Walk and fine-tune. Move your arms, climb a few stairs, and make small adjustments rather than overtightening everything at once.
For a simple daypack without a supportive hipbelt or load lifters, place both shoulder straps over your shoulders, pull each adjustment tail down evenly, and use the sternum strap if the bag includes one. On longer hikes, stop and readjust if the load settles or the straps create pressure points.
Pro Tip: Do not judge the fit by comparing the visible tail lengths alone. Your shoulders may not be perfectly symmetrical. Adjust each side until the pack sits level and feels balanced.
| Observation | Likely Cause | First Fix |
|---|---|---|
| Tail feeds through buckle | Threading, dirt, wear, or damaged buckle | Inspect, clean, and rethread |
| Padded straps slide outward | Fit or sternum-strap issue | Refit pack and adjust sternum strap |
| Pack leans backward | Loose load lifters or poor packing | Bring load closer to the back |
| One side repeatedly loosens | Uneven threading or local wear | Compare both buckle paths |
D-Ring vs. Ladder-Lock: Know Your Hardware

Backpack hardware names are easy to confuse. Identifying the correct component prevents you from modifying the wrong part.
The Ladder-Lock Controls Strap Length
A ladder-lock is the small slotted buckle through which the shoulder-strap webbing passes. Its bars create a controlled webbing path that allows tightening in one direction while resisting movement in the other. ITW Nexus describes its Ladderloc adjustment buckle as a one-handed webbing adjuster designed to resist slippage and creep.
The exact threading path varies by buckle design. In general, the webbing should:
- Enter the buckle without twisting.
- Pass around the intended center or locking bar.
- Exit on the side shown by the pack manufacturer’s original configuration.
- Lie flat across the full width of the buckle.
- Leave enough free tail for safe adjustment.
Before unthreading anything, photograph both sides of the pack. If one side works correctly, use it as the reference for the slipping side.
What a D-Ring Does
A D-ring is a D-shaped piece of hardware. Depending on the backpack, it may serve as an attachment point, pull handle, routing loop, or part of a model-specific adjustment system. It should not automatically be treated as the component that locks the shoulder-strap length.
If pulling a D-shaped loop changes the strap tension, inspect the complete mechanism. The loop may simply help you operate a separate ladder-lock or cam buckle.
| Component | Typical Function | What to Check |
|---|---|---|
| Ladder-lock buckle | Adjusts and holds webbing length | Threading, bar condition, and fit |
| D-ring | Attachment, pull, or routing point | Cracks, distortion, and intended use |
| Load lifter | Controls the upper pack’s position | Angle, tension, and symmetry |
| Sternum strap | Keeps shoulder straps positioned | Height, comfort, and tension |
Why Webbing Condition and Friction Matter
The buckle can only grip reliably when its bars and the webbing are in usable condition. The webbing does not need to develop a permanent kink before it can hold.
Inspect the full section that passes through the buckle. Look for:
- Polished or shiny areas that feel smoother than the rest of the strap
- Frayed edges or broken fibers
- Thinning, stretching, or permanent folds
- Sticky residue from tape, food, sunscreen, or skin products
- Fine dirt or sand trapped in the weave
- Webbing that is narrower than the buckle opening
Next, inspect the buckle under bright light. A ladder-lock may lose holding power if a bar is cracked, rounded, deeply scratched, bent, or polished smooth from wear. Replace damaged hardware rather than trying to build more friction with glue or adhesive tape.
Note: A small bend left by normal adjustment is not automatically a defect. The concern is webbing that is frayed, glazed, torn, badly folded, or no longer held by sound hardware.
How to Clean, Rethread, and Test the Strap
Work on one side at a time so the other strap remains available as a reference.
- Empty the backpack. Remove enough weight to prevent the strap from snapping through the buckle while you work.
- Photograph the buckle. Take clear pictures from the front, back, and side before unthreading it.
- Brush away loose dirt. Use a dry, soft-bristled brush around the buckle bars and webbing.
- Hand-clean if needed. Follow the pack’s care label. Use a small amount of mild soap and lukewarm water on the affected webbing, then rinse away residue with a damp cloth.
- Air-dry completely. Keep the pack away from direct heat, a tumble dryer, and strong sunlight while it dries.
- Rethread the webbing. Follow the original path or the manufacturer’s diagram. Keep the strap flat and centered.
- Load and fit the pack. Use your normal load and adjust the backpack in the correct order.
- Mark the starting position. Place a small removable clip on the free tail several centimeters below the buckle, or measure the visible tail with a ruler.
- Perform a walking test. Walk, climb stairs, and move your shoulders for ten minutes.
- Measure again. If the tail has moved through the buckle, the hardware or webbing still needs attention.
Deuter’s backpack cleaning guidance recommends removing dirt with a brush and soapy water and warns against machine washing and tumble drying. Your own manufacturer’s instructions should take priority.
Securing Loose Webbing Ends
Long strap tails can flap, snag, or make the backpack look untidy. Rolling and securing them is useful for organization, but it should not be confused with repairing a buckle that slips.
Benefits of Rolling the Ends
A neatly rolled tail can:
- Reduce flapping in wind
- Keep the tail away from bicycle wheels and moving equipment
- Prevent loose webbing from catching on branches or handles
- Make it easier to see whether the strap is creeping through the buckle
Roll the free end away from the buckle and hold it with an elastic strap keeper or a small hook-and-loop webbing band. Leave enough unrolled webbing to make normal adjustments.
How to Add a Secondary Stop
If the ladder-lock is sound but the webbing still creeps slightly, a compatible triglide or webbing slider can act as a secondary stop behind the main buckle.
- Measure the webbing width.
- Choose a triglide made for the same width and similar webbing thickness.
- Thread the free tail through the triglide according to the hardware maker’s directions.
- Position it close enough to limit backward movement without pressing against the ladder-lock at an angle.
- Test the setup with the normal load before a long trip.
A keeper may reduce convenience because you must loosen or reposition it whenever you change the shoulder-strap length.
Adjustability Trade-Offs
- Elastic or hook-and-loop keeper: Best for controlling the loose tail; does not reliably stop buckle creep.
- Triglide stopper: Adds resistance and remains adjustable, but requires correct sizing and threading.
- Replacement ladder-lock: Best when the original buckle is worn, cracked, or mismatched.
- Permanent sewing repair: Appropriate when the webbing or sewn attachment is damaged; usually best handled by the manufacturer or a gear-repair professional.
Adjustability vs. Stability: Finding the Right Balance
The best repair keeps the strap secure without making normal adjustment unnecessarily difficult. Start with the least invasive solution:
- Correct the pack fit.
- Check and correct the webbing path.
- Clean and dry the webbing and buckle.
- Add a removable tail keeper if the only problem is loose excess webbing.
- Add a compatible secondary triglide if minor creep remains.
- Replace worn or damaged hardware.
- Arrange professional repair for sewn-in webbing or shoulder-harness damage.
If several people use the same backpack, preserve easy adjustment rather than tying or permanently fixing the straps at one length. A personal pack used with a consistent load may benefit from a removable stopper, but the shoulder straps should still be adjustable for clothing changes and load variation.
Should You Remove a D-Ring or Buckle?
Do not cut off a D-ring, ladder-lock, or other original hardware simply because a strap is slipping. The part may support another adjustment, reinforce the webbing path, or be sewn into a load-bearing assembly.
Warning: Do not cut, melt, drill, glue, or reshape load-bearing backpack webbing or hardware unless the manufacturer specifically approves the method. A damaged shoulder-strap attachment can fail while the pack is being carried.
If a separate D-ring appears decorative or repeatedly snags, check the backpack manual or contact the manufacturer before removing it. If removal requires cutting webbing, stitching, or molded hardware, use a professional repair service.
When to Replace the Buckle or Webbing
Replace or professionally repair the affected part when:
- The buckle has a visible crack or missing section
- A locking bar is bent, rounded, or deeply worn
- The webbing is torn, badly frayed, melted, or noticeably thinner
- Correctly threaded and clean webbing still creeps during a normal-load test
- The buckle is too wide for the webbing and cannot center it securely
- The shoulder strap is separating from the pack body
Replacement buckles must match the webbing width. Measure the webbing itself, not the outside width of the old buckle. A field-repair ladder-lock with a removable pin may replace certain sewn-in shoulder-strap or load-lifter buckles without opening the seam. Sea to Summit identifies its field-repair ladder-lock for backpack shoulder straps and load lifters.
Basic Field-Repair Buckle Procedure
- Confirm that the replacement is designed for the same webbing width and application.
- Unload the pack and photograph the original routing.
- Remove the damaged buckle according to the replacement maker’s instructions.
- Place the removable-pin buckle through the existing sewn webbing loop.
- Tighten its screw or pin as directed by the manufacturer.
- Thread the adjustable webbing through the ladder-lock.
- Test the repair with a light load before returning to the normal load.
Do not attempt a no-sew buckle replacement if the webbing loop, stitching, shoulder padding, or pack body is torn. Those failures need sewing with suitable materials and construction methods.
Regular Maintenance and Inspection
Inspect the shoulder straps, buckles, and attachment stitching before a long trip and after the pack has been dragged, overloaded, or exposed to sand and mud.
- Brush dirt from buckle slots and webbing.
- Remove soap, sunscreen, and adhesive residue promptly.
- Keep webbing flat when adjusting it.
- Allow the pack to dry completely before storage.
- Store it away from direct heat, damp conditions, and prolonged sunlight.
- Check that each buckle holds during a short loaded walk.
- Inspect seams where the shoulder straps join the pack body.
Routine cleaning can restore normal grip when dirt is the cause, but it cannot restore a cracked buckle or heavily worn webbing.
Common Fixes to Avoid
- Duct tape around the buckle: It can leave residue, hide damage, and make adjustment difficult.
- Oil or silicone lubricant: Lubricant can reduce friction and attract dirt.
- Super glue: Glue can damage fibers, create stiff pressure points, and prevent future adjustment.
- Heating or melting the strap: Heat may weaken load-bearing webbing. Sealing a freshly cut non-load-bearing tail is different from repairing worn structural webbing and should only be done with proper guidance.
- Hard knots close to the buckle: Knots can jam, concentrate wear, and prevent rapid adjustment.
- Adding unnecessary weight: A heavier load does not repair faulty hardware and may make the slipping worse.
- Cutting off a D-ring or buckle: This can permanently damage the adjustment system.
Frequently Asked Questions
Can I use duct tape to fix slipping straps?
Duct tape may hold a strap briefly, but it is not a dependable repair. It can leave adhesive on the webbing, hide buckle damage, and make later adjustment difficult. Clean and rethread the strap, add a compatible stopper, or replace the damaged buckle instead.
How often should I inspect my backpack for wear?
Inspect the straps and buckles before long trips and after heavy use, falls, mud, sand, or overloading. For a regularly used pack, a quick monthly check helps catch fraying, cracked hardware, and loose stitching early.
Are some backpacks less likely to have slipping straps?
Look for a pack that matches your torso, uses correctly sized ladder-locks, has flat and textured webbing, and provides accessible replacement parts or repair support. Fit and hardware condition matter more than an unsupported brand ranking.
What webbing materials are commonly used for backpack straps?
Nylon and polyester webbing are common. Reliable holding depends on the complete system, including weave, thickness, width, surface condition, buckle design, and correct threading. Material name alone does not guarantee that a strap will stay in place.
Can washing my backpack improve strap performance?
Careful hand-cleaning may help when dirt, body oil, or residue reduces friction. Follow the care label, use mild soap, rinse away residue, and air-dry the pack. Do not machine-wash or tumble-dry it unless the manufacturer specifically permits those methods.
Why does only one shoulder strap keep loosening?
Compare that side with the working side. The slipping strap may be twisted, threaded differently, contaminated, worn, or passing through damaged hardware. Your normal shoulder posture may also place more tension on one side, so test the buckle position rather than judging by tail length alone.
Will a rolled strap tail stop the buckle from slipping?
Not by itself. A rolled tail controls excess webbing and reduces flapping. It does not repair incorrect threading or a worn ladder-lock. A properly sized triglide can provide a secondary stop, while damaged hardware should be replaced.
When should I take the backpack to a repair shop?
Use a professional repair service when the shoulder strap is separating from the pack, structural webbing is torn, stitching has failed, or replacement requires opening a load-bearing seam. Contact the manufacturer first when the pack may still be covered by a repair policy or warranty.
Sources
- Osprey Backpack Size and Fit Guide — pack-loading, hipbelt, shoulder-strap, load-lifter, and sternum-strap adjustment
- Gregory Backpack Fit and Sizing Guide — torso fit, shoulder-harness position, hipbelt placement, and sternum-strap function
- ITW Nexus Ladderloc — ladder-lock adjustment and resistance to webbing slippage
- Sea to Summit Field Repair Ladder-Lock — replaceable hardware for backpack shoulder straps and load lifters
- Deuter Backpack Cleaning Guide — brushing, hand-cleaning, drying, and storage precautions
Conclusion
Backpack strap slipping is usually a buckle, webbing, or fit problem rather than a lack of “webbing memory.” Check whether the strap is truly feeding through the ladder-lock, compare the threading on both sides, clean the contact surfaces, and fit the loaded pack in the correct order. A loose-tail keeper can reduce flapping, while a compatible triglide can provide a secondary stop. Replace cracked, worn, or mismatched hardware, and use a professional repair service when structural webbing or stitching is damaged.