
Last Updated on July 24, 2026 by Caleb Warren
Balancing on an electric scooter becomes much easier when you use a stable stance, start slowly, and make every control input smooth. Before moving, learn your scooter’s throttle and brake system, inspect its tires and folding mechanism, and put on a properly fitted helmet. Practice on flat, open ground until starting, turning, and stopping feel predictable.
Quick Answer
To balance on an electric scooter, use a staggered stance with one foot forward, bend your knees, look ahead, and keep both hands relaxed on the handlebars. Push off before using the throttle, accelerate gently, and brake progressively. Practice straight lines, wide turns, and controlled stops on flat, open ground.
Key Takeaways
- Use a staggered stance that fits fully on the deck rather than placing your feet side by side.
- Keep your knees bent, shoulders relaxed, eyes forward, and both hands on the handlebars.
- Push off and establish balance before applying the throttle.
- Use the braking method described in your scooter’s manual because brake systems differ by model.
- Practice at low speed and avoid wet pavement, loose gravel, potholes, ice, and other low-traction surfaces.
- Stop riding if you notice loose parts, steering play, damaged tires, weak brakes, or repeated wobbling.
At a Glance
| Time Required | 20 to 30 minutes per practice session, with several sessions recommended |
| Difficulty | Beginner |
| Tools Needed | Scooter manual, approved helmet, protective pads, closed-toe shoes, and a tire gauge if the scooter has pneumatic tires |
| Cost | No additional cost if you already own suitable safety gear |
Warning: Electric scooter controls, brake systems, speed limits, and permitted riding areas vary. Read your model’s manual and check local laws before riding. Do not practice near traffic, pedestrians, children, pets, parked vehicles, steep slopes, or fixed obstacles.
Disclosure: As an Amazon Associate I earn from qualifying purchases. Some links on this page are affiliate links, at no extra cost to you.
Choose a Stable Electric Scooter
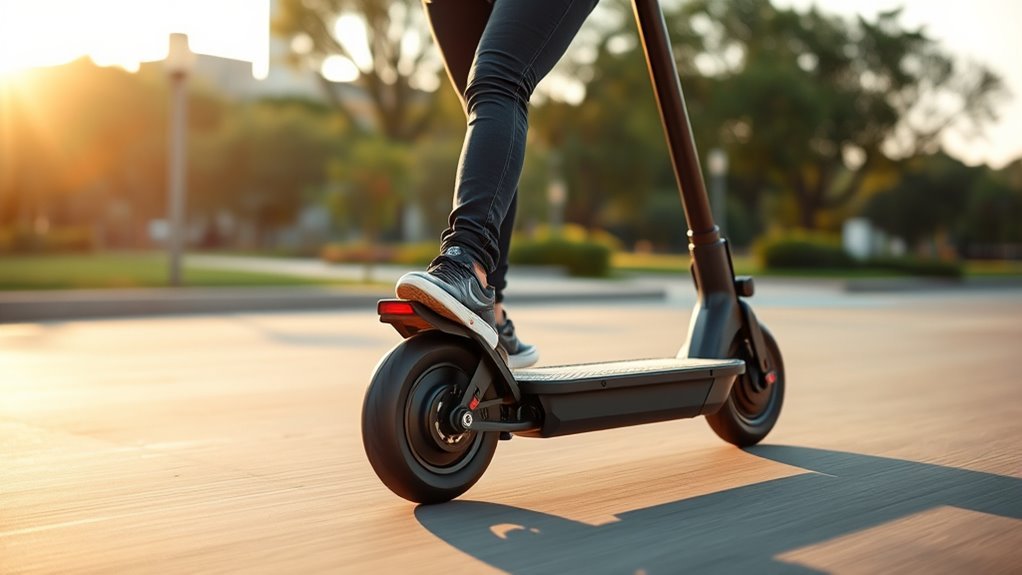
A stable electric scooter gives a beginner more room to correct small balance errors. Look for a deck that is long and wide enough for a staggered stance, a grippy deck surface, a stem that locks firmly, and handlebars that suit your height. A lower deck can also make mounting and stepping off easier.
Larger or wider tires may roll more smoothly over small pavement joints, but wheel diameter alone does not guarantee stability. Tire pressure, steering geometry, rider weight, suspension, deck shape, and speed also affect how the scooter feels. Check the manufacturer’s rider-weight and height limits before buying or riding.
Beginner or reduced-speed modes are useful because they soften acceleration and limit how quickly the scooter gains speed. Confirm that the brakes respond smoothly and that replacement tires, brake parts, and service information are available.
Electrical certification does not teach you how to balance, but it is still an important product-safety consideration. In the United States and Canada, UL 2272 evaluates electrical systems used in personal e-mobility devices, including many electric scooters. Buy from a known seller and confirm any certification through the certifying organization rather than relying only on a product listing.
Wear Protective Gear That Fits
Wear a helmet every time you ride. The helmet should be approved for the activity and meet the rules in your country or region. In the United States, look for the label showing compliance with the CPSC bicycle helmet standard when choosing a bicycle-style helmet.
Place the helmet level on your head rather than tilted backward. Adjust it so it feels snug, does not block your vision, and does not move when you gently shake your head. Fasten the chin strap securely. Replace a helmet after a significant impact, even when the outer shell appears undamaged, and follow the helmet maker’s replacement instructions.
Knee pads, elbow pads, and wrist protection can reduce scrapes and impact injuries during beginner practice. Wear long clothing made from durable fabric and closed-toe shoes with clean, grippy soles. Tie loose laces and secure dangling straps so they cannot catch on the wheels or controls.
Check Your Scooter Before Riding
A quick inspection can reveal a problem before it affects your balance. The CPSC recommends checking micromobility devices for damage and following all manufacturer instructions, age limits, and weight limits.
- Handlebars and stem: Confirm that the stem is straight, firm, and free from unusual movement.
- Folding latch: Make sure the latch is fully closed and locked according to the manual.
- Brakes: Test the brake control while stationary and confirm that it slows or holds the correct wheel.
- Throttle: Check that it moves freely and returns normally when released.
- Tires: Look for cuts, embedded objects, low pressure, severe wear, or wheel damage.
- Deck: Keep the standing surface clean and dry.
- Lights and reflectors: Confirm that they work when riding in conditions where visibility equipment is required.
- Battery and display: Check for error warnings and make sure you have enough charge for the planned practice.
Do not ride if the steering feels loose, the folding mechanism will not lock, the brakes feel weak, the tire is damaged, or the scooter makes an abnormal sound. Use a qualified repair service or the manufacturer’s approved procedure.
Set Your Riding Stance First
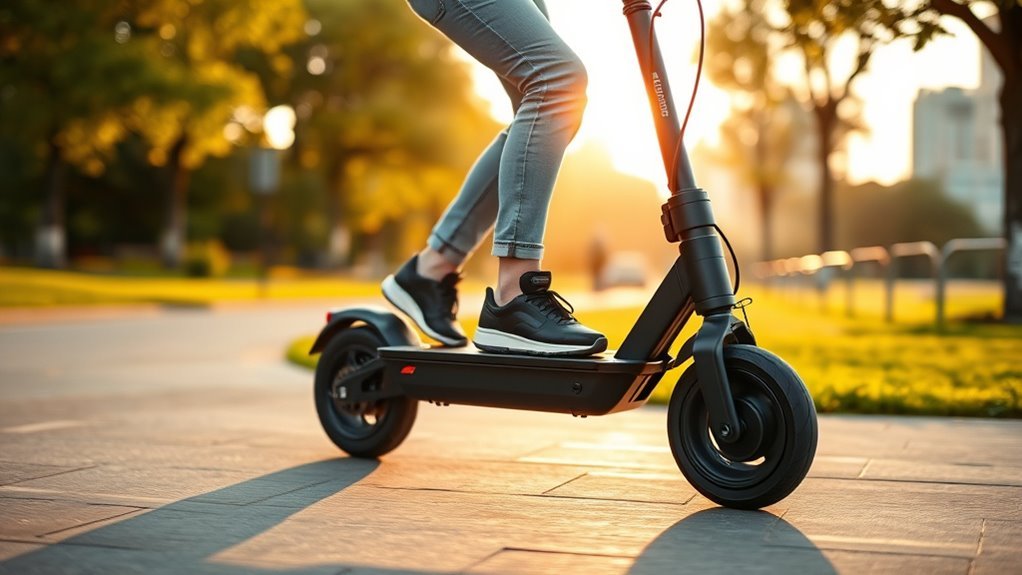
Use a staggered stance rather than placing your feet side by side. Put your preferred lead foot near the front half of the deck, pointing mostly forward. Place the other foot behind it at a slight angle. Both feet should remain fully supported by the deck and clear of the wheels and rear fender.
Bend your knees slightly and keep your hips centered over the scooter. Your back can remain comfortably upright, but avoid locking your knees or becoming rigid. Relax your shoulders and elbows so your arms can absorb small steering movements instead of magnifying them.
| Body Part | Position |
|---|---|
| Lead foot | Near the front half of the deck and mostly forward |
| Rear foot | Behind the lead foot at a comfortable angle |
| Knees | Softly bent, never locked |
| Hips and torso | Centered and relaxed |
| Hands and elbows | Both hands on the bars with relaxed elbows |
Before turning the power on, stand on the stationary scooter while another person safely steadies it, or place one foot on the deck while the other remains on the ground. This helps you find a comfortable position without an unexpected throttle response.
Mount and Dismount Smoothly
Read the manual before starting because some scooters require a push before the motor engages, while others may respond differently. A common beginner starting sequence is:
- Turn on the scooter and select its lowest or beginner mode.
- Place your lead foot securely on the deck.
- Keep both hands on the handlebars and look ahead.
- Push gently with your ground foot until the scooter begins to glide.
- Place the pushing foot behind your lead foot.
- Confirm that you feel balanced before applying light throttle pressure.
Do not jump onto the deck, pull sharply on the handlebars, or press the throttle while only one foot is loosely positioned. The handlebars are for steering and control, not for supporting your full body weight.
To dismount, release the throttle and brake until the scooter stops completely. Keep the handlebars straight, place your rear foot on the ground, and then step off with the lead foot. Do not step off while the scooter is still rolling quickly.
Look Ahead and Keep Both Hands on the Bars
Look toward the path you want to follow rather than staring at the front wheel. Scan the pavement far enough ahead to notice cracks, potholes, gravel, pedestrians, opening car doors, and changing traffic conditions before you reach them.
Keep both hands on the handlebars whenever the scooter is moving. Do not use a phone, carry an object in one hand, hang a heavy bag from the handlebars, or ride with a passenger. A handlebar load can affect steering, and one-handed riding gives you less control when the wheel hits a bump.
Steer With Light Handlebar Control
Hold the grips firmly enough to maintain control but not so tightly that your arms become rigid. Tense arms can turn every small wheel movement into a larger steering correction. Keep your elbows relaxed and guide the bars with small inputs.
Light Grip Steering
At very low speed, you will turn mainly by rotating the handlebars slightly. Avoid twisting them sharply. Sudden steering can shift the front wheel away from your center of balance and make the scooter feel unstable.
Keep your shoulders facing the direction of travel and allow your hips and knees to make small corrections. Do not pull your body forward by the handlebars or lean heavily on one grip.
Gentle Turn Adjustments
Slow down before entering a turn. Look through the turn, make a small steering input, and allow your body to follow the scooter’s path. Use wide turns during early practice. Tight circles require more steering and balance control, especially at walking speed.
| Input | Likely Effect | Better Approach |
|---|---|---|
| Sharp handlebar turn | Sudden direction change | Turn the bars gradually |
| Rigid arms | Overcorrection and fatigue | Relax the shoulders and elbows |
| Looking at the wheel | Late hazard response | Look through the turn |
Lean Into Turns for Better Balance
As your speed increases slightly, your body and scooter should follow the same gentle arc. Lean only a small amount and keep your body aligned with the scooter. Do not throw your shoulders into the turn or lean farther than the scooter.
Keep both knees bent and maintain even pressure through your feet. Enter slowly, hold a steady line, and wait until you are leaving the turn before adding more throttle. Avoid braking hard while leaning because the sudden change in speed or traction may disturb your balance.
Practice large circles in both directions before trying tighter turns. Many riders feel more comfortable turning one way, so spend extra time practicing the weaker side at low speed.
Use Gentle Throttle Pressure
Treat the throttle as a gradual control rather than an on-off switch. Once both feet are secure and the scooter is gliding, press the throttle lightly. Allow the scooter to gain speed before adding more pressure.
| Throttle Input | Response | Balance Effect |
|---|---|---|
| Light, gradual press | Smooth speed increase | Gives you time to adjust |
| Steady pressure | Predictable speed | Supports a stable line |
| Sudden full press | Abrupt acceleration | Can pull your weight backward |
If the scooter surges, release the throttle smoothly, keep the handlebars straight, and bend your knees. Do not respond by jerking the bars or jumping off unless you are moving slowly enough to step off safely.
Brake Gradually to Stay Stable
Electric scooters use different braking systems. Your model may have one linked lever, separate controls, an electronic brake, a mechanical disc or drum brake, or a rear-fender brake. Read the manual and identify every brake before your first powered ride.
For a normal stop:
- Look ahead and choose your stopping point.
- Release the throttle.
- Keep the handlebars mostly straight.
- Bend your knees and move your hips slightly backward.
- Apply the scooter’s brake control progressively according to its manual.
- Reduce brake pressure as you reach walking speed if needed to keep the final stop smooth.
Do not stamp on the rear fender unless the manufacturer identifies it as a brake. Do not assume that every scooter requires separate front and rear brake inputs. Some models combine braking functions through one control.
Note: Stopping distance increases with speed and may also increase on wet, dusty, loose, or sloped surfaces. Leave more room than you think you need and avoid following vehicles, bicycles, or other riders closely.
Practice an Emergency Stop
Emergency braking should be practiced separately from normal stopping. Begin at a very low speed in a clear area. Release the throttle, keep the scooter straight, bend your knees, shift your hips slightly back, and apply the brake firmly but progressively. Repeat only after you can stop without locking a wheel, skidding, or stepping off early.
Do not practice emergency stops on wet pavement, loose gravel, painted road markings, metal covers, steep slopes, or near obstacles. If a brake locks, behaves unpredictably, or provides weak stopping force, stop riding and have the scooter inspected.
Ride Carefully on Rough Surfaces
Small electric scooter wheels can react sharply to potholes, cracks, raised pavement, stones, sticks, and loose material. Scan ahead and avoid the hazard whenever possible. Reduce speed before reaching it rather than braking or turning sharply while the wheel is crossing it.
If a minor pavement joint cannot be avoided, approach it as straight as possible, keep both hands on the bars, relax your knees, and maintain a slow, steady speed. Do not jump the scooter or pull hard on the handlebars.
Stop and walk the scooter around:
- Deep potholes or wide cracks
- Loose gravel, sand, mud, or wet leaves
- Ice, snow, or standing water
- Wet metal covers, rails, or painted surfaces
- High curbs, steps, or obstacles beyond the scooter’s stated limit
- Construction debris or badly broken pavement
Maintain tire pressure at the value printed in the manual or on the tire. Pressure that is too low can make steering feel heavy and may damage the tire or rim. Excessive pressure can reduce comfort and grip. Never guess based on another scooter model.
Ride Hills Only After Mastering Flat Ground
Beginners should learn on flat ground. A hill changes acceleration, braking distance, and weight transfer. Do not use a slope that exceeds the scooter manufacturer’s limits.
When riding downhill, reduce speed before the descent, keep both feet secure, and apply the brakes gradually to prevent the scooter from gaining more speed than you can control. Avoid sudden steering and do not coast quickly toward an intersection or obstacle.
When riding uphill, keep a steady stance and avoid weaving from side to side. If the scooter slows sharply, displays a warning, overheats, or cannot maintain a controlled line, stop in a safe place and walk it.
Practice Balance in Open Spaces
Choose a flat, dry, legal practice area with good visibility and no moving traffic. An empty private parking area may work when you have the owner’s permission. Avoid crowded parks, sidewalks, roads, slopes, and places where a mistake could affect another person.
Use this practice order:
- Stationary stance: Find your lead foot position and practice stepping on and off with the power off.
- Push and glide: Push gently and coast without using the throttle.
- Low-speed starts: Add a small amount of throttle only after both feet are secure.
- Straight lines: Ride toward a distant point while looking ahead.
- Wide circles: Turn in both directions with small handlebar movements.
- Figure eights: Link two wide turns while controlling speed.
- Normal stops: Choose a line or marker and stop before it.
- Emergency stops: Practice only after normal braking feels predictable.
- Mounting and dismounting: Repeat until you can stop fully and step off without rushing.
Pro Tip: Use short practice sessions. Stop when your legs, hands, or attention become tired. Fatigue causes riders to stiffen their arms, look down, and react late to small balance changes.
Balance improves fastest when you master smooth starts, straight lines, wide turns, and controlled stops before adding speed.
Fix Common Electric Scooter Balance Problems
| Problem | Possible Cause | What to Do |
|---|---|---|
| Wobble during acceleration | Throttle applied too quickly, rigid arms, or feet not secure | Release the throttle smoothly, bend your knees, relax your elbows, and restart at a lower speed |
| Wobble at higher speed | Excess speed, tense steering, low tire pressure, loose hardware, or wheel damage | Ease off the throttle, avoid sudden steering, stop safely, and inspect the scooter before riding again |
| Pulling to one side | Uneven foot pressure, tire problem, brake drag, or wheel alignment issue | Center your stance and have persistent pulling inspected by an approved service provider |
| Unsteady turns | Entering too fast, looking down, or turning the bars sharply | Slow before the turn, look through it, and use a wider arc |
| Lurching while stopping | Brake applied suddenly or body weight too far forward | Apply the brake progressively, bend your knees, and move your hips slightly back |
Do not try to cure repeated wobble by installing wider handlebars, changing the steering mechanism, or fitting unapproved parts. Modifications may affect cables, controls, folding components, and warranty coverage. Use only parts and procedures approved for your exact model.
Frequently Asked Questions
How can I make an electric scooter more stable?
Use the correct tire pressure, lock the folding mechanism fully, tighten hardware only as the manual directs, and make sure the wheels, brakes, stem, and tires are undamaged. Ride at a lower speed with a staggered stance and relaxed arms. Do not install unapproved steering or handlebar parts.
How do I keep my balance on an electric scooter?
Place one foot forward and the other behind it, bend your knees, center your hips, and look ahead. Keep both hands on the handlebars and make small steering, throttle, and brake inputs. Avoid becoming rigid or shifting all your weight onto the handlebars.
How do I stop scooter wobble?
Ease off the throttle, keep the handlebars mostly straight, bend your knees, and relax your arms. Do not make a sudden steering correction. Stop in a safe place and inspect tire pressure, wheel condition, stem movement, folding hardware, and brakes. Persistent wobble requires professional inspection.
How should a beginner balance on a scooter?
Start with the power off and practice your stance. Then push and glide without throttle. When that feels steady, use the lowest speed mode, apply light throttle, ride in a straight line, make wide turns, and practice smooth stops on flat, open ground.
Which foot should go in front on an electric scooter?
Use whichever lead foot feels most natural and lets you push comfortably with the other foot. Many riders keep the foot they first place on the deck at the front and place the pushing foot behind it. Practice both positions with the power off before choosing.
Why do I lose balance when accelerating or braking?
Acceleration shifts your body backward, while braking shifts it forward. Sudden inputs make those weight changes harder to control. Apply the throttle gradually, bend your knees, and move your hips slightly backward during braking while keeping the handlebars straight.
Can I practice balancing with the scooter turned off?
Yes. Power-off practice is a useful way to learn where to place your feet and how to mount and dismount without an unexpected throttle response. Keep one foot on the ground or have another adult steady the scooter while you find your stance.
Conclusion
To balance on an electric scooter, begin with preparation rather than speed. Inspect the scooter, wear suitable protective gear, use a staggered stance, and look ahead. Push off before adding gentle throttle, steer with relaxed arms, and use the braking method specified for your model.
Practice straight lines, wide turns, and controlled stops on flat ground before riding faster or approaching hills. Avoid low-traction surfaces and stop immediately when the scooter feels loose, damaged, or unpredictable. Smooth control and repeated low-speed practice will give you safer, more dependable balance.
Sources
- U.S. Consumer Product Safety Commission Micromobility Information Center — pre-ride checks, rider visibility, helmets, manufacturer instructions, and local traffic rules
- U.S. Consumer Product Safety Commission Bicycle Helmet FAQ — helmet standards, labeling, fit, and replacement warnings
- Segway Ninebot KickScooter ES Series User Manual — an official example of model-specific starting, turning, braking, inspection, and surface warnings
- UK Department for Transport E-Scooter Guidance — helmets, single-rider rules, phone use, permitted riding locations, and legal restrictions
- UL Solutions Micromobility Certification Guidance — electrical-system certification for electric scooters and other personal e-mobility devices
