
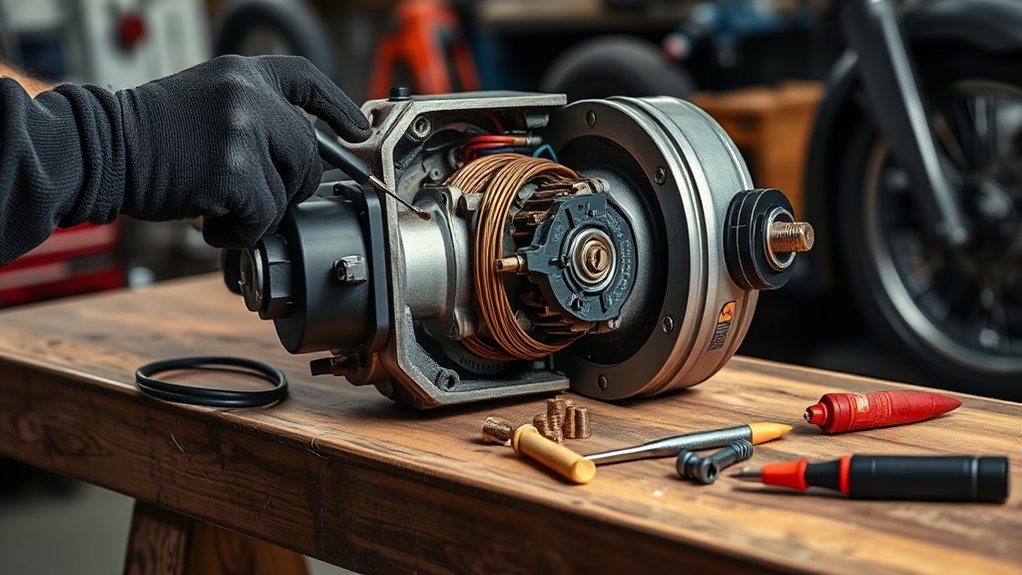
Last Updated on July 23, 2026 by Caleb Warren
To fix an electric scooter motor, first determine whether the scooter has no electrical power or powers on but will not drive. Check the display for an error code, confirm the battery is charged, release both brake levers, disable any app lock or parking mode, and inspect the motor cable. Test internal wiring only after following the model’s service instructions and disconnecting power safely.
Quick Answer
Start with the battery, charger, error code, brake sensor, throttle, and visible wiring before blaming the motor. If those checks pass, compare the three motor phase readings, test for a phase-to-axle short, inspect the Hall-sensor circuit, and isolate the controller. Replace the motor when it has internal electrical, axle, casing, or winding damage.
Key Takeaways
- A scooter that will not power on needs different checks from one whose display works but motor does not respond.
- Brake sensors, app locks, kick-to-start settings, wiring faults, and battery protection can block the motor even when the motor is healthy.
- Do not judge every motor by one generic resistance range. Compare all three phase pairs and use the service specification for your exact model.
- Never open, rebuild, bypass, or probe inside a lithium-ion battery pack unless you are professionally trained and authorized to service it.
- Use only the original or manufacturer-approved charger, battery, motor, and controller replacements.
At a Glance
| Time Required | About 20–60 minutes for basic checks; longer if the deck, motor, or wiring harness must be removed |
| Difficulty | Beginner for visual checks; intermediate for low-voltage signal testing; professional service for battery-pack or live high-current repairs |
| Tools Needed | Exact model manual, digital multimeter, insulated hand tools, eye protection, flashlight, contact cleaner suitable for electronics, and a stable repair stand |
| Cost | Visual checks may cost nothing. Parts and labor vary widely by model, damage, region, warranty status, and parts availability. |
Warning: Stop immediately if the battery is swollen, cracked, leaking, unusually hot, hissing, smoking, or producing a strong chemical odor. Move away from the scooter, keep other people clear, and contact local emergency services if there is smoke or fire. Do not open, puncture, solder, rebuild, bypass, or reuse a damaged lithium-ion battery pack.
Disclosure: As an Amazon Associate I earn from qualifying purchases. Some links on this page are affiliate links, at no extra cost to you.
Electric Scooter Motor Basics
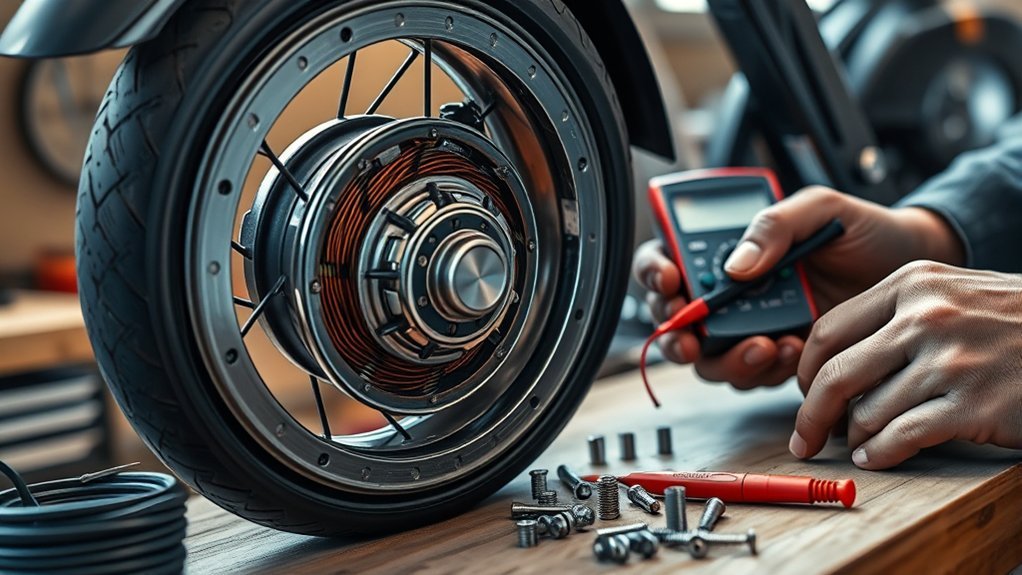
Most modern standing electric scooters use a brushless DC motor, often built directly into the front or rear wheel as a hub motor. A few designs use a separate motor with gears, a belt, or a chain. Check your model before looking for mechanical parts that may not exist on your scooter.
The drive system includes more than the motor. The battery and battery-management system supply power, the display and throttle send commands, brake sensors can cancel acceleration, and the controller switches current through the motor’s phase windings. Hall sensors inside many motors report rotor position to the controller. A fault anywhere in this chain can cause weak power, jerking, a locked-feeling wheel, intermittent cutouts, or no response.
Because wire colors, connector layouts, voltage ranges, error codes, torque settings, and calibration procedures vary, download the manual or troubleshooting guide for your exact model before disconnecting components. Manufacturers such as NIU provide model-specific manuals instead of one universal test procedure.
Before You Open the Scooter
- Record the model and symptom. Note whether the display turns on, which wheel is affected, any error code, and whether the fault began after rain, a collision, charging, a tire repair, or handlebar adjustment.
- Turn the scooter off and unplug the charger. Do not work on the scooter while it is charging.
- Let hot components cool. A controller or motor that overheated during a climb may temporarily enter protection mode.
- Remove the battery only when the manual permits it. Some packs are not designed for user removal.
- Prevent accidental wheel movement. Raise the driven wheel securely before any powered test.
- Protect the water seals. Opening the deck may damage gaskets, reduce water resistance, or affect the warranty.
The U.S. Consumer Product Safety Commission advises owners to use the charger supplied or approved by the manufacturer, remain present while charging, and avoid modified or repurposed battery packs. Review the current CPSC micromobility safety guidance before working around the battery system.
Note: UL 2272 covers electrical systems in personal e-mobility devices such as pathway e-scooters. Certification does not make every repair safe, but it is a useful consideration when choosing a scooter or compatible replacement electrical system. See the UL Solutions personal e-mobility overview.
Why Your Electric Scooter Motor Won’t Start
Begin by separating two different symptoms. If the display and lights remain completely off, focus on charging, the battery, power button, communication cable, main fuse, and controller power supply. If the display turns on but the scooter will not move, check operating settings, brake sensors, throttle input, error codes, motor wiring, Hall sensors, and the controller.
| Symptom | Likely Areas | First Check |
|---|---|---|
| No display or lights | Battery charge, BMS protection, power button, main connector, fuse, communication cable | Unplug the charger, verify the correct charger was used, and check the model’s no-power procedure |
| Display works but no acceleration | App lock, parking mode, kick-to-start, brake sensor, throttle, error code, motor/controller circuit | Release the brakes, push the scooter to its start speed if required, and read the error code |
| Motor jerks, cogs, or hums | Loose phase wire, Hall-sensor fault, controller channel fault, internal motor damage | Inspect the motor cable and connectors, then rotate the wheel by hand |
| Power cuts out on hills or acceleration | Low charge, battery voltage sag, BMS cutoff, hot connector, controller overheating | Charge with the approved charger, inspect high-current connectors, and note whether power returns after resting |
| Grinding or wheel wobble | Bearing, brake rub, tire damage, bent axle, loose fastener, internal motor damage | Keep the scooter off and spin the wheel by hand |
Check Operating Settings and Error Codes
Before opening the deck, confirm that the scooter is not locked through its app, set to parking mode, limited by an incomplete activation process, or waiting for a push start. Many scooters do not apply motor power from a complete stop until you push them to a minimum speed.
Read the displayed error code before disconnecting anything. Manufacturer support systems commonly use separate codes for brake, throttle, communication, battery, controller, motor, and Hall-sensor faults. A code can prevent unnecessary part replacement and help you inspect the correct cable first.
Check the Battery and Charger
A depleted battery can leave the scooter completely dead or allow the display to turn on while the motor cuts out under load. Charge it only with the supplied or manufacturer-approved charger. A connector that fits is not proof that a charger has the correct voltage, current profile, polarity, communication, or protection system.
CPSC specifically warns against unapproved “universal” micromobility chargers because incompatible units can create a fire hazard. See the CPSC charger warning.
If the manual provides a safe battery-output test point, compare the measured voltage with the specification for that exact battery. Do not assume that every “36-volt” or “48-volt” pack has the same full-charge and cutoff values. A normal-looking resting voltage also does not rule out a weak cell group, poor connector, or BMS cutoff under acceleration.
Pro Tip: Write down what happens to the display when you press the throttle. A display that dims, restarts, or drops rapidly from a high charge reading points more strongly toward battery sag, a loose high-current connection, or protection shutdown than a simple open motor winding.
Check the Brake-Cutoff Sensors
Many controllers block throttle output whenever a brake lever sensor reports that the brake is applied. Make sure both levers return fully and that their cables have not been pinched during a handlebar adjustment or fall. If the brake light remains on or the display shows a brake error with both levers released, inspect and reseat the brake-sensor connectors according to the model manual.
Check Wires, Connectors, and Fuses
Inspect the wiring before performing electrical measurements. Pay particular attention to the motor cable where it exits the axle, passes a suspension arm, enters the deck, or bends during steering. Cuts, crushing, sharp bends, water, and poor strain relief can damage phase and Hall-sensor conductors.
Inspect Wiring Connections
- Turn the scooter off, unplug the charger, and disconnect the battery only when the service procedure permits it.
- Photograph every connector before separating it.
- Inspect for bent pins, backed-out terminals, corrosion, discoloration, melted plastic, moisture, and damaged locking tabs.
- Trace the harness for frayed insulation, pinch points, previous splices, and places where it can rub against metal.
- Use electronics-safe contact cleaner only where appropriate and allow it to dry fully before reconnecting power.
- Reconnect plugs by their housings rather than pulling or pushing on the wires.
Perform continuity testing only on an unpowered and properly isolated wire or component. A continuity beeper alone cannot prove that a connection will carry high motor current without excessive resistance or heating.
Check Fuses and Terminals
Not every scooter uses a user-serviceable fuse. If yours does, inspect it using the manual’s procedure. Replace it only with the exact manufacturer-specified fuse type and rating. Never bridge the fuse with wire, foil, or a higher-rated substitute. A fuse that blows again indicates an unresolved short, controller fault, damaged harness, or other overload.
| Finding | What It May Mean | Next Step |
|---|---|---|
| Fuse open or visibly burned | Overcurrent, short circuit, failed controller, or damaged wiring | Find the cause before fitting the exact specified replacement |
| Connector is brown, melted, or loose | High resistance and overheating | Stop riding and replace the damaged connector or harness correctly |
| Green or white corrosion on pins | Moisture entry and unreliable signals | Clean or replace the connector and restore its seal |
| Voltage is present with no load but collapses on throttle | Battery sag, poor high-current connection, or protection cutoff | Stop repeated load testing and have the battery and power path evaluated |
Test the Electric Scooter Motor and Controller
Move to motor and controller tests only after the battery, settings, brake sensors, throttle cable, fuses, and visible wiring have been checked. Disconnect the motor from the controller before resistance or insulation measurements. Label the connectors so they return to the correct channel and orientation.
Motor Winding and Insulation Check
Most three-phase BLDC scooter motors have three thicker phase conductors. With the battery disconnected and the motor isolated from the controller, measure resistance between each phase pair:
- Phase A to Phase B
- Phase B to Phase C
- Phase C to Phase A
The three readings should normally be close to one another. Do not use 0.5–3 ohms as a universal healthy range. Small scooter motors can have very low winding resistance, and the resistance of the meter leads and connector contact can form a large part of the displayed value. Touch the probes together first to see the lead resistance, use the meter’s relative function if available, and compare your results with the exact service specification.
Next, test from each phase conductor to the motor axle or exposed metal housing. The motor should normally be electrically isolated from the casing. Continuity or measurable low resistance from a phase wire to the axle can indicate damaged winding insulation or a pinched internal cable.
Spinning the disconnected wheel may generate a small alternating voltage between phase pairs. Similar output from all three pairs can provide supporting evidence that the windings and magnets are interacting, but this test does not rule out shorted turns, damaged insulation, Hall-sensor failure, or mechanical damage.
Check the Motor Hall Sensors
Many scooter motors include three Hall sensors connected through a smaller multi-pin plug. A damaged Hall wire or sensor can cause jerking, cogging, no acceleration, or a motor error even when the phase windings still have continuity.
Start with a visual inspection. Look for pinched thin wires, bent pins, corrosion, and damage where the cable enters the axle. If the manufacturer provides a Hall-sensor test, follow it exactly. A common design supplies the sensors with approximately 5 volts and produces three switching signals as the wheel turns, but supply and signal levels are model-specific.
For a powered Hall test, the motor connector generally must remain connected or be attached to an approved test harness. Carefully back-probe the specified ground, supply, and signal pins while the driven wheel is raised. Each signal should switch as the wheel turns slowly. Do not short adjacent pins or force probes into sealed connectors.
Manufacturer guidance for applicable models also uses the behavior of a fault during an approved dual-channel swap to distinguish a motor Hall fault from a controller input fault. Apollo’s motor Hall-sensor troubleshooting example illustrates this model-dependent approach.
Throttle and Controller Signal Test
A Hall-effect throttle normally needs a supply voltage and ground from the controller. Do not disconnect it and expect a valid live output unless you are using the manufacturer’s approved test fixture.
- Inspect the throttle lever for impact damage, sticking, or failure to return fully.
- Inspect the throttle cable near the lever, stem hinge, and deck entry.
- Reseat the connector with power off.
- If the manual permits a powered test, raise the driven wheel and keep the throttle connected.
- Back-probe the specified ground and signal wires without spreading or shorting the terminals.
- Confirm that the signal changes smoothly from rest to full input and returns consistently to its neutral value.
Many Hall throttles operate through a signal range roughly around 1–4 volts, but that is not a universal specification. Use the expected neutral, full-input, supply, and fault limits for your exact controller. A flat signal, abrupt drop, dead spot, or value outside the controller’s permitted startup range can stop the motor.
Inspect the controller casing, connectors, and surrounding area for water marks, corrosion, burned odor, swollen components, melted terminals, or damaged seals. Do not touch or probe the internal controller circuit while it is energized. Capacitors may retain energy after the battery has been disconnected.
Swap to Isolate the Fault
A swap test is appropriate only when you have a known-compatible component or an identical dual-motor system whose manufacturer permits the test. Do not attach a random motor or controller merely because its connector fits.
| Approved Isolation Test | Result | Likely Direction |
|---|---|---|
| Fault follows the motor when identical left/right motor connections are exchanged | The same motor still faults on the other compatible channel | Motor cable, Hall sensors, windings, or internal motor damage |
| Fault stays on the same controller channel | A known-good compatible motor faults only on that output | Controller channel, harness, or connector |
| Known-good identical controller restores operation | Original motor works normally | Original controller or its input circuit |
| Fault does not follow one component consistently | Intermittent or changing symptom | Harness, connector, battery sag, moisture, communication, or more than one fault |
Check the Belt, Bearings, and Motor Shaft
First identify the drive type. A direct-drive hub motor has no external drive belt. If your scooter uses a separate motor with a belt or chain, inspect that drive for cracks, missing teeth, fraying, contamination, incorrect tension, and poor alignment.
- Spin the wheel with the scooter off. Listen for grinding, scraping, clicking, or a repeating tight spot.
- Check for brake rub. A bent disc or misaligned caliper can imitate a motor or bearing problem.
- Check bearing feel. Roughness, looseness, or side-to-side play indicates wear. Many scooter bearings are sealed, so external lubricant will not repair pitting or a seized race.
- Inspect the axle and cable entry. Look for a bent axle, damaged threads, loose nuts, missing anti-rotation washers, or a motor cable twisted at the axle.
- Check wheel wobble. Confirm that the rim, tire, motor covers, and axle remain centered and secure.
Do not spray lubricant near a brake disc, brake pads, tire tread, electrical connector, or sealed motor opening. Replace damaged bearings or the motor assembly according to the service design.
Repair or Replace the Motor
A connector, external cable, Hall sensor, bearing, or removable motor cover may be repairable when replacement parts, seals, and service information are available. The repair must restore insulation, strain relief, alignment, water sealing, and safe heat dissipation.
Motor replacement is usually the safer choice when you find:
- Burned or shorted windings
- Continuity from a phase wire to the axle or casing
- A cracked or warped motor housing
- A bent axle or badly damaged axle threads
- Severe internal corrosion or water damage
- Repeated overheating after the external cause has been corrected
- Unavailable Hall sensors, bearings, seals, or winding specifications
- A repair cost that approaches the value of a compatible complete motor assembly
Do not choose a replacement by wheel size or connector shape alone. Match the model, nominal voltage, power rating, axle dimensions, phase and Hall arrangement, brake type, tire size, controller compatibility, and firmware or calibration requirements.
When to Use Professional Service
Use an authorized or qualified repair service when the battery pack is damaged, a high-current connector has melted, the scooter has significant water intrusion, the fault causes sudden cutouts while riding, the motor requires rewinding, the controller must be opened, or the manufacturer does not provide a safe user-level procedure.
Also consider warranty coverage before opening the deck or replacing sealed components. A correct diagnosis through the manufacturer may prevent the unnecessary replacement of both the motor and controller.
Test the Scooter After the Repair
- Confirm that every connector is fully seated and locked.
- Route cables away from tires, brakes, suspension links, sharp edges, and folding joints.
- Restore all gaskets, cable glands, covers, fasteners, washers, and axle hardware.
- Tighten fasteners to the manufacturer’s torque specification.
- Spin the wheel by hand and verify that it turns without new rubbing, grinding, or side play.
- Raise the driven wheel and run a brief no-load test while standing clear of the wheel.
- Check the display for errors and confirm that each brake lever cancels the throttle as designed.
- Perform a slow test ride in a clear, level area.
- Stop and recheck the scooter if it jerks, cuts out, smells hot, displays an error, or heats a connector.
Do not return to normal traffic or high-speed riding until acceleration, braking, steering, cable routing, wheel security, and thermal behavior remain normal.
Frequently Asked Questions
Can an electric scooter motor be repaired?
Yes. External cables, connectors, Hall sensors, bearings, and some motor covers may be repairable when the motor was designed for service and matching parts are available. Replace the motor if it has burned windings, a phase-to-casing short, a bent axle, major corrosion, a cracked housing, or structural damage.
What are the three most common electrical problem areas?
There is no universal top-three ranking for every scooter. Common categories include the battery or charging system, damaged wiring or connectors, and control faults involving the brake sensor, throttle, controller, communication cable, or motor Hall sensors. The displayed error code and exact symptom should guide the order of testing.
How can you tell if an electric scooter motor is bad?
Strong evidence includes unequal phase readings, continuity from a phase wire to the axle, a Hall-sensor fault that follows the motor on an approved isolation test, internal grinding, a bent axle, severe overheating, burned windings, or a motor-specific error that remains after its wiring and controller channel have been verified.
What is the most common problem with electric scooters?
No single fault is most common across every brand, age, and symptom. Battery charge, battery sag, loose connectors, damaged control cables, brake-sensor faults, and tire or brake problems are frequent service areas. Start with the visible symptom and error code instead of assuming the motor has failed.
What resistance should an electric scooter motor have?
There is no safe universal ohm value. Motor size, winding design, temperature, meter accuracy, leads, and connectors affect the reading. With the motor disconnected, compare all three phase-to-phase readings. They should generally be similar and must agree with the specification for your model. Each phase should also remain isolated from the axle or casing.
Can you test the motor without opening the scooter deck?
You can perform several useful checks without opening it: read the error code, check app settings, release the brakes, test kick-to-start behavior, inspect the external motor cable, spin the wheel by hand, listen for grinding, and observe whether the display dims or restarts under throttle. Internal electrical isolation tests normally require access to the motor connector.
Should you replace the motor and controller together?
Not automatically. Replace only the component proven faulty unless the manufacturer sells a matched assembly or requires controller pairing. Confirm voltage, current, sensor, connector, firmware, and calibration compatibility before installing either part.
Conclusion
An electric scooter motor should be diagnosed as part of the complete drive system rather than replaced after one continuity test. Begin with the battery, charger, operating settings, brake sensors, error codes, and wiring. Then compare the phase circuits, check insulation and Hall-sensor operation, and isolate the controller only with compatible parts and a model-approved procedure.
Repair minor serviceable faults when the correct parts and specifications are available. Replace the motor when it has burned windings, an electrical short to its casing, a bent axle, serious water damage, or structural failure. Most importantly, stop DIY work when the battery pack, high-current wiring, or sealed electronics present a fire or shock risk.
Sources
- U.S. Consumer Product Safety Commission: Micromobility Safety Center — battery, charging, replacement-pack, and general e-scooter safety guidance
- CPSC Warning About Universal Micromobility Chargers — charger compatibility and fire-risk guidance
- UL Solutions: Personal E-Mobility Testing and Certification — scope and purpose of UL 2272 electrical-system certification
- Apollo Scooters E7 Motor Hall-Sensor Troubleshooting — examples of Hall faults, cable checks, wheel symptoms, and compatible dual-channel isolation
- NIU Official Downloads and User Manuals — model-specific operating and service information
- U.S. Environmental Protection Agency: Used Lithium-Ion Batteries — safe recycling and disposal guidance
