Last Updated on July 29, 2026 by Caleb Warren
A torn backpack seam can spread quickly once the pack is loaded, but the right repair depends on what failed. An opened line of stitching may only need to be resewn, while ripped or weakened fabric needs a backing patch. Before you begin, empty the pack, inspect the damage, and check whether the area carries structural weight.
Quick Answer
To repair a torn backpack seam, first identify whether the stitching opened or the fabric itself ripped. Clean and dry the area, realign the seam, then hand-sew it with a backstitch and durable polyester or nylon thread. Add a compatible patch only if the fabric is damaged, and follow the adhesive’s cure instructions before loading the pack.
Key Takeaways
- Resew an opened seam only when the surrounding fabric is still strong; add a backing patch when the fabric is torn or thin.
- Trim only loose fibers, clean the area, and let it dry before applying tape, adhesive, or sealant.
- Use thread, needles, patches, and adhesives that match the backpack material and the thickness of the seam.
- Cure time is product-specific: some repair tapes can be used right away, while liquid urethane sealers may need several hours.
- Do not rely on a home repair for a failed shoulder-strap anchor, hip-belt anchor, frame channel, child carrier, or other safety-critical area.
At a Glance
| Time Required | 20–45 minutes of hands-on work, plus any cure time listed on the adhesive or sealant |
| Difficulty | Easy for an opened seam; moderate for torn fabric or thick, layered areas |
| Tools Needed | Needle, durable thread, thimble, scissors, clips or pins, cleaning supplies, and a compatible patch or sealant when needed |
| Cost | Low; often limited to thread, a needle, and a repair patch or sealant |
What’s in This Article
Disclosure: As an Amazon Associate I earn from qualifying purchases. Some links on this page are affiliate links, at no extra cost to you.
Inspect the Damage and Check the Warranty
Empty the backpack and turn the damaged area so you can see both sides. Then identify the failure:
- Opened seam: The thread broke, but the fabric and seam allowance are still intact. This usually needs resewing rather than a patch.
- Torn fabric beside the seam: The needle holes or fabric have ripped. Add a backing patch before sewing so the new stitches do not pull through weakened material.
- Delaminated or coated fabric: The coating is peeling or separating. Sewing alone will not restore the coating, so use a product approved for that fabric or contact the manufacturer.
- Mesh damage: Use a mesh patch or a loose darning stitch that does not bunch the pocket.
- Structural damage: A failed shoulder-strap anchor, hip-belt anchor, bottom panel, haul loop, frame channel, child carrier, or avalanche-pack component needs manufacturer or professional evaluation.
Check the backpack maker’s repair and warranty policy before cutting or sewing. Some brands offer factory repairs; for example, Osprey’s repair program covers many damaged packs, with separate limits for certain safety products.
Warning: Stop using the backpack if a load-bearing attachment is pulling out or the surrounding fabric is shredded. A neat-looking home repair is not proof that the area can safely carry its original load.
Common Mistakes to Avoid When Repairing a Backpack Seam

Do not treat every tear the same way. Sewing directly through weak or frayed fabric can create a new line of perforations and make the damage spread. On the other hand, adding a bulky patch to a cleanly opened seam can make the area stiff without solving the real problem.
Trim only loose fibers that stop the fabric or patch from lying flat. Do not pull on frayed strands, cut intact stitches outside the damaged area, or enlarge the opening. Avoid rigid household glue, excessive adhesive, and tightly packed stitches that pucker the fabric.
Do not assume that every adhesive needs 24 hours. Repair tape, urethane sealant, silicone sealant, and iron-on fabric adhesive all have different application and cure instructions.
Tools and Materials You’ll Need
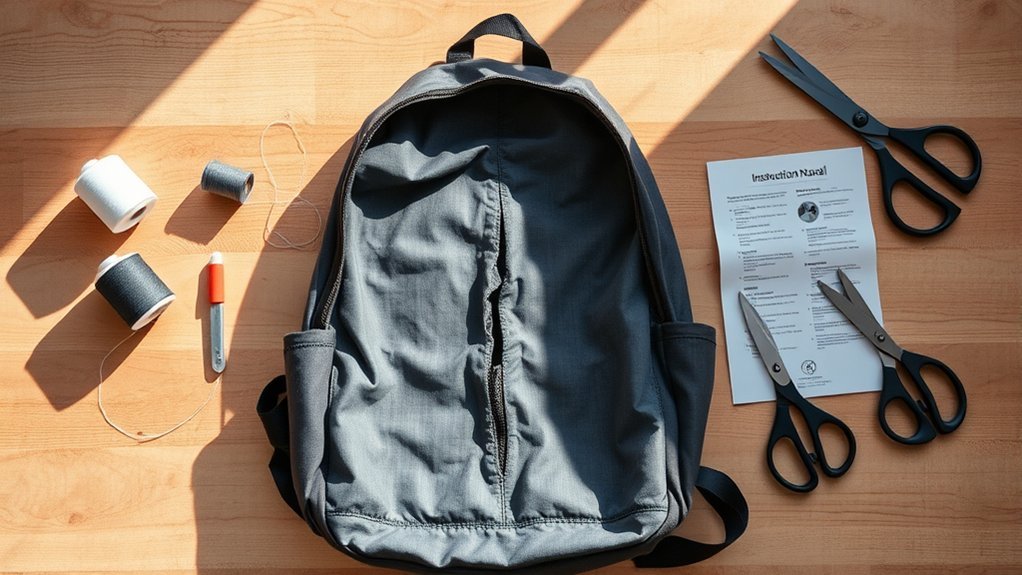
Gather the supplies before you open the seam or apply adhesive. You may not need every item for a simple repair.
Essential Repair Materials
- Hand-sewing needle: Choose a sharp needle strong enough for the fabric layers without being so large that it leaves oversized holes.
- Polyester or nylon thread: Use durable thread that fits the needle and matches the fabric weight. Upholstery-weight thread can work for thick pack cloth, but it may be too heavy for lightweight nylon.
- Thimble: Use it to push the needle through thick layers without forcing the point toward your fingers.
- Scissors: Use sharp scissors to trim loose fibers and shape patches with smooth, rounded corners.
- Clips or pins: Hold the seam alignment or backing patch in place while you sew. Keep pins away from waterproof coatings when avoidable.
Tools for Effective Patching
- Repair tape or fabric patch: Choose a product that lists nylon, polyester, canvas, or the specific pack material on its label.
- Flexible adhesive or seam sealer: Use only when the repair method calls for it. Seam Grip WP, for example, bonds to several outdoor fabrics but is not made for silicone-treated fabric.
- Isopropyl alcohol: Useful for preparing many synthetic surfaces before repair tape is applied, when the product directions recommend it.
- Damp cloth and mild soap: Use these for general cleaning, then let the area dry fully.
- Backing material: Use a piece of similar-weight nylon or polyester when the original fabric is torn or missing.
Note: Test adhesive or alcohol on a hidden spot first. Silicone-treated fabric needs a silicone-compatible product, and some coated or laminated materials require manufacturer-specific repair tape.
Choose the Right Repair Method
Use the least invasive method that restores the damaged structure:
- Stitching opened, fabric sound: Realign the original seam and sew along the former stitch line.
- Fabric split beside the seam: Place a backing patch inside the pack, extending beyond the weakened area, then sew through sound fabric around the damage.
- Small surface cut away from a seam: A rounded repair-tape patch may be enough without sewing.
- Large hole or missing fabric: Use an inner backing piece and an outer patch, or send the pack to a repair service if the area is difficult to reach.
- Water-resistant coated seam: Complete the structural repair first, then apply the compatible seam sealer specified for the material.
A patch should overlap sound material rather than sit only on frayed edges. GEAR AID’s repair-tape instructions call for rounded corners and at least a 0.5-inch overlap around the damaged area.
How to Clean the Repair Area
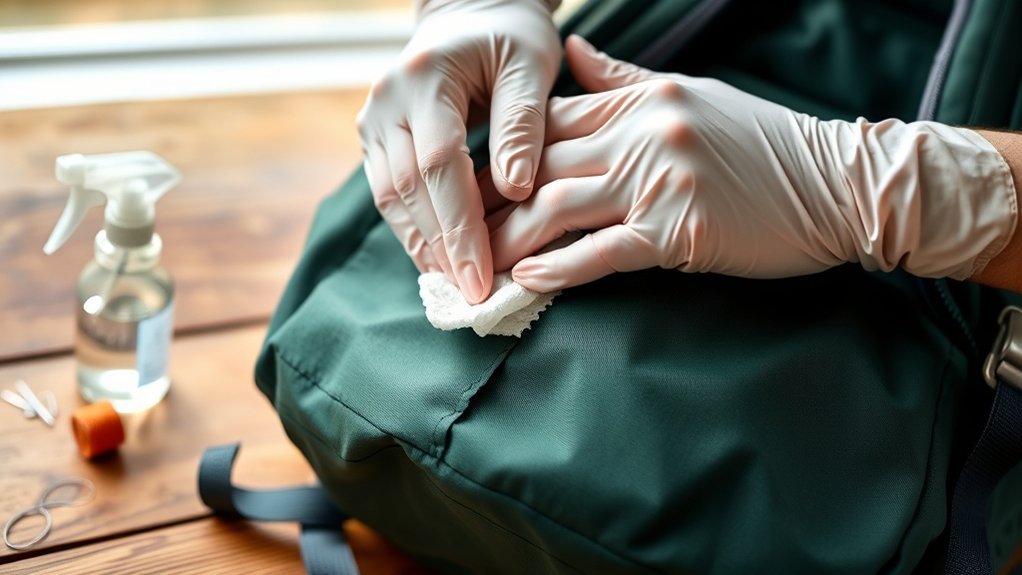
- Empty and flatten the pack: Remove rigid frames or removable panels when the manufacturer allows it, then place the damaged area on a clean surface.
- Remove surface dirt: Wipe the area with a damp cloth. Use mild soap only if needed, and rinse away residue.
- Let it dry completely: Adhesive and repair tape bond poorly to damp fabric.
- Prepare for tape: When the tape maker recommends it, wipe the application area with a small amount of isopropyl alcohol and let it evaporate.
- Trim loose fibers: Cut only dangling strands that prevent clean alignment. Leave sound fabric and intact stitching in place.
How to Apply a Patch When the Fabric Is Torn
Skip this step if only the thread failed and the seam allowance is still strong.
- Cut the patch: Use matching or compatible fabric. Extend the patch beyond every weak edge and round the corners to reduce peeling.
- Place a backing patch: For a tear beside a seam, put the patch on the inside so the new stitches pass through sound material.
- Align the original seam: Match the fold, seam allowance, and edge position before clipping or pinning the layers.
- Apply adhesive only when required: Follow the product label for amount, temperature, pressure, and ventilation. More adhesive does not create a stronger repair.
- Add an outer tape patch when useful: A surface patch can protect exposed fibers, but it should not replace structural stitching in a load-bearing seam.
Pro Tip: Shape repair tape with rounded corners and press from the center outward to remove air pockets. Keep the patch flat while the adhesive develops its bond.
Sewing Techniques for a Durable Seam Repair
The goal is to place secure stitches through sound fabric without creating a stiff, over-perforated line.
Choosing the Right Thread
- Polyester: A practical all-purpose choice with good abrasion and moisture resistance.
- Nylon: Strong and slightly elastic, but it must still match the fabric and needle size.
- Thread thickness: Choose a heavier thread for thick pack cloth and a finer one for lightweight nylon. The thread should move through the fabric without sawing or enlarging the holes.
- Single or doubled strand: Use one sufficiently strong strand when possible. A doubled strand is useful for some hand repairs, but it can be too bulky for thin fabric.
Stitching Techniques for Durability
- Start beyond the failed section: Begin in sound stitching about 0.25 to 0.5 inch before the opening.
- Follow the original seam line: Reuse existing holes when they are visible and undamaged to avoid adding unnecessary perforations.
- Use a backstitch: Bring the needle forward, then place each new stitch back toward the previous one so the line remains continuous.
- Keep even tension: Pull the thread snug, not tight. The fabric should lie flat without puckering.
- Finish beyond the damage: Continue into sound material, then secure the thread on the inside.
A backstitch is also used in an iFixit backpack-strap repair guide, but a shoulder-strap anchor should still be professionally checked when the base fabric is torn or weakened.
Knotting for Secure Finishing
- Make two small locking stitches: Place them close together in sound fabric at the end of the repair.
- Tie the knot inside: Keep it away from the wearer and from items that may snag it.
- Trim a short tail: Leave enough thread that the knot cannot slip, but not a long loose strand.
- Inspect the seam: Confirm that no stitch is loose and that the fabric remains flat.
How to Seal the Edges to Prevent Fraying
Sealant is optional unless the fabric, coating, or repair product requires it. Apply a thin layer only to exposed cut edges or the repaired seam, and keep it away from zippers, buckles, foam, and moving hardware.
Match the sealant to the fabric. A urethane product may work on nylon, canvas, vinyl, and polyester but fail on silicone-treated fabric. For silnylon or another silicone-coated material, use a product designed for silicone, such as Seam Grip SIL.
Sealing can improve water resistance around the stitch holes, but it does not make every backpack fully waterproof. Follow the manufacturer’s directions for coating thickness, temperature, ventilation, and cleanup.
How Long to Let the Repair Cure and How to Test It
Use the timeline printed on the specific product. Pressure-sensitive repair tape and liquid seam sealers do not cure the same way. GEAR AID lists an 8–12 hour cure time for Seam Grip WP, while Patagonia notes that Tenacious Tape can be washed 24 hours after application.
- Keep the area flat: Do not fold, flex, or pack the repaired section while a liquid adhesive or sealer cures.
- Maintain contact: Use light clips or a flat weight only if the product instructions allow it and the pressure will not force adhesive through the fabric.
- Inspect the repair: Check for lifted patch edges, missed stitches, puckering, gaps, or adhesive that remains tacky.
- Test gradually: Start with a light load indoors. Increase the weight in stages while watching the seam.
- Stop if the fabric distorts: New tearing, stretching, popping stitches, or peeling means the repair needs reinforcement or professional service.
Note: “Dry to the touch,” “ready for use,” and “safe to wash” may be different milestones. Use the product label rather than a universal 24-hour rule.
Troubleshooting a Backpack Seam Repair
- The patch will not stick: Remove dirt, oil, moisture, and soap residue; confirm that the patch is compatible with the coating.
- The seam puckers: Loosen the stitch tension and resew with evenly spaced stitches.
- The thread keeps breaking: Check for a needle eye that is too small, a sharp fabric edge, or thread that is too fine for the load.
- The needle will not pass through: Use a thimble and a suitable heavy-duty needle. Do not force a needle toward your hand.
- The repair peels after curing: The surface may be incompatible, contaminated, or flexing beyond the adhesive’s limit.
- The fabric tears beside the new stitches: Stop loading the pack. The surrounding material is too weak and needs a larger backing panel or professional repair.
How to Maintain Your Backpack to Prevent Future Damage
Inspect seams, strap anchors, zippers, and the bottom panel before and after major trips. Catching a loose stitch early can prevent a larger tear. Clean the pack according to the maker’s care instructions, and let it dry completely before storage.
Store the backpack in a cool, dry place away from prolonged heat and direct sunlight. Avoid overpacking and do not use compression straps to force a load beyond the pack’s shape. Carry a small field kit with a needle, thread, repair tape, and alcohol wipes for temporary repairs.
Recheck any repaired seam after the first loaded trip. If the stitch line stretches, the patch lifts, or nearby fabric begins to whiten or fray, unload the pack and reinforce or professionally repair the area before using it again.
Frequently Asked Questions
Can I use regular glue instead of flexible fabric adhesive?
Use only an adhesive whose label lists the backpack material. Many rigid household glues create a hard spot that can crack or peel as the fabric flexes. Outdoor urethane and silicone products are not interchangeable, so match the adhesive to the coating.
How do I choose the right patch material?
Use a patch with similar weight, flexibility, and fiber type. Nylon or polyester works for many backpacks, while mesh pockets need mesh. Check that the patch and adhesive are compatible with any polyurethane, silicone, wax, or laminate coating.
What if the tear is too large to patch?
A large tear usually needs an inner backing panel that extends into sound fabric, followed by structural stitching and, when appropriate, an outer patch. Send the pack to the manufacturer or a gear-repair shop if fabric is missing, the area is hard to reach, or the damage affects a load-bearing seam.
Can I machine-sew the backpack instead of hand-sewing it?
Yes, when the damaged section can lie flat and the machine, needle, and thread can handle the layers. Test the setup on scrap material first. Do not sew through hidden frames, foam, webbing hardware, wires, or hydration components, and use professional service for structural anchors.
Can I use duct tape for a backpack seam repair?
Duct tape can serve as a short-term field fix, but its adhesive may leave residue, lift on textured fabric, and make later sewing or gluing harder. Replace it with fabric repair tape or a sewn patch as soon as practical.
How often should I check my backpack for damage?
Inspect it before and after major use. Pay close attention to shoulder-strap anchors, hip-belt attachments, zipper ends, compression-strap bases, the bottom panel, and any previous repair.
Sources
- GEAR AID: Tenacious Tape Repair Tape Instructions — cleaning, trimming loose threads, rounded corners, and patch overlap.
- GEAR AID: Seam Grip WP Field Repair Kit — compatible fabrics, silicone limitation, and 8–12 hour cure time.
- GEAR AID: Seam Grip SIL — silicone-compatible sealing for silnylon and silicone-treated outdoor fabrics.
- Patagonia: How to Fix a Hole With Repair Tape — synthetic-fabric patch preparation and the 24-hour wait before washing.
- Osprey: All Mighty Guarantee — manufacturer repair options and limits for certain safety products.
- iFixit: Torn-Off Backpack Shoulder Strap Repair — backstitch-based reinforcement example.
Conclusion
A torn seam does not always mean a ruined backpack, but the repair must match the damage. Resew sound fabric, reinforce torn fabric with a compatible backing patch, and use adhesive or sealant only as directed. Test the repair with a light load first, and send structural or safety-critical damage to the manufacturer or a qualified repair shop.