

Last Updated on July 30, 2026 by Caleb Warren
Backpack shoulder pain often starts when the load is heavier than your current carrying capacity, packed too far from your body, or supported mainly by your shoulders. You can usually improve mild discomfort by reducing the load, using both shoulder straps, moving heavy items closer to your back, and adjusting the pack so it does not hang or sway. Persistent, severe, or nerve-related symptoms need medical attention rather than another strap adjustment.
Quick Answer
To reduce backpack shoulder pain, remove unnecessary weight, wear both shoulder straps, keep heavy items close to your back, and use a fitted hip belt on heavier packs. Adjust the sternum strap for stability rather than overtightening it. Stop carrying the pack if you develop numbness, weakness, severe pain, or persistent tingling.
Key Takeaways
- The commonly quoted 10–15% weight guideline is mainly intended for children and teenagers, not as a universal adult pain threshold.
- A sternum strap stabilizes the shoulder straps; a fitted hip belt does more to move a heavier load toward the pelvis.
- Pain on one side often points to uneven packing, unequal strap length, or carrying the bag on one shoulder.
- Strength exercises should be light, controlled, and pain-free. Hanging exercises are not appropriate for everyone.
- Numbness, persistent tingling, weakness, deformity, severe swelling, or inability to move the arm requires medical evaluation.
At a Glance
| Time Required | 5–10 minutes to weigh, repack, and adjust the backpack |
| Difficulty | Easy; exercise progression may require professional guidance |
| Tools Needed | Household scale, mirror, and an optional light resistance band |
| Cost | Usually $0; approximately $10–$20 if you buy a resistance band or luggage scale |
Warning: Stop carrying the backpack and seek prompt medical advice if you have sudden severe pain, an arm or shoulder that looks deformed or badly swollen, inability to move the arm, persistent pins and needles, loss of sensation, unusual weakness, fever, or pain after a fall or other injury. These symptoms should not be treated as a simple backpack-fit problem.
Disclosure: As an Amazon Associate I earn from qualifying purchases. Some links on this page are affiliate links, at no extra cost to you.
Understanding the Causes of Shoulder and Neck Pain

A backpack changes how force is applied to your shoulders, upper back, trunk, and hips. If the load hangs away from your body, you may lean forward to keep your balance. Narrow or overtightened straps can also create pressure points around the shoulders and neck.
Discomfort is more likely when several factors occur together:
- Excess load: The pack is heavier than you can comfortably carry for the required distance and time.
- Poor load position: Heavy objects sit far from your back or shift as you walk.
- Uneven support: One shoulder strap is longer, or the pack is carried on one shoulder.
- Incorrect pack size: The torso length, shoulder harness, or hip belt does not match your body.
- Long carry time: Even a moderate load can become uncomfortable when carried without a change of position.
- Previous problems: A neck condition, shoulder injury, instability, surgery, or nerve irritation can reduce tolerance.
Repeatedly guarding a painful shoulder may make a rounded or tense position feel habitual. However, backpack pain is not explained by posture alone, and a heavy backpack does not cause scoliosis. The American Academy of Orthopaedic Surgeons notes that poorly used backpacks can contribute to muscle and joint discomfort in children and teenagers, while also clarifying that they do not cause scoliosis.
How Much Should a Backpack Weigh?
There is no single percentage that guarantees a pain-free backpack for every person. Pack design, fitness, carry time, terrain, previous injuries, and how the load is arranged all affect comfort.
For schoolchildren, the American Academy of Pediatrics advises keeping a school backpack at no more than 15% of the child’s body weight. This means a child who weighs 100 pounds should carry no more than about 15 pounds. That pediatric ceiling should not be treated as a universal adult backpacking or travel rule.
Research also shows why a percentage should not be presented as a guarantee. A systematic review and meta-analysis of schoolbag weight and low-back pain did not find that bags above 10% of body weight were associated with a higher prevalence of low-back pain, although the certainty of the evidence was low. Duration, personal capacity, and other factors still matter.
How to Weigh and Test Your Backpack
- Pack everything you normally carry. Include water, electronics, chargers, books, food, and clothing.
- Weigh the loaded pack. Use a luggage scale, or weigh yourself with and without the backpack and subtract the difference.
- Remove unnecessary items. Clear old papers, oversized water containers, duplicate chargers, and items you can leave at your destination.
- Put on the pack correctly. Use both shoulder straps and fasten the hip belt and sternum strap if the pack includes them.
- Walk for five minutes. Include stairs or a slight incline when those conditions match your normal route.
- Check your symptoms. Reduce the load if you lean forward, the straps dig in, your fingers tingle, one shoulder hurts, or the pack feels unstable.
The best load is not simply a percentage on a chart. It is a load you can carry with steady breathing, an upright position, no numbness, and no increasing pain.
What to Do When Your Shoulders Hurt
If discomfort begins while you are carrying the backpack, do not keep tightening the straps and push through it. Stop in a safe place, remove the pack, and allow the pressure to come off your shoulders.
- Remove or reduce the load. Carry fewer items, use a locker, leave nonessential equipment behind, or divide the load when practical.
- Move gently. Slowly roll the shoulders, move the arms through a comfortable range, and walk without the pack for a few minutes.
- Repack the bag. Move dense objects toward the back panel and balance the right and left sides.
- Reset every strap. Loosen all straps, put the pack back on, and follow the fitting sequence later in this article.
- Shorten the next carry. If pain returns quickly, use a lighter bag or another transport method rather than repeatedly provoking the same symptom.
Note: Mild muscular soreness may improve after the load is removed, but persistent numbness, weakness, severe pain, or loss of movement is not normal backpack discomfort. Do not try to exercise through those symptoms.
The Importance of Muscle Balance

Your shoulders work best when the shoulder blade, rotator-cuff, upper-back, chest, and trunk muscles can share the task. Carrying a pack does not automatically strengthen one group and weaken another, but fatigue, prolonged guarding, and repeated forward leaning can reduce comfortable movement.
Instead of labeling every muscle as permanently overused or underused, use the following table as a practical guide to common patterns that may appear during a long carry:
| Common Carrying Pattern | Helpful Response |
|---|---|
| Tight chest or front-shoulder sensation | Reduce strap pressure, move gently, and add pain-free chest mobility |
| Shoulders lifting toward the ears | Reduce the load and improve hip-belt support instead of pulling the shoulder straps tighter |
| Shoulder blades feel tired or unstable | Use light rows, scapular setting, and gradual carrying practice |
| Pain on only one side | Check strap length, side-to-side packing, and one-shoulder carrying habits |
Exercises can support shoulder endurance, but they cannot compensate for a backpack that is too heavy, poorly fitted, or carried through worsening pain.
Choosing the Right Backpack

Selecting the right backpack can reduce pressure points and make the load easier to control. Choose the smallest pack that safely holds what you need rather than filling unused space with extra items.
Look for these features:
- Two wide, adjustable shoulder straps: They should curve around the shoulders without gaps or pressure against the neck.
- A padded back panel: This improves comfort and prevents hard objects from pressing into your back.
- An appropriate torso length: On fitted hiking or travel packs, the shoulder harness and hip belt must match your torso rather than your overall height alone.
- A supportive hip belt: This is especially useful for heavier or longer carries because it can shift more support toward the pelvis.
- A movable sternum strap: It should slide to a comfortable position and stabilize the shoulder straps without restricting breathing.
- Multiple compartments: They make it easier to keep dense objects close to the back and balance both sides.
- A lightweight empty pack: A heavy bag consumes part of your carrying capacity before you add any gear.
Try the backpack with realistic weight before relying on it for school, commuting, travel, or hiking. A bag that feels comfortable when empty may fit very differently after a laptop, water, books, or outdoor equipment is added.
Products Worth Considering
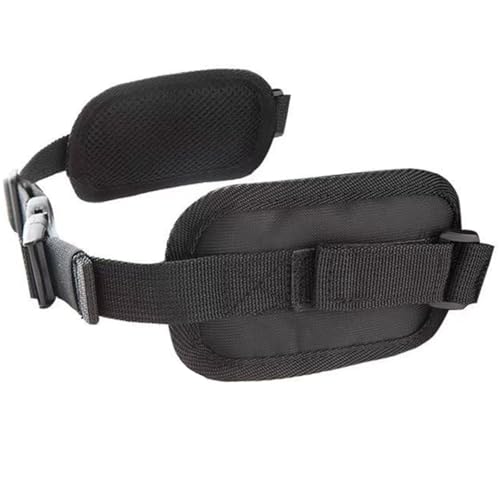

【High Quality Material】The back brace's bottom strap is made of high quality neoprene, why? Superior Elasticity & Conformity: Neoprene stretches significantly but also has strong elastic recovery. This allows the bottom strap to: Snugly conform to the unique curves of the hips and lower back/pelvis. At the same time, it ensures the back brace to provide consistent, dynamic compression and support that moves with the body during bending, twisting, and sitting/standing.
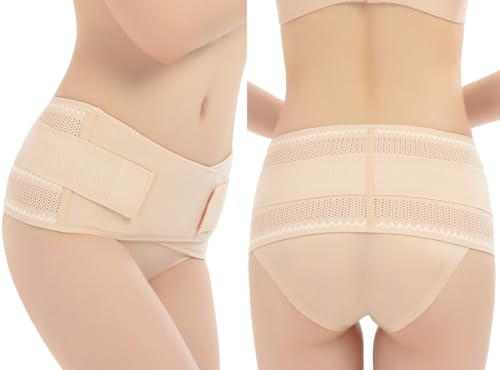
OPTIMAL BACK SUPPORT - Support and comfortability combined into a versatile back brace. No matter the nature of your abdominal surgery – be it a C-section, hysterectomy, liposuction, or tummy tuck – our abdominal binders offer unparalleled support.
The Benefits of Using a Chest Strap
A chest strap, also called a sternum strap, connects the shoulder straps across the front of your chest. Its main purpose is to keep the shoulder straps positioned and reduce side-to-side movement. It may improve comfort, but it should not be treated as the main load-bearing feature.
Products Worth Considering
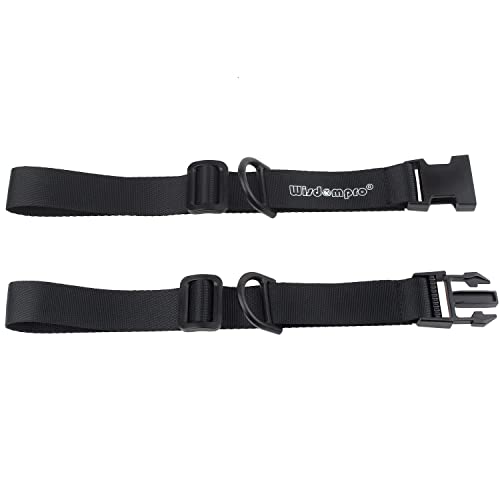
Keeps shoulder straps of your backpack securely in place, and gives your hands free.

Secure Fixation: Our backpack chest strap ensures your shoulder straps stay securely in place, preventing your backpack from slipping off your shoulders. This chest strap for backpack is perfect for transferring pressure and reducing shoulder fatigue during long hikes or outdoor activities.
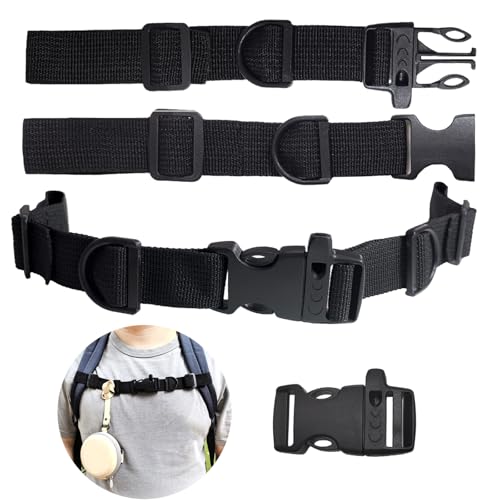
2 PCS Universal Backpack Chest Straps: Fix the backpack straps securely on your shoulders to free up both hands. Perfect for children's school bags, as well as for hiking, traveling, jogging, camping, mountaineering bags and other activities with a heavy-loaded backpack.
Enhanced Weight Distribution
A sternum strap can help keep the shoulder harness from sliding outward and may spread strap contact more comfortably across the upper body. However, it does not transfer the load to your hips as effectively as a properly fitted hip belt.
For fitted hiking packs, follow the adjustment order used in the Osprey backpack fitting guide: position and tighten the hip belt first, then adjust the shoulder straps and load lifters, and fasten the sternum strap last. This prevents the sternum strap from being used to compensate for an incorrect torso length or loose hip belt.
Improved Posture Alignment
A correctly positioned sternum strap can make the pack feel more stable, which may reduce the urge to round the shoulders or grip the straps with your hands. Use it as follows:
- Position it below the collarbone: Approximately 2 inches below the collarbone is a common starting point on adjustable packs.
- Keep it level: A twisted or sharply angled strap can pull one shoulder strap inward more than the other.
- Tighten only until stable: You should still be able to breathe deeply and move your arms normally.
- Recheck the shoulder straps: If the sternum strap must be extremely tight to hold the harness in place, the backpack may be the wrong size or incorrectly adjusted.
Pro Tip: Loosen the sternum strap before removing the backpack. Refasten and adjust it after the hip belt and shoulder straps are correctly positioned each time you put the pack on.
Proper Adjustment and Fit of Your Backpack
A backpack should sit close enough that it does not swing, but it should not be cinched so tightly that the straps compress your neck, restrict arm movement, or cause tingling. Begin with all straps loose and adjust the pack in a consistent order.
Products Worth Considering
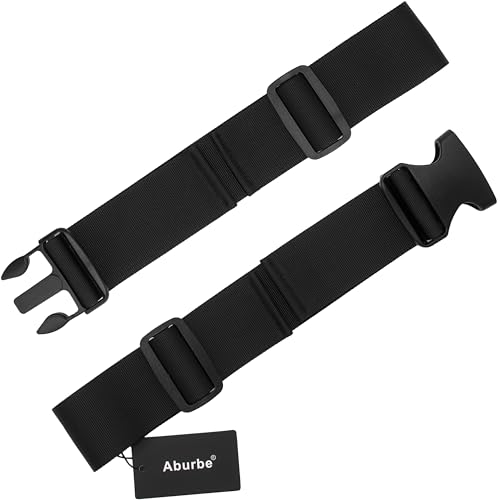
Extra Wide 2-Inch Design: Provides enhanced support and comfort for heavier loads, reducing strain during prolonged wear

ENHANCED COMFORT FOR LONG RUCKS - The upgraded design features larger, extra-padded belt straps (9.5" x 4.25" x 0.75") and 210D HT CORDURA on the underside, offering superior comfort and preventing skin irritation, even when worn shirtless.

[SUPERIOR WEIGHT DISTRIBUTION] Effectively redistributes the load from your shoulders to your hips, dramatically reducing strain and fatigue. Carry heavier loads for longer durations with enhanced comfort.
Adjust Shoulder Straps
- Place the backpack high enough to stay close. A school or everyday backpack should rest around the middle of the back rather than hanging far below the waist.
- Use both shoulder straps. Set them to equal lengths before making small side-to-side corrections.
- Pull down and back. Tighten until the pack rests close to your body without forcing your shoulders upward.
- Check for gaps. The padded portions should follow the curve of your shoulders instead of bridging above them.
- Test arm movement. Reach forward and overhead within a comfortable range. The straps should not cut into the armpits or neck.
- Readjust after packing changes. Adding a laptop, water, or clothing can change how the harness sits.
Use Hip Belt
A hip belt is most effective when it rests over the hip bones rather than around the soft waist or low across the abdomen. Center the padding over the top of the hip bones and tighten it evenly.
The belt should be snug enough to support part of the load without pinching, rubbing, or sliding down. After tightening it, adjust the shoulder straps so they stabilize the upper pack rather than carrying every pound. On technical packs, gently tighten the load lifters to bring the upper pack closer without pulling the shoulder straps away from their natural curve.
Common Fit Problems and Fixes
| Problem | Likely Cause | Fix |
|---|---|---|
| Pain on one shoulder | Unequal straps or uneven packing | Match strap length and balance dense items left to right |
| Straps dig into the neck | Harness too narrow, sternum strap too tight, or wrong torso size | Loosen the sternum strap and reassess pack size |
| Shoulders rise toward the ears | Shoulder straps overtightened or hip belt not supporting the load | Reset the hip belt, then loosen and retighten the shoulder straps |
| Pack sways while walking | Loose compression, hip belt, or sternum strap | Compress the contents and tighten stabilizing straps moderately |
| You lean far forward | Load is excessive or sits too far from the back | Remove weight and reposition heavy items against the back panel |
| Tingling in an arm or hand | Possible strap pressure or nerve irritation | Remove the pack immediately; seek advice if the symptom persists or returns |
How to Pack for Better Weight Distribution
Good packing keeps the center of mass close to your body and prevents the contents from shifting.
- Place dense items close to the back panel. Laptops, books, filled water reservoirs, and other heavy objects should not sit in the outermost pocket.
- Balance both sides. Avoid putting every heavy item in one side pocket.
- Fill empty space. Use clothing or soft items to stop dense objects from moving.
- Keep frequently used items accessible. This prevents you from repeatedly unpacking and repacking the load poorly.
- Use compression straps. Tighten them enough to control movement without crushing fragile contents.
- Review the load regularly. Remove receipts, old papers, unused equipment, and water you no longer need.
For schoolchildren, AAOS recommends placing heavier items low and toward the center of the backpack. The AAP similarly advises placing textbooks and computers close to the body and balancing items between the right and left sides.
Exercises to Strengthen Key Muscles
Strengthening the muscles that support the shoulder blade and shoulder joint may improve endurance, but exercises should not reproduce sharp pain, tingling, weakness, or a feeling that the shoulder is slipping. The AAOS shoulder conditioning program recommends individualized exercise selection and advises readers not to ignore pain.
1. Standing Row
- Attach a light resistance band at about waist height.
- Stand tall with the elbows close to your sides.
- Pull the elbows back while gently drawing the shoulder blades toward each other.
- Return slowly without shrugging.
- Begin with 2 sets of 8–10 pain-free repetitions.
2. Scapular Setting
- Sit or stand with your arms relaxed.
- Gently move the shoulder blades down and slightly together.
- Do not force the chest upward or pinch hard.
- Hold for 5–10 seconds while breathing normally.
- Repeat 8–10 times.
3. Face Pulls or Reverse Flys
Use very light resistance and a controlled range. Keep the shoulders away from the ears and stop before fatigue changes your form. Begin with 1–2 sets of 8–12 repetitions. These movements should feel like upper-back work, not a pinch in the front or top of the shoulder.
4. Optional Active Hang
An active hang may help some experienced, pain-free exercisers practice shoulder-blade control, but it is not a required treatment for backpack pain. Do not attempt it if you have shoulder instability, a recent injury or surgery, painful overhead movement, persistent numbness, significant weakness, or difficulty supporting your body weight.
If a clinician or qualified trainer has confirmed that hanging is appropriate, begin with your feet partly supported and use short, comfortable holds rather than immediately attempting repeated full-body hangs or 30–60-second isometric holds.
Caution: Do not use a heavily loaded backpack as exercise resistance while your shoulder is painful. Stop any movement that causes sharp pain, tingling, numbness, weakness, clicking with pain, or a feeling that the shoulder is unstable.
Incorporating Breaks and Changing Positions
No single break interval is required for every backpack user. A practical approach during a long carry is to check your shoulders, hands, breathing, and posture every 30–60 minutes and stop sooner when discomfort begins.
During a break:
- Remove the backpack rather than merely loosening one strap.
- Walk without the load for a few minutes.
- Move the neck and shoulders gently through a comfortable range.
- Check whether the pack has shifted or one strap has loosened.
- Move or remove items if one side feels heavier.
- Drink water, but remember that extra water also adds meaningful load.
If you use a single-strap bag temporarily, alternate sides frequently. For regular or heavier carrying, a two-strap backpack is usually the better choice because it avoids placing the entire load on one shoulder.
Tips for Carrying Your Backpack Safely
- Use both straps. One-shoulder carrying creates uneven pressure and encourages the pack to rotate.
- Keep the pack close. Tighten the shoulder straps enough to prevent hanging, but do not pull the shoulders upward.
- Use the hip belt on heavier packs. Position it over the hip bones before adjusting the upper harness.
- Stabilize with the sternum strap. Tighten only enough to prevent outward strap movement and pack sway.
- Pack dense objects near your back. Balance the load from side to side.
- Lift with control. Bend your knees, keep the pack close, and avoid twisting while lifting it from the floor.
- Build carrying time gradually. Do not jump from a light daily bag to a fully loaded pack for several hours.
- Respond to symptoms early. Remove the pack when pain, tingling, or numbness begins.
Long-term Strategies for Pain Prevention
Long-term comfort depends on matching the backpack and load to the person carrying it. Recheck the fit when your body, equipment, footwear, clothing layers, or normal load changes.
- Train gradually: Increase either weight or carry time in small steps instead of increasing both at once.
- Maintain general strength: Include pain-free upper-back, shoulder, trunk, hip, and leg exercises rather than focusing only on posture.
- Keep the pack organized: Review the contents weekly and remove items that no longer serve a purpose.
- Replace damaged components: Stretched straps, compressed padding, broken buckles, and slipping adjusters can make a previously comfortable pack unstable.
- Use another transport option: A rolling bag, luggage cart, locker, second set of books, or divided load may be safer when the required load repeatedly causes symptoms.
- Address recurring pain: A physical therapist or other qualified clinician can assess shoulder movement, neck involvement, nerve symptoms, previous injury, and pack fit.
Good posture should feel adaptable rather than rigid. You do not need to force your shoulders backward throughout the day. Focus on comfortable movement, an appropriate load, and regular changes of position.
When to Get Medical Help
Arrange a medical evaluation if shoulder pain is getting worse, repeatedly returns with light loads, makes it difficult to move the arm, or does not begin improving after roughly two weeks of load reduction and gentle activity. The NHS shoulder-pain guidance also advises prompt help for sudden severe pain, deformity, major swelling, inability to move the arm, persistent pins and needles, loss of sensation, an unusually hot or cold arm, fever, or pain following an accident.
Children and teenagers should not be expected to tolerate recurring back, neck, or shoulder pain as a normal part of school. Discuss persistent symptoms with a pediatrician and work with the school to reduce the required load when needed.
Frequently Asked Questions
Can shoulder pain from backpacks affect other areas of the body?
Yes. A poorly fitted or excessive load can contribute to neck, upper-back, lower-back, or hip discomfort because you may lean, rotate, or shorten your stride to balance it. However, pain in several areas can also have causes unrelated to the backpack, especially when symptoms continue after the pack is removed.
How often should I take breaks while carrying a backpack?
There is no universal medical interval. For a prolonged carry, checking your comfort every 30–60 minutes is practical, but stop earlier if pain, tingling, numbness, unusual fatigue, or strap pressure develops. Remove the backpack fully during the break and reassess the load and fit.
What are signs my backpack is too heavy?
Common signs include leaning far forward, struggling to put the pack on, shoulder straps digging in, rapid fatigue, loss of balance, one-sided pain, or discomfort that increases as you walk. Numbness, persistent tingling, or weakness requires removing the pack and may require medical assessment rather than merely reducing a few pounds.
Is it better to carry a backpack on one shoulder?
No. Using one shoulder concentrates pressure on one side and allows the load to rotate. Wear both shoulder straps at equal lengths whenever possible. If you must use a single-strap bag briefly, keep it light and change sides regularly.
Can poor posture while using a backpack cause long-term issues?
A heavy or poorly fitted pack can cause temporary leaning, fatigue, and discomfort, but posture alone does not reliably predict chronic pain. Repeated symptoms should prompt changes to the load and fit and, when they persist, an assessment for shoulder, neck, joint, tendon, or nerve problems.
Will a chest strap stop backpack shoulder pain?
Not by itself. A chest strap can stabilize the shoulder straps and reduce pack movement, but it cannot correct excessive weight, the wrong torso size, uneven packing, or an underlying shoulder condition. On heavier fitted packs, set the hip belt first and use the sternum strap as the final stabilizing adjustment.
Can exercises fix shoulder pain caused by a backpack?
Pain-free strengthening can improve shoulder endurance, but exercises cannot make an excessive or poorly fitted load safe. Reduce the provoking load first. Seek professional guidance when pain is severe, movement is limited, symptoms involve numbness or weakness, or exercises make the problem worse.
Conclusion
Reducing backpack shoulder pain starts with the load and fit, not with forcing better posture or exercising through discomfort. Remove unnecessary weight, keep dense items close to your back, wear both shoulder straps, and use a fitted hip belt when the pack is designed for one. Use the sternum strap to stabilize the harness rather than overtightening it.
Gentle movement and gradual strengthening may improve endurance after the provoking load has been corrected. Stop and get medical advice when pain is severe, continues despite changes, limits arm movement, follows an injury, or includes numbness, tingling, or weakness.
Sources
- American Academy of Pediatrics: Backpack Safety — pediatric pack-weight, packing, strap, and fit guidance.
- American Academy of Orthopaedic Surgeons: Backpack Safety — two-strap use, close load positioning, packing, lifting, and symptom guidance.
- Osprey Backpack Size and Fit Guide — hip-belt, harness, load-lifter, torso-length, and sternum-strap adjustment sequence.
- AAOS Rotator Cuff and Shoulder Conditioning Program — pain-free shoulder strengthening, stretching, and exercise-safety guidance.
- NHS Shoulder Pain Guidance — self-care boundaries, persistent symptoms, and urgent warning signs.
- Calvo-Muñoz et al.: Schoolbag Weight and Low-Back Pain Meta-Analysis — evidence limitations surrounding fixed body-weight thresholds.
