
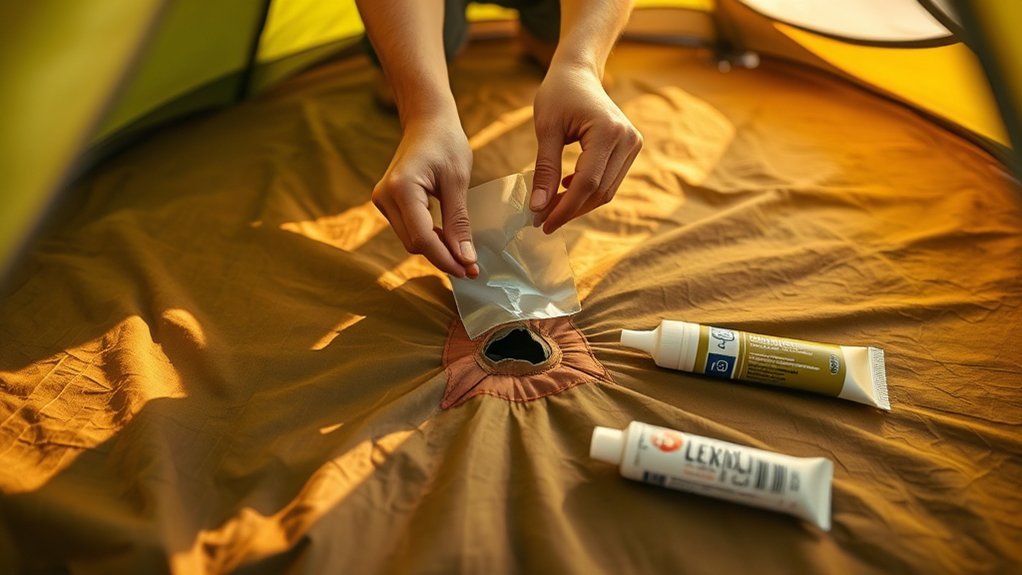
Last Updated on July 27, 2026 by Mason Reed
A torn tent floor can turn a dry campsite into a wet one, but most punctures and tears are straightforward to repair. The key is using a patch or sealant that matches your tent’s waterproof coating. Small pinholes may need only a compatible sealant, while larger tears usually need a dedicated repair patch. Before applying anything, identify the floor material, clean the damage, and follow the repair product’s cure instructions.
Quick Answer
To repair a torn tent floor, first check whether the fabric is polyurethane-coated or silicone-treated. Clean and dry the damaged area, then cover small punctures with a compatible sealant or repair patch. For larger tears, apply a rounded patch that overlaps the damage by at least 1/2 inch and let it set or cure according to the product instructions.
At a Glance
| Time Required | About 10–30 minutes of active work; set or cure time ranges from immediate use to 24 hours depending on the product |
| Difficulty | Beginner-friendly for pinholes and short tears; moderate for large or heavily stressed tears |
| Tools Needed | Clean cloth, isopropyl alcohol or manufacturer-approved cleaner, compatible repair tape or patch, compatible sealant if needed, and sharp scissors |
| Cost | About $8–$25 if you need to buy repair tape, sealant, or both |
Key Takeaways
- Identify the waterproof coating before choosing a repair product. Silicone-treated and polyurethane-coated fabrics need different adhesives and sealants.
- Clean and completely dry the damaged fabric before patching; dirt, body oils, and moisture can weaken the bond.
- Round the corners of cut patches and overlap the damage by at least 1/2 inch; some tent manufacturers recommend about 1 inch.
- Do not assume every repair needs 8–12 hours. Set and cure times vary by patch and sealant, so follow the product label.
- A peeling or sticky waterproof coating is a different problem from a puncture and may require recoating, manufacturer repair, or replacement.
Disclosure: As an Amazon Associate I earn from qualifying purchases. Some links on this page are affiliate links, at no extra cost to you.
Understanding the Importance of Tent Floor Repairs

Your tent floor separates your sleeping area from wet soil, rocks, sticks, and abrasive ground. A small puncture may let moisture through and can grow into a larger tear if the fabric continues to stretch around the damaged area.
Prompt repairs can extend the useful life of a tent, but the repair must match the fabric and coating. A patch that bonds strongly to conventional polyurethane-coated nylon may not adhere properly to silicone-treated fabric. That compatibility check is more important than the brand name on the repair kit.
The most important step happens before you open the sealant: find out whether the damaged side of your tent floor is polyurethane-coated, silicone-treated, or covered by another waterproof finish.
Note: Check the tent manufacturer’s care and warranty instructions before using alcohol, solvent-based adhesive, or sealant. When using a solvent-containing repair product, follow its label, work with good ventilation, and avoid direct skin contact. Gloves are a sensible precaution.
Identify the Tent Floor Coating Before You Repair It
Do not assume that every nylon or polyester floor uses the same waterproof treatment. Some tents use a polyurethane coating, some use silicone-treated fabric, and some use different coatings on opposite sides.
Start with the tent’s product page, owner’s manual, or manufacturer support team. If the specification says silnylon, silpoly, silicone-coated, or silicone-treated, choose a repair product specifically designed to adhere to silicone. GEAR AID states that Seam Grip SIL is intended for silicone-treated fabrics and should not be substituted for a urethane repair product on a polyurethane-coated surface.
For compatible non-silicone nylon, polyester, and similar tent fabrics, a urethane repair adhesive such as Seam Grip WP or a manufacturer-approved repair patch may be appropriate. If you cannot identify the coating confidently, contact the tent maker before making a permanent repair.
Choose the Right Repair for the Damage
| Damage | Typical Repair | Important Check |
|---|---|---|
| Tiny pinhole | Compatible seam sealant or a small repair patch | Match sealant to the coating |
| Short clean tear | Rounded repair patch overlapping the tear | Use silicone-compatible tape on silicone-treated fabric |
| Large or stressed tear | Patch with generous overlap; reinforce the opposite side if appropriate | Consider professional repair if fabric is badly distorted or missing |
| Leaking seam | Compatible seam sealer | Confirm whether factory seam tape is peeling |
| Widespread peeling or sticky coating | Recoat if appropriate or seek manufacturer repair/replacement | A local patch will not fix widespread coating failure |
Materials Required for Small Hole Repairs
For most small repairs, you need only a few supplies: a suitable cleaner, a cloth, and either compatible repair tape or sealant. Temporary backing tape is optional when you need to hold a puncture flat while applying liquid adhesive; it is not required for every repair.
Essential Cleaning Supplies
Dedicated repair tape adheres best to clean, dry fabric. GEAR AID recommends isopropyl alcohol for its Tenacious Tape products, while manufacturers such as NEMO also allow appropriate gentle cleaning methods for tent repairs. Always check your own tent’s care instructions first.
| Supply | Purpose |
|---|---|
| Isopropyl alcohol or manufacturer-approved cleaner | Removes dirt and oils before patching |
| Clean lint-free cloth | Wipes and dries the repair area |
| Compatible sealant | Seals suitable pinholes or reinforces compatible repairs |
| Dedicated repair tape or patch | Covers punctures and tears |
| Packing or masking tape | Optional temporary backing while applying some liquid repairs |
Sealant Options Available
The correct sealant depends on the tent floor’s waterproof coating. For silicone-treated fabrics, use a silicone-specific product such as Seam Grip SIL or another product approved by the tent manufacturer. GEAR AID lists a typical cure time of about 3–6 hours for its silicone sealant.
For compatible non-silicone tent fabrics, a urethane repair product such as Seam Grip WP may be appropriate. GEAR AID lists an 8–12 hour cure for that product under normal application conditions and notes that low humidity can lengthen curing.
Do not use the cure time from one sealant as a general rule for every tent-floor repair.
Pro Tip: For a fast field repair, carry a peel-and-stick patch that is compatible with your tent. Standard Tenacious Tape works on many nylon and polyester surfaces, while silicone-treated silnylon or silpoly needs silicone-compatible repair tape. Press the patch firmly from the center outward so no bubbles or wrinkles remain.
Backing Material Choices
If a puncture keeps spreading apart while you apply liquid adhesive, temporary packing or masking tape on the opposite side can help hold the fabric flat. Remove or replace temporary materials as required by the repair-product instructions.
For a dedicated peel-and-stick patch, temporary backing is usually unnecessary. Cut or select a patch large enough to extend at least 1/2 inch beyond the damage in every direction. Some tent manufacturers recommend roughly 1 inch of overlap for additional security.
Avoid relying on duct tape as a permanent repair. It can leave residue and is harder to remove cleanly when you later apply a proper gear patch.
Step-by-Step Guide to Repairing Small Holes
Necessary Materials for Repairs
Gather a clean cloth, an approved cleaning method, sharp scissors if you are cutting a patch, and either a compatible repair patch or a sealant designed for your tent’s coating.
If you are using a liquid product, read its label before starting. Application temperature, humidity, ventilation, and cure requirements vary among repair products.
Repair Process Steps
- Identify the coating. Check the tent specifications or ask the manufacturer whether the damaged surface is polyurethane-coated, silicone-treated, or another material.
- Clean the area. Remove soil and loose debris. If permitted by the tent maker and repair-product instructions, wipe the patch area lightly with isopropyl alcohol.
- Let it dry completely. Adhesive should not be applied over damp fabric.
- Trim loose threads. Do not enlarge the tear; remove only fibers that prevent a patch from lying flat.
- Apply the repair. For a compatible pinhole sealant, cover the hole and slightly overlap sound fabric. For repair tape, center the patch over the hole and press firmly from the center outward.
- Respect the cure or set time. Follow the exact directions for the product you used before folding, heavily stressing, or storing the tent.
Preparing for Larger Tear Repairs
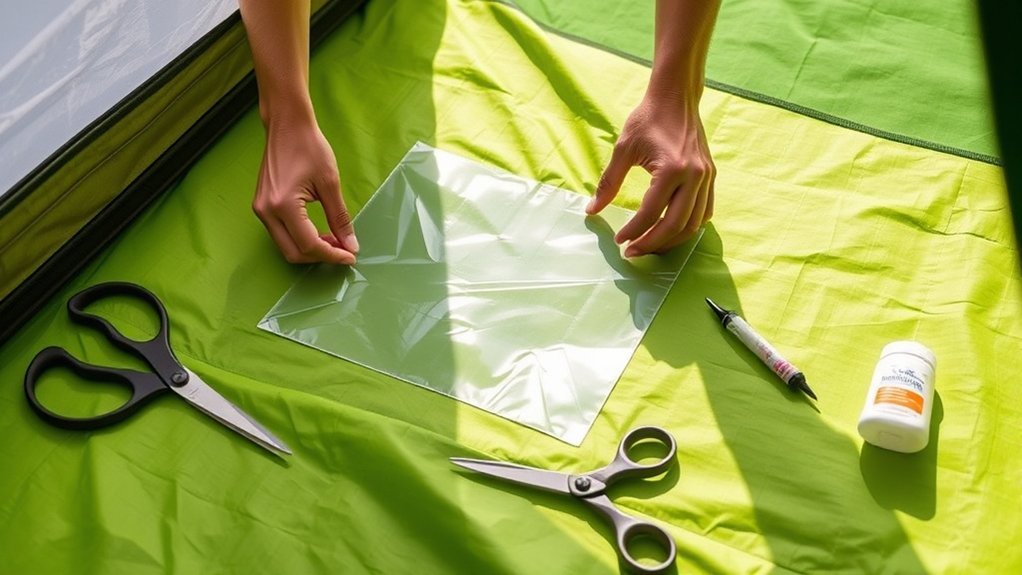
For a larger tear, first spread the floor flat so the torn edges return to their natural position without bunching or stretching. Clean and completely dry both sides of the fabric.
- Bring the torn edges together naturally without overlapping them.
- Cut a compatible patch that extends at least 1/2 inch beyond the damage; about 1 inch provides additional margin on a larger repair.
- Round every corner so there are no sharp points that can snag or lift.
- Apply the patch according to its instructions and smooth it firmly from the center toward the edges.
- For a large hole or a high-stress area, reinforce the opposite side with a second compatible patch when the patch manufacturer or tent maker recommends it.
Essential Materials for Larger Repairs
Large tears require the same careful surface preparation as pinholes, but a permanent patch becomes more important because liquid sealant alone may not provide enough structural support.
Required Repair Materials
- A manufacturer-approved cleaner or isopropyl alcohol when permitted.
- A clean, lint-free cloth.
- A dedicated tent-repair patch compatible with the coating.
- Sharp scissors if the patch needs trimming.
- A compatible sealant only when the repair system calls for one.
- Optional temporary tape to align the tear during an adhesive repair.
For silicone-treated tents, use a silicone-compatible patch such as GEAR AID Tenacious Tape Silnylon Repair Tape or another patch recommended by the tent manufacturer. Ordinary repair tape may not bond properly to a silicone surface.
Preparing the Repair Area
Lay the floor on a clean, flat surface. Remove grit, soil, and loose fibers around the damage. Clean the patch zone using the method allowed by your tent manufacturer and let it dry fully.
Place the torn edges together without creating wrinkles. If temporary tape is needed to keep them aligned, use it only as backing while you work. Avoid permanently trapping an incompatible adhesive beneath the final repair.
Applying the Patch
Cut the patch with rounded corners and enough overlap to anchor it to undamaged fabric. Peel away its backing without touching the adhesive more than necessary, center it over the damage, and press firmly from the center outward.
A spoon or another smooth, hard object can help press the patch evenly without introducing wrinkles. NEMO’s tent-repair guidance similarly recommends a rounded patch, generous overlap, and firm pressure across the patch.
If your chosen repair system combines a urethane adhesive with a patch, follow that manufacturer’s sequence and cure directions rather than adding silicone sealant automatically.
Cleaning the Area Before Patching
Cleaning is one of the simplest ways to improve adhesion. Dirt, sunscreen, body oils, old adhesive, and moisture can prevent repair tape from bonding evenly.
Brush away loose debris first. Where allowed by the tent maker, lightly wipe the repair zone with isopropyl alcohol and a clean cloth. Do not soak the fabric. If the manufacturer advises against alcohol or solvents, use its recommended cleaning method instead.
Let the area dry completely before patching. Apply the repair only when the fabric lies flat and feels dry on both sides.
Cutting and Applying the Patch Correctly
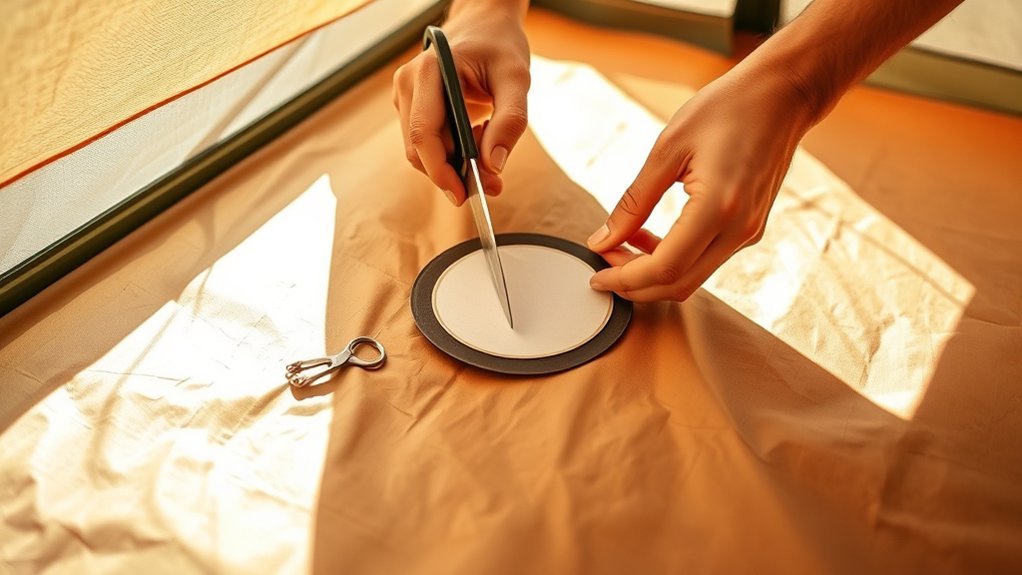
- Measure the damage: The patch should extend at least 1/2 inch beyond every edge of the tear; use more overlap when the manufacturer recommends it.
- Round the corners: Sharp corners are easier to catch and peel.
- Use sharp scissors: Clean edges sit flatter against the tent fabric.
- Match the adhesive to the coating: Standard repair tape works on many conventional tent fabrics, while silicone-treated floors require silicone-compatible adhesive.
- Press from the center outward: Push out wrinkles and trapped air while ensuring every edge lies flat.
Securing the Patch During Curing
Whether the repair needs pressure or curing depends on the product. Many peel-and-stick patches are simply pressed firmly into place. Liquid adhesives may require the repaired fabric to remain flat and undisturbed while they cure.
If the adhesive instructions call for pressure, cover the repair with release or wax paper so a weight cannot stick to exposed adhesive. Use a smooth, moderate weight and avoid stretching the floor.
Do not apply a blanket 8–12 hour rule. For example, GEAR AID currently specifies about 3–6 hours for Seam Grip SIL and 8–12 hours for Seam Grip WP, while standard Tenacious Tape continues building bond strength after application and reaches its stated washable condition after 24 hours.
Tips for Ensuring a Strong Bond
- Start clean and dry: Remove grit, oils, and moisture before applying adhesive.
- Choose compatible materials: The best-looking patch will still fail if its adhesive cannot bond to the coating.
- Give the patch enough overlap: Anchor the repair to sound fabric around the entire tear.
- Round the corners: Avoid points that can catch on clothing, sleeping pads, or the ground.
- Apply firm, even pressure: Work out bubbles and wrinkles immediately.
- Follow the actual cure instructions: Temperature, humidity, and adhesive chemistry affect cure time.
Warning: Do not fold or tightly stuff a liquid-adhesive repair before it has fully cured. Folding uncured adhesive onto another part of the floor can shift the patch, glue fabric together, or weaken the repair.
Temporary Field Repair vs. Permanent Repair
On the trail, your priority is usually stopping a tear from spreading and keeping water out until you get home. A lightweight, coating-compatible peel-and-stick patch is ideal because it does not require mixing or lengthy preparation.
Clean and dry the area as well as conditions allow, apply the patch with rounded corners, and press it firmly. A compatible patch can also serve as the permanent repair if its manufacturer describes it that way.
Duct tape can work as a last-resort emergency measure when nothing else is available, but it is not the preferred permanent solution because residue can complicate a cleaner repair later.
What If the Floor Coating Is Peeling or Sticky?
A patch repairs localized physical damage. It does not restore a waterproof coating that is failing across a large area.
If the inside of a polyurethane-coated floor is flaking, a compatible recoating product may restore the waterproof layer after the deteriorated coating is prepared correctly. REI’s tent-waterproofing guidance recommends identifying the coating before applying a replacement treatment.
GEAR AID sells Seam Grip TF specifically for restoring polyurethane coatings, but it is not intended for silicone-treated fabric.
If the floor is extensively sticky, brittle, delaminated, or damaged across many areas, contact the tent manufacturer. Professional repair, a replacement tent body, or tent replacement may be more reliable than covering numerous failing areas with patches.
How to Test the Repair
After the required set or cure time has passed, inspect the patch before taking the tent on another trip.
- Look for lifting corners, wrinkles, gaps, or uncured adhesive.
- Gently flex the repaired area. The patch should move with the fabric rather than detach.
- Press around the patch edge to confirm it is firmly bonded.
- For a waterproofness check, place the tent on a clean surface and wet the repaired area from the outside with a controlled amount of water.
- Inspect the inside for seepage rather than immediately soaking or submerging the repair.
If water gets through, dry the tent completely and inspect whether the leak is coming through the patch, an adjacent puncture, a seam, or deteriorated floor coating.
Maintaining Your Tent After Repairs
Once the repair is fully set, a few habits can reduce the chance of another floor tear.
- Inspect the campsite: Remove sharp sticks, stones, pinecones, and other debris before pitching.
- Use a correctly sized footprint when appropriate: It can reduce abrasion, but it should not extend beyond the tent floor where it can collect rainwater.
- Keep sharp gear away from the floor: Be careful with trekking-pole tips, crampons, tools, pet claws, and sharp-edged equipment.
- Clean gently: Follow the tent manufacturer’s instructions rather than using harsh detergent or automatically putting the tent in a washing machine.
- Dry before storage: Never store a wet tent for long periods.
- Store loosely in a cool, dry place: Long-term heat, moisture, and tight compression can shorten the life of coatings and seam tape.
- Inspect before and after trips: Catching a pinhole early is easier than repairing a long tear later.
Big Agnes, NEMO, and other tent manufacturers also emphasize thoroughly drying tents before storage and protecting their waterproof materials from improper cleaning and long-term moisture.
Frequently Asked Questions
Can I use regular tape instead of packing tape?
Ordinary household tape is not a good permanent tent-floor repair. Packing or masking tape can sometimes serve as temporary backing while you apply liquid adhesive, but the finished repair should use dedicated gear-repair tape, a compatible patch, or a suitable sealant. Duct tape is best reserved for emergencies because its residue can complicate later repairs.
What if my patch doesn’t adhere properly?
Stop before relying on it in the field. Check whether the fabric was completely clean and dry and, more importantly, whether the patch adhesive is compatible with the floor coating. Standard repair tape may not bond to silicone-treated fabric. Follow the patch manufacturer’s removal instructions, clean the area again, and apply the correct replacement patch.
How do I know if the patch is durable?
After the required set or cure time, the patch should have flat, firmly bonded edges with no bubbles or lifting corners. It should flex with the tent floor without separating. Gently test the repaired area with water and inspect the inside for seepage before relying on it during a rainy trip.
Can I wash the tent after patching?
Wait until the repair has completely set or cured, then follow the tent manufacturer’s cleaning instructions. Even when a repair tape itself is described as washable, that does not mean the complete tent should go into a washing machine. Gentle hand or spot cleaning is commonly recommended for tent fabrics and waterproof coatings.
How often should I check for damage?
Inspect the tent floor when you unpack after a trip and again before an important outing. Look for pinholes, cuts, lifting patches, peeling seam tape, sticky coatings, and abrasion. Repairing a small defect early is usually easier than waiting for the fabric to tear farther.
How do I know whether my tent floor is silicone- or polyurethane-coated?
Check the manufacturer’s product specifications, owner’s manual, or support information. Terms such as silnylon, silpoly, silicone-coated, or silicone-treated indicate that at least one surface uses silicone. Some fabrics use different coatings on opposite sides, so contact the manufacturer when the specification is unclear rather than guessing.
Can I repair a torn tent floor while camping?
Yes. Carry a small patch that is compatible with your tent’s coating plus an alcohol wipe or the cleaning material recommended by the tent maker. Clean and dry the tear, apply the patch with adequate overlap, and press it firmly. A peel-and-stick patch avoids waiting for liquid adhesive to cure during a trip.
Conclusion
A torn tent floor usually does not mean the end of the tent. The most reliable repair starts by identifying the waterproof coating, then matching it with the correct patch or sealant. Clean and dry the area carefully, give the patch plenty of overlap, and follow its real set or cure time rather than using a one-size-fits-all rule.
Afterward, inspect and water-test the repair before your next trip. A footprint, careful campsite preparation, gentle cleaning, and dry storage can help prevent the next puncture and keep a sound repair working for many more nights outdoors.
Sources
- GEAR AID — Seam Grip SIL Silicone Tent Sealant — silicone-fabric compatibility and silicone-sealant cure guidance
- GEAR AID — Seam Grip WP Field Repair Kit — urethane repair compatibility, application conditions, and cure guidance
- GEAR AID — Tenacious Tape Repair Tape — cleaning, patch overlap, rounded corners, application, and bond guidance
- GEAR AID — Tenacious Tape Silnylon Repair Tape — silicone-compatible peel-and-stick patch guidance
- NEMO Equipment — Easy Fix: Tent Has a Hole — tent-cleaning, patch sizing, rounded corners, and pressure technique
- REI Expert Advice — How to Waterproof a Tent — identifying coating type and addressing deteriorated polyurethane floor coatings
