

Last Updated on July 29, 2026 by Mason Reed
A rainfly should follow the shape of your tent’s designed pole structure while staying separated from the inner tent wherever the model allows. The reliable way to maintain that gap is to assemble the correct poles, stake the body evenly, attach every fly connection, use the intended guylines, open the vents, and retighten the pitch when wet fabric begins to sag.
Quick Answer
To keep a rainfly from touching the inner tent, use the tent’s supplied or manufacturer-approved poles, square the tent body, secure every fly buckle and pole attachment, and stake all required guy-out points. Keep the vents open and retension the fly after rain, wind, or falling temperatures loosen the fabric.
Key Takeaways
- Do not substitute arbitrary longer poles. Use the tent’s original pole set or an approved replacement.
- An even body pitch and properly tensioned guylines are the main defenses against fly sag and contact.
- Open low and high vents so moist air can escape, even when it is raining.
- Some nylon flies stretch when wet and need to be retensioned during a storm.
- Moisture inside the tent may be condensation rather than a leak through the rainfly.
At a Glance
| Time Required | About 10–20 minutes for setup and inspection |
| Difficulty | Easy, though semi-freestanding and trekking-pole tents require closer attention to stake placement |
| Tools Needed | Correct pole set, stakes or suitable anchors, rainfly, guylines, and built-in tensioners |
| Cost | Usually $0 with the included hardware; replacement cord, anchors, or approved parts cost extra |
Disclosure: As an Amazon Associate I earn from qualifying purchases. Some links on this page are affiliate links, at no extra cost to you.
Why the Rainfly Should Stay Off the Inner Tent

In a double-wall tent, the waterproof rainfly forms the outer weather barrier while the breathable or mesh inner tent holds your sleeping area. The space between them gives warm, moist air a route toward the fly vents and helps keep condensation on the fly from rubbing directly against the inner fabric.
That separation does not make the tent immune to condensation. Humid weather, cold temperatures, wet ground, damp gear, and the moisture released by campers can still leave water on the inside of the fly. According to MSR’s condensation guidance, ventilation is the main way to reduce this moisture: cooler, drier air must enter while warmer, moisture-laden air escapes.
When the fly lies against the tent body, condensation may transfer to the inner wall, sleeping bag, or clothing. Contact can also block airflow and cause a loose fly to flap, collect water, or place uneven loads on its attachment points.
Note: Touching a sound waterproof rainfly does not automatically force rain through it by “breaking surface tension.” The more common problem is the transfer of condensation from the inside of the fly. A true leak usually involves a hole, damaged seam, failed coating, poor door closure, or pooled water.
How to Keep the Rainfly From Touching the Tent
Always begin with the instructions for your exact tent. Freestanding, semi-freestanding, tunnel, pyramid, and trekking-pole shelters use different attachment points and tension patterns. When the manufacturer’s directions differ from the general sequence below, follow the manufacturer.
1. Use the Correct Pole Set
Assemble the poles completely and seat every section before bending the frame into place. Connect the pole tips to the correct grommets, hubs, sleeves, or corner fittings. Install the ridge pole or spreader bar when the model includes one because it may be responsible for lifting the fly away from the inner tent.
Warning: Do not install a random longer pole to create more clearance. Excess length can overstretch fabric, pull out grommets, distort the frame, split a pole, or damage seams. Use only the supplied pole set or a replacement approved for the exact tent model.
2. Square and Stake the Tent Body Evenly
Choose level ground that drains well instead of a depression or runoff channel. The National Park Service recommends level ground that is not a low spot and advises campers to check for flooding, wind, dead branches, and other overhead hazards.
Lay out the body or footprint in its intended shape. Stake the corners in sequence while keeping the floor smooth, but do not stretch it like a drum. Measure by eye from corner to corner and correct any skewed angles. A crooked body pulls the pole structure sideways and makes it difficult to center the fly.
Semi-freestanding tents may depend on one or more stake-out points to create their full floor area and wall tension. Missing those anchors can let the inner wall lean into the fly even when the poles appear upright.
3. Attach Every Rainfly Connection
Identify the head, foot, doors, and color-coded corners before tightening anything. Connect every intended buckle, hook, pole pocket, corner grommet, clip, and hook-and-loop pole wrap. A skipped pole wrap or incorrectly rotated fly can leave one panel loose while another is overstretched.
Center the fly over the ridgeline and confirm that the doors align with the inner-tent doors. Adjust the corner straps in small, even increments. The fly should follow the designed pole shape; do not try to make the edges universally higher than the center.
4. Stake the Vestibules and Guy-Out Points
Stake each vestibule far enough from the tent to open its panels and create the designed airflow gap. Then attach the guylines to the marked fly loops. Guylines support the poles, reduce flapping, pull broad fly panels away from the inner body, and help shed rain.
Big Agnes recommends using the intended guylines to maintain the tent structure and keep the rainfly away from the body. MSR likewise notes that guying out the fly improves both stability and ventilation.
- Extend a guyline in the direction that best pulls the fly panel away from the inner tent.
- Use a secure stake or an anchor suited to soil, sand, snow, rock, or a tent platform.
- Keep the line clear of doors and walking paths where possible.
- Tighten until the panel is smooth and stable, not until seams or poles look strained.
- Use reflective cord or markers where lines may become a nighttime trip hazard.
Pro Tip: After tightening the main corners, walk around the tent once and adjust opposing points in small increments. Pulling one corner as tight as possible before checking the opposite side often shifts the entire fly off-center.
5. Open the Vents
Open the rainfly’s supported vents, roof vents, or vent struts unless blowing rain or snow makes a particular opening unsafe to use. When conditions permit, create high-low ventilation: cooler air enters near the bottom of the fly while warm, moist air exits through higher vents.
You may also partially open the top of a vestibule door when its design provides rain protection. Keep wet jackets, boots, and packs in the vestibule rather than spreading them through the sleeping area. Never cook inside a tent or enclosed vestibule unless the shelter and appliance manufacturer explicitly provide a safe system for that use.
6. Retension After Rain, Wind, or Cooling
Recheck the pitch after the fly becomes wet or the temperature drops. Some nylon fabrics absorb a small amount of moisture, stretch, and begin to sag. Polyester and specialized composite fabrics may remain more dimensionally stable, but every tent can loosen if stakes move or tensioners slip.
Shake off pooled water when you can do so safely, reseat loose stakes, and shorten the appropriate guyline or corner strap. Do not yank a cold, wet panel tight in one movement. Use gradual adjustments around the tent so the load remains balanced.
7. Keep Gear From Pushing Out the Inner Wall
A perfectly pitched fly may still touch the inner tent if a wide sleeping pad, sleeping bag, backpack, dog, or camper pushes the inner wall outward. Center the sleeping system and keep bulky gear away from tapered foot or head sections. Do not hang heavy objects from unsupported inner-tent loops.
If the floor is too narrow for the occupants and pads, changing the guyline tension will not solve the problem. Reduce the amount of gear inside or use a tent with enough floor width and wall volume for the sleeping system.
Benefits of Proper Fly-to-Body Separation

The space between a rainfly and inner tent is useful, but it should not be treated as a powerful insulation chamber. Its most important benefits involve airflow, moisture separation, and a stable weatherproof pitch.
| Benefit | What It Does |
|---|---|
| Improves ventilation | Leaves a route for moist air to reach open fly vents instead of being trapped against the inner wall. |
| Limits moisture transfer | Reduces direct contact between the inner tent and condensation on the underside of the fly. |
| Improves water shedding | A smooth, supported fly is less likely to form low pockets where rain can collect. |
| Reduces flapping | Balanced guyline tension limits movement that can abrade fabric or interrupt sleep. |
| Protects usable space | Keeps the inner walls closer to their intended shape and away from sleeping bags and clothing. |
A taut fly cannot eliminate condensation, but it gives ventilation and drainage features the best chance to work as designed.
Choosing Poles and Supports Safely
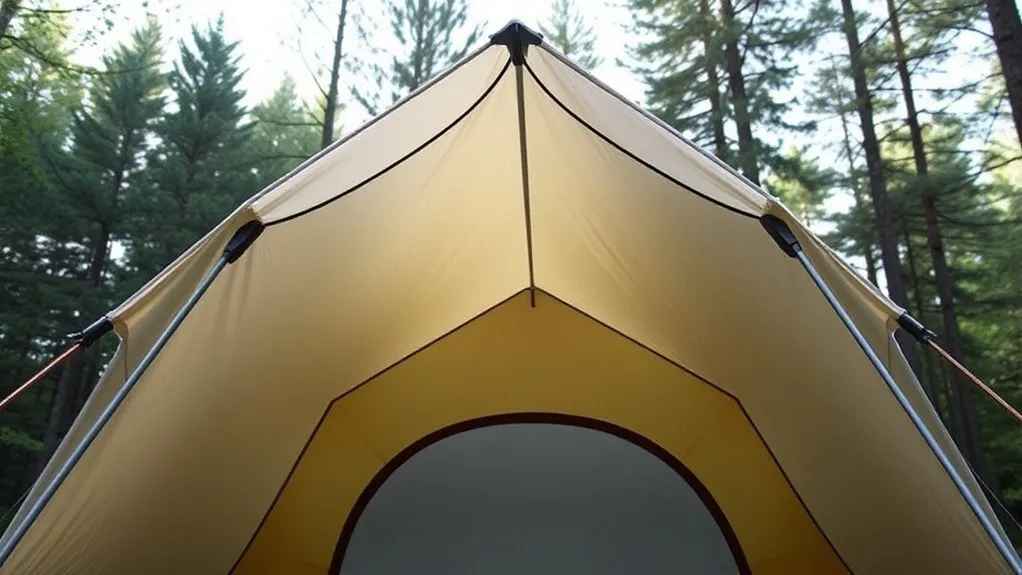
The right pole is the one designed for the tent. Aluminum, fiberglass, carbon, air-beam, and trekking-pole structures all behave differently. Material alone does not determine compatibility.
Inspect each section for cracks, bent ferrules, split ends, loose hubs, damaged shock cord, and incomplete connections. A partly seated pole joint creates a weak point and may shorten the frame enough to let the fly sag. Replace damaged parts before relying on the tent in severe weather.
Use optional support poles or trekking poles only where the tent manual identifies a compatible awning, vent, tarp, or alternate-pitch configuration. Do not place a pole tip directly against an unreinforced fly panel.
Managing Ventilation, Temperature, and Condensation
A rainfly blocks precipitation and wind, but it does not function like the insulated wall of a building. Closing every opening may feel warmer at first, yet trapped moisture can condense as the fly cools. Maintaining some airflow is usually the better way to keep the sleeping area comfortable and reduce dampness.
Use these moisture-management steps:
- Open supported roof and low vents before going to sleep.
- Vent from opposite sides when the weather allows crossflow.
- Keep wet clothing and footwear in the vestibule without blocking an air inlet.
- Avoid touching the inner wall with sleeping bags or pads.
- Wipe heavy condensation with an absorbent cloth in the morning.
- Shake or dry the fly before packing whenever conditions permit.
NEMO recommends a taut, correctly staked pitch, open vents, and keeping wet gear out of the sleeping area. Even with those steps, dew or condensation may still form when the air is humid and the fly surface cools below the dew point.
Note: A little moisture on the underside of the rainfly does not necessarily mean the tent failed. Look at where the water begins, whether it appears on broad cold surfaces or along a specific seam, and whether it continues during a controlled hose test after the tent is dry.
Troubleshooting Rainfly Contact
| Symptom | Likely Cause | Correction |
|---|---|---|
| The whole fly sits off-center | Rotated fly, uneven corner straps, or a skewed tent body | Loosen all corners, confirm door orientation, square the body, and retighten evenly. |
| One broad panel touches the inner tent | Missing guyline, loose anchor, skipped pole wrap, or gear pushing outward | Connect the designated attachment, reposition gear, and tension the panel’s guy-out point. |
| The fly sags after rain begins | Wet nylon stretch or moving stakes | Shake off pooled water, reseat the anchors, and gradually retighten the corner straps and guylines. |
| The fly flaps in wind | Loose lines, poor guyline direction, or an exposed pitch | Use all storm guy points, improve the anchor direction, and move to a safer site when conditions exceed the tent’s intended use. |
| Water appears over broad inner surfaces | Condensation | Increase ventilation, remove wet gear, wipe the fly, and keep the inner wall from touching it. |
| Water follows one seam or puncture | Failed seam tape, damaged coating, hole, or open zipper | Dry and inspect the area, confirm door closure, and use the manufacturer-approved repair or seam treatment. |
| Water pools on the fly | Loose panel, incorrect pole assembly, missing support, or poor setup geometry | Check every pole joint and attachment, then rebalance the corner and guyline tension. |
| A tensioner repeatedly slips | Incorrect cord routing, worn cord, or damaged hardware | Reroute it according to the manual or replace it with compatible cord and hardware. |
Final Inspection Before Bed
- All pole sections are fully seated and correctly positioned.
- The tent body is square and no corner is pulled out of shape.
- The rainfly doors align with the inner doors.
- Every required buckle, clip, pole wrap, and fly corner is connected.
- Vestibules are staked and provide their intended coverage.
- Broad fly panels are smooth and clear of the inner body.
- Guylines are secure without visibly distorting seams or poles.
- Vents are open where weather conditions allow.
- Sleeping bags, pads, and gear are not pushing against the walls.
- Stakes and lines are visible enough to avoid trips after dark.
Rainfly Materials and Waterproofing
Nylon and polyester are both widely used for rainflies. Nylon can provide high strength at a low weight, but some conventional nylon fabrics stretch more after absorbing moisture. Polyester generally has better dimensional stability when wet, although weight, denier, weave, coatings, construction, and design all affect real performance.
The fiber name alone does not tell you how waterproof a fly will be. Check the manufacturer’s published waterproof rating, coating, seam construction, and care instructions. A hydrostatic-head rating measures the water pressure a fabric and its coating can withstand. Sea to Summit explains that the rating is measured in millimeters of water pressure, although acceptable ratings and testing methods vary by product and manufacturer.
Many rainflies combine several forms of protection:
- Water-repellent surface treatment: Helps water bead and roll off the face fabric.
- Waterproof coating or membrane: Forms the main barrier against water passing through the fabric.
- Seam tape or seam sealant: Protects needle holes and construction seams.
- Correct tension: Encourages drainage and limits pooling, flapping, and fabric contact.
Do not apply a generic waterproofing product merely because condensation appears inside the tent. First clean and dry the fly, inspect for actual leakage, and check the tent manufacturer’s treatment recommendations. Some modern fabrics require different products or no conventional DWR treatment.
Cleaning and Storing the Rainfly
Clean the rainfly when dirt, oils, smoke residue, salt, or sap begins to affect it. Follow the care label and manufacturer instructions because cleaners that are safe for clothing may damage tent coatings.
- Shake or brush off loose dirt.
- Use warm—not hot—water.
- Apply a tent-specific cleaner with a clean, soft sponge or cloth.
- Rinse thoroughly so no cleaner remains.
- Air-dry the fly completely away from prolonged direct sunlight.
- Inspect the coating, seam tape, attachment loops, buckles, and zippers before storage.
Big Agnes advises against machine washing, bleach, dishwashing liquid, and household detergent because they can damage fabric or waterproof treatments.
Never place a damp rainfly into long-term storage. Trapped moisture can promote mildew and coating breakdown. For storage between seasons, place the clean, completely dry fly loosely in a breathable container in a cool, dry, temperature-stable location. Avoid a hot vehicle, attic, damp basement, or sealed container that can trap humidity.
Frequently Asked Questions
What materials are best for rainfly construction?
Both nylon and polyester can make effective rainflies. Nylon often provides high strength for its weight, while polyester is generally more dimensionally stable when wet. Compare the complete construction, including fabric weight, waterproof coating, seam treatment, published waterproof rating, pole structure, and ventilation design.
Can I use my tent without a rainfly?
You can leave the fly off when the forecast is reliably dry and the tent body provides the privacy and exposure protection you need. Keep the rainfly nearby because dew, wind, and unexpected rain can arrive quickly. Never assume a mesh inner tent provides meaningful rain protection.
How tight should a rainfly be?
It should be smooth enough to shed water and resist flapping without pulling the pole frame, seams, grommets, or zippers out of shape. Tighten opposing corners and guylines gradually. If seams look stretched, poles bow unnaturally, or zippers become difficult to close, reduce the tension.
Why does my rainfly sag after it gets wet?
Some nylon fabrics absorb a small amount of moisture and stretch. Stakes can also loosen as wet soil softens. Safely shake off pooled water, reseat the anchors, and make small adjustments to the corner straps and guylines. Polyester and specialized fabrics may stretch less, but their anchors still need checking.
Does touching the rainfly cause water to leak through?
Contact does not automatically force rain through sound waterproof fabric. However, the inner tent or sleeping gear can pick up condensation from the underside of the fly. Water that consistently follows a seam, puncture, zipper, or damaged coating is more likely to be a true leak.
How do I clean my rainfly?
Use warm water, a tent-specific cleaner, and a clean soft sponge or cloth. Rinse thoroughly and air-dry the fly completely. Unless the manufacturer specifically permits it, do not machine wash or use bleach, fabric softener, dish soap, or household laundry detergent.
What factors affect rainfly durability?
UV exposure, dirt, smoke, abrasion, flapping, overtensioning, chemical cleaners, damp storage, heat, coating age, and repeated folding all affect durability. A balanced pitch, careful cleaning, complete drying, and cool ventilated storage help extend the fly’s useful life.
How can I store my rainfly properly?
Make sure it is completely clean and dry. For long-term storage, fold or roll it loosely and place it in a breathable container in a cool, dry, temperature-stable space. Do not leave it compressed in a damp stuff sack, sealed plastic bin, hot vehicle, or humid attic.
Conclusion
Keeping a rainfly away from the inner tent depends on correct setup rather than extra pole height. Use the tent’s designed pole set, square and stake the body, attach every fly connection, tension the vestibules and guylines evenly, and leave the vents open whenever conditions allow.
Check the pitch again after rain, wind, or cooling temperatures. If contact continues, look for a missing attachment, loose anchor, wet-fabric stretch, incorrect pole assembly, or gear pushing the inner wall outward. These corrections improve airflow, reduce condensation transfer, limit flapping, and help the shelter shed water as designed.
Sources
- Big Agnes: Tent Setup and Ventilation Tips — guyline use, fly separation, wet-fabric sag, and rainstorm retensioning.
- MSR: Tent Guying and Condensation Guidance — ventilation, guyline tension, condensation causes, and long-term storage.
- NEMO Equipment: Minimizing Tent Condensation — correct tension, vent use, site orientation, and wet-gear management.
- U.S. National Park Service: Finding and Setting Up a Campsite — drainage, terrain, overhead hazards, and tent-site safety.
- Big Agnes: Seasonal Tent Maintenance — waterproof coatings, seam tape, UV exposure, reproofing, and storage.
- Big Agnes: How to Wash a Tent — suitable cleaners, hand washing, drying, and products to avoid.

