
Last Updated on September 10, 2026 by Daniel Globe
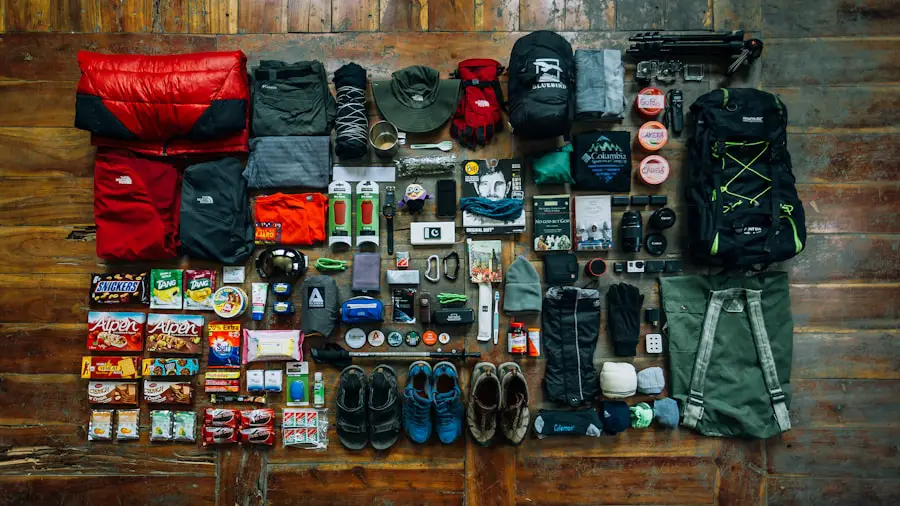
A single forgotten item can turn a simple hike into a cold, exhausting, or dangerous situation. The right hiking gear helps you navigate, manage changing weather, treat minor injuries, and stay safe if the trip lasts longer than planned. Use this checklist as a starting point, then adjust it for your route, season, group, and local regulations.
Quick Answer
Every hike should cover the Ten Essentials: navigation, sun protection, extra clothing, illumination, first aid, fire, repair tools, extra food, water and treatment supplies, and emergency shelter. Add supportive footwear, a suitable backpack, hygiene items, and satellite communication when the route extends beyond reliable cell coverage.
Key Takeaways
- Pack the complete Ten Essentials on every hike, even when you expect to return within a few hours.
- Choose clothing, footwear, water, food, and shelter for the actual terrain, forecast, elevation, and trip length.
- Carry both digital navigation and a backup you know how to use, such as a printed map and compass.
- Treat natural water correctly and never assume a clear stream is free from harmful germs.
- Leave a trip plan with a trusted person and carry satellite communication when help may be difficult to reach.
What’s in This Article
- Plan Your Hike Before Packing
- Complete Hiking Essentials Checklist
- Clothing and Footwear
- Navigation Tools
- Illumination, Fire, and Repair Gear
- Hydration and Nutrition
- Safety and First Aid
- Shelter and Protection
- Backpack and Carrying Gear
- Personal Care and Hygiene
- Emergency Communication Devices
- Day-Hike and Overnight Gear
- Weather, Wildlife, and Local Rules
- Optional Comfort Items
- Frequently Asked Questions
- Pack Smart, Hike Safe
Disclosure: As an Amazon Associate I earn from qualifying purchases. Some links on this page are affiliate links, at no extra cost to you.
Plan Your Hike Before Packing
Your gear list should begin with the trip rather than the products in your closet. Check the trail distance, elevation gain, surface, water availability, expected daylight, forecast, and current closures. Confirm whether the area requires a permit, reservation, bear-resistant food container, fire permit, or human-waste pack-out system.
Choose a route that matches the least experienced person in your group. Set a turnaround time before you begin, especially on summit hikes where reaching the top is only half the trip.
Create a trip plan with your route, trailhead, vehicle details, group members, expected return time, and emergency contacts. Leave it with a trusted person who is not joining the hike. The National Park Service Hike Smart guidance recommends leaving enough information for others to recognize when you are overdue and where responders should begin looking.
Warning: Do not rely on a social-media post or a message sent from the trail as your only trip plan. Cell coverage may disappear before the message sends. Give the full plan to someone before you leave.
Complete Hiking Essentials Checklist
The Ten Essentials are systems that help you respond to injury, changing weather, navigation errors, darkness, and unexpected delays. The exact products may change, but every category should be covered.
| Essential System | What to Carry | Why It Matters |
|---|---|---|
| Navigation | Printed map, compass, offline map or GPS, route notes | Helps you stay on route and recover from a wrong turn |
| Sun Protection | Sunscreen, sunglasses, hat, sun-protective clothing | Reduces sunburn and prolonged UV exposure |
| Extra Clothing | Insulating layer, rain shell, warm hat, gloves, spare socks as needed | Protects you when temperature or weather changes |
| Illumination | Headlamp or flashlight with spare batteries | Allows safe travel or first aid after dark |
| First Aid | Wound care, blister care, medications, emergency information | Supports early care until you can leave or receive help |
| Fire | Waterproof matches or lighter and approved fire starter | Can provide emergency warmth where fires are legal and safe |
| Repair Tools | Knife or multi-tool, tape, cord, repair patches | Helps repair packs, footwear, tents, poles, or clothing |
| Extra Food | No-cook, energy-dense food beyond the planned meals | Provides energy during delays or route changes |
| Water | Adequate water, extra carrying capacity, and treatment supplies | Prevents dehydration and supports emergency delays |
| Emergency Shelter | Bivy sack, space blanket, tarp, or suitable tent | Reduces exposure to wind, rain, snow, and cold |
The Ten Essentials are not a fixed shopping list. They are ten safety systems that should remain functional when your hike does not go as planned.
Clothing and Footwear
Your clothing choices directly affect how safely and comfortably you can respond to changing conditions. A practical layering system uses a base layer, an insulating layer, and an outer shell.
Base Layer
The base layer sits against your skin. Merino wool and synthetic fabrics move moisture away from your body and dry more quickly than absorbent everyday fabrics. This helps you manage temperature while climbing, resting, or moving through changing weather.
Insulating Layer
The insulating layer traps warm air. Fleece and insulated jackets are common choices. Carry enough insulation for the coldest conditions you could reasonably face, including the temperature after sunset if an injury or wrong turn delays your return.
Outer Shell
The outer shell blocks wind and precipitation. Waterproof-breathable shells can release some moisture vapor, but no shell eliminates sweat during hard activity. Open vents, slow your pace, and remove layers before your clothing becomes soaked.
Footwear
Choose footwear for fit, traction, terrain, pack weight, and weather. Hiking boots can offer protection and structure on rough trails or under heavier loads. Breathable trail shoes may feel cooler and dry faster on warm, maintained routes. Waterproof footwear is useful in wet or cold conditions but can feel hot and may dry slowly after water enters from the top.
Wear the shoes before the trip and test them with the socks you plan to use. Trim your toenails and address hot spots as soon as you feel rubbing rather than waiting for a blister to form.
Pro Tip: Pack a wide-brim hat, UV-blocking sunglasses, and broad-spectrum, water-resistant SPF 30 or higher sunscreen. Reapply sunscreen according to its label, especially after sweating.
Navigation Tools
Getting lost can turn into an emergency when weather, darkness, limited water, or an injury prevents you from correcting the mistake quickly. Prepare your route before leaving and carry more than one navigation method.
A topographic map shows elevation, terrain features, drainage, roads, and other landmarks. A compass helps orient the map, confirm direction, and take a bearing. Magnetic declination varies by location, so learn how to set or account for it before the hike. The USGS map-and-compass guide explains these skills in detail.
A smartphone or GPS device can add live positioning, route recording, and offline maps. Download the correct map before leaving cell coverage, confirm that it opens in airplane mode, and save important coordinates such as the trailhead, junctions, campsites, and emergency exits.
Note: A phone battery can drain quickly in cold weather, while recording a route, or when searching for a weak signal. Carry a charged power bank or spare device batteries and protect them from moisture.
Illumination, Fire, and Repair Gear
Headlamp or Flashlight
Carry a headlamp or flashlight even when you expect to finish before sunset. A headlamp keeps both hands free for navigation, first aid, climbing over obstacles, or setting up shelter. Pack spare batteries or confirm that the rechargeable battery has enough capacity for an unexpected night.
Fire-Starting Supplies
Waterproof matches, a reliable lighter, and compact tinder can help provide emergency warmth where fires are permitted. Keep them sealed from moisture and practice using them safely.
Warning: A fire starter is emergency equipment, not permission to build a fire. Follow all closures and fire restrictions. Use a stove or emergency shelter instead when open flames are prohibited or conditions are unsafe.
Knife and Repair Supplies
A small knife or multi-tool can help cut cord, prepare a repair, or manage food. Add a short length of strong tape, cord, safety pins, and repair patches that match your equipment. Overnight hikers may also need a tent-pole sleeve, stove tool, mattress patch, and replacement buckle or strap.
Hydration and Nutrition
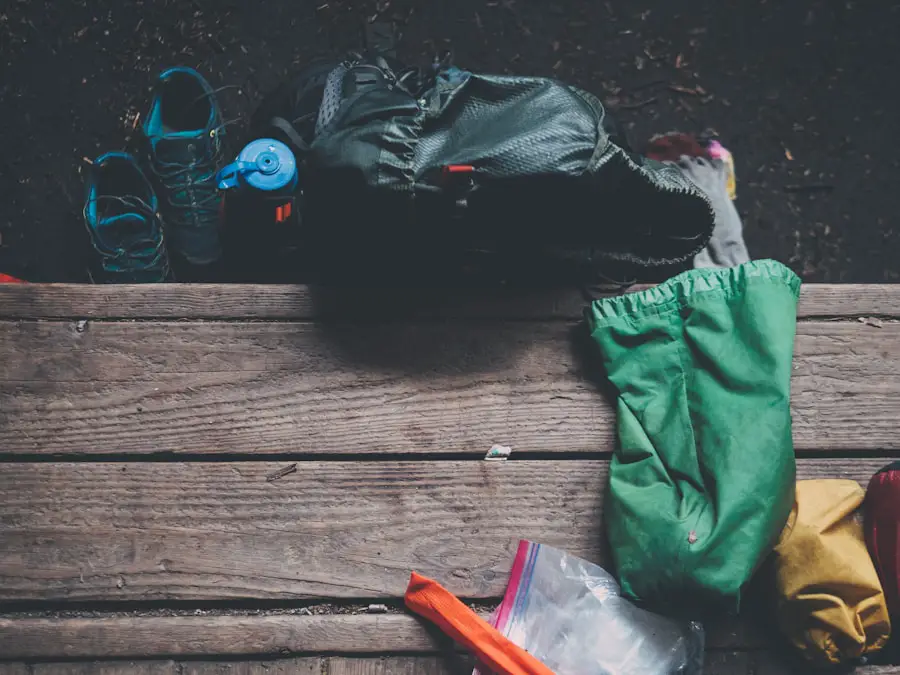
Water supports temperature control, circulation, physical performance, and clear thinking. A common planning starting point is about 0.5 liter per hour of moderate hiking, but this is not a fixed rule. Heat, humidity, elevation, pace, body size, sun exposure, and pack weight can raise your needs.
Calculate how long you expect to hike, identify reliable refill points, and carry an emergency reserve. Drink regularly rather than waiting until you feel severely thirsty. In hot conditions or on long, strenuous routes, include food or drinks that replace some of the salt lost through sweat.
Warning: Drinking excessive plain water without replacing electrolytes can also be dangerous. Do not force large amounts of water beyond your needs, and follow destination-specific heat guidance.
Treating Backcountry Water
Clear water can still contain parasites, bacteria, or viruses. The CDC recommends boiling as the most reliable way to kill germs. Bring clear water to a rolling boil for one minute, or three minutes above 6,500 feet.
When boiling is impractical, use a suitable filter and then disinfect the filtered water according to the product instructions. Check what the filter or disinfectant is designed to remove because not every product treats parasites, bacteria, and viruses equally.
Boiling, filtering, or disinfecting cannot make water safe when it contains harmful chemicals, fuel, toxins, mining runoff, or radioactive contamination. Use a different source when chemical contamination is possible.
Pro Tip: Carry a backup treatment method. A few correctly selected tablets add little weight and can help if a filter freezes, breaks, clogs, or is lost.
Food for Day and Multi-Day Hikes
Food fuels your pace, body heat, and decision-making. Lightweight options such as nuts, dried fruit, energy bars, tortillas, jerky, nut butter, and other compact foods provide energy without taking much space.
Carry more than the exact amount you expect to eat. An extra no-cook meal or a generous supply of snacks can help during a delay, navigation error, injury, or unexpected overnight stay.
For multi-day trips, freeze-dried meals are popular because they are lightweight and shelf-stable. Balance carbohydrates, protein, fats, and salty foods rather than relying only on sweet snacks. Confirm that you have enough fuel and water to prepare every meal.
Safety and First Aid
| First Aid Category | What to Pack or Know |
|---|---|
| Wound Care | Adhesive bandages, gauze pads, antiseptic wipes, medical tape, gloves |
| Pain and Illness | Appropriate pain relief, antihistamine if suitable for you, personal medications |
| Blister and Skin Care | Blister pads, moleskin or tape, tweezers, insect-bite treatment |
| Emergency Information | Medical conditions, allergies, emergency contacts, insurance information |
| Emergency Skills | CPR, bleeding control, wound care, heat illness recognition, hypothermia response |
A first aid kit belongs in every pack, regardless of hike length. Adjust its size and contents for the number of people, trip duration, remoteness, weather, and known medical needs. Check expiration dates and replace supplies after each use.
High-altitude routes require awareness of altitude illness. Hot routes require a plan for heat exhaustion and heat stroke. Cold or wet routes require enough insulation and shelter to prevent hypothermia. Insect-heavy areas may call for repellent, a tick-removal tool, and suitable medication.
Warning: Owning a first aid kit is not the same as knowing how to use it. Complete certified first aid and CPR training. A Wilderness First Aid course is especially valuable when professional help may be hours away.
Before a group hike, discuss emergency roles, turnaround rules, exit points, and what to do if someone becomes separated. Do not split the group casually when one person is injured, fatigued, or unsure of the route.
Shelter and Protection
Weather can change quickly, and an injury can force you to stop moving. For a day hike, carry a compact emergency bivy sack, space blanket, or tarp that can reduce wind and rain exposure. This equipment should be accessible without emptying your entire pack.
Longer trips require a shelter appropriate for the expected season. Three-season tents suit many spring, summer, and fall conditions. Four-season tents use stronger structures and fabrics for snow loading and severe winter weather. A tarp can be a lighter option when you have the skills and suitable terrain to pitch it securely.
Choose campsites carefully. Avoid depressions that may collect water, exposed ridges during severe weather, unstable slopes, drainage channels, and dead branches or trees that could fall. Use established campsites where required and avoid altering vegetation to create a new site.
A sleeping pad is not only for comfort. It limits heat loss into the ground. Match the pad and sleeping bag to the coldest realistic overnight conditions rather than the average daytime temperature.
Backpack and Carrying Gear
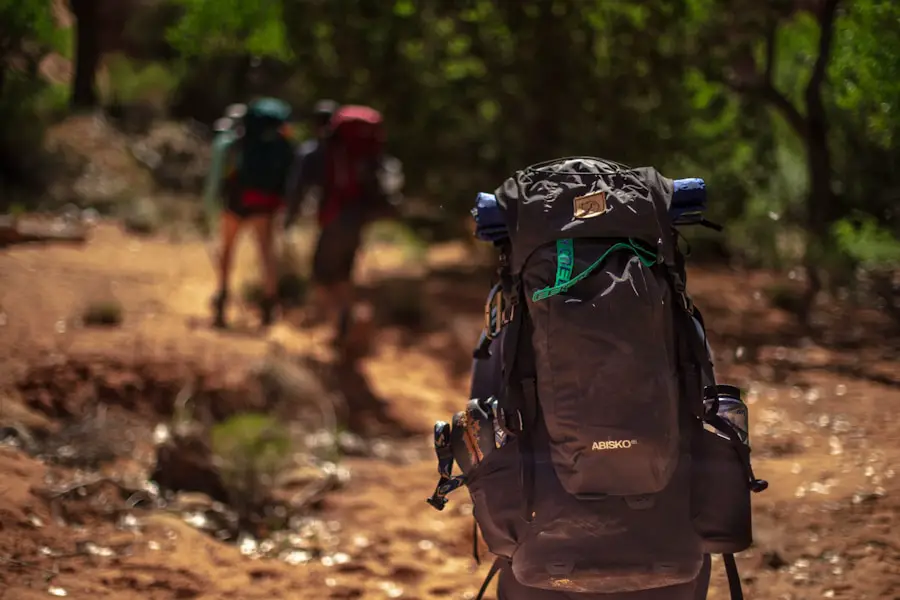
Your backpack affects balance, comfort, and access to emergency gear. A daypack may be enough for a short route, while many multi-day trips require a pack in the approximate 40-to-70-liter range. The correct size depends on season, shelter volume, food load, water needs, and how compactly your equipment packs.
Prioritize fit over capacity alone. A properly fitted hip belt should transfer much of the load to your hips, while the shoulder straps stabilize the pack without creating painful pressure points.
Pack dense or heavy items close to your back and around the middle-to-upper part of the pack. Keep the load balanced from side to side. Store water, food, navigation, rain protection, first aid, insulation, and emergency communication where you can reach them quickly.
Trekking poles can improve balance on loose, steep, snowy, or rocky ground and may reduce stress during descents. Adjust them correctly and shorten or lengthen them when the slope changes.
Compression sacks and dry bags can organize sleeping gear and clothing, but excessive compression may make the pack rigid or create awkward lumps. Keep critical insulation and electronics protected from water even when the backpack includes a rain cover.
Pro Tip: Load the complete pack at home and walk with it before the trip. Check for rubbing, shifting weight, difficult-to-reach gear, loose straps, and items that rattle or leak.
Personal Care and Hygiene on the Trail
Good hygiene reduces illness and protects the surrounding environment. Carry a toothbrush, toothpaste, hand sanitizer, toilet paper, waste bags, and a small amount of biodegradable soap when appropriate.
Do not wash yourself, clothing, or dishes directly in a lake, spring, or stream. The Leave No Trace waste guidelines recommend carrying water at least 200 feet away, using only a small amount of biodegradable soap, straining food scraps, and scattering the wastewater.
Carry out every piece of trash, including food scraps, wipes, hygiene products, and packaging. Wipes marketed as biodegradable still need to be packed out.
Where local rules allow burial of human waste, dig a cat hole 6 to 8 inches deep and at least 200 feet from water, trails, and campsites. Cover and disguise the hole afterward. Some canyons, alpine zones, deserts, high-use areas, and protected lands require all human waste to be packed out, so check the destination rules first.
Note: Menstrual products, diapers, wipes, and other hygiene items should be sealed and packed out. Do not bury or burn them.
Emergency Communication Devices for Remote Areas
A cell phone is useful, but it may lose service in valleys, forests, mountains, deserts, or other remote terrain. Download emergency information before leaving coverage and conserve the battery. For remote trips, consider a satellite-based device that matches the type of communication you need.
| Device | Main Use | Important Limits |
|---|---|---|
| Smartphone | Calls, texts, offline maps, photos, local emergency numbers | Cell service may be absent; battery and moisture remain concerns |
| Satellite Messenger | Two-way text messaging, tracking, check-ins, and SOS on supported services | Usually needs an active plan, charged battery, and usable view of the sky |
| Satellite Phone | Voice calls through a compatible satellite network | Service, sky visibility, terrain, subscription, and network coverage affect use |
| Personal Locator Beacon | Dedicated distress alert through the 406 MHz Cospas-Sarsat system | Normally one-way; no routine messaging; manual activation; emergency use only |
A personal locator beacon transmits a 406 MHz distress signal through the international Cospas-Sarsat system. Models with GPS or another GNSS receiver may include a more precise position when they obtain a location. Other beacons can still be located through the satellite system, but the initial search area may be wider.
If you carry a U.S.-coded beacon, register it with NOAA and keep the information current. Registration helps search-and-rescue authorities identify the owner, contact emergency details, and respond more efficiently. Review the current NOAA 406 MHz beacon guidance before relying on the device.
Warning: Do not perform a live distress activation to practice. Read the manual and use only the manufacturer’s approved self-test procedure. False alerts can divert emergency resources and put responders at risk.
Charge communication devices before leaving, protect them from water and impact, and carry them on your body or within reach rather than burying them at the bottom of the pack. Practice opening the antenna, finding the SOS control, and moving to an area with a clearer view of the sky.
Day-Hike and Overnight Gear
Every trip needs the core emergency systems. Overnight hiking adds sleep, cooking, food-storage, and camp equipment.
| Category | Day Hike | Overnight Trip |
|---|---|---|
| Shelter | Emergency bivy, blanket, or compact tarp | Tent, tarp, or approved shelter plus emergency backup |
| Sleep System | Usually emergency insulation only | Sleeping bag or quilt and insulated sleeping pad |
| Food | Planned snacks or meal plus emergency food | All meals, extra food, cooking supplies, and sufficient fuel |
| Food Storage | Secure food and pack out all scraps | Bear canister, locker, approved bag, or other locally required system |
| Clothing | Weather layers and emergency insulation | Additional insulation, sleep clothing, and spare socks as conditions require |
| Repair Kit | Tape, cord, knife or multi-tool | Tent, pad, stove, pack, and footwear repair items |
Weather, Wildlife, and Local Rules
Check the latest destination forecast and trail conditions before leaving. Mountain weather can differ sharply from nearby towns, and summer heat can become dangerous on exposed terrain. Know when thunderstorms, floods, snow, high winds, extreme heat, or wildfire smoke should change or cancel the trip.
Research the wildlife in the area and follow local instructions. Do not feed or approach animals. Keep food, trash, toiletries, sunscreen, and other scented items secured as required. Some destinations require certified bear-resistant containers, while others provide lockers or specify another storage method.
Fire rules, camping zones, group-size limits, dog restrictions, water access, and waste rules can change by season or location. Guidance in a general checklist never overrides posted signs, permit conditions, ranger instructions, or emergency closures.
Note: Save the land manager’s phone number, emergency instructions, permit, and map offline. A webpage you opened at home may not load at the trailhead.
Optional Comfort Items
Once the safety essentials are packed, a few optional items can make the trip more comfortable. A scarf with a hidden pocket can hold small items such as a key or folded cash. Traveler pants may add useful pockets and freedom of movement. In cold conditions, a rechargeable hand warmer can improve comfort during rest stops.
These items are additions rather than replacements. Pack navigation, water, first aid, insulation, lighting, shelter, and emergency communication before using space or battery capacity for comfort gear.
Love travel? Join Our Facebook Community For More Tips.
Frequently Asked Questions
What are the Ten Essentials for hiking?
The Ten Essentials are navigation, sun protection, extra clothing, illumination, first aid, fire-starting supplies, a knife or repair tools, extra food, water and treatment supplies, and emergency shelter. Adapt the equipment within each category to your route and conditions.
How much water should you bring on a day hike?
A common starting estimate is about 0.5 liter per hour of moderate hiking. Increase or decrease that amount for heat, humidity, elevation, exertion, body size, and reliable refill points. Carry an emergency reserve and more water when the destination gives stricter guidance.
What food works best for hiking?
Pack compact food that is easy to eat and provides a mix of carbohydrates, fats, protein, and salt. Nuts, dried fruit, tortillas, nut butter, jerky, and energy bars are practical choices. Carry more than the exact amount required by your planned schedule.
Do you need waterproof boots for hiking?
Not for every trail. Waterproof footwear can help in wet, muddy, snowy, or cold conditions. Breathable trail shoes may be more comfortable in warm, dry weather and often dry faster. Fit, traction, terrain, and pack weight matter more than choosing one style for every hike.
What should a hiking first aid kit include?
At minimum, carry gloves, adhesive bandages, gauze, medical tape, antiseptic wipes, blister treatment, tweezers, suitable pain relief, and personal medications. Expand the kit for the group size, trip duration, weather, wildlife, altitude, and distance from emergency care.
When do you need a personal locator beacon?
A PLB is valuable on remote routes where cell service is unreliable and a serious injury could prevent self-rescue. It is a dedicated last-resort distress device rather than a routine messaging tool. Register a U.S.-coded beacon with NOAA and learn the approved test procedure before the trip.
Is a phone enough for hiking navigation and emergencies?
A phone is useful but should not be your only plan in remote terrain. Download offline maps, carry backup power, and bring a printed map and compass that you know how to use. Add a satellite messenger, satellite phone, or PLB when the route extends beyond reliable cell coverage.
Safety Disclaimer: This article provides general information and does not replace professional wilderness safety, medical, navigation, or first aid training. Follow current local regulations and consult qualified professionals before remote, technical, high-altitude, or high-risk trips.
Pack Smart, Hike Safe
The right gear cannot guarantee a problem-free hike, but it gives you more ways to manage a wrong turn, injury, sudden storm, equipment failure, or unexpected night outside. Cover every Ten Essentials category first, then add footwear, backpack, hygiene, communication, and overnight equipment that match the trip.
Before leaving the trailhead, confirm that your route is open, your map works offline, your water and treatment supplies are accessible, your headlamp turns on, your first aid kit is complete, and someone has your trip plan. Preparation lets you spend less time worrying about forgotten gear and more time enjoying the trail.
Sources
- National Park Service: Ten Essentials – Core emergency equipment systems for outdoor trips
- National Park Service: Hike Smart – Route planning, ability assessment, and trip-plan guidance
- U.S. Geological Survey: Using a Compass With a Topographic Map – Map orientation, bearings, and magnetic declination
- Centers for Disease Control and Prevention: Backcountry Water Treatment – Boiling, filtration, disinfection, and treatment limitations
- Leave No Trace: Dispose of Waste Properly – Cat holes, soap, wastewater, toilet paper, and pack-out practices
- NOAA SARSAT: 406 MHz Emergency Distress Beacons – PLB operation, registration, testing, and search-and-rescue alerts
