
Last Updated on July 28, 2026 by Mason Reed
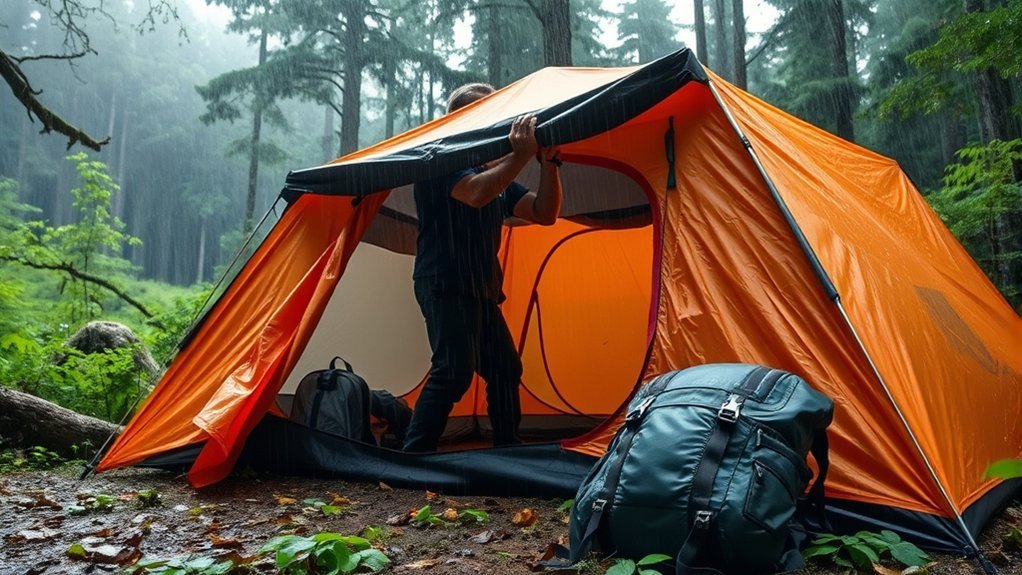
Setting up a tent in the rain does not have to mean a soggy night. Staying dry starts with choosing ground that will not collect runoff, keeping your footprint inside the tent floor, pitching the rainfly correctly, and protecting dry gear while you work. Just as important, know when rain has become a lightning or flash-flood hazard that calls for shelter or relocation instead of a better tarp.
Quick Answer
To keep a tent dry in rain, choose level ground outside drainage paths, keep the footprint fully under the tent floor, tension the rainfly and guylines, ventilate the shelter, and keep wet gear outside the sleeping area. Do not dig trenches or build runoff structures; relocate if water begins flowing through the site.
Key Takeaways
- Choose an established or durable site away from low spots, dry washes, drainage channels, and visible flood paths.
- Keep every edge of a ground tarp or footprint under the tent floor so it cannot catch rain and funnel it underneath.
- Use the full rainfly, stakes, and guylines your tent requires, and re-tension them if wet fabric or soft soil causes sagging.
- Do not dig a trench or build a stick-and-rock “rain dam” as routine water control. Current Leave No Trace guidance favors finding a campsite that does not need modification.
- Ventilation matters because condensation inside a tent can look and feel like a leak.
- A tent protects you from rain, but it is not safe lightning shelter. Move to a substantial building or enclosed hard-topped vehicle when thunder threatens.
Disclosure: As an Amazon Associate I earn from qualifying purchases. Some links on this page are affiliate links, at no extra cost to you.
Importance of Preparation for Rainy Conditions
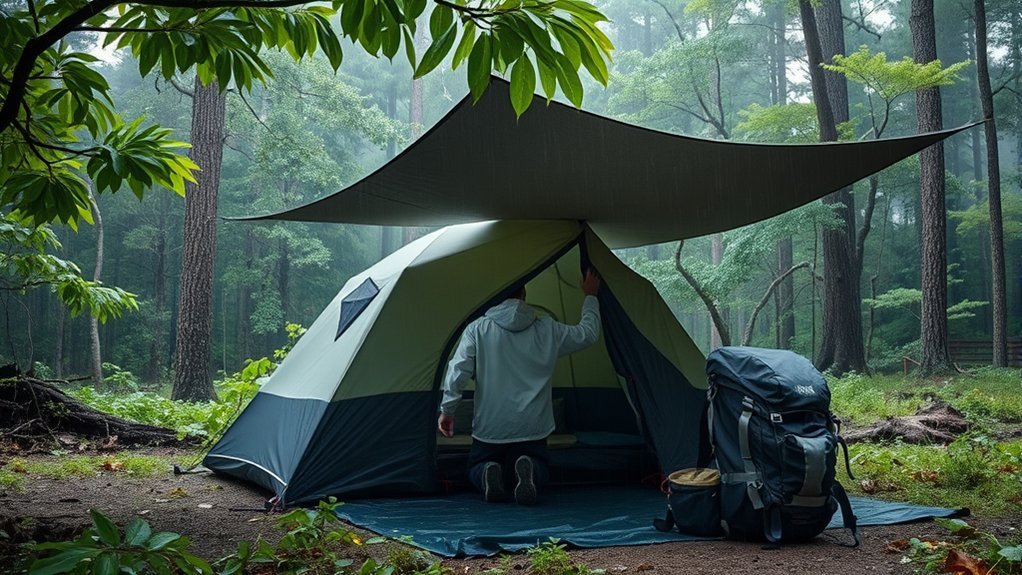
When you’re heading out into the wild, preparing for rain can mean the difference between an uncomfortable night and a manageable one. Rainy-weather camping starts before the tent comes out of its bag: check the forecast, understand the terrain, inspect your shelter, and know where you would go if the weather becomes dangerous.
At home, pitch the tent once before the trip. Check that the poles, stakes, guylines, rainfly, footprint, zippers, and attachment points are present and usable. If your tent has model-specific instructions for seam maintenance, waterproof coatings, or a fly-first or fast-fly setup, follow the manufacturer’s procedure rather than improvising in the field.
Note: Current Leave No Trace rainy-camping guidance says good campsites are found, not made and advises campers to avoid digging trenches or building structures at the campsite.
Before You Pitch: Check Weather and Escape Routes
Rain is not the only hazard that comes with a storm. Before settling into a site, check whether thunderstorms, flash flooding, high winds, or rapidly rising water are possible. In backcountry areas, also identify how you would reach higher ground or safer shelter if conditions change overnight.
- Avoid washes and drainage channels. A dry streambed can carry fast-moving water during a storm, including rain that falls upstream from your campsite.
- Stay out of obvious low points. Depressions that look comfortable when dry can become collection basins during prolonged rain.
- Look overhead. The National Park Service advises campers to watch for dead trees and branches as well as lightning, wind, and flash-flood hazards.
- Know your lightning shelter. According to the National Weather Service, a tent is not safe shelter from lightning. Use a substantial building or an enclosed hard-topped vehicle when one is available.
Warning: Do not stay in a tent simply because it is waterproof when thunder is nearby. If you hear thunder, seek proper lightning shelter. If runoff or water levels begin rising around camp, move to higher ground rather than trying to divert the water around your tent.
A dry tent is weather protection, not lightning or flash-flood protection. Choose a safe site before worrying about how to keep the floor dry.
Choosing the Right Location for Your Tent
Site selection matters more than any extra tarp. In a developed campground, use the designated tent pad or established campsite. In the backcountry, follow local regulations and Leave No Trace durable-surface guidance. Look for ground that is already durable, reasonably level, and not shaped like a bowl.
| Consideration | What to Look For |
|---|---|
| Tent orientation | Point the main door away from wind-driven rain when practical, while keeping entrances and guylines clear of traffic. |
| Overhead hazards | Do not camp beneath dead, damaged, or hanging branches. Wind and saturated soil can increase tree hazards. |
| Ground drainage | Avoid puddles, depressions, low spots, and compacted channels where runoff will collect. |
| Water-flow signs | Treat dry washes, debris lines, scoured soil, and matted vegetation as warnings that water may move through the area. |
| Impact | Prefer established or durable surfaces instead of clearing vegetation, moving rocks, or reshaping the campsite. |
Tarp Placement: Ground and Overhead
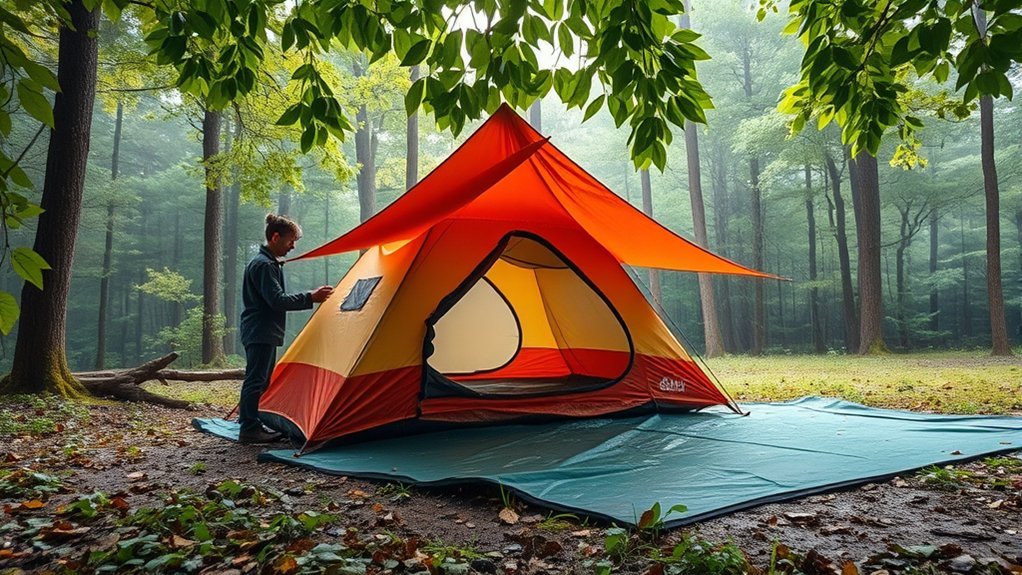
A footprint or ground tarp protects the tent floor from abrasion and adds another barrier between the floor and wet ground. The critical detail is size: every edge must stay beneath the tent floor. A tarp that sticks out can catch rain running off the shelter and direct that water underneath.
Tent-specific footprints are often intentionally smaller for exactly this reason. For example, Big Agnes explains that its footprints are made smaller than the tent body so they do not catch rain and redirect it under the floor. If you use a generic tarp, fold the excess completely underneath.
Next, install the tent’s rainfly exactly as designed. If you are adding a separate overhead tarp, pitch it with a clear slope or ridgeline so water has an obvious path off the fabric. Keep runoff from that tarp away from the tent door, sleeping area, and any low ground beside the tent.
How to Set Up a Tent in the Rain: Step by Step
- Choose the site before unpacking. Spend a minute looking at slope, drainage, overhead hazards, wind direction, and flood exposure.
- Create overhead protection first when practical. If you carry a separate tarp and can rig it safely without damaging vegetation, use it to create a dry working area. In developed sites, use permitted anchor points and campsite rules.
- Keep sleeping gear packed. Leave sleeping bags, quilts, clothing, and electronics inside waterproof bags or the vehicle until the shelter is covered.
- Position the footprint. Use the fitted footprint or fold a generic groundsheet so no edge extends beyond the tent floor.
- Use a fly-first setup only if your tent supports it. Some tents let you erect the poles, footprint, and rainfly before exposing the inner tent. Follow the manufacturer’s instructions rather than forcing this method on a tent that was not designed for it.
- Stake and tension the shelter. Secure the corners, attach the rainfly correctly, and use the required guylines so the fly does not sag against the inner tent or form pockets that hold water.
- Open the designed vents. Keep rain-protected vents open whenever conditions allow. Ventilation helps reduce condensation from occupants and wet equipment.
- Bring dry gear inside last. Keep boots, rain jackets, and other dripping items in the vestibule or another protected wet zone rather than against sleeping bags or tent walls.
Pro Tip: Pack the rainfly, footprint, stakes, and a few essential guylines where you can reach them without unloading your whole pack or vehicle. In steady rain, the less dry gear you expose during setup, the easier the job becomes.
Securing Your Tarp Against Wind and Water
Whether you are tensioning the tent’s rainfly or a separate tarp, the goal is controlled runoff and stable fabric. Anchor the shelter at its intended points and create enough slope that water drains instead of collecting in a sag.
Wet soil can reduce stake holding power, and some nylon shelter fabrics can relax or stretch when saturated. Recheck the setup after the fabric has been wet for a while. Big Agnes recommends re-tensioning a wet fly and using the guylines to reduce sag, pooling, and contact between the rainfly and tent body.
Tarp Installation Techniques
Choose a tarp material and pitch that suit the trip rather than assuming one shape is always best. Rectangular and square tarps allow many configurations, while shaped or catenary-cut tarps are usually designed around particular pitches and attachment points.
| Material | Practical Consideration |
|---|---|
| Ripstop nylon | Light and packable; some nylon fabrics can sag as they become wet, so tension may need adjustment. |
| Polyester | Common in camping shelters and typically changes tension less with moisture than many nylon fabrics. |
| Canvas or heavy fabric | Durable but bulky and heavy; more practical for vehicle-based camping than lightweight backpacking. |
Whatever material you use, do not create a flat roof that can hold a deep pool of rainwater. Follow the tarp maker’s attachment guidance, use intact grommets or reinforced tie-outs, and direct runoff away from the tent entrance.
Wind Resistance Strategies
Wind can loosen stakes, flap fabric, and push a rainfly into the inner tent. Use the shelter’s designated guy points, keep each line tensioned without overloading the fabric, and check anchors when the ground becomes soft. A lower, cleaner tarp profile generally exposes less loose fabric to wind than a high, floppy pitch.
Avoid placing heavy rocks directly on lightweight tarp fabric or moving natural materials around sensitive backcountry campsites just to improvise anchors. Use suitable stakes, deadman anchors only where appropriate and permitted, or manufacturer-approved alternatives for the surface you are camping on.
Water Diversion: Why Trenching and Rain Dams Are Poor Defaults

Digging a trench around a tent is an old camping technique, but it disturbs soil and vegetation and does not match current low-impact camping practice. Some public lands explicitly prohibit tent trenching, and current Leave No Trace guidance for camping in rain says to avoid both trenches and campsite structures.
Warning: Do not start digging because water is approaching the tent. If runoff is flowing through your campsite, the safer and lower-impact response is usually to move the shelter to higher, better-drained ground and follow the rules for that specific campground, park, or backcountry area.
The so-called “rain dam” made from sticks or stones is also an older technique. A 2001 Backpacker article described lining up natural materials to divert runoff, but current Leave No Trace rainy-camping advice now tells campers to avoid building structures at the campsite. Treat the rain dam as historical advice, not the preferred modern solution.
If you’re in a backcountry area and water begins entering the site, do not rely on a trench to rescue a poor location. Protect your dry gear, identify a safer durable surface, and move before conditions worsen. In flash-flood terrain, move toward higher ground and follow warnings or evacuation instructions immediately.
Pro Tip: A bathtub-style tent floor, a correctly fitted footprint, and a well-chosen site work together. The raised waterproof floor helps with splashing and shallow surface moisture, but no tent-floor design makes a flood-prone campsite safe.
Tools Needed for a Rain-Ready Tent Setup
At a Glance
| Time Required | About 10–30 minutes, depending on the tent, weather, and whether an overhead tarp is used |
| Difficulty | Beginner to intermediate; easier after one practice setup at home |
| Tools Needed | Tent, full rainfly, correctly sized footprint or groundsheet, stakes, guylines, rain gear, and waterproof bags; overhead tarp optional |
| Cost | No added cost if your existing tent kit already includes the needed rainfly, stakes, guylines, and ground protection; optional gear varies by model and size |
Essential Camping Tools
For rainy conditions, prioritize the pieces that protect and stabilize the shelter: the correct rainfly, enough stakes for the tent and vestibules, required guylines, and a footprint or properly folded groundsheet. A small pack towel is also useful for wiping moisture that gets inside during setup, while waterproof stuff sacks or dry bags keep sleeping gear isolated from wet equipment.
A shovel is not part of the normal rainproofing kit because reshaping the campsite should not be the plan. Pack digging tools only for legitimate trip needs and use them according to local regulations, not to trench around the tent.
Tool Durability Considerations
Check gear before every trip. Replace badly bent stakes, frayed guylines, cracked tensioners, damaged grommets, and broken buckles before they become storm-night problems. Inspect the tent floor and rainfly for damaged coatings, punctures, or seam problems and follow the tent manufacturer’s care instructions for repairs or seam treatment.
Common Mistakes to Avoid When Camping in the Rain
Even experienced campers can turn a manageable storm into a wet night with a few avoidable mistakes:
- Choosing a low campsite because it looks flat. Flat ground is useful only when it is also outside the site’s drainage path.
- Letting the footprint stick out. Exposed groundsheet edges can catch runoff and direct it beneath the tent.
- Skipping rainfly attachment points or guylines. A loose fly can sag, flap, pool water, or touch the inner tent.
- Closing every vent. A sealed tent can collect enough condensation to make the interior feel as though the shelter is leaking.
- Bringing soaked gear into the sleeping area. Keep dripping jackets, boots, and packs in a vestibule or protected wet zone whenever possible.
- Trying to fix drainage by digging. Move to a better site rather than carving a trench around the shelter.
- Ignoring thunder or rising water. Waterproof fabric does not protect you from lightning or flash flooding.
- Learning the tent for the first time in a storm. A practice pitch exposes missing parts and confusing steps before bad weather arrives.
Maintaining a Dry Interior: Tips and Tricks
Once the shelter is pitched, separate wet items from dry ones. Keep rain jackets, boots, and dripping packs in the vestibule when the tent design allows it. Store sleeping bags and spare clothing in waterproof sacks until you are ready to use them, and avoid pressing bedding or gear against the tent walls.
Keep the rainfly tensioned so it remains separated from the inner tent, but do not close every vent in an attempt to block rain. Occupants add moisture to the air through breathing, and wet clothing adds even more. Protected roof vents, mesh panels, or partially opened rain-safe vents allow some of that moisture to escape.
Is It a Leak or Condensation?
A wet tent does not always mean the waterproof fabric failed. Before assuming you have a leak, look at where the water appears and what the weather was doing.
| What You Notice | Likely Cause | What to Do |
|---|---|---|
| Fine droplets across much of the inner surface | Condensation | Increase protected ventilation, keep wet gear out, and maintain separation between the fly and inner tent. |
| Water repeatedly appears along one seam or damaged spot | Possible seam, coating, or fabric leak | Control the water during the trip, then dry the tent and repair it according to the manufacturer’s instructions. |
| Water trapped between the footprint and floor | Exposed footprint edge or poor drainage | Tuck the footprint fully underneath. If runoff is entering the site, relocate the tent. |
| Water entering at the doorway | Wind-driven rain, poor vestibule pitch, or runoff from an overhead tarp | Adjust the fly or tarp so runoff lands away from the entrance and keep the door closed toward the weather. |
| The entire floor area is surrounded by rising or flowing water | Unsafe or poorly drained site | Protect essential gear and move to safer, higher ground. Do not dig a trench around the tent. |
Practicing Your Camping Skills for Future Trips
Practice tent and tarp setup at home before you are standing in an actual downpour. Pitch the complete shelter, including the rainfly, vestibules, footprint, stakes, and guylines. Learn which parts can stay attached when packed and whether your model supports a fly-first setup.
Practice packing it down, too. In wet weather, keep the soaked fly or tent body separate from sleeping gear when possible. Once home, unpack the shelter promptly and dry it completely before long-term storage.
Frequently Asked Questions
What gear should I bring for camping in the rain?
Bring the tent’s full rainfly, a correctly fitted footprint or groundsheet, enough stakes and guylines for the complete pitch, rain clothing, and waterproof bags for sleeping gear and spare clothes. A separate overhead tarp, pack towel, and spare cord can also be useful when the campsite permits them.
How do I dry my tent after use?
Shake off loose water and dirt, then pitch or hang the tent in a well-ventilated place until the fly, body, floor, guylines, and storage sack are fully dry. Follow the manufacturer’s care instructions and avoid long-term storage while the shelter is damp.
Can I set up my tent in a heavy downpour?
Yes, if the hazard is rain rather than lightning or flooding. Keep dry gear packed, use overhead protection when practical, and use a fly-first setup only if your tent is designed for it. If thunder is present, seek proper lightning shelter instead of remaining in the tent.
Are there specific tent designs better for rain?
Useful wet-weather features include a full-coverage rainfly, protected vents, a bathtub-style floor, well-designed vestibules, reliable guy points, and properly sealed or factory-taped seams. Construction quality and correct pitching matter as much as any single feature.
How can I keep my gear dry inside the tent?
Keep sleeping bags, spare clothes, and electronics in waterproof bags until the shelter is covered. Put boots, wet jackets, and dripping packs in a vestibule or protected wet zone instead of the sleeping area, and keep dry gear away from tent walls where condensation can collect.
Should a tarp go under or over a tent?
They serve different purposes. A footprint or groundsheet goes under the tent and must stay completely inside the floor perimeter. A separate overhead tarp can create a dry work area or extra rain protection, but it should be pitched with enough slope to drain away from the tent and entrance.
What should I do if water starts pooling under my tent?
First make sure the footprint is not sticking out past the tent floor. If the site itself is collecting or carrying runoff, protect your dry gear and move the tent to higher, better-drained ground. Do not solve a bad site by digging a drainage trench.
How can I tell condensation from a tent leak?
Condensation often appears as widespread droplets on cool inner surfaces, especially with closed vents or wet gear inside. A leak is more likely when water repeatedly enters at the same seam, puncture, zipper area, or damaged coating. Ventilate first, then inspect the specific wet area once the tent is dry.
Conclusion
A dry night in the rain comes down to preparation more than campsite modification. Choose a safe, well-drained site, keep the footprint inside the tent floor, pitch and tension the rainfly correctly, ventilate the shelter, and keep wet gear away from your sleeping system. Skip trenches and improvised rain dams; if water is flowing through camp, move. And when rain comes with thunder or rising water, treat the weather hazard as the priority rather than the tent.
Sources
- Leave No Trace: Plan Ahead and Prepare — Camping in the Rain — supports avoiding flooded sites, trenches, and constructed campsite structures.
- Leave No Trace: Travel & Camp on Durable Surfaces — supports using durable or established campsites and minimizing site alteration.
- National Park Service: Finding and Setting Up a Campsite — supports avoiding low ground and checking for lightning, flooding, wind, and overhead tree hazards.
- National Weather Service: Lightning Safety — supports leaving a tent for substantial shelter or an enclosed hard-topped vehicle when thunderstorms threaten.
- National Weather Service: Flash-Flood Safety — supports avoiding camping along streams and washes and moving to higher ground when flooding threatens.
- Big Agnes: Tent Care and Rain Tips — supports guyline tension, preventing rainfly sag and pooling, and ventilating to reduce condensation.
