
Last Updated on July 23, 2026 by Caleb Warren
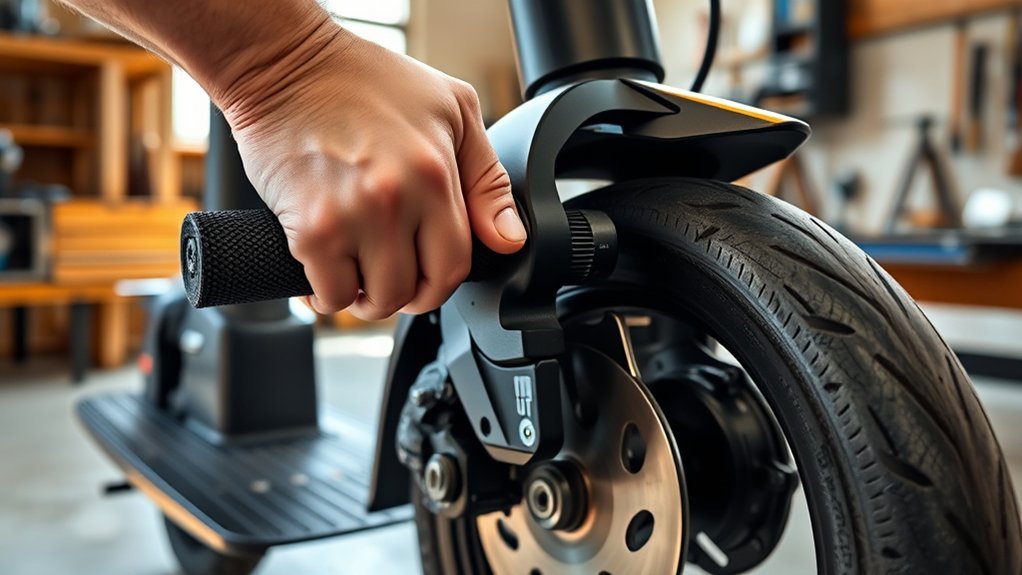
Adjusting an electric scooter brake can fix excess lever travel, weak cable response, or a disc that rubs as the wheel turns. This guide focuses on cable-operated mechanical disc brakes. Scooter designs vary, so check your model’s manual before loosening bolts, changing pad clearance, or retensioning the cable.
Quick Answer
To adjust a mechanical electric scooter disc brake, confirm the wheel and rotor are straight, remove cable slack, align the caliper, set both pads close to the rotor without touching it, and tighten all fasteners to the manufacturer’s specification. Finish with a wheel-spin check and a controlled low-speed brake test.
Key Takeaways
- Confirm that your scooter has a cable-operated mechanical disc brake before following the cable-adjustment steps.
- Tool sizes, pad clearances, and bolt torque values vary by scooter and caliper model.
- Cable slack causes excess lever travel; constant rubbing usually points to pad clearance, caliper alignment, rotor runout, or a sticking cable or caliper arm.
- The brake pads should sit close to the rotor but must not remain pressed against it while the wheel turns.
- Do not ride if the cable is frayed, the rotor is cracked or badly bent, the lever touches the grip, or braking remains weak after adjustment.
At a Glance
| Time Required | About 20 to 40 minutes, depending on the brake design and the fault |
| Difficulty | Beginner to intermediate for a cable-operated mechanical disc brake |
| Tools Needed | Model-specific hex keys or wrenches, torque wrench if available, flashlight, clean lint-free cloth, and isopropyl alcohol for the rotor |
| Cost | No added cost if you already own the correct tools; replacement pads, cables, or rotors cost extra |
Warning: Brakes are a safety-critical system. Power the scooter off, let the rotor and caliper cool, keep fingers away from a spinning rotor, and do not ride if the cable is damaged, the rotor is cracked or badly deformed, a hydraulic brake leaks, the wheel or caliper is loose, or the brake cannot stop the scooter firmly.
Disclosure: As an Amazon Associate I earn from qualifying purchases. Some links on this page are affiliate links, at no extra cost to you.
What Tools Do You Need to Adjust Scooter Brakes?
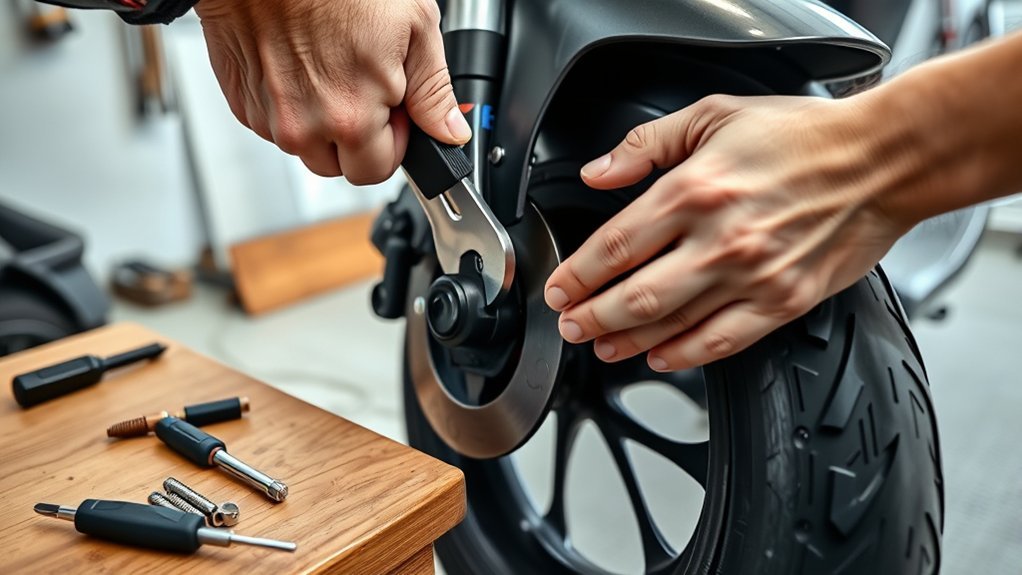
The correct tools depend on your scooter and caliper. Some models use an 8 mm open-ended wrench with 2 mm, 4 mm, and 5 mm Allen wrenches, but those sizes are not universal. Check the owner’s manual or inspect each fastener before applying force.
- Correct hex keys or Torx bits: For the caliper bolts, pad adjuster, cable anchor, or small retaining screws.
- Open-ended wrench: Some cable anchors or locknuts use a standard nut instead of a hex bolt.
- Torque wrench: Helps tighten caliper and cable-anchor bolts to the scooter manufacturer’s specification.
- Flashlight and white card: Makes the gap between each pad and the rotor easier to see.
- Isopropyl alcohol and a clean lint-free cloth: For cleaning the rotor without leaving an oily film.
- Stable scooter stand: Keeps the wheel off the ground so it can turn freely.
Pro Tip: Test-fit the tool fully in each bolt before turning it. A loose or incorrect hex key can round the fastener and make a simple brake adjustment much harder.
Identify Your Electric Scooter Brake Type Before Adjusting It
The cable and caliper steps in this guide apply to a mechanical disc brake. Do not use them on every brake system.
| Brake Type | How to Recognize It | Typical Adjustment |
|---|---|---|
| Mechanical disc | A visible steel cable pulls an arm on a disc-brake caliper. | Cable tension, caliper position, and pad clearance can usually be adjusted. |
| Hydraulic disc | A sealed hose enters the caliper and there is no cable-pull arm. | Caliper alignment and pad replacement are possible, but a soft lever may require bleeding by a qualified technician. |
| Drum brake | The braking parts sit inside the wheel hub or a closed drum. | Cable free play may be adjustable, but there is no exposed rotor to center. |
| Electronic or regenerative brake | Braking is controlled through the motor, controller, dashboard, or app. | Use only manufacturer-approved settings and diagnostic procedures. |
Note: Many scooters combine two systems, such as a mechanical disc brake and an electronic motor brake. Adjusting the mechanical brake does not repair a fault in the electronic braking system.
Safety Checks Before You Start
Complete these checks before changing the cable or caliper position:
- Turn off and unplug the scooter. Do not work near a powered drive wheel or active throttle.
- Let the brake cool. The rotor and caliper can become hot after riding.
- Support the scooter securely. Raise the affected wheel so it can turn without the scooter falling.
- Confirm the wheel is fully seated. Check the axle, axle nuts, quick-release parts, and wheel bearings for looseness.
- Inspect the cable and housing. Replace a cable that is frayed, rusty, kinked, cracked, or slow to return.
- Inspect the rotor. Stop using the brake if the rotor is cracked, badly deformed, deeply scored, loose, or below the manufacturer’s minimum thickness.
- Inspect the pads. Replace pads that are below the manufacturer’s wear limit, contaminated, cracked, loose, or worn at a strong angle.
- Clean the rotor if needed. Use isopropyl alcohol and a clean cloth. Keep oil, grease, chain lubricant, and dirty fingers away from the rotor and pad surfaces.
The U.S. Consumer Product Safety Commission recommends checking brakes, lights, tires, cables, handlebars, and the frame before riding a micromobility device. See the CPSC micromobility safety guidance.
Why Is Your Scooter Brake Rubbing?
A rubbing disc brake usually comes from the rotor touching one or both pads when the lever is released. The pattern of the noise can help you find the cause.
A constant scrape usually points to pad clearance or caliper alignment. A scrape at one point during each wheel revolution often points to rotor runout or a wheel that is not seated correctly.
| Symptom | Likely Cause | First Check |
|---|---|---|
| Continuous light scraping | Pad too close, caliper off-center, or cable over-tightened | Pad gaps and caliper position |
| Scrape once per revolution | Bent rotor, loose rotor, or wheel seating problem | Rotor movement while spinning the wheel |
| Brake does not release | Sticking cable, damaged housing, seized caliper arm, or excessive cable tension | Whether the caliper arm returns fully |
| Noise only while braking | Contamination, glazing, pad wear, loose hardware, or rotor damage | Pad and rotor condition |
- Inspect pad wear and placement.
- Confirm the wheel and rotor are secure.
- Clean the rotor and caliper area.
- Check whether the rotor moves from side to side.
- Verify that the caliper sits parallel to the rotor.
- Confirm that the cable and caliper arm return freely.
Ordinary cable slack normally causes delayed engagement or excess lever travel. It does not usually hold the brake on. A cable that is corroded, kinked, routed badly, or adjusted too tightly can prevent the brake from releasing fully.
How Do You Fix Brake Cable Slack?
Pull the brake lever while watching the caliper arm. If the lever moves too far before the arm begins applying the brake, the cable may need a small tension adjustment.
| Action | Purpose | Stop When |
|---|---|---|
| Turn the barrel adjuster in the tension-increasing direction | Removes a small amount of cable slack | The lever feels firm and the wheel still turns freely |
| Tighten the adjuster locknut | Prevents the setting from changing | The locknut is snug against the lever or caliper body |
| Reset the cable at the anchor bolt | Corrects more slack than the barrel adjuster can handle | The cable is just taut without pulling the caliper arm forward |
- Find the barrel adjuster at the lever or caliper.
- Turn it in a small increment, then pull and release the lever several times.
- Check the lever feel and spin the wheel.
- Repeat only until the brake engages firmly without dragging.
- Tighten the barrel-adjuster locknut if fitted.
Many flat-handlebar systems increase cable tension when the barrel adjuster is turned counterclockwise, but this is not universal. Follow the direction shown in your scooter or brake manual.
Warning: Do not keep extending the barrel adjuster to compensate for badly worn pads. Excessive extension can reduce thread engagement or place the caliper arm outside its effective operating range. Adjust or replace the pads as required.
When Should You Reposition the Cable Clamp?
Reposition the cable at its anchor or pinch bolt when noticeable slack remains after a small barrel-adjuster correction, the adjuster is close to its limit, or a new cable has settled after use.
If slack remains, reset the barrel adjuster to a usable position, re-anchor the cable without preloading the brake arm, and tighten the cable bolt to the manufacturer’s specification.
- Turn the barrel adjuster most of the way back into its body while leaving a small amount of adjustment available.
- Loosen the cable-anchor bolt with the correct tool.
- Confirm that the caliper arm is resting fully against its stop.
- Pull the inner cable just taut. Do not rotate the brake arm forward while pulling it.
- Tighten the anchor bolt to the specified torque.
- Pull and release the lever several times to settle the cable.
- Use the barrel adjuster for the final small correction.
- Spin the wheel and confirm that the brake releases completely.
- Keep the cable straight at the anchor.
- Do not clamp over a frayed or flattened section.
- Fit a cable-end cap if the cable end is exposed and fraying.
- Replace a cable or housing that moves roughly or fails to return.
How Do You Center the Caliper?
Before centering the caliper, confirm that the wheel is seated correctly and the rotor is reasonably straight. Caliper adjustment cannot fully correct a loose wheel or badly bent rotor.
- Use the correct tool to loosen the caliper mounting bolts only enough for the caliper to move sideways.
- Look through the caliper and determine whether one pad is fixed or whether both pads move.
- For a dual-moving-pad design, pulling and holding the brake lever may center the caliper over the rotor.
- For a single-moving-pad design, move the fixed inner pad close to the rotor first, then position the caliper body so it sits parallel to the rotor.
- Snug the mounting bolts gradually, alternating between them so the caliper does not twist.
- Release the lever and inspect the pad gaps with a flashlight.
- Spin the wheel and make a small manual correction if one pad still rubs.
- Tighten the mounting bolts to the scooter or caliper manufacturer’s torque specification.
Some scooter manufacturers use the lever-hold method for disc-brake alignment. Apollo’s official support guidance, for example, describes loosening the mounting bolts, squeezing the lever to center the caliper, and tightening the bolts while holding the lever. See Apollo’s disc-brake noise and alignment guide. Your scooter’s design still takes priority.
How Do You Align the Brake Pads?
Correct pad alignment means the friction surfaces meet the rotor evenly during braking and clear it when the lever is released. Do not use a small retaining screw or grub screw as an alignment control unless your model manual specifically identifies it for that purpose.
Pad Centering Steps
- Confirm that the rotor runs through the correct part of both pad surfaces.
- Loosen the caliper mounting bolts just enough to allow controlled movement.
- Set the fixed inner pad close to the rotor if your caliper has one fixed pad.
- Position the caliper parallel to the rotor.
- Use the lever-centering method only if it suits your caliper design.
- Tighten the mounting bolts gradually and evenly.
- Spin the wheel and inspect the gap on both sides.
- Readjust until the wheel turns freely and the lever remains firm.
The rotor does not need to appear perfectly centered in every caliper body. The important points are that the pad faces align with the braking track, the rotor does not contact the caliper body, and neither pad drags during free rotation.
Preventing Brake Rubbing
Prevent rubbing by checking the system in the correct order. Starting with cable tension alone can hide the real fault.
| Check | Action | Correct Result |
|---|---|---|
| Wheel seating | Seat and secure the wheel correctly | Rotor stays in a consistent position |
| Rotor runout | Replace or professionally true a bent rotor | No side-to-side contact during rotation |
| Caliper alignment | Position the caliper parallel to the rotor | Even or appropriate pad clearance |
| Pad clearance | Back the rubbing pad away in a small increment | Wheel spins freely without excessive lever travel |
| Cable return | Replace a sticking cable or housing | Caliper arm returns fully after release |
How Do You Set the Inner and Outer Brake Pads?
Many cable-operated disc calipers use a fixed inner pad and a cable-driven outer pad. The fixed inner pad is normally set with a pad-adjustment screw or dial. The outer pad position is influenced by the caliper position, cable anchor, and small cable-tension adjustments.
- Turn the inner pad adjuster until the pad approaches the rotor.
- Back it away enough to create the manufacturer’s required running clearance.
- Align the caliper body so the outer pad also clears the rotor.
- Remove cable slack without pulling the caliper arm away from its resting stop.
- Pull the lever several times, then recheck both gaps.
- Spin the wheel and listen for contact.
Do not leave either pad pressed snugly against the rotor. Some Shimano mechanical disc-brake manuals specify clearances of about 0.2 to 0.5 mm for particular calipers, but that number is not universal. Use the specification for your scooter or caliper. See the Shimano mechanical disc-brake dealer manual for an example of design-specific pad adjustment.
- Loosen the caliper only as much as needed for alignment.
- Use the caliper’s pad adjusters to create clearance.
- Do not pry against the friction surfaces with a flathead screwdriver.
- For a hydraulic brake, use only the manufacturer-approved piston-reset procedure and tool.
- Reinstall all pad-retaining clips, pins, and bolts exactly as specified.
When Should You Replace Scooter Brake Pads or the Rotor?
Adjustment cannot restore a brake part that has reached its wear limit or suffered damage. Inspect the pads and rotor before trying to solve every problem with cable tension.
Replace the Brake Pads When
- The friction material is at or below the manufacturer’s minimum thickness.
- The pads are contaminated with oil or grease.
- The friction material is cracked, loose, glazed, or worn at a severe angle.
- The backing plate or wear indicator is contacting the rotor.
- Braking remains weak after correct alignment and cable adjustment.
One Shimano mechanical-disc manual lists 0.5 mm as the usable pad limit for the brake models covered by that manual. Other scooter calipers may use a different limit, so do not apply 0.5 mm to every scooter.
Replace or Service the Rotor When
- It is cracked, deeply scored, badly warped, loose, or heat-damaged.
- Its thickness is below the minimum stamped on the rotor or listed by the manufacturer.
- It continues to strike the caliper after the wheel and caliper have been aligned.
- It has been contaminated and cannot be restored using the manufacturer’s cleaning procedure.
Note: New pads and rotors may require a bedding or burn-in procedure before they provide full braking force. Follow the brake or scooter manufacturer’s instructions and perform the process in a traffic-free area.
How Do You Test Brake Response And The Taillight?
Test the mechanical operation first with the drive system off. Then power the scooter on only when you are ready to check the brake light or perform a controlled riding test.
Brake Lever Response
- Pull and release the lever several times.
- Confirm that the lever returns smoothly after every pull.
- Make sure the brake engages before the lever reaches the handlebar grip.
- Spin the wheel and apply the brake. The wheel should stop firmly and predictably.
- Release the lever. The wheel should turn again without strong rubbing.
- Check every adjusted bolt and locknut once more.
- Wear a helmet and perform a walking-speed or very low-speed test in a clear, level area.
- Increase speed gradually only after the scooter stops straight and predictably.
Do not begin with a normal-speed road test. Braking distance changes with speed, rider weight, tire grip, road slope, moisture, and the scooter’s brake design. Wet conditions normally increase stopping distance and reduce tire grip.
Taillight Function Check
Power the scooter on, pull the brake lever, and confirm that the rear brake light activates immediately if your model has that feature. Release the lever and make sure the light returns to its normal state.
- If the mechanical brake works but the light does not, inspect the lever sensor, connector, wiring, and light according to the scooter manual.
- If the light stays on, confirm that the lever returns fully and is not holding the brake-light switch closed.
- If wires were disturbed during the repair, inspect them for pinching, loose connectors, or damaged insulation.
The brake light is an electrical safety feature. A working light does not prove that the mechanical brake is adjusted correctly, and a correctly adjusted mechanical brake does not repair a failed light circuit.
Troubleshooting Electric Scooter Brakes After Adjustment
| Problem | Likely Cause | What to Do |
|---|---|---|
| Lever nearly touches the grip | Cable slack, worn pads, incorrect inner-pad setting, or hydraulic fault | Check pad wear and clearance before adding more cable tension |
| Wheel slows with the lever released | Pad drag, cable over-tension, sticking arm, or bearing problem | Release cable tension slightly and isolate whether the resistance comes from the brake or wheel bearings |
| Brake squeals and feels weak | Contamination, glazing, loose hardware, or unsuitable pad and rotor pairing | Clean the rotor, inspect the pads, and replace contaminated or damaged parts |
| Rotor rubs at one point | Rotor runout or incorrect wheel seating | Reseat the wheel and have a damaged rotor trued or replaced |
| Brake does not release | Sticking cable, corroded housing, seized caliper arm, or damaged lever | Stop riding and repair or replace the faulty part |
| Hydraulic lever feels soft | Air, fluid leak, worn pads, or internal hydraulic fault | Do not adjust a cable that is not present; arrange the correct hydraulic service |
When Should a Technician Repair Your Scooter Brakes?
Stop riding and arrange professional service when:
- The brake still cannot stop the wheel firmly after adjustment.
- The lever reaches the grip or suddenly loses pressure.
- A hydraulic hose, lever, or caliper leaks fluid.
- The rotor is cracked, severely warped, loose, or below its wear limit.
- The cable is frayed, corroded, kinked, or repeatedly slips at the anchor.
- The caliper arm does not return freely.
- The wheel, axle, folding stem, steering bearings, or suspension is loose.
- You cannot confirm the correct pad clearance or bolt torque.
Frequently Asked Questions
How Do You Stop Death Wobble on an Electric Scooter?
Slow down smoothly and stop riding until you find the cause. Check tire pressure, wheel and axle security, wheel bearings, steering bearings, the folding mechanism, stem bolts, suspension parts, wheel alignment, and brake drag. A brake adjustment alone will not correct looseness or instability in the steering or chassis. Have the scooter inspected if any play remains.
Can Electric Brakes Be Adjusted?
It depends on the system. Cable-operated disc and drum brakes usually allow mechanical adjustment. Hydraulic brakes allow caliper alignment and pad service but do not use cable tension. Electronic or regenerative brakes may have manufacturer-approved strength settings in the app or dashboard, but internal faults require model-specific diagnosis.
How Do You Unlock the Speed Limit on an Electric Scooter?
Use only the official riding modes and speed settings provided in the scooter’s manual, dashboard, or manufacturer app. Do not use undocumented codes, modified firmware, controller changes, or wiring alterations. These changes can affect safety systems, violate local rules, damage the scooter, or void warranty coverage.
How Often Should You Check Electric Scooter Brakes?
Check basic brake operation before every ride. Inspect the cable, lever, rotor, pads, wheel security, and brake light more closely whenever the lever feel changes, rubbing begins, stopping distance increases, or the scooter has suffered an impact.
Can You Spray WD-40 or Lubricant on Scooter Brakes?
No. Do not spray lubricant on the rotor, pads, drum shoes, or braking surface. Oil reduces friction and can make the brake unsafe. Use a brake-manufacturer-approved cleaning method, normally isopropyl alcohol on the rotor, and replace pads that remain contaminated.
Why Does the Brake Still Rub After Centering the Caliper?
Check whether the wheel is seated correctly and whether the rotor moves sideways as it turns. Also inspect the fixed-pad clearance, caliper angle, cable tension, and caliper-arm return. A bent rotor or loose wheel cannot be corrected by repeatedly centering the caliper.
Conclusion
To adjust a cable-operated electric scooter disc brake, begin with the wheel, rotor, pads, cable, and caliper rather than turning one adjuster at random. Remove only the required cable slack, align the caliper for your brake design, and leave both pads close to the rotor without constant contact. Test the wheel, lever, fasteners, and taillight before completing a low-speed ride test. Stop riding and arrange service whenever the brake remains weak, damaged, loose, or difficult to diagnose.
Sources
- U.S. Consumer Product Safety Commission Micromobility Information Center — pre-ride inspection, helmet, visibility, and riding-safety guidance
- Shimano Mechanical Disc Brake Dealer’s Manual DM-BR0007 — cable, rotor, pad-clearance, wear, contamination, and safety guidance
- Shimano Mechanical Disc Brake Dealer’s Manual DM-RBMBR01 — model-specific pad clearances and cable adjustment
- Segway P-Series Support — example of a scooter using both disc and electric braking systems
- Apollo Scooters Disc-Brake Noise Guide — scooter-specific caliper alignment, rotor inspection, cleaning, and testing
