
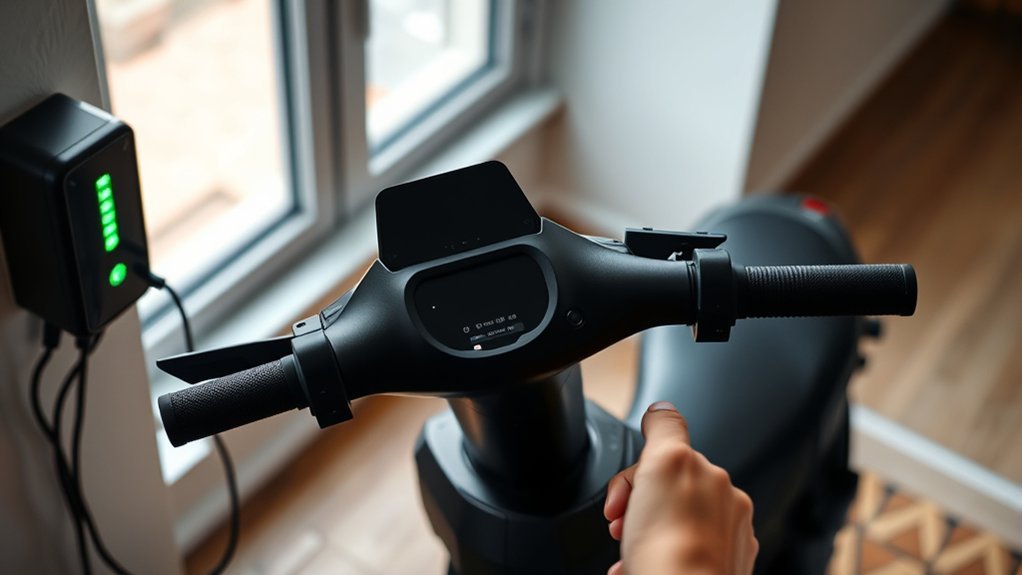
Last Updated on August 26, 2026 by Caleb Warren
If your electric scooter won’t work after charging, first identify what “not working” means: does it have no power at all, does it refuse to charge, or does the display turn on while the motor stays inactive? Start with the charger, battery status, charging port, power button, and visible wiring. Move to fuses, sensors, the controller, and motor only after the safer external checks.
Quick Answer
If an electric scooter won’t work after charging, check whether the charger actually completed a charge, inspect the port and accessible connections, confirm the power button and any safety interlocks, and read the display for error codes. If the battery is swollen, unusually hot, damaged, wet, smoking, or smells burnt, stop troubleshooting and get professional help.
Key Takeaways
- Charger-light colors are model-specific. On many scooters red means charging and green means full or standby, so check your manual instead of assuming a color means failure.
- Use only the original charger or a replacement specifically approved for your scooter and battery.
- A scooter that powers on but will not move needs a different diagnosis from one with a completely blank display.
- Brake sensors, kickstand interlocks, kick-to-start settings, and reset procedures vary by model.
- Do not open, bypass, jump-start, or disassemble a lithium-ion battery pack unless the manufacturer provides a service procedure and you are qualified to perform it.
At a Glance
| Time Required | About 10–30 minutes for basic external checks; longer if service or parts are required |
| Difficulty | Easy for visual checks; advanced electrical diagnosis should follow the manufacturer’s service instructions |
| Tools Needed | Owner’s manual, flashlight, dry soft brush, and optionally a multimeter when the manual provides safe test points |
| Cost | No cost for basic checks; replacement parts and professional service vary by model |
Warning: Stop charging or testing immediately if the battery is swollen, leaking, unusually hot, smoking, sparking, making hissing or popping sounds, has a strong chemical or burnt smell, or has suffered serious impact or water damage. Do not open or puncture a lithium-ion battery pack. Charge only while you are present, never while sleeping, and use the charger supplied or approved by the scooter manufacturer.
Disclosure: As an Amazon Associate I earn from qualifying purchases. Some links on this page are affiliate links, at no extra cost to you.
Start With Common Failure Points
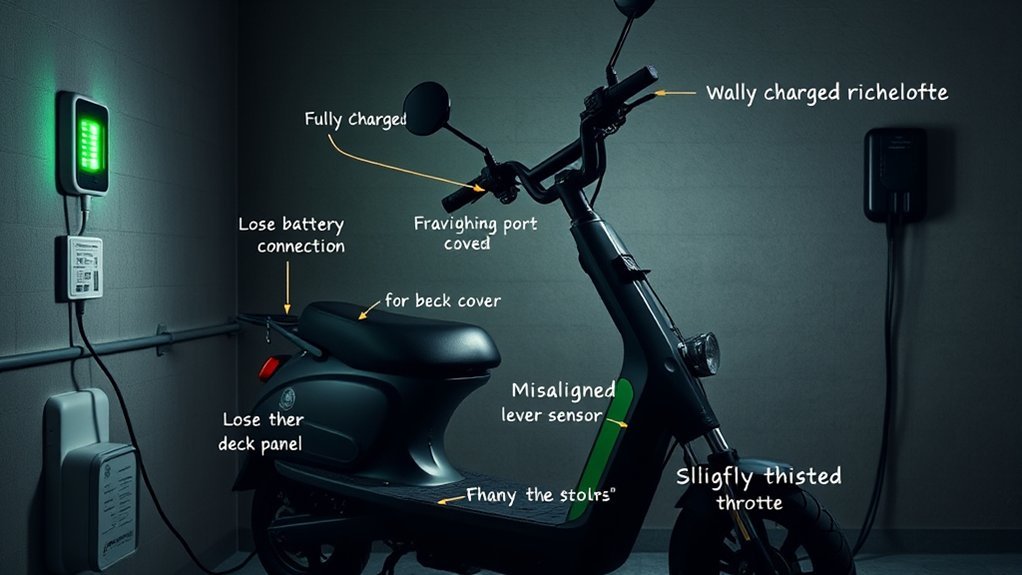
Start with the low-risk checks before assuming the battery, controller, or motor has failed. First determine which symptom you have, because the troubleshooting path changes depending on whether the scooter is completely dead, refuses to charge, or powers on without driving the motor.
| Symptom | Check First | Common Possibilities |
|---|---|---|
| No display, lights, or response | Charger, battery status, power button, accessible connections | Discharged/degraded battery, loose connection, fuse, switch, controller |
| Does not charge | Wall outlet, approved charger, charger LED, charging port | Charger fault, dirty/damaged port, temperature protection, battery fault |
| Display works but motor does not | Error codes, kick-start requirement, brake/throttle sensors | Safety interlock, throttle issue, controller fault, motor fault |
Check the battery, charger, charging port, accessible connections, power controls, and any model-specific error message before replacing components. A battery gauge or green charger light does not prove that the battery can deliver normal power under load, but it is still useful diagnostic information.
Pro Tip: Write down exactly what happens when you press the power button: no response, brief flash, error code, beep, normal display, or shutdown after a few seconds. That symptom often narrows the problem faster than replacing parts one by one.
Check the Electric Scooter Battery and Charger
If your electric scooter will not power on, verify the charging system before opening any covers. Plug the approved charger into a known-working outlet and observe its indicator. Do not assume a particular color means failure: charger LEDs vary by manufacturer. For example, some Segway and Razor chargers use red while charging and green when charging is complete or the charger is in standby. Your owner’s manual is the correct reference for your scooter.
Inspect the charger cable, plug, and enclosure for cuts, crushed sections, exposed conductors, bent contacts, melted plastic, or heat damage. Do not use a damaged charger.
Use only the charger that came with the scooter or one specifically approved by the manufacturer for that exact battery system. A plug that physically fits is not enough. Charger voltage, current, connector polarity, and the scooter’s charging electronics must be compatible.
The U.S. Consumer Product Safety Commission reported 156 fire or thermal incidents involving “universal” micromobility chargers between January 1, 2023 and May 16, 2024, and warns consumers not to use an unapproved universal charger simply because its connector fits.
If your manufacturer provides safe voltage specifications and accessible test points, a multimeter can help verify charger output. Compare the reading with the charger label or service manual rather than assuming a generic voltage. If you are not comfortable making the measurement, replace a suspect charger only with an approved unit or have a technician test it.
Next, check any externally accessible battery connection specified in the manual. Some scooters use removable batteries; many others use sealed or non-removable packs. Do not remove deck covers or disconnect an internal pack merely to “reset” it unless your manufacturer specifically instructs you to do so.
If the battery percentage reaches full but the scooter immediately shuts down or loses power under load, the battery may be degraded, the battery-management system may be protecting the pack, or a connection may be unstable. Diagnosis beyond the manufacturer’s external checks is a good reason to use an authorized service center.
Check Temperature Before Blaming the Battery
Lithium-ion battery systems commonly limit charging outside their approved temperature range. If the scooter has just been stored in very cold or very hot conditions, move it to the temperature range specified in its manual and allow it to stabilize before charging. Do not try to force-charge a battery that the scooter or charger is refusing to charge because of temperature protection.
Inspect the Charging Port for Damage
Inspect the charging port for debris, dirt, corrosion, moisture, bent contacts, looseness, or melted plastic. NIU, for example, specifically recommends checking that the charging port is clean and free from obstructions when a scooter will not charge.
Power the scooter off and disconnect the charger before cleaning. Use a dry soft brush or gentle compressed air from a safe distance. Do not insert metal tools into the port, scrape electrical contacts aggressively, or apply liquid cleaner unless the manufacturer specifically permits it.
Look for worn plastic, pushed-in pins, corrosion, or a socket that moves when the plug is inserted. Make sure the correct charger plug seats completely without forcing it.
If the port is wet, shows heat damage, sparks, smells burnt, or no longer holds the plug securely, stop charging. Port replacement normally requires opening the scooter and should follow the manufacturer’s service procedure.
Check Fuses and Wiring
Some electric scooters have a replaceable fuse or circuit protection near the battery or controller; others do not provide a user-serviceable fuse. Check your manual before opening the deck.
If your model has an accessible replaceable fuse, power the scooter off and disconnect it from the charger before inspection. Look for a broken internal fuse element, darkening, or melting. When safe and appropriate, a continuity tester or multimeter is more reliable than visual inspection alone.
| Check | Result |
|---|---|
| Fuse intact and has continuity | Continue troubleshooting elsewhere |
| Fuse element broken / no continuity | Replace only with the specified type and rating |
| Correct amperage and fuse type used | Circuit protection remains as designed |
| Replacement fuse blows again | Stop testing; a short or component fault may be present |
Never install a higher-amperage fuse to stop repeated blowing. The fuse is protecting the wiring and electronics. If a correctly rated replacement immediately fails again, professional electrical diagnosis is safer than repeated replacement.
Inspect only accessible wiring and connectors for looseness, pinching, corrosion, discoloration, or obvious damage. Do not cut into insulation or bypass connectors to make the scooter run.
Check the Switch and Brake Sensors
Check the power switch or power button using the procedure in your manual. Some scooters respond to a short press; others require the button to be held for a specific period. If the button feels loose, jammed, physically damaged, or does not respond consistently, it may need service.
If the display powers on but the motor does not engage, check model-specific safety inputs. Depending on the scooter, these can include a brake lever sensor, kickstand interlock, throttle error, lock mode, or other electronic protection. Not every scooter has each of these systems.
Switch Function Check
Make sure the power button moves normally and that its surrounding housing is clean and dry. Do not spray liquid cleaner into the switch.
| Check | What to Look For |
|---|---|
| Power button | Normal movement and correct press/hold procedure |
| Display | Power, warning icons, or error codes |
| Safety interlock | Correct position if your model has one |
| App lock / security mode | Scooter unlocked if the model uses an app-based lock |
If the display wakes but reports an error, record the code before resetting anything. The code may identify the affected system in the manufacturer’s manual or app.
Brake Sensor Check
On scooters that use an electronic brake cut-off sensor, the controller may prevent motor drive while it believes the brake is applied. Check that the brake lever returns normally after you release it.
Look for a visibly damaged lever, loose external connector, debris around the lever mechanism, or an error code related to the brake. Do not bypass a brake cut-off circuit to make the motor run. If the sensor requires adjustment or replacement, follow the service manual or have a technician repair it.
Test the Controller for Faults
The controller manages power between the battery, motor, throttle, brakes, and display. A controller fault can prevent startup or motor operation even when the battery has charge, but controller diagnosis should begin with non-invasive checks.
Look for error codes, a burnt-electronics smell, heat discoloration, melted connectors, corrosion, or signs of water intrusion around accessible controller wiring. Make sure visible plugs are fully seated only when they are designed to be user-accessible.
A generic multimeter reading is not enough to prove that an electronic motor controller is healthy. Controllers can use switched electrical signals and model-specific test procedures. Perform live electrical measurements only when the manufacturer provides the correct test points, expected readings, and safety procedure.
Controller Burn Marks
Burn marks, melted connectors, soot, or a persistent burnt-electronics smell can indicate overheating, a short circuit, or component failure. Stop powering the scooter repeatedly if you find these signs.
| Symptom | Possible Fault | Action |
|---|---|---|
| Burn marks or melted connector | Heat or electrical damage | Stop testing and arrange service |
| Burnt smell | Possible internal failure | Power off and inspect professionally |
| Error code | Model-specific fault | Check the manual/app before replacing parts |
Do not continue live testing if you hear crackling, see sparks, or smell overheating electronics. Those symptoms require service rather than repeated power cycling.
Connection and Compatibility
Because the controller regulates motor power, replacement controllers must match the scooter’s electrical system and communications requirements. Voltage alone does not guarantee compatibility.
Check manufacturer part numbers, connector layout, motor configuration, display compatibility, and any firmware requirements before installing a replacement. An incorrect controller can create new faults or damage other components.
Inspect the Motor for Damage
If the display works and the controller is not reporting an obvious battery or sensor problem, inspect the motor system externally. Check the motor cable where it exits the wheel or frame for cuts, crushing, exposed conductors, or loose connectors.
With the scooter powered off, check whether the driven wheel rotates as the manufacturer describes. Excessive binding, grinding, scraping, or a sudden change in resistance can point to a mechanical, brake, bearing, cable, or motor problem.
During a normal manufacturer-approved startup test, listen for abnormal grinding, clicking, or humming. Do not open a sealed hub motor merely for inspection unless the service manual instructs you to do so.
| Check | What You Notice | Action |
|---|---|---|
| Motor cable | Cuts, crushed insulation, damaged connector | Stop riding and repair |
| Wheel movement | Unexpected binding or scraping | Check brake/mechanical system |
| Motor area | Burn smell or unusual heat | Stop testing |
| Startup | Abnormal grinding, clicking, or humming | Use model-specific diagnostics or service |
Testing motor phase wiring or controller output is advanced electrical work. Use the model’s service documentation or a qualified repair technician rather than applying generic voltage assumptions.
Rule Out Throttle and Display Issues
If the scooter powers on but will not accelerate, inspect the throttle and display. A loose or damaged signal connection can prevent motor activation even though the battery is charged.
Before assuming the throttle has failed, confirm whether your scooter uses kick-to-start. Some models intentionally keep the motor disabled until the scooter is already rolling at a few miles per hour. This is a normal safety feature, not a fault.
Throttle Connection Check
Check the throttle connection and externally visible wiring for pinching, cuts, looseness, water, or corrosion. The throttle should move smoothly and return to its resting position when released.
Do not rely on hearing a click; many electronic throttles operate without an audible switch. Also avoid testing the throttle in a way that could unexpectedly drive the scooter forward. Follow the manufacturer’s diagnostic procedure and keep the driven wheel controlled if the manual requires a powered test.
If the throttle is physically damaged, sticks, does not return, or triggers an error code after its connector has been checked, it may require replacement.
Display Power Inspection
Inspect the display power path for visible loose, pinched, corroded, or damaged wiring. If the screen stays dark, determine whether other lights or sounds work. A completely dead scooter points toward the main power path, while a scooter with other working electronics may have a display-specific problem.
If the display shows an error code, write it down and check the owner’s manual or official app. Do this before clearing the code, because the stored fault can be the fastest route to the correct repair.
| Check | Result |
|---|---|
| Display cable | Secure and undamaged |
| Controller/display connector | Fully seated if user-accessible |
| Wiring | No cuts, pinching, corrosion, or heat damage |
| Screen | Normal startup or useful error information |
| Error codes | Recorded and checked against official documentation |
If the screen remains blank while other systems receive power, the display, its wiring, or the controller-to-display communication path may need professional diagnosis.
Reset the Scooter or Update Firmware
If the hardware checks are normal, use only the manufacturer-documented restart or reset procedure. This might involve powering the scooter off and back on, holding a specified button combination, using a reset function in the official app, or following another model-specific procedure.
Do not open the deck and disconnect a sealed battery simply because a generic troubleshooting guide calls it a “battery reset.” Some scooters have non-removable batteries and no user-serviceable battery parts.
If your scooter can communicate with its official app, check for recorded faults and manufacturer-recommended firmware updates. Segway documentation for applicable models, for example, uses its app for firmware updates and error-code information.
- Power the scooter down normally before performing a documented restart.
- Record error codes before clearing or resetting them.
- Use only the manufacturer’s official app or software.
- Confirm that any firmware update is intended for your exact scooter model.
- Do not interrupt an update once the manufacturer’s installation process has started.
If the scooter cannot stay powered long enough to complete a firmware procedure, solve the underlying power problem first rather than repeatedly attempting updates.
Check for Water Damage, Impact Damage, or a Safety Recall
If the problem began after heavy rain, deep puddles, washing, a crash, or a hard impact, treat that event as an important diagnostic clue. Water resistance does not mean every scooter is waterproof, and damaged seals or open charging ports can let moisture reach electrical components.
Do not charge a scooter with a wet charging port or suspected internal water intrusion. Let the manufacturer or an authorized service provider determine whether the battery and electronics are safe to use.
For a sudden unexplained battery or electrical problem, also check the manufacturer’s support site and the U.S. Consumer Product Safety Commission recall database for applicable safety notices before buying replacement parts.
Replace Faulty Parts or Get Help
When charging, connection, sensor, error-code, and documented reset checks do not restore operation, concentrate on the component supported by the evidence rather than replacing parts at random.
| Component | Action |
|---|---|
| Battery | Use manufacturer diagnostics; replace only with an approved compatible pack |
| Charger | Verify model compatibility and replace if damaged or confirmed faulty |
| Charging port | Service if loose, melted, corroded, or physically damaged |
| Controller | Use model-specific electrical diagnosis before replacement |
| Motor | Check external cable/mechanical symptoms, then service if internal diagnosis is required |
Seek professional assistance if the scooter has battery swelling, unusual heat, smoke, sparks, repeated fuse failure, melted wiring, significant water damage, a burnt smell, or an electrical fault you cannot isolate without probing internal live circuits.
A qualified technician can test the battery under load, inspect the battery-management system, measure controller signals correctly, verify motor windings and sensors, and determine whether replacement is safer than repair.
Prevent the Problem From Happening Again
Follow the charging and storage instructions for your exact model. Keep the charging port covered when it is not in use, avoid charging a wet scooter, and inspect the charger periodically for cable or connector damage.
Use only manufacturer-approved batteries and chargers. Do not rebuild a lithium-ion battery pack with used or mismatched cells, and do not use a charger from another scooter unless the manufacturer confirms compatibility.
If the scooter will be stored for a long period, follow the manufacturer’s recommended storage charge and recharge interval. These instructions differ between models, so the owner’s manual takes priority over a generic schedule.
Before each ride, make sure the brakes, throttle, lights, tires, folding mechanism, and visible cables are in usable condition. Do not ride a scooter that has an unresolved error code or known electrical fault.
Frequently Asked Questions
Why Is My Electric Scooter Fully Charged but Not Working?
A full battery indication does not guarantee that power is reaching every part of the scooter. Possible causes include a loose connection, degraded battery, blown fuse, power-button problem, brake or throttle error, controller fault, app lock, or model-specific safety interlock. Record any error code and work through the power path before replacing parts.
How Do You Reset an Electric Scooter Battery?
There is no universal electric-scooter battery reset. Use only the reset, restart, or app procedure documented for your exact model. Do not open the deck, disconnect a sealed battery, bypass the battery-management system, or short battery terminals in an attempt to reset the pack.
How Do I Fix My Electric Scooter That Won’t Turn On?
Start with a known-working outlet and the approved charger. Check the charging port, power button, battery indication, accessible connectors, and any error codes. If your model has a user-serviceable fuse, test it. Stop DIY troubleshooting if the battery is damaged, hot, swollen, wet, smoking, sparking, or smells burnt.
How Can I Tell if an Electric Scooter Battery Is Bad?
Warning signs include sharply reduced range, unexpected shutdowns, failure to accept or retain a normal charge, repeated battery-related error codes, abnormal heat, swelling, leakage, or physical damage. Voltage measurements can help only when you know the correct specifications and safe test points for the pack. Damaged lithium-ion batteries should not be opened or repeatedly charged for diagnosis.
Why Does My Scooter Charger Stay Green When the Battery Is Empty?
On many chargers, green means standby or charge complete. If the battery is actually low and the light never changes when the charger is connected, the charger may not be communicating with the battery because of a bad outlet, damaged charger, charging-port problem, battery protection state, or battery fault. Check the LED meanings in your model manual before diagnosing the color.
Why Does My Electric Scooter Turn On but Not Move?
Check whether the scooter requires a kick-start speed before the motor engages. Then check for error codes, an active brake sensor, throttle fault, app lock, or other model-specific safety interlock. If those checks pass, the controller, motor wiring, or motor may need diagnosis.
Conclusion
If your electric scooter still won’t run after charging, diagnose the symptom in order instead of replacing parts blindly. Verify the approved charger and battery status, inspect the charging port and accessible wiring, check the power controls and error codes, and then rule out model-specific brake, throttle, kick-start, controller, display, and motor issues.
Do not use a generic battery-disconnect procedure or an unapproved “universal” charger as a shortcut. If the battery is swollen, unusually hot, damaged, wet, smoking, sparking, or smells burnt—or if internal live electrical testing is required—stop troubleshooting and use a qualified technician.
Sources
- U.S. Consumer Product Safety Commission — Micromobility Information Center — lithium-ion battery, charger, charging-supervision, and replacement-battery safety guidance.
- U.S. CPSC — Universal Charger Safety Warning — charger compatibility and fire-risk guidance.
- Segway Ninebot KickScooter F2 Product Manual — charging-light behavior, maintenance checks, error codes, firmware, and battery specifications.
- NIU Kick Scooter FAQ — charging-port troubleshooting, charger indication, battery serviceability, and startup guidance.
- Razor Icon Electric Scooter Manual — charger LED behavior, kick-start operation, and troubleshooting examples.
