

Last Updated on September 10, 2026 by Daniel Globe
If your electric scooter turns on but won’t move, the problem may be simpler than a failed motor. Many scooters require a short push before the throttle activates, and some will not drive while a brake sensor, parking mode, app lock, or error condition is active. If those checks pass, work through the battery, visible wiring, throttle, controller, motor, and mechanical parts in that order. Avoid opening or probing the battery pack unless you have the correct service information and electrical experience.
Quick Answer
An electric scooter can power its display yet refuse to move because it needs a kick-start, is locked or in parking mode, detects an active brake, has a throttle or wiring fault, has a weak battery under load, or has a controller, motor, Hall-sensor, or mechanical problem.
Key Takeaways
- First check whether your model requires you to push off before the throttle activates.
- Make sure parking mode, app lock, walk mode, or another drive restriction is not active.
- A brake lever that does not return fully can keep the motor cutoff active on some scooters.
- Treat error codes as model-specific; the same number can mean different things on different brands.
- Leave battery-pack, controller, and live motor-circuit repairs to qualified service unless you have the correct wiring diagram and test procedure.
At a Glance
| Time Required | 10–30 minutes for basic checks; longer if professional diagnosis is needed |
| Difficulty | Easy for external checks; advanced for controller, motor, or battery diagnosis |
| Tools Needed | Owner’s manual, phone/app if required, flashlight, basic hand tools; multimeter only for model-approved tests you understand |
| Cost | Often $0 for settings, debris, or loose accessible connections; component replacement varies by model |
Warning: Stop using and charging the scooter if the battery is swollen, unusually hot, smoking, hissing, leaking, badly damaged, or producing a strong burnt or chemical smell. Do not open a lithium-ion battery pack, bypass its protection system, or improvise a charger. The U.S. Consumer Product Safety Commission recommends using only the charger and replacement battery supplied or approved for the device.
Disclosure: As an Amazon Associate I earn from qualifying purchases. Some links on this page are affiliate links, at no extra cost to you.
Check the Battery, Brake, and Throttle
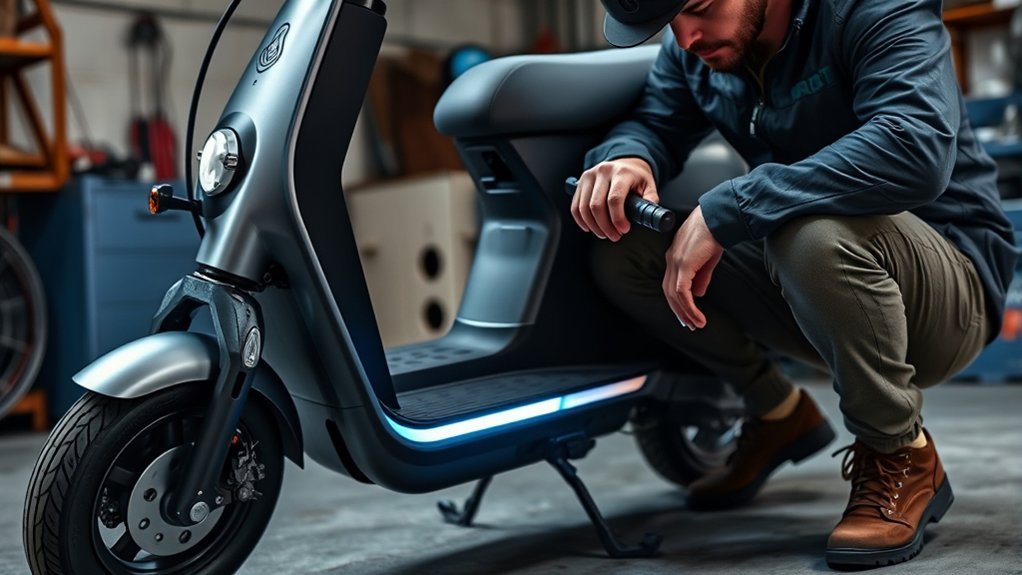
Start with the checks that do not require opening the scooter. A powered display proves that at least part of the electrical system is awake; it does not prove that the battery can supply enough current to drive the motor.
1. Make Sure the Scooter Is Allowed to Start
Before assuming anything is broken, push the scooter forward and then try the throttle. Many electric scooters use a safety start speed. For example, a Segway F2 manual states that the motor normally engages after the scooter reaches about 3 km/h (1.9 mph), while Xiaomi documents a roughly 4 km/h (2.5 mph) start requirement on the Mi Electric Scooter 3. The exact behavior depends on the model and settings.
Also check the dashboard and companion app, if your scooter uses one. Make sure the scooter is not locked, in Parking mode, or restricted by another security or operating mode. Some Segway models, for example, can remain unable to accelerate while Parking mode is active.
Pro Tip: If the scooter worked normally before an app update, settings change, shutdown, or long period of storage, check the app and dashboard before removing any covers. A mode or error condition is much easier to fix than a controller.
2. Check the Battery and Charger
Fully charge the scooter with the charger supplied or approved by the manufacturer. Look at both the charger indicator and the scooter’s battery reading. If the battery percentage falls rapidly, the scooter shuts down when you press the throttle, or the display dims under acceleration, the battery or one of its connections may not be able to support the motor load.
Common lithium-ion systems labeled 36V often charge to around 42.0V, while common 48V systems often charge to around 54.6V. Those figures come from typical 10-series and 13-series lithium-ion configurations using about 4.2V per cell at full charge; they are not universal specifications. Always use the voltage listed for your exact battery and charger. Grin Technologies lists these common 42.0V and 54.6V charging profiles, while Battery University explains the common 4.20V-per-cell lithium-ion charge limit.
Do not probe inside a sealed battery pack merely to confirm these numbers. If the battery is removable, make sure it is installed and latched exactly as the manual specifies. If the pack has suffered impact, water intrusion, overheating, or physical damage, stop and have it inspected.
3. Release the Brake Completely
Pull and release each brake lever. It should return smoothly to its normal position. Many scooters use an electronic brake-cutoff signal that prevents motor drive while braking. A stuck lever, damaged sensor, or damaged sensor wire can therefore leave the display on while preventing acceleration.
This behavior is documented by manufacturers. For example, Xiaomi lists a brake-lever fault as code 15 on certain models when the lever does not return correctly or its sensor circuit has a problem. Segway also uses code 15 for a brake Hall-sensor fault on some models. These examples do not mean that code 15 has the same meaning on every scooter.
4. Check the Throttle
With the scooter switched off, make sure the throttle moves freely and returns to its resting position. Look for a grip, accessory, or debris rubbing against it. Then restart the scooter without touching the throttle or brake unless your manual instructs otherwise.
On certain Xiaomi and Segway scooters, code 14 indicates a throttle or accelerator Hall-sensor problem. Xiaomi also notes that a throttle held out of its normal position during startup can trigger a fault. If your scooter displays an error, use the manual for your exact model rather than assuming a generic code definition.
Do not rely on a universal throttle-voltage range. Hall-effect throttle signal voltages and connector pinouts vary. Electrical testing should use the manufacturer’s wiring diagram or service procedure so you do not short a reference, signal, or supply wire.
Look for Loose Wiring and Error Codes
If the scooter still will not move, switch it off and inspect the wiring that is externally accessible without opening the battery. Pay particular attention to connectors near the handlebars, folding stem, controller compartment entrance, and motor cable.
- Look for a connector that has partially separated.
- Check for pinched, cut, or badly rubbed insulation.
- Look for bent connector pins or damaged locking tabs.
- Check for corrosion, moisture, melted plastic, or darkened terminals.
- Inspect areas that were recently repaired, folded, adjusted, or involved in a crash.
Do not repeatedly disconnect waterproof connectors unless necessary. Many use alignment marks, seals, or keyed pins that can be damaged by forcing them together.
Read the Exact Error Code
Write down the complete error code before restarting or disconnecting anything. Then check the manufacturer’s manual or support page for your model.
Error numbers are not universal. For example, NIU identifies error 03 as an accelerator fault on applicable KQi scooters. By contrast, Xiaomi’s Scooter 6 Pro guidance uses code 14 for an accelerator fault, code 15 for a brake-lever fault, and code 18 for a motor Hall-sensor fault. Segway publishes similar 14, 15, and 18 definitions for some models, but you should still verify your exact scooter.
Note: An error code can narrow the search dramatically. Record the code, scooter model, battery level, and what happened immediately before the problem started. That information is also useful if you need manufacturer support.
Test the Controller and Motor
Move to the controller and motor only after the simple checks are complete. These components handle substantially more current than the display and control circuits, so a scooter can appear normal on the dashboard even when the drive system has a serious fault.
Signs the Controller May Be Involved
A controller problem becomes more likely when the battery is charged, the wheel turns freely, the brake and throttle are behaving normally, connectors are secure, and the scooter still gives no motor response. A controller-communication or overcurrent error can also point in this direction. For example, Xiaomi identifies controller communication and overcurrent faults separately in its current error guidance.
Do not diagnose the controller simply by checking continuity in the motor wires. A continuity test cannot prove that the controller’s switching electronics are operating correctly.
Signs the Motor or Motor Cable May Be Involved
Inspect the motor cable where it exits the wheel or frame. Damage in this high-movement area can affect phase or sensor wiring. Symptoms such as severe cogging, jerking, unusual resistance, repeated motor-related error codes, or a motor that tries to start but cannot rotate can justify professional motor/controller diagnosis.
Do not disconnect a brushless scooter motor and connect it directly to an improvised battery or power supply. Brushless motors normally depend on controlled phase switching, and some systems also use Hall-sensor feedback. Use the manufacturer’s diagnostic procedure or an authorized repair service instead.
Check the Hall Sensor
The motor’s Hall sensors report rotor position to the controller on many brushless scooter systems. A damaged Hall sensor, damaged sensor cable, poor connector contact, or controller-side Hall circuit fault can cause no start, rough starting, jerking, or a motor-related error.
- Check the dashboard or app for a motor/Hall error.
- Switch the scooter off and inspect the motor connector and cable for damage, moisture, or a loose connection.
- Check the manufacturer’s error-code documentation for the exact model.
- If the manual requires live Hall-signal measurements, use its specified connector pinout, reference voltage, and procedure. If those details are unavailable, have the scooter professionally tested.
For example, Xiaomi identifies motor Hall-sensor problems under code 18 on applicable models and lists the motor Hall cable, Hall sensor board, motor, or controller acquisition circuit among the possible causes. Segway also identifies motor Hall-sensor faults on applicable models.
A Hall-sensor error does not automatically mean that the entire motor must be replaced. The fault may be in a connector, cable, sensor board, motor assembly, or controller, depending on the design.
Fix Mechanical Problems That Block Movement
Mechanical resistance can also make an electric scooter seem electrically dead. Switch the scooter off and safely lift one wheel at a time. Spin it by hand without placing fingers near the brake rotor, tire, or other pinch points. The amount of normal resistance varies between drive and non-drive wheels, but neither wheel should be mechanically locked by debris or a badly dragging brake.
| Check | Fault | Effect |
|---|---|---|
| Brake lever | Sticks or does not return | Brake cutoff may stay active or brake may drag |
| Brake pads | Excessive rubbing or misalignment | Wheel rotation becomes difficult |
| Bearings | Worn or damaged | Wheel feels rough or resists rotation |
| Wheels | Misaligned or damaged | Friction and rubbing increase |
| Axle/debris | Damaged, wrapped, or blocked | Wheel movement can be restricted |
Look around the tire, fender, brake rotor, axle, and motor cable for wire, string, plastic, stones, or other debris. Check whether the brake rotor is badly bent or a pad is clamped against it. Grinding, side-to-side wheel movement, or a wheel that remains difficult to rotate after the brake is released may indicate bearing, axle, brake, or wheel damage.
Do not ride the scooter until a mechanical lock, loose wheel, damaged axle, or serious brake problem has been corrected.
Use This Safe Troubleshooting Order
- Charge correctly: use the approved charger and confirm the scooter shows a usable charge.
- Try kick-to-start: push the scooter to its required starting speed before pressing the throttle.
- Check modes: turn off app lock, Parking mode, or other drive restrictions.
- Check the brake: make sure the lever returns and the brake is not dragging.
- Check the throttle: confirm it moves and returns freely.
- Read error codes: use the manufacturer’s definition for your exact model.
- Inspect accessible wiring: look for loose, damaged, wet, or corroded connections with the scooter powered off.
- Check mechanical movement: make sure the wheels and brakes are not physically jammed.
- Escalate advanced faults: controller, battery-pack, motor-phase, and Hall-sensor circuit diagnosis should follow model-specific service information.
When to Stop DIY Troubleshooting
Basic external checks are reasonable for many owners, but stop troubleshooting and contact the manufacturer, an authorized service center, or a qualified micromobility technician when:
- the battery is swollen, leaking, smoking, unusually hot, damaged, or smells burnt;
- the charging connector, battery connector, controller, or wiring is melted or badly discolored;
- water has entered the battery or electronics compartment;
- the scooter repeatedly reports controller, battery, motor, or Hall-sensor errors;
- the motor cable or axle area is damaged;
- the scooter suffered a major crash or battery impact;
- diagnosis would require opening the battery pack or probing unfamiliar live high-current wiring;
- you cannot identify the correct wiring diagram or test specification for the model.
A display that turns on confirms only that part of the scooter has power. It does not prove that the battery, safety interlocks, controller, or motor drive circuit can deliver propulsion.
Help Prevent the Problem From Coming Back
Keep connectors and charging areas clean and dry, inspect the motor cable and brake operation periodically, and deal with unusual noises or intermittent error codes before they become complete failures. Follow the manufacturer’s storage and charging instructions rather than relying on generic battery advice.
The U.S. Consumer Product Safety Commission recommends charging micromobility products with the charger supplied or approved by the manufacturer, being present while they charge, following the manufacturer’s charging instructions, and using only approved replacement battery packs. Do not treat a charger as compatible merely because its plug fits.
Frequently Asked Questions
Why is my e-scooter turning on but not moving?
Common causes include a kick-to-start requirement, Parking or lock mode, an active brake sensor, a stuck or failed throttle, a weak battery under load, loose wiring, an error condition, a controller or motor fault, a Hall-sensor problem, or a mechanically blocked wheel. Start with the simple external checks before opening the scooter.
Is there a reset button on an electric scooter?
There is no universal reset-button design. Some scooters can be power-cycled, while certain models offer a factory reset through their companion app. Xiaomi, for example, documents an app-based factory reset for some scooters. Follow the procedure for your exact model because a factory reset may erase personalized settings.
Why is my scooter starting but not moving?
If the display starts normally but the motor does not engage, first push the scooter forward because your model may require a minimum starting speed. Then check for a lock or parking mode, a brake lever that is not fully released, a throttle fault, an error code, low battery performance, loose wiring, or mechanical drag.
How do I tell if an electric scooter fuse is blown?
First check whether your scooter actually has a user-serviceable fuse; many models do not expose one. If the manual identifies a removable fuse, disconnect power as instructed, remove the fuse, and inspect or test it for continuity. Replace it only with the exact type and rating specified by the manufacturer. Never bridge or bypass a blown fuse.
Why does my electric scooter only move after I push it?
That may be normal. Many scooters use a kick-to-start feature so the motor does not engage from a complete stop. The required speed varies by model; examples from current Segway and Xiaomi documentation range around 3–4 km/h. Check your manual or app settings before assuming there is a fault.
Can a bad battery make the display work but stop the motor?
Yes. The display and control electronics require much less power than the drive motor. A weak battery, battery-management protection event, or poor high-current connection may therefore allow the scooter to turn on but fail when the motor demands substantially more current.
Can a brake sensor stop an electric scooter from accelerating?
Yes, on scooters that use an electronic brake-cutoff signal. If the lever is stuck, does not return completely, or its sensor or wiring fails, the controller may continue to interpret the brake as active and inhibit motor power. Manufacturer error codes can help identify this condition.
Conclusion
If your electric scooter turns on but won’t move, begin with the low-risk causes: charge state, kick-to-start behavior, Parking or lock mode, the brake lever, throttle movement, error codes, accessible connectors, and wheel rotation. Only then should the controller, motor, or Hall-sensor system become the focus.
A powered dashboard does not guarantee that the drive system is healthy. Just as important, electrical troubleshooting should not create a larger problem than the original fault. Avoid improvised motor power tests, battery-pack repairs, fuse bypasses, and live probing without model-specific service information. When the problem involves battery damage, melted wiring, repeated controller or motor errors, or unknown high-current circuits, professional service is the safer next step.
Sources
- U.S. Consumer Product Safety Commission — Micromobility Information Center — lithium-ion charging, approved charger, and replacement-battery safety.
- Xiaomi Electric Scooter 6 Pro Error Code and Repair Guideline — controller, accelerator, brake-lever, motor, Hall-sensor, and wiring faults.
- Xiaomi Mi Electric Scooter 3 Throttle Troubleshooting — kick-start behavior, throttle faults, power cycling, and model-specific factory reset guidance.
- Segway Ninebot KickScooter F2 User Manual — start-speed requirement and normal riding procedure.
- NIU Electric Scooter Troubleshooting FAQ — model-specific accelerator error-code guidance.
- Battery University — Charging Lithium-ion — common lithium-ion charge-voltage behavior.
