
Last Updated on July 27, 2026 by Daniel Globe
Knowing what to bring on a hiking trip is about more than packing comfortable shoes and a bottle of water. A good hiking checklist prepares you for changing weather, navigation problems, minor injuries, delays, and an unexpected night outside. Your exact gear will vary by trail, season, distance, terrain, and how far you will be from help.
Quick Answer
For most hiking trips, bring navigation tools, sun protection, extra insulation, a headlamp, first-aid supplies, fire-starting equipment, repair tools, extra food, enough water plus treatment when needed, and emergency shelter. Add well-fitting footwear, weather-appropriate layers, a properly fitted backpack, and any gear required by the trail or local conditions.
Key Takeaways
- Build your packing list around the National Park Service Ten Essentials, then adjust it for your route, weather, season, and distance from help.
- Choose footwear for fit, traction, terrain, and load rather than assuming a taller boot will prevent ankle injuries.
- Dress in moisture-managing layers and carry protection for conditions that could become colder, wetter, windier, or sunnier than expected.
- Carry more than one way to navigate, and do not depend on cellular service or a single phone battery.
- Plan water by hiking time and conditions, and carry a reliable treatment method when you may need to refill from backcountry sources.
- Leave your route and expected return time with a trusted contact before heading into remote terrain.
Hiking Essentials Checklist: What to Bring on a Hike
The National Park Service organizes basic outdoor emergency equipment into ten systems. The exact item within each category can change depending on the trip, but the categories provide a useful starting point for both short day hikes and longer outings.
| Essential | What to Pack |
| Navigation | Map, compass, GPS or navigation app, with an offline or paper backup |
| Sun protection | Sunscreen, sunglasses, hat, and protective clothing as conditions require |
| Insulation | Extra layers and rain/wind protection appropriate for the forecast and elevation |
| Illumination | Headlamp or flashlight plus adequate battery power |
| First aid | A trip-appropriate first-aid kit and personal medications |
| Fire | A protected ignition source and fire starter where appropriate and legal |
| Repair kit and tools | Knife or multi-tool, plus small repair items suited to your gear |
| Food | Enough food for the planned hike plus a reasonable emergency reserve |
| Hydration | Water plus treatment supplies when relying on natural water sources |
| Emergency shelter | Emergency blanket, bivy, tarp, or another shelter suitable for your trip |
Pro Tip: Pack for the consequences of a delay, not just for the time you expect to spend hiking. A late turnaround, route-finding problem, injury, or weather change can turn a comfortable afternoon walk into several extra hours outside.
Hiking Boots and Footwear: Prioritize Fit, Traction, and Terrain
Selecting appropriate hiking footwear can make a major difference in comfort and confidence on the trail. Match the shoe or boot to the terrain, distance, expected weather, pack weight, and your own feet.
For rocky trails, steep climbs, rough ground, or heavier loads, you may prefer a hiking boot with a firmer sole, protective upper, and secure fit. Those features can improve underfoot protection and stability. However, do not assume that a high boot collar automatically prevents ankle sprains. Previous injuries, conditioning, balance, fatigue, terrain, and the way the footwear fits also matter.
On smoother, well-maintained trails, lighter hiking shoes or trail-running shoes may provide enough traction and protection while offering lower weight and greater flexibility. There is no single best choice for every hiker.
Fit is more important than the label on the shoe. Try hiking footwear with the socks you intend to wear. Your toes should have room to move without being crushed against the front, especially on descents, while your heel should feel secure rather than sliding excessively. Check whether the shoe’s width matches your foot instead of simply sizing up to solve pressure points.
Wear new footwear on shorter walks before committing to a long hike. This gives you a chance to find hot spots, pressure points, or sock combinations that could lead to blisters later.
Clothing: Layer for Comfort and Protection
Layering makes it easier to manage sweat, wind, rain, and temperature changes without carrying an entirely different outfit for every condition. A common system uses a base layer, an insulating layer, and a weather-resistant outer shell.
Base layer
The layer next to your skin should manage moisture during exertion. Merino wool and synthetic fabrics are common choices because they can move moisture away from the skin and generally dry more effectively than absorbent everyday fabrics.
Insulating layer
The middle layer helps retain body heat. Fleece and insulated jackets are common options. Choose the amount of insulation according to temperature, wind, elevation, expected stops, and how easily you become cold.
Outer shell
A rain shell or other protective outer layer helps block wind and precipitation. Waterproof-breathable materials can reduce rain exposure while allowing some moisture vapor to escape, although no shell eliminates sweating during hard exertion.
Also consider a sun hat or warm hat, gloves, spare socks, sunglasses, and sun-protective clothing when the route or weather calls for them.
Note: Conditions at a trailhead may not represent conditions on an exposed ridge or at higher elevation. Check the forecast and local land-manager alerts before leaving, then carry enough clothing for plausible changes during the hike.
Backpack: Find the Right Size and Fit
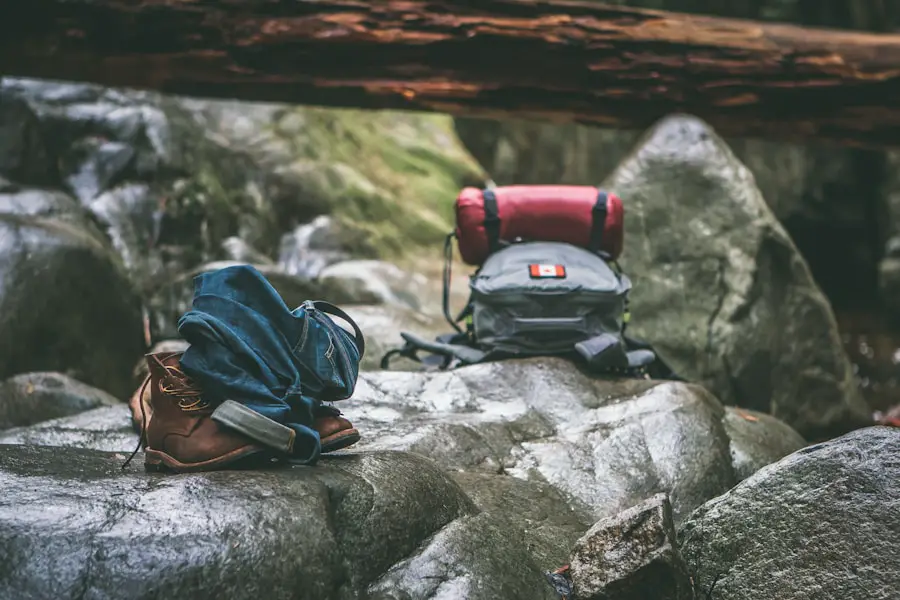
Your backpack should be large enough to carry the gear your specific trip requires without being so oversized that you fill it with unnecessary equipment. For many day hikers, roughly 15 to 30 liters can work well. Short, simple walks may require less, while long days in variable weather may require more.
Overnight trips often need substantially more room for shelter, a sleep system, food, and cooking equipment. Packs around 35 to 50 liters may work for compact overnight setups, while multi-day trips commonly move into the 50-liter-and-up range. Gear bulk, season, water availability, and whether you are carrying shared group equipment all affect the ideal capacity.
Fit matters as much as volume. A backpack with a supportive hip belt can transfer much of the load away from the shoulders. Shoulder straps should follow the body comfortably without creating pressure points, and an adjustable sternum strap can help stabilize the shoulder straps.
When possible, try a pack with weight inside it rather than judging an empty backpack. Adjust the hip belt first, then shoulder straps, load lifters if equipped, and the sternum strap. Ventilated back panels can also improve comfort in warm conditions, although ventilation varies by design.
Navigation: Maps, Compass, and GPS
Navigation equipment is useful only when you know how to use it. Study your intended route before leaving, identify major junctions and landmarks, and download any digital maps you may need while you still have service.
| Navigation Tool | Best Use | Important Limitation |
|---|---|---|
| Topographic map | Shows trails, terrain, contour lines, water features, and other mapped landmarks | Must be current enough for the route and interpreted correctly |
| Compass | Establishes direction and can be paired with a map for route finding | Requires skill and attention to magnetic declination and nearby magnetic interference |
| GPS / phone app | Position checking, route tracking, and digital mapping | Accuracy varies with sky view and device; batteries, damage, or software problems can make it unavailable |
Topographic maps are particularly helpful because contour lines reveal elevation changes that may not be obvious from a simple trail diagram. Closely spaced contour lines usually indicate steeper ground, helping you anticipate strenuous climbs or descents.
A map and compass give you a battery-independent navigation option. Learn how to orient the map, identify your approximate position, and follow a bearing before relying on these skills in an emergency.
GPS is convenient but should not be treated as infallible. According to GPS.gov, GPS-enabled smartphones are typically accurate to about 4.9 meters (16 feet) under open sky, while trees and other obstructions can reduce accuracy. Mapping errors can also occur even when the GPS position itself is working normally.
The National Park Service Trip Planning Guide recommends downloading park maps for offline use where available and carrying a backup paper map rather than depending entirely on a phone.
First Aid Kit: Essential Supplies for the Trail
A hiking first-aid kit should match the number of people in your group, trip duration, terrain, remoteness, weather, and personal medical needs. A few adhesive bandages may be adequate for minor scrapes close to town, but a remote hike calls for a more complete kit.
The American Red Cross hiking first-aid checklist includes items such as adhesive bandages, antiseptic supplies, blister treatment, gauze, medical tape, nonlatex gloves, tweezers, and suitable medications.
A practical hiking kit may include:
- Adhesive bandages in several sizes
- Sterile gauze and medical tape
- Antiseptic wipes or appropriate wound-cleaning supplies
- Blister treatment
- Elastic wrap
- Nonlatex gloves
- Fine-tipped tweezers
- Pain-relief medication you can safely take
- Antihistamine or other trip-specific medication when appropriate
- Any personal prescription or emergency medication
- Emergency first-aid instructions
If you hike in tick habitat, prevention is more useful than simply packing a removal tool. The CDC recommends measures such as EPA-registered insect repellent, appropriate clothing or treated gear, tick checks, and prompt removal of attached ticks. For removal, clean fine-tipped tweezers work well: grasp the tick close to the skin and pull upward with steady, even pressure.
Check your kit periodically. Replace expired medications and supplies, replenish anything used, and make sure water-sensitive contents stay protected.
Warning: First-aid supplies are not a substitute for professional medical care. Serious bleeding, breathing problems, severe allergic reactions, major injuries, altered mental status, or other life-threatening conditions require emergency assistance as soon as it can be obtained.
Shelter: Tents, Sleeping Bags, Tarps, and Emergency Protection
Shelter needs depend on whether you are taking a day hike or deliberately spending the night outdoors. Even on a day hike, a compact emergency shelter can provide valuable protection if an injury, route problem, or sudden weather change delays your return.
For overnight hiking, choose a tent, tarp, or other shelter suited to the expected wind, precipitation, bugs, terrain, and number of occupants. Lightweight backpacking tents reduce carried weight, but protection, usable space, durability, and ease of setup also matter.
A sleeping bag is only one part of an overnight sleep system. Choose its warmth rating with the expected low temperature in mind and remember that a rating is not a guarantee that every person will feel comfortable at that temperature. Standardized adult sleeping-bag testing is covered by ISO 23537-1:2022, while real-world comfort can also change with clothing, the sleeping pad, shelter, humidity, wind, and whether you naturally sleep warm or cold.
Down insulation provides a strong warmth-to-weight ratio and packs efficiently, but it should be kept dry because moisture can reduce its loft. Synthetic bags are generally bulkier for comparable warmth but can be easier to manage in consistently damp conditions.
Tarps are another versatile shelter option. They can provide rain or sun protection and can be configured in several ways, but effective pitching requires suitable anchor points or poles and some practice.
Food and Water: Pack Enough for the Route
Food and hydration directly affect comfort, judgment, and physical performance. Pack food that is easy to eat, calorie-dense enough for the trip, and unlikely to spoil during the time it will be carried.
Trail mix is popular because nuts, seeds, dried fruit, granola, and similar ingredients can provide a useful combination of carbohydrates, fats, and protein. Energy bars, dried fruit, nut or seed butter packets, jerky, sandwiches, wraps, and other portable foods can also work well depending on the hike.
How much water should you carry?
A useful starting point for moderate hiking is roughly 0.5 liter of water per person per hour. Current National Park Service hiking guidance for Great Smoky Mountains National Park similarly lists at least 1 liter for every two hours of hiking. Treat that as a planning baseline rather than a fixed prescription.
Heat, direct sun, humidity, altitude, pace, body size, sweat rate, medical conditions, and strenuous climbing can change how much you need. Check the route before leaving so you know whether reliable water is available and whether seasonal sources may be dry.
If you expect to refill from streams, lakes, springs, or other untreated backcountry sources, carry an appropriate treatment system rather than assuming clear-looking water is safe. The National Park Service backcountry health guidance discusses boiling, filtering, and disinfection methods for reducing the risk from waterborne pathogens.
Pro Tip: Before a remote hike, identify both your planned water sources and a backup. A filter is useful only if water is actually present where you expect to find it.
Safety Essentials: Whistle, Fire Starter, and Emergency Blanket
A few small emergency items can become disproportionately valuable when a routine hike goes wrong.
Whistle
A whistle allows you to make a loud signal repeatedly with much less effort than sustained shouting. Keep it somewhere you can reach even if you cannot easily remove your backpack.
Fire-starting equipment
Matches, a lighter, or another dependable ignition method can help with emergency warmth or signaling where fire use is permitted. Protect ignition supplies from moisture and carry suitable fire-starting material rather than assuming naturally available tinder will be dry.
Warning: Carrying fire-starting equipment does not mean you should build a fire. Check current fire restrictions and land-manager rules, and never start a fire when conditions or regulations make it unsafe or illegal.
Emergency blanket or bivy
A compact reflective blanket or emergency bivy can reduce exposure to wind and help retain body heat during an unexpected delay. It may also make you more visible to rescuers. It is emergency equipment, however, and should not replace an appropriate overnight shelter when you deliberately plan to camp.
Do Not Forget Sun Protection, a Headlamp, and Repair Tools
Three easy-to-overlook categories are sun protection, illumination, and equipment repair.
Sun protection
Carry sunscreen, sunglasses, a hat, and protective clothing appropriate for the route. Exposure can increase on open terrain, snow, high elevations, ridgelines, and routes with little shade.
Headlamp
Carry a headlamp or flashlight even when you expect to finish before sunset. A wrong turn, injury, slow group member, difficult descent, or unexpectedly long break can leave you on the trail after dark. Check the light before leaving and make sure you have adequate battery power.
Repair kit and tools
A small knife or multi-tool can be useful for repairs and general trail tasks. A compact repair kit might also contain duct tape, cord, zip ties, safety pins, a tent or sleeping-pad patch, or other items that match the equipment you are carrying. There is no reason to carry repair parts for gear you do not have.
Plan the Route, Weather, and Emergency Response Before You Leave
Gear is only one part of hiking preparation. Before departure, confirm the trail’s distance, elevation gain, difficulty, expected hiking time, access conditions, current closures, permit requirements, and any destination-specific rules.
Check the weather forecast close to departure and consider whether conditions may differ at higher elevation or later in the day. Be willing to change routes or turn around when weather, trail conditions, fatigue, injury, or available daylight make continuing a poor choice.
The National Park Service recommends leaving a trip plan with a trusted person who is not going on the trip. Include your route, starting point, group information, vehicle information when useful, backup plan, and expected return time. Tell that person when you return.
Do not assume that your phone will have cellular service. In remote areas, hikers may choose a satellite-based personal locator beacon or two-way satellite communicator as an additional emergency communication option. Keep electronic devices charged, conserve battery power, and carry navigation that does not depend entirely on a single device.
If you become lost
Stop and calmly assess the situation before wandering farther from your last known route. Use your map, compass, GPS position, and visible landmarks to determine where you are. If retracing your route is clearly safe, that may be appropriate. If you cannot safely regain the route and can contact emergency services, provide your location or coordinates, trail name, last known position, surroundings, clothing description, and relevant medical information.
After requesting rescue, changing location can make you harder to find. Unless an immediate hazard requires you to move, follow instructions from emergency personnel, make yourself visible, conserve energy, and use your emergency shelter and illumination as needed.
Adjust Your Hiking Gear for Wildlife, Insects, and Local Conditions
The Ten Essentials form a baseline, not a complete list for every environment. Depending on where and when you hike, you may also need insect repellent, a head net, winter traction devices, trekking poles, gaiters, extra insulation, rain pants, water shoes, or other specialized equipment.
Wildlife precautions also vary. Check the official land manager’s guidance before visiting bear habitat or other areas with specific food-storage or wildlife-safety rules. Carry and use deterrents only where recommended and legally permitted, and learn how to use any safety equipment before relying on it.
Tick exposure is another location-dependent concern. In grassy, brushy, or wooded tick habitat, use preventive measures and check your clothing, body, gear, and pets after the hike.
Optional Gear for Overnight Trips, Photography, and Base Camping
Once your safety essentials are covered, add equipment that matches the purpose of the trip. For an overnight hike, your sleep system deserves careful attention. The sleeping bags discussed in this article can provide additional ideas when comparing backpacking sleep systems.
If your hiking trip begins from a travel trailer or vehicle-based campsite, reliable off-trail power may also be useful. Our guide to the best travel trailer batteries is intended for that vehicle or base-camp role rather than as equipment to carry in a hiking backpack.
Photographers may need extra protection and organization for cameras, lenses, batteries, and weather-sensitive accessories. The options in this article can help when a photography setup is part of the trip. Whatever extras you bring, make sure they do not displace water, clothing, navigation, first aid, or other safety-critical equipment.
Love travel? Join Our Facebook Community For More Tips.
Frequently Asked Questions
What should I bring on a hiking trip?
Start with navigation, sun protection, insulation, illumination, first aid, fire-starting capability, repair tools, food, water, and emergency shelter. Also bring appropriate footwear, layered clothing, a comfortable backpack, and any gear required for the weather, terrain, wildlife, or overnight plans.
How much water should I bring for a hiking trip?
A reasonable starting estimate for moderate hiking is about 0.5 liter per person per hour, but there is no single amount that fits every hike. Increase your planned supply as needed for heat, strenuous terrain, long distances, high sun exposure, and individual needs. Carry treatment equipment when you expect to refill from untreated backcountry sources.
What kind of food should I bring for a hiking trip?
Choose portable foods that provide useful energy without requiring complicated preparation. Trail mix, nuts, dried fruit, bars, jerky, sandwiches, wraps, and similar foods can work well. Bring enough for the planned outing plus a reasonable emergency reserve, especially when hiking far from quick assistance.
What navigation tools should I bring for a hiking trip?
Carry navigation suited to the route, such as a current map, compass, GPS device, or smartphone navigation app. Download digital maps before leaving service and keep a paper or other battery-independent backup for remote hikes. Most importantly, learn how to use your navigation tools before you need them.
What should I include in a first aid kit for a hiking trip?
Useful basics include adhesive bandages, sterile gauze, medical tape, antiseptic or wound-cleaning supplies, blister treatment, nonlatex gloves, tweezers, an elastic wrap, appropriate pain-relief medication, personal medications, and emergency instructions. Customize the kit for the group, terrain, weather, trip length, allergies, and distance from medical assistance.
What clothing should I bring for a hiking trip?
Wear breathable, moisture-managing clothing and use layers that can be added or removed as conditions change. A base layer, insulating layer, and protective shell form a useful system. Depending on the trip, also pack a hat, sunglasses, sunscreen, gloves, spare socks, and rain protection.
What kind of backpack should I bring for a hiking trip?
Choose a pack that fits your torso and hips comfortably and has enough capacity for the actual equipment the trip requires. Many day hikers use packs around 15 to 30 liters, while overnight and multi-day trips generally require more. A supportive hip belt, comfortable shoulder straps, and stable load placement become increasingly important as pack weight rises.
Do I need a headlamp if I am only going on a day hike?
Yes, carrying a small headlamp or flashlight is a sensible safety measure even on a planned day hike. Injuries, navigation mistakes, difficult terrain, weather, or a slower-than-expected pace can keep you outside after sunset. Check the light and its battery before leaving.
Can I rely on my phone for hiking navigation?
A phone is useful for navigation, but it should not be your only plan on a remote route. Cellular coverage may disappear, batteries can run down, screens can break, and GPS reception can worsen under heavy tree cover or other obstructions. Download offline maps and carry an appropriate backup.
Sources
- National Park Service — Ten Essentials — navigation, sun protection, insulation, illumination, first aid, fire, repair tools, food, hydration, and emergency shelter.
- National Park Service — Trip Planning Guide — route preparation, offline maps, emergency planning, and trusted-contact trip plans.
- National Park Service — Backcountry Health — backcountry drinking-water risks and treatment methods.
- GPS.gov — GPS Accuracy — real-world GPS accuracy and factors that degrade positioning.
- American Red Cross — Hiking & Backpacking First Aid Kit Checklist — recommended first-aid supplies and trip-specific kit planning.
- Centers for Disease Control and Prevention — Preventing Lyme Disease — tick-bite prevention, tick checks, and prompt tick removal.
