
Last Updated on September 10, 2026 by Daniel Globe
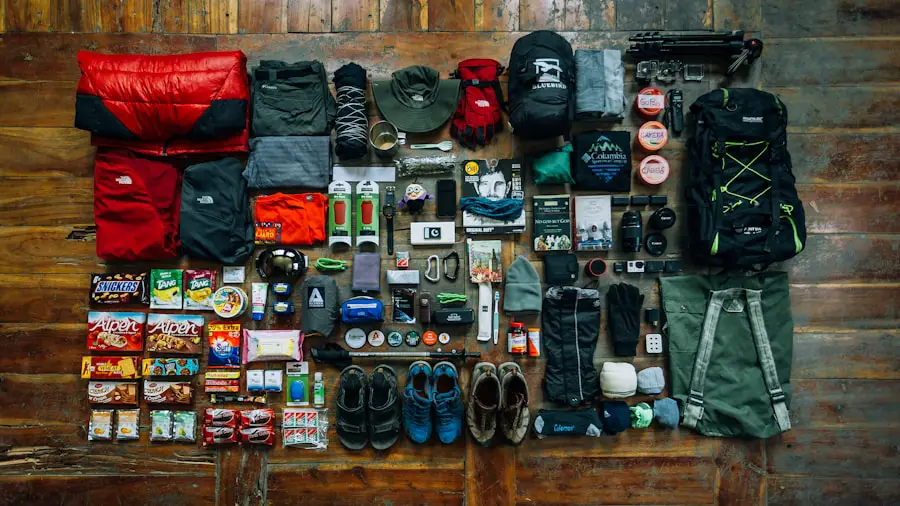
Knowing what to bring hiking can make the difference between a comfortable day outside and a minor problem turning into a serious one. Your exact gear should match the trail, weather, distance, elevation, and your own needs, but every hike should begin with reliable footwear, appropriate clothing, enough food and water, navigation, and basic emergency supplies.
Quick Answer
For most day hikes, bring the Ten Essentials: navigation, sun protection, extra layers, light, first aid, fire-starting supplies where legal, repair tools, extra food, water plus treatment, and emergency shelter. Add supportive footwear, personal medications, insect protection, and route-specific gear. Check conditions and tell someone your plan before leaving.
Key Takeaways
- Use the Ten Essentials as your starting checklist, even when you expect to be out only for the day.
- Match footwear, clothing, water, and emergency gear to the actual trail and forecast rather than packing from a one-size-fits-all list.
- Carry a navigation backup and enough battery power; do not depend on your phone for every safety function.
- Treat natural water when its safety is uncertain, and understand what your filter or disinfectant can and cannot remove.
- Check weather, trail alerts, regulations, and your turnaround time before you start hiking.
At a Glance
| Time Required | About 10–20 minutes to check conditions and pack for a typical day hike |
| Difficulty | Easy, but the checklist must be adjusted for trail, weather, elevation, and remoteness |
| Tools Needed | Daypack, route information, navigation tools, weather forecast, and the Ten Essentials |
| Cost | Varies; most safety items are reusable and may already be part of your outdoor gear |
Disclosure: As an Amazon Associate I earn from qualifying purchases. Some links on this page are affiliate links, at no extra cost to you.
Complete Hiking Essentials Checklist
The National Park Service Ten Essentials provide a useful foundation for deciding what to pack. The categories are designed to help with normal trail needs as well as unexpected delays, injuries, or weather changes.
- Navigation: Map, compass, GPS device, or offline map.
- Sun protection: Sunscreen, sunglasses, protective clothing, and a hat.
- Extra clothing: Insulating and weather-resistant layers suitable for the worst reasonable conditions you may encounter.
- Illumination: Headlamp or flashlight plus spare power.
- First aid: A kit appropriate for your group, route, and medical needs.
- Fire: A lighter, waterproof matches, or another emergency fire starter where possession and use are legal and appropriate.
- Repair tools: A multi-tool, knife where legal, tape, cord, or other gear-specific repair supplies.
- Extra food: More than you expect to eat during the planned hike.
- Water: Enough for the route plus a treatment method when you may depend on natural water.
- Emergency shelter: A lightweight bivy, emergency blanket, tarp, or other protection from exposure.
Note: The Ten Essentials are a starting point, not a universal finished packing list. A desert hike, winter hike, bear-country trail, high-elevation route, and paved nature walk can require very different additions.
Choose Footwear for the Trail
Selecting appropriate footwear is one of the most important gear decisions for a hike. Your shoes or boots should fit well, provide dependable traction, and protect your feet from the terrain you expect to cross.
For rocky, rough, or uneven trails, hikers often prefer footwear with a supportive platform, durable upper, protective toe area, and an outsole designed for loose or irregular ground. High-cut hiking boots can provide a more secure feel for some people, while others are comfortable in low hiking shoes or trail runners. Footwear alone cannot guarantee protection from ankle injuries, so good footing, pacing, and trail awareness still matter.
For well-maintained paths and less technical terrain, lightweight hiking shoes or trail runners can reduce bulk and often provide more ventilation. The best choice depends on the trail, your pack weight, your experience, and how your feet respond to different footwear.
Wet and muddy conditions may favor waterproof footwear, especially in cool weather or where your feet are likely to stay exposed to moisture. In warm environments, however, breathable, quick-drying footwear can sometimes be more comfortable. Waterproof membranes can reduce water entry but also tend to dry more slowly once water gets inside.
Wear Hiking Socks and Prevent Blisters
Pair your footwear with socks that manage moisture and fit without bunching. Merino-wool and synthetic hiking socks are common choices. Avoid starting a long hike in completely unfamiliar footwear. Wear new shoes or boots on shorter walks first so you can identify rubbing, heel lift, pressure points, or sizing problems before spending hours on the trail.
Pro Tip: Keep blister treatment where you can reach it quickly. Address a hot spot as soon as you feel rubbing instead of waiting until a blister has fully formed.
Dress in Layers for Changing Conditions
Layering makes it easier to adjust your clothing as your activity level and the weather change. The exact layers you need depend on temperature, wind, precipitation, elevation, and how long you expect to be outside.
Base Layer: Moisture Management
The base layer sits next to your skin and should manage perspiration. Merino wool and synthetic fabrics are common choices because they move moisture away from the skin and dry more effectively than heavy cotton in cool or wet conditions. A comfortable, close fit generally works well without restricting movement.
Middle Layer: Insulation
The middle layer provides warmth. Fleece, synthetic insulation, or another lightweight insulating garment can trap warm air without excessive bulk. You can add or remove this layer as your activity level and the temperature change.
Outer Layer: Wind and Rain Protection
The outer layer protects you from wind and precipitation. A breathable rain shell is useful when showers or exposed conditions are possible. Features such as pit zips or other vents can help release heat during strenuous hiking.
Pack for conditions that could realistically occur later in the day, not just the weather at the trailhead when you begin.
Choose a Comfortable Hiking Backpack
A backpack is more than a container for your gear. It should hold your essentials securely while allowing you to move comfortably.
A pack around 20 to 30 liters often provides enough room for a typical day hike, but capacity is less important than fitting the equipment your particular route requires. Cold-weather clothing, large water carries, camera equipment, or family gear can require considerably more space.
The backpack should sit securely without creating painful pressure points. Adjustable shoulder straps, a sternum strap, and a hip belt can improve stability and help manage the load. Test the pack with realistic weight before relying on it for a longer trail day.
Durable nylon or polyester fabrics are common in hiking packs. A water-resistant fabric, pack liner, dry bag, or rain cover can help protect important contents from precipitation. Use pockets or small storage bags to keep frequently needed items—such as water, snacks, sunscreen, navigation tools, and first aid—easy to reach.
Carry Navigation Tools and a Backup
Navigation should begin before you reach the trail. Review the route, distance, elevation gain, major junctions, possible turnaround points, water availability, and any trail closures or restrictions.
A topographic map can show elevation changes, trails, terrain features, and landmarks. A compass can provide direction without depending on a battery. If you carry them, learn how to use them before you need them in an emergency.
GPS devices and smartphone mapping apps are convenient for tracking your location and route, but electronics can fail, lose power, become damaged, or become difficult to use in poor conditions. The National Park Service recommends carrying a physical map as a backup to electronic navigation.
Before leaving service, download any maps you need for offline use. Charge your phone and GPS device and consider carrying a small power bank for longer or remote hikes.
Pro Tip: Tell a reliable person your trail, planned route, vehicle location, expected return time, and what they should do if you do not check in. This remains useful even when you carry a phone or satellite communicator.
Protect Yourself From Sun and Insects
Sun protection matters on cloudy days as well as bright ones, and exposure can be greater around snow, water, sand, or high elevations. Current CDC travel guidance recommends broad-spectrum SPF 30 or higher for substantial sun exposure.
Apply sunscreen to exposed skin and reapply it regularly, especially after heavy sweating, swimming, or toweling off. Sunscreen works best as part of a broader strategy that also includes shade when available, protective clothing, sunglasses with UV protection, and a hat that shades exposed skin.
In areas with mosquitoes, ticks, or other biting insects, pack an appropriate insect repellent and follow its label instructions. Long sleeves and long pants can add protection in brushy or insect-heavy areas.
Carry Enough Water and Know How to Treat It
Water needs vary widely with temperature, humidity, elevation, sun exposure, pace, body size, and exertion. Plan your water before leaving rather than assuming every day hike requires the same amount.
Calculating Water Needs
As one practical reference point, Great Smoky Mountains National Park advises carrying at least 1 liter of water per two hours of hiking. That works out to about half a liter per hour. Hot weather, exposed terrain, strenuous climbing, dry climates, and longer routes can require more.
A useful starting point for many moderate hikes is about 1 liter of water for every two hours, but conditions and individual needs can push requirements much higher.
Do not use that baseline blindly. Check the managing agency’s recommendations for your trail, identify reliable water sources, and carry a reserve if a source may be seasonal or unavailable.
Water Storage and Access
Water bottles and hydration reservoirs both work well. Bottles make it easy to see how much water remains, while a reservoir lets you drink without stopping. Many hiking backpacks include a reservoir sleeve and hose port.
On hot or dry routes, distributing water between more than one container can provide redundancy if a bottle leaks or a reservoir is damaged.
Water Purification and Safety
Never assume a clear-looking stream or spring is safe to drink. According to the CDC’s backcountry water-treatment guidance, boiling is the most reliable method for killing germs. When boiling is not practical, filtering and then disinfecting is generally the next-best option when water safety is uncertain.
Portable treatment systems are not identical. Many filters remove parasites but do not remove all bacteria or viruses, while some chemical disinfectants have limitations against particular parasites. Follow the manufacturer’s instructions for pore size, treatment time, water temperature, and the organisms the product is designed to address.
Warning: A filter or purification tablet does not automatically make every natural water source safe. Treatment cannot make water contaminated by harmful chemicals or toxins safe to drink. Use another water source when chemical contamination is suspected.
Pack Food and Extra Nutrition
Nutrition helps maintain energy during a hike, and carrying extra food gives you a buffer if the trip lasts longer than expected.
Trail mix is popular because nuts, seeds, dried fruit, chocolate, or granola can provide a compact combination of carbohydrates, fats, and protein. Energy bars are also convenient because they pack easily and require no preparation.
Fresh fruit such as apples or bananas can work well for shorter hikes, while nut-butter packets, jerky, crackers, tortillas, dried fruit, or other shelf-stable foods can provide more calories without taking up much room.
Choose foods that you know sit well during exercise. For longer hikes, plan enough for the expected duration and include an additional no-cook reserve in case weather, navigation problems, an injury, or another delay keeps you out longer than planned.
Pack First Aid and Personal Medications
A hiking first aid kit should match the group and route rather than being treated as a fixed list. A basic kit can include adhesive bandages, gauze, medical tape, antiseptic supplies, blister treatment, and other supplies you know how to use.
Carry any personal medications you may need during the hike, including medications you would require if your return is delayed. Check first aid supplies periodically and replace expired or damaged items.
Basic first aid knowledge is as important as the kit itself. If you regularly hike in remote areas, formal first aid or wilderness first aid training can make your supplies far more useful.
Bring a Headlamp, Repair Tools, and Signaling Gear
A headlamp is worth carrying even when you expect to finish before dark. Delays caused by route-finding, an injury, weather, photography, or a slower-than-expected pace can keep you out much later than planned. Hands-free lighting also makes it easier to use trekking poles, handle first aid supplies, or navigate rough ground.
Check the batteries before leaving and carry spare batteries or another compatible power source when appropriate.
A multi-tool can help with minor equipment repairs and food preparation. Depending on your gear, a small repair kit may also include tape, cord, zip ties, a patch kit, or replacement parts.
A whistle is a lightweight signaling tool and can be easier to use repeatedly than shouting. Keep it somewhere you can reach without unpacking your entire bag.
Carry Emergency Shelter and Warmth
Emergency shelter is easy to overlook on a day hike because you do not plan to spend the night. That is exactly why a compact emergency bivy, space blanket, or lightweight tarp can be valuable: it provides some protection if an injury, navigation problem, or sudden weather change prevents a timely return.
The Ten Essentials also include fire-starting supplies. Waterproof matches, a lighter, or another compact fire starter can help in some emergency situations, but fire rules vary. Never start a fire where it is prohibited or where conditions make it unsafe. Check local fire restrictions before your trip.
Check Weather and Set a Turnaround Time
Check the latest forecast shortly before leaving, including precipitation, temperature, wind, heat, and thunderstorm potential. Mountain and exposed environments can change quickly, and conditions at higher elevations may differ greatly from those at the trailhead.
If thunderstorms are possible, plan conservatively. The National Weather Service states that there is no safe place outside when thunderstorms are in the area. A substantial enclosed building or hard-topped vehicle provides the safest nearby shelter.
Warning: Do not rely on a tent, picnic shelter, isolated tree, rocky overhang, or summit as safe lightning shelter. If you hear thunder and safe shelter is reachable, leave exposed terrain and move to that shelter.
Set a turnaround time before starting. Turn around when that time arrives even if you have not reached the summit or destination. This gives you a buffer for slower hiking, route-finding, darkness, or deteriorating weather.
Check Trail Rules, Wildlife, and Route-Specific Gear
A complete hiking checklist changes with the destination. Before leaving, check the land manager’s current trail conditions, closures, permits, water availability, fire restrictions, parking rules, and wildlife advisories.
Bear country may require approved food storage or other precautions. Snow and ice may require traction devices or specialized skills. Desert routes may require much larger water carries. River crossings, high elevations, winter conditions, or technical terrain may call for equipment far beyond a standard day-hike checklist.
Trekking poles can improve balance and provide another point of contact on steep, loose, or uneven ground. They are optional for many trails but may be useful on long climbs and descents.
Follow Leave No Trace Practices
Carry out your trash, food scraps, and other waste rather than leaving them on the trail. Stay on established trails where required, avoid cutting switchbacks, and leave plants, rocks, cultural objects, and other natural features where you find them.
Rules for human waste vary by location, terrain, and land-management agency. Some places require waste to be packed out. Check local requirements before relying on a general backcountry method. The National Park Service Leave No Trace guidance also emphasizes protecting vegetation, packing out waste, and respecting wildlife.
Optional Hiking and Travel Gear
Once the safety essentials are covered, optional items can make a hike more enjoyable. Compact binoculars are useful for viewing wildlife and distant scenery without approaching animals. For more guidance, see this article on compact binoculars for hiking.
Other optional items include a camera, sit pad, gaiters, trekking poles, small towel, field guide, or notebook. Keep optional equipment secondary to water, weather protection, navigation, and emergency gear.
If your hiking trip is part of a broader vacation and you are researching mobility or sightseeing equipment for other parts of the journey, you can also read this guide to the best travel scooter.
Love travel? Join Our Facebook Community
Frequently Asked Questions
What should I bring when hiking?
Start with navigation, sun protection, extra clothing, a headlamp, first aid, fire-starting supplies where appropriate, repair tools, extra food, water and treatment, and emergency shelter. Add suitable footwear, personal medications, insect protection, and any gear required by the trail or weather.
How much water should I bring when hiking?
There is no single amount that works for every hike. As a practical baseline, some National Park Service guidance recommends at least 1 liter for every two hours of hiking. Increase your planned supply for heat, high exertion, dry climates, exposed terrain, altitude, or unreliable water sources.
What kind of food should I bring when hiking?
Choose portable foods you tolerate well during activity, such as trail mix, nuts, dried fruit, energy bars, nut-butter packets, jerky, fruit, crackers, or sandwiches. Pack enough for the planned hike plus some extra no-cook food in case your return is delayed.
What navigation tools should I bring when hiking?
Carry navigation appropriate for the route, such as a paper topographic map and compass plus a GPS device or smartphone with offline maps. Learn how to use your tools before the hike and do not rely on a single battery-powered device.
What should I include in a first aid kit for hiking?
A basic hiking kit can include adhesive bandages, gauze, medical tape, antiseptic supplies, blister treatment, and other items you know how to use. Add personal medications and adjust the kit for your group, trip length, environment, and distance from help.
What clothing should I wear when hiking?
Wear clothing suited to the forecast and dress in adjustable layers. Moisture-managing base layers, an insulating layer when temperatures require it, and a wind or rain shell can help you adapt as conditions change. Wear comfortable hiking footwear and socks that fit properly.
What else should I bring when hiking?
Useful additions include a headlamp, whistle, multi-tool, sunscreen, insect repellent, sunglasses, emergency shelter, repair supplies, power bank, and route-specific items such as trekking poles, traction devices, or additional water.
Do I need the Ten Essentials on a short hike?
It is still wise to use the Ten Essentials as your planning framework. Short hikes can involve sudden weather changes, wrong turns, injuries, or unexpected delays. You can scale the quantity and size of items to the route without eliminating basic emergency preparation.
Can my phone replace a map, GPS, and headlamp?
A phone can handle several useful tasks, but relying on one device creates a single point of failure. Battery loss, damage, cold temperatures, or other problems can remove navigation, communication, and light at once. Carry appropriate backups, including a separate headlamp and offline or physical navigation.
Sources
- National Park Service — Ten Essentials — essential hiking gear, navigation backup, emergency supplies, and trip preparation.
- Great Smoky Mountains National Park — Hiking — current Ten Essentials and hiking-water planning guidance.
- CDC — Water Treatment When Hiking, Camping, or Traveling — boiling, filtering, disinfection, and treatment limitations.
- CDC Yellow Book — Sun Exposure in Travelers — sunscreen, protective clothing, sunglasses, and UV-risk guidance.
- National Weather Service — Lightning Safety — thunderstorm planning and safe shelter guidance.
- National Park Service — Leave No Trace — trail protection, waste disposal, and responsible wildlife practices.

