

Last Updated on August 25, 2026 by Caleb Warren
An electric scooter rattles when vibrations from the road loosen hardware, wear down protective bushings, or cause unpadded internal components to collide with the metal frame. The most common rattle sources are loose stem folding mechanisms, vibrating fender brackets, chattering brake pads, unpadded battery packs, and dry wheel bearings. You can systematically isolate and silence these noises using basic metric hex keys, blue threadlocker, and vibration-dampening foam.
Quick Answer
To fix an electric scooter rattle, isolate the sound using a static drop test. Tighten the stem folding latch and hinge bolts first—this cures over 70% of rattles. Next, secure fender brackets, torque motor axle nuts to 30–40 Nm, snug loose brake caliper bolts, apply medium-strength Blue Loctite 242 to loose fasteners, and cushion shifting batteries with dense EVA foam.
Key Takeaways
- Stem & Folding Latch: The primary source of high-frequency metallic chatter; easily silenced by tightening the hinge pin and adding rubber dampening shims.
- Fastener Maintenance: Constant road vibration backs out unthreaded bolts; always use medium-strength (Blue) threadlocker rather than permanent formulas.
- Brake & Cable Noise: Loose mechanical brake pad retention springs and internal cables slapping inside the hollow stem create deceptive clicking sounds.
- Hub & Wheel Bearings: Gritty, dry, or loose sealed cartridge bearings produce grinding vibrations that require repacking with synthetic grease or complete replacement.
At a Glance
| Time Required | 20 to 45 minutes |
| Difficulty | Beginner to Intermediate |
| Tools Needed | Metric Allen/Hex keys (2.5mm–8mm), Torque wrench, Blue Threadlocker 242, Rubber washers, EVA foam strips |
| Cost | $5 – $25 (DIY materials) |
Disclosure: As an Amazon Associate I earn from qualifying purchases. Some links on this page are affiliate links, at no extra cost to you.
Find the Source of the Rattle: Diagnostic Techniques
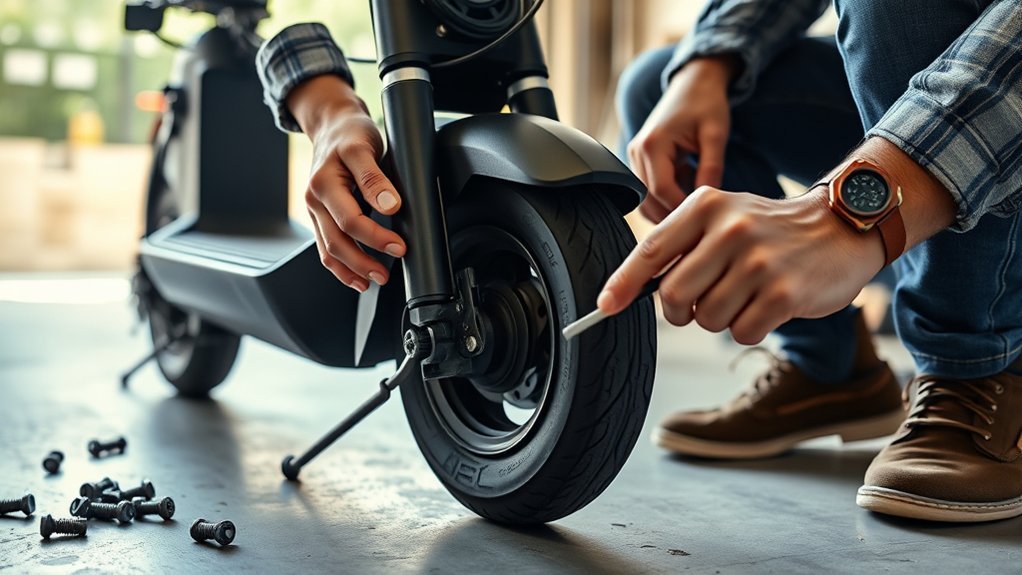
Before turning a single wrench, use targeted physical tests to isolate where the noise originates. Electric scooter frames are rigid aluminum extrusions that act as acoustic resonance chambers; a rattle occurring at the rear fender can easily echo through the deck and sound like it is coming from the front steering column.
- The 2-Inch Drop Test: Power off the scooter. Lift the front wheel roughly 2 inches off the ground and drop it onto a smooth, flat surface, then repeat with the rear wheel. Listen carefully for metallic chatter. If the front rattles, inspect the folding joint, headset bearings, or front suspension. If the rear rattles, focus on the fender, motor axle nuts, or kickstand.
- The Handlebar Rocking Test: Hold the front brake lever tightly and push the handlebars firmly forward and backward. If you feel slight play, clicking, or knocking near the base of the steering column, your folding latch tension bolt or headset collar is loose.
- The Lateral Wheel Shake: Grab the top of each tire and wiggle it side-to-side perpendicularly to the wheel’s rotation. Any noticeable clunk or free play indicates worn sealed hub bearings or loose axle nuts.
- Speed-Dependent vs. Bump-Dependent Listening: If the rattle increases in frequency as your road speed increases (regardless of road roughness), the issue is rotational (bearings, brake rotor rub, or motor stator play). If it only rattles when riding over cracks, paving stones, or rough asphalt, the issue is structural (fenders, deck panels, internal wiring, or battery shifting).
Fix Stem and Folding Mechanism Play (The Most Common Culprit)
The folding mechanism experiences massive leverage while you accelerate, brake, and lean over the handlebars. Over time, the locking collar, eccentric latch cam, or hinge pin develops micro-clearances that create a persistent rattling or clicking sound over uneven ground.
Pro Tip: Never overtighten the main steering headset bolt (the vertical bolt inside the stem) to cure a rattle. Doing so crushes the headset bearings, causing “notchy” steering and premature bearing failure. Adjust the folding hinge clamping bolt first, and only preload the headset until free play disappears while the handlebars still rotate smoothly.
- Adjust the Folding Latch Preload: Unfold the stem halfway. Locate the central tension adjustment screw inside the hinge joint (typically an M5 or M6 internal hex bolt). Turn it clockwise in quarter-turn increments. Re-clamp the latch; closing the folding lever should require firm, positive palm pressure without forcing it.
- Install Anti-Vibration Rubber Dampeners: If your scooter uses a tongue-and-groove hinge design (such as popular models from Segway, Xiaomi, or Apollo), the bare aluminum faces will chatter against each other. Insert a custom-molded silicone or rubber dampening shim (0.4mm to 1.2mm thick) into the hinge pocket to eliminate metal-on-metal contact.
- Silence Internal Cable Slap: Brake cables and motor wiring harnesses routed through the hollow stem tube frequently strike the inner aluminum wall when hitting bumps. Feed a length of split foam pipe insulation or spiral cable wrap into the stem entry port to pad the harness against the internal tubing.
Check Loose Bolts and Torque to Specification
Electric scooters lack large pneumatic automotive dampeners, subjecting every fastener to continuous high-frequency vibrations that break standard mechanical threads loose. Inspecting and torquing your hardware every 100 to 200 miles prevents rattling and critical component failure.
Warning: Always use Medium-Strength Blue Threadlocker (such as Loctite 242) on scooter hardware. Never use permanent Red threadlocker (Loctite 271) on small metric bolts; permanent formulas require 500°F (260°C) heat to break down and will shear soft hex bolt heads inside aluminum frames during future repairs.
Use a calibrated torque wrench and follow standardized fastener guidelines (such as those outlined by Park Tool Repair Standards) to secure critical assemblies:
| Location | Fastener Size | Recommended Torque | Threadlocker Required? |
|---|---|---|---|
| Handlebar Clamp Bolts | M4 / M5 Hex | 4 – 6 N·m | Yes (Blue 242) |
| Brake Caliper Mounting Bolts | M6 Hex | 6 – 8 N·m | Yes (Blue 242) |
| Deck Perimeter Screws | M3 / M4 Countersunk | 2 – 4 N·m | Optional (Low-strength) |
| Main Wheel Axle Nuts | M10 / M12 Flange Nut | 35 – 45 N·m | No (Mechanical lock washer) |
| Suspension Pivot Bolts | M6 / M8 Shoulder Bolt | 8 – 12 N·m | Yes (Blue 242) |
Inspect Bearings, Wheels, and Axles
Worn sealed cartridge bearings generate a hollow rattling or grinding buzz that intensifies with speed. Water intrusion, road grime, and harsh curb impacts breach bearing rubber seals, washing out grease and pitting the hardened steel ball tracks.
- Free-Spin Inspection: Prop the scooter up on a crate so both wheels hang freely. Spin the wheel vigorously by hand. A healthy wheel spins in complete silence for 30 to 60 seconds and slows down smoothly. If you hear a dry hissing or clicking sound, or feel rough vibrations through the fork, the bearing balls are scored.
- Checking Hub Axle Play: Place your thumbs against the fork leg and fingers on the wheel rim. Rock the wheel laterally. If you detect distinct mechanical play or knocking before the fork flexes, either the inner bearing race has worn against the axle or the axle nuts lack proper torque.
- Split-Rim Hardware Check: Many modern scooters utilize split-rim wheels to facilitate tire changes. If the perimeter bolts holding the two wheel halves together loosen, the tire bead and split halves will click under rider load. Tighten all split-rim perimeter bolts in a crisscross pattern.
Note: Never spray penetrating solvents (such as standard multi-purpose WD-40) directly into wheel hubs. Penetrating fluids dissolve the internal polyurea grease inside sealed cartridge bearings, destroying them within a few miles. Always use dedicated sealed bearing replacements (such as standard 6000-series 2RS bearings) or non-aerosol synthetic bearing grease.
Fix Fender and Kickstand Rattles
Fenders and kickstands have long cantilevered designs that act as mechanical tuning forks, amplifying small chassis vibrations into loud buzzing noises.
Check Fender Mounts and Reinforce Brackets
Rear mudguards endure violent upward road shocks. If your scooter lacks a rigid metal fender support bracket, the plastic guard will flex downward and slap against the rotating tire over every bump.
- Inspect the primary mounting bolts beneath the deck lip. Remove each bolt, apply medium Blue threadlocker, and reinstall.
- Install an aftermarket metal fender support bracket (standard on modern Segway and Xiaomi models) that ties the rear tip of the mudguard directly to the solid wheel axle studs.
- Ensure the tail-light wire routed underneath the fender is secured inside its protective plastic channel; a drooping brake light cable frequently chatters against the tire.
Tighten Kickstand Hardware and Tension Springs
Kickstands rattle when the pivot bolt backs out or when the internal extension spring loses tension, allowing the kickstand arm to bounce against the lower frame edge while riding.
Unfold the kickstand and tighten the rear mounting bracket bolts to 5–7 N·m using Blue threadlocker. Check the pivot bolt that joins the folding arm to the bracket; snug it down so the arm extends and retracts smoothly without lateral wobble.
Add Vibration Padding
Where plastic or metal parts meet the aluminum frame, apply adhesive neoprene foam pads or rubber washers. Stick a 2mm-thick rubber bumper directly on the frame where the kickstand arm rests in its folded position to cushion metal-on-metal strikes.
Secure the Battery and Motor Mounts
Internal deck components that shift under acceleration or braking create heavy, low-pitched thumping and rattling noises.
Warning: When opening the scooter deck to inspect the battery, power the unit off and disconnect the main XT60/XT90 power harness. Never use sharp metallic tools near the battery pack; puncturing a lithium-ion cell will cause immediate thermal runaway and catastrophic fire.
Battery Mount Stability and Foam Insulation
Lithium-ion battery packs are heavy (typically 6 to 20 lbs). If the internal mounting brackets loosen or the factory packing foam degrades, the hard battery casing will slide inside the deck chamber.
Open the deck plate and inspect the pack. If the battery can be moved by hand, pack high-density, closed-cell EVA foam blocks along the front, rear, and sides of the battery compartment. The foam should firmly compress when the deck lid is screwed down, locking the pack in place without applying crushing pressure to the internal battery management system (BMS).
Motor Mount Tightness and Torque Arms
Hub motors produce intense rotational torque against the frame dropouts. If the axle nuts or torque retention washers shift, the motor axle will click back and forth within the dropout slots during regenerative braking or hard acceleration.
Inspect the axle nuts on both sides of the hub motor. Verify that the tabbed torque washers are correctly seated inside the frame dropouts. Torque the main axle nuts to 35–45 N·m. Inspect the motor cable exit spring to verify that the protective metal coil is not buzzing against the axle nut.
Check Brake Pads, Caliper Springs, and Cable Noise
Braking systems produce both continuous scraping noises and intermittent high-speed clicking rattles when components lose alignment.
“A rhythmic, metallic ticking sound that disappears the moment you lightly pull the brake lever is almost always a loose pad retention spring or a slightly warped brake rotor.”
- Pad Return Spring Tension: In mechanical and hydraulic disc brakes, a small metal leaf spring separates the two brake pads. If this spring bends or loses temper, the pads will rattle loosely inside the caliper body over rough roads. Remove the pads, gently bend the spring arms outward to increase retention tension, and reinstall.
- Caliper Alignment: Loosen the two M6 caliper mounting bolts slightly. Squeeze and hold the brake lever firmly to center the caliper over the rotor, then re-tighten each bolt to 6–8 N·m.
- Brake Cable Housing Clips: External cable housing routed along the neck or swingarms can tap against the frame. Secure loose housing with rubberized C-clips or zip ties with adhesive foam backing.
Lubricate Moving Parts the Right Way
Dry pivot joints chatter and squeak under load. However, using the wrong lubricant attracts road grit, transforming into an abrasive grinding paste that accelerates component wear.
- Folding Hinges and Pivot Pins: Clean the joints with isopropyl alcohol. Apply a light coating of synthetic silicone grease or dry PTFE lubricant (such as Teflon spray) to the contact surfaces. Work the folding joint back and forth, then wipe away all exterior excess.
- Suspension Bushings: Spray pure silicone lubricant into rubber and polyurethane suspension bushings. Avoid petroleum-based greases on rubber bushings, as petroleum degrades synthetic elastomers.
- Brake Cables: Drip two drops of dry cable lubricant into the cable housing ferrules to ensure the inner braided wire glides smoothly without catching.
Check Suspension for Wear, Bushing Play, and Preload
Modern commuter and performance electric scooters from brands like NIU Mobility and Apollo employ front and rear coil-spring or hydraulic suspension systems that require routine calibration to stay quiet.
- Coil Spring Preload: If a coil spring suspension lacks sufficient preload tension, the spring will sit loose in its aluminum collar and rattle loudly over sharp bumps. Tighten the preload adjustment ring clockwise until the spring is firmly seated with at least 2–3mm of initial compression.
- Suspension Arm Bushings: Lift the scooter and push the swingarm up and down sideways. If the pivot arm exhibits lateral play, the brass or polyurethane bushings are worn and require replacement or re-shimming with stainless steel micro-washers.
- Hydraulic Shock Shafts: Inspect shock absorber shafts for oil leakage or pitting. A blown hydraulic damper will bottom out violently with a loud metallic clank over ordinary road bumps.
Prevent Future Scooter Rattling: The Pre-Ride Routine
Implementing a routine inspection schedule prevents minor fastener drift from turning into structural noise or road breakdowns:
- Weekly “M-Check”: Trace an imaginary “M” shape across your scooter—starting at the front wheel axle, moving up to the handlebars, down to the deck/folding hinge, up to the seat/rear suspension, and down to the rear motor axle. Wiggle each component along the path to detect loosening early.
- Maintain Correct Tire Pressure: Under-inflated pneumatic tires transfer massive shock loads directly into the aluminum chassis, shaking bolts loose twice as fast. Maintain tire pressure between 45 and 50 PSI (or manufacturer spec).
- Sheltered Storage: Store your scooter in a climate-controlled, dry room. Moisture oxidizes hardware and degrades bearing grease, leading to seized pivots and persistent chassis chatter.
Frequently Asked Questions
Why is my electric scooter making a rattling sound?
Electric scooters rattle when road vibrations loosen frame bolts, wear out the folding mechanism hinge, or cause loose brake pads, fender brackets, and internal battery packs to vibrate against the aluminum deck. Inspecting hardware and tightening loose bolts with medium-strength threadlocker cures the vast majority of rattles.
How do I stop my electric scooter stem from rattling?
To silence stem rattles, adjust the internal folding latch tension screw clockwise until the locking clamp closes with firm resistance. If metal-on-metal play persists, insert a rubber anti-vibration folding shim into the hinge pocket and wrap loose internal brake/throttle cables in foam sleeves.
Does a rattling noise always mean an expensive repair?
No. Over 90% of electric scooter rattles are caused by loose external hardware (such as kickstand bolts, fender brackets, and folding latches) that can be fixed at home in under 30 minutes with standard metric hex wrenches, foam dampening tape, and Blue Loctite 242.
Can I ride an electric scooter with a rattling hub motor?
No, you should not ride with a rattling hub motor. A clunking or rattling hub motor indicates loose axle nuts, worn internal bearings, or loose stator magnets. Riding on a damaged motor hub can cause the wheel to seize, strip axle dropouts, or cause sudden loss of control at high speeds.
Conclusion
An electric scooter rattle is an early warning system rather than just an annoyance. By following a structured troubleshooting process—isolating vibrations with drop tests, calibrating the folding stem clamp, securing fender brackets, torquing motor axle nuts to spec, and adding dense foam dampening to the battery bay—you can eliminate distracting noise and ensure your scooter remains safe, responsive, and durable for thousands of miles of quiet riding.
Sources
- Park Tool Repair Help — Mechanical torque specifications, bolt threadlocker application, and bearing maintenance standards.
- Segway-Ninebot Official Support — Commuter electric scooter stem folding clamp adjustment and structural maintenance guidelines.
- Henkel Loctite Technical Data — Threadlocker selection guidelines (removable anaerobic Blue 242 vs. permanent Red 271).
- NIU Mobility User Guides — Electric scooter chassis inspection intervals, suspension maintenance, and battery safety procedures.
