

Last Updated on August 26, 2026 by Caleb Warren
You can convert some normal kick scooters into electric scooters by adding a compatible motor, battery, controller, throttle, brake cut-off system, and secure wiring. The important part is not simply making the motor spin. The scooter’s frame, fork, brakes, wheels, battery mount, and electrical components must all work safely together. A direct-fit conversion kit is usually a better starting point than mixing unrelated parts.
Quick Answer
To turn a normal scooter into an electric scooter, first confirm that the frame, fork, wheels, and brakes can handle the conversion. Install a compatible motor kit, manufactured lithium-ion battery, controller, throttle, and brake cut-off. Match all electrical ratings, follow the kit’s wiring diagram, and test the finished scooter at very low speed before normal riding.
Key Takeaways
- Start with a scooter that has a sound frame, fork, folding mechanism, wheels, and effective brakes.
- A direct-fit hub-motor conversion kit is normally simpler than fabricating a chain-drive system.
- Match the battery, controller, motor, charger, connectors, and brake controls as one electrical system.
- Use a professionally manufactured battery pack with appropriate protection rather than building a pack from loose lithium-ion cells.
- Follow the exact wiring diagram or connector pinout; wire colors are not universal.
- Test the motor, throttle, brake cut-off, steering, and mechanical brakes before riding in traffic.
At a Glance
| Time Required | Several hours for a well-matched bolt-on kit; substantially longer if brackets, wheels, brakes, or the frame require fabrication |
| Difficulty | Intermediate to advanced DIY; professional help is appropriate for structural fabrication, battery work, or unfamiliar high-current electrical connections |
| Tools Needed | Hex keys, appropriate wrenches/sockets, torque wrench where specifications are provided, screwdrivers, tire tools if needed, multimeter, cable ties or clips, and kit-specific tools |
| Cost | Usually several hundred dollars once the motor kit, battery, approved charger, mounting hardware, and any brake or wheel changes are included; custom fabrication can increase the total |
Warning: A scooter conversion combines a high-energy lithium-ion battery with a vehicle that may travel much faster than the original kick scooter was designed to travel. Do not use a cracked or damaged frame, improvise a lithium-ion battery pack from loose cells, bypass battery protection, or ride a conversion whose brakes cannot stop it reliably. Get qualified help when structural or battery work is outside your experience.
Disclosure: As an Amazon Associate I earn from qualifying purchases. Some links on this page are affiliate links, at no extra cost to you.
Check Whether Your Scooter Can Be Converted Safely
Before choosing a motor, decide whether the original scooter is a suitable platform. A lightweight children’s kick scooter, worn folding scooter, or model with weak brakes may not be a sensible candidate even if you can physically attach a motor.
Inspect the scooter closely before buying conversion parts:
- Frame and deck: Look for cracks, corrosion, bent sections, loose welds, or previous repairs.
- Fork and axle area: Make sure the fork is straight and has enough space for the intended wheel or hub motor.
- Folding mechanism: Check for movement, wear, damaged pins, or a latch that can open unexpectedly.
- Brakes: The scooter needs dependable mechanical braking. A motor cut-off or regenerative braking feature is not a substitute for a working mechanical brake.
- Wheels and tires: Confirm the intended motor wheel fits without rubbing the fork, deck, brake, or other components.
- Weight capacity: Remember that the battery, motor, controller, brackets, and wiring add weight before the rider even steps on the deck.
- Mounting space: There must be a secure place for the battery and controller without blocking steering, folding, brakes, or safe foot placement.
The U.S. Consumer Product Safety Commission advises riders to inspect handlebars, brakes, throttle, lights, tires, cables, and the frame before riding a micromobility device. That becomes especially important after a DIY conversion.
Pro Tip: If your scooter requires major welding, fork modification, improvised axle slots, or a braking system redesign just to accept a conversion kit, compare the cost and risk with buying a purpose-built electric scooter before proceeding.
Choose the Right Electric Scooter Motor
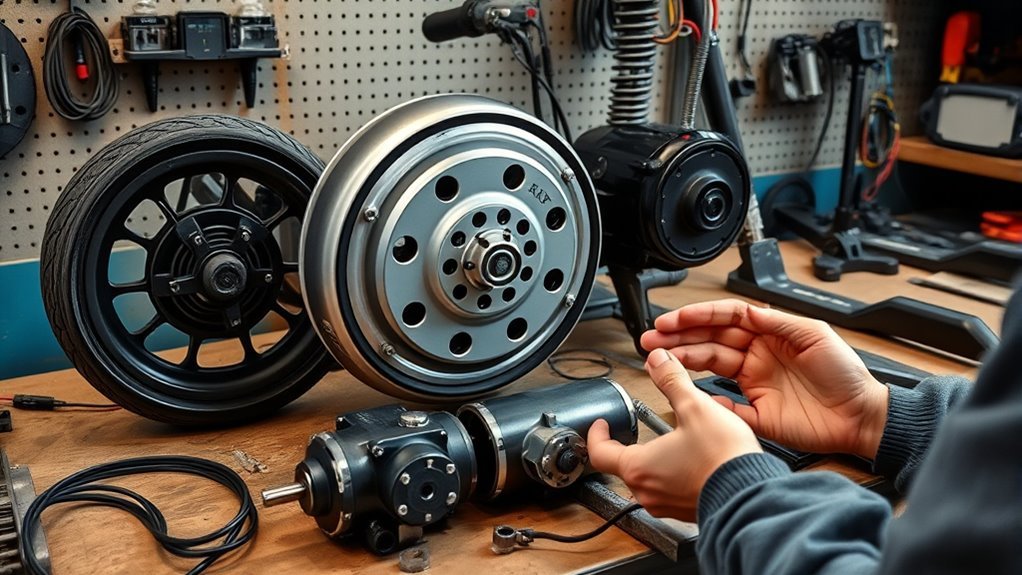
Choose a motor that matches the scooter’s wheel size, mounting points, rider load, expected terrain, controller, and battery rather than selecting it by wattage alone.
Hub Motor vs. Chain Drive
A hub motor is often the simplest option for a DIY kick-scooter conversion because the motor is built into the wheel. A properly designed kit can reduce the amount of custom fabrication and drivetrain alignment required.
A chain-driven motor can offer different gearing and torque characteristics, but it generally requires a secure motor bracket, sprocket alignment, chain tension, guarding, and enough frame clearance. Poor alignment can create noise, rapid wear, chain derailment, or mechanical interference.
Do not assume that a particular wattage automatically makes a motor suitable for commuting or hills. A nominal 250W, 350W, 500W, or higher-rated motor can behave very differently depending on wheel diameter, gearing, controller current, rider weight, gradient, and system voltage. Higher power also increases the demands placed on the frame, fork, tires, and brakes.
Check Motor and Wheel Fit
Before ordering a hub motor, verify the wheel diameter, axle dimensions, fork or frame spacing, brake arrangement, tire clearance, and cable exit location. Use any washers, anti-rotation hardware, or torque-retention parts specified by the kit manufacturer.
A hub motor produces reaction torque at the axle. The motor must therefore sit securely in hardware designed to handle that load. Do not enlarge or weaken a fork or dropout simply to force an incompatible axle into place.
Pick the Battery and Controller
The battery, controller, motor, and charger must be treated as one matched system. Do not choose a battery solely because it says “36V,” “48V,” or has a large mAh number on the label.
Battery Type and Capacity
A professionally manufactured lithium-ion battery pack is commonly used because it provides relatively high energy storage for its size and weight. For a conversion, choose a battery made for light electric-vehicle or micromobility use with an appropriate battery-management system and documented voltage, capacity, discharge limits, charging requirements, and connector information.
Avoid assembling a traction battery from loose or repurposed 18650 cells unless the work is being performed by a properly qualified battery specialist. The CPSC advises against using micromobility battery packs that have been modified or reworked by unqualified personnel or assembled using repurposed or used cells.
Note: Battery capacity is easier to compare in watt-hours (Wh) than mAh alone. As a basic calculation, watt-hours are approximately nominal battery voltage multiplied by amp-hours. For example, two packs with the same Ah rating but different voltages do not store the same amount of energy. Actual riding range also changes with speed, hills, rider weight, wind, tire pressure, temperature, and repeated acceleration.
Where applicable and available, look for products evaluated by a recognized testing laboratory to appropriate micromobility standards. UL Solutions explains that UL 2271 covers batteries for light electric vehicle applications and UL 2272 covers electrical systems in personal e-mobility devices. A home conversion using individually certified components is not automatically a UL 2272-certified finished scooter.
Controller Compatibility
Match the controller to the motor type and the battery’s electrical limits. A brushless DC motor normally requires a compatible brushless controller with the correct Hall-sensor arrangement if the motor uses Hall sensors.
Check all of the following before connecting power:
- Battery nominal voltage
- Battery maximum/full-charge voltage
- Controller operating-voltage range
- Motor voltage/rating specified by the kit
- Controller continuous and peak-current limits
- Battery and BMS continuous/peak discharge limits
- Connector type and current rating
- Throttle and brake-sensor compatibility
- Charger specified for the battery
Do not use a simple rule such as “a 1000W motor needs 30A” without checking the complete system. Electrical current changes with voltage and operating load, while controllers may allow brief peaks above their nominal continuous level.
Use the Correct Charger
The charger must be specifically compatible with the battery pack’s chemistry, voltage, charge profile, connector, and battery-management system. A plug that fits does not prove compatibility.
In its September 2024 micromobility charger warning, CPSC cautioned against chargers marketed as “universal” unless they have been tested and approved to work safely with the device. Use the charger supplied or approved for the battery or conversion system.
Wiring and Mounting
Mount the battery so it cannot slide, bounce, contact a wheel, interfere with steering, or detach during braking. The enclosure or mounting system should protect it from impact and weather while respecting the battery manufacturer’s installation and temperature requirements.
Mount the controller securely where the manufacturer allows adequate cooling. Do not bury a controller in insulation or seal it in a way that traps excessive heat if the unit relies on airflow or its housing for cooling.
Use clean cable routing:
- Keep power and signal cables away from tires, brake mechanisms, sharp edges, and moving suspension or folding parts.
- Leave enough cable movement at the handlebars for full steering lock in both directions.
- Use grommets, sleeves, clips, or other protection where wires cross edges.
- Add strain relief so connector weight is not pulling directly on pins or wires.
- Use the supplied or manufacturer-specified connectors rather than twisting bare wires together.
- Keep connections protected from moisture according to the component instructions.
Do not assume identical wire colors mean identical functions. Verify each connector against the controller or kit wiring diagram before energizing the system.
Parts and Tools You May Need
A direct-fit conversion is easier when most components come from one compatible system. A typical build may require:
- Hub motor wheel or compatible drive motor
- Matched motor controller
- Professionally manufactured battery pack with BMS
- Battery-compatible charger
- Throttle
- Compatible brake cut-off lever or brake sensor
- Display or power switch if required by the controller
- Battery and controller mounts
- Kit-specified axle washers, retention hardware, or brackets
- Appropriate connectors and cable protection
- Fasteners specified for the conversion
Useful tools commonly include hex keys, sockets or wrenches, screwdrivers, a torque wrench when torque values are supplied, tire tools, cutters for cable ties, and a multimeter for checking polarity and system voltage. Specialized fabrication should be left to someone equipped and qualified to do it safely.
Mount the Motor on Your Scooter
If you are installing a hub-motor wheel, remove the original wheel according to the scooter manufacturer’s design and verify that the new axle seats fully and correctly in its mounting points. Install all washers, spacers, anti-rotation hardware, brake components, and axle fasteners exactly as required by the motor kit.
Check that the wheel:
- Is centered correctly
- Rotates without touching the fork, deck, brake, or cable
- Has sufficient tire clearance
- Does not bind when axle fasteners are tightened
- Allows the brake to work across its full operating range
For a chain-driven motor, mounting becomes more fabrication-dependent. The motor bracket must be rigid, the chain line must remain aligned, and moving components need safe clearance. If the frame needs drilling, welding, grinding, or structural alteration, professional fabrication is the safer choice.
Keep weight distribution in mind. A heavy battery mounted high on the stem or far behind the rear wheel can make steering or handling less predictable. A low, secure location that does not reduce ground clearance excessively is generally preferable when permitted by the component design.
Wire the Throttle and Brake Controls
Mount the throttle where it can be reached comfortably without preventing normal brake operation. Turn the handlebars fully left and right after installation and make sure the throttle cable does not tighten, pull a connector, or activate the throttle.
Connect the throttle only according to the controller’s wiring diagram, connector labels, or verified pinout. Do not identify throttle power, ground, or signal wires by color alone.
- Mount the throttle securely without blocking the brake lever.
- Use the correct controller port or documented pinout.
- Secure wiring without pinching it beneath clamps.
- Allow enough slack for full steering movement.
- Route cables away from the wheel and folding mechanism.
Brake Cut-Off vs. Regenerative Braking
A brake cut-off tells a compatible controller to stop driving the motor when you apply the brake. This is different from the mechanical brake that physically slows the scooter.
The brake sensor may use different electrical logic depending on the controller, so use the brake levers or sensors specified for that system rather than assuming a normally open or normally closed circuit.
Regenerative braking is an optional function on some motor/controller systems. If supported, it may return some energy to the battery during deceleration. However, it depends on the motor, controller, battery/BMS, and programming, and it should never be treated as a replacement for dependable mechanical brakes.
Warning: Do not road-test a conversion if squeezing the brake does not reliably slow the scooter or if the motor continues applying torque while a brake cut-off is supposed to be active.
Check Everything Before First Power-Up
Before connecting or switching on the main battery, perform a full mechanical and electrical inspection.
- Confirm the battery and controller voltage specifications match.
- Check battery polarity using the manufacturer’s documentation and appropriate test equipment.
- Confirm every connector is in the correct labeled port.
- Check that no bare conductor or damaged insulation is visible.
- Make sure cables cannot touch tires, brakes, sharp edges, or folding joints.
- Confirm the motor wheel rotates freely.
- Confirm mechanical brakes operate normally.
- Check motor, battery, controller, and handlebar mounts for movement.
- Verify steering reaches full left and right lock without pulling cables.
- Make sure the throttle returns normally when released.
If the manufacturer’s instructions specify a fuse, circuit breaker, pre-charge device, torque value, or particular connection sequence, use that specification rather than guessing a value.
Test Your Electric Scooter Safely
Do not make the first test a full-speed road ride. Begin with the driven wheel clear of the ground if the scooter can be supported safely and the conversion-kit instructions permit this type of test.
1. Perform a Stationary Function Test
Switch the system on and apply only a small amount of throttle. Confirm that the driven wheel starts smoothly and rotates in the intended direction. Release the throttle and verify that motor power stops.
Next, test each brake cut-off sensor. With the wheel turning slowly under power, apply the corresponding brake control. If the controller is designed to provide brake cut-off, motor torque should stop as specified by the system.
Watch and listen for:
- Grinding, rubbing, or knocking
- Unexpected wheel movement
- Intermittent power
- Connectors becoming loose
- Abnormal heat
- Throttle response that does not return normally
2. Perform a Low-Speed Riding Test
Wear a properly fitted helmet and other appropriate protective equipment. The CPSC recommends helmet use when riding scooters.
Use an empty, controlled area away from traffic, pedestrians, curbs, steep slopes, and obstacles. Start at walking or jogging speed rather than attempting top speed immediately.
Test one function at a time:
- Accelerate gently.
- Release the throttle and confirm power stops.
- Apply the brakes progressively.
- Check steering and balance.
- Listen for rubbing or loose hardware.
- Stop and inspect the motor mount, axle hardware, battery mount, controller, and connectors.
CPSC recommends checking the brakes and understanding the scooter’s stopping behavior because stopping distance can vary substantially between scooters.
3. Increase Speed Gradually
Only increase speed after the scooter has passed repeated low-speed tests. Added motor power can expose weaknesses that were not noticeable when the scooter was human-powered.
If you detect steering wobble, brake fade, loosened fasteners, motor cut-outs, excessive heat, unusual noise, or movement in the battery or motor mount, stop riding and correct the cause before another test.
Troubleshoot Common Conversion Problems
Scooter Does Not Power On
Check that the battery is charged, switched on if it has a switch, fully seated in its mount, and connected to the controller. Confirm any display, ignition, or enable wire specified by the controller is connected correctly. If a fuse or protective device supplied by the system has opened, determine the cause rather than repeatedly replacing or bypassing it.
Display Turns On but Motor Does Not Run
A brake cut-off sensor that is permanently active can prevent some controllers from driving the motor. Check the controller’s error display and wiring documentation. Also verify the throttle, motor, and Hall-sensor connectors if used.
Motor Runs Roughly or Jerks
Stop the test. A wrong phase/Hall connection, damaged connector, incompatible motor/controller combination, or mechanical interference can produce rough operation. Do not experiment randomly with high-current wiring. Follow the motor/controller troubleshooting procedure supplied with the kit.
Power Cuts Out Under Load
Possible causes include a low battery, battery-management-system protection, controller protection, a poor high-current connection, excessive load, or an electrical mismatch. Stop riding if connectors, wiring, the controller, or battery become abnormally hot.
Motor Continues When Braking
If your conversion is designed to provide a brake cut-off, do not continue normal riding until the brake sensor, wiring, and controller configuration have been checked. Mechanical brakes must still operate independently of the electrical system.
Charge the Battery Safely
Lithium-ion battery care is one of the most important parts of owning a converted scooter. Follow the battery manufacturer’s charging and storage instructions rather than applying generic charging rules.
- Use only the charger supplied or specifically approved for the battery/system.
- Do not substitute a generic charger simply because its plug fits.
- Remain present while the battery is charging and do not charge while sleeping.
- Unplug the charger when the specified charge cycle is complete.
- Do not charge a swollen, crushed, punctured, leaking, unusually hot, or otherwise damaged battery.
- Do not continue using a battery or charger that has been recalled or identified as unsafe.
- Keep the battery and charger away from conditions prohibited by their manufacturer.
CPSC’s current micromobility safety guidance recommends approved replacement batteries and appropriate charging practices to reduce fire risk.
Check Local Electric Scooter Rules
Conversion does not automatically make a scooter legal to use everywhere. Maximum speed, motor output, minimum rider age, helmet requirements, registration, insurance, sidewalk use, road access, and bike-lane rules vary by country, state, province, and city.
CPSC advises riders to follow local traffic laws because helmet rules, riding locations, and roadway requirements differ between communities. Check the rules where you plan to ride before using a converted scooter on public property.
Also remember that modifying a scooter can affect the original manufacturer’s warranty, rated operating limits, and certification status. A DIY conversion should not be represented as a manufacturer-approved or UL 2272-certified finished device unless the completed system has actually undergone the applicable certification process.
Maintain and Upgrade Your Electric Scooter
Converted scooters need more frequent inspection than a simple kick scooter because vibration, motor torque, electrical current, and added weight create new wear points.
Before regular rides, inspect:
- Motor and axle fasteners
- Battery mount and locking mechanism
- Controller mount
- Brake operation
- Tire condition and pressure
- Throttle return
- Brake cut-off operation if fitted
- Cable abrasion and connector condition
- Frame, fork, and folding joint
Periodically check the battery for physical damage, unusual heating, swelling, connector discoloration, or other changes. Replace damaged cables or connectors with correctly rated components rather than temporary household wiring repairs.
Keep braking surfaces clean and dry. Never put oil or grease on brake pads, discs, drums, or rim braking surfaces. Lubricate only bearings, pivots, or other points specifically identified by the component manufacturer, and keep lubricant away from friction surfaces.
If you want more range, replace the battery only with a professionally manufactured pack that is electrically compatible with the controller, charger, mounting system, and motor. Do not simply add loose cells or substitute a higher-voltage pack.
When a lithium-ion battery reaches the end of its useful life, do not put it in ordinary household trash or general recycling. Use an appropriate battery-recycling or hazardous-waste program.
Frequently Asked Questions
Can You Turn a Normal Scooter Into an Electric Scooter?
Yes, some normal kick scooters can be converted by installing a compatible motor, controller, battery, throttle, brake cut-off, and wiring system. The scooter must also have a sound frame, suitable wheel or motor mounting points, enough space for the components, and brakes capable of controlling the finished scooter safely.
Are Scooters Good for Autistic Kids?
Autism alone does not determine whether a scooter is suitable for a child. Consider the individual child’s balance, coordination, judgment, sensory needs, ability to brake and steer, and level of supervision. Follow the scooter manufacturer’s age and weight limits and use a properly fitted helmet. A DIY electric conversion adds substantially more speed and complexity than a normal kick scooter and should not be treated as a children’s toy.
Is 30 Mph Fast for an E-Scooter?
Yes. Thirty mph, or about 48 km/h, is very fast for a stand-up scooter and greatly increases stopping distance and the consequences of a crash. A normal kick-scooter chassis should not be assumed safe at that speed simply because a motor can propel it there. Check the scooter’s structural limits, brakes, tires, local laws, and protective-equipment requirements.
Can We Convert an Old Scooter to an Electric?
Possibly, but age alone does not tell you whether the scooter is suitable. Inspect an older scooter carefully for cracks, corrosion, worn folding joints, bent forks, damaged wheels, loose bearings, and inadequate brakes. If the structure or braking system is questionable, replacing the scooter is safer than adding motor power to it.
Do I Need a Special Battery for an Electric Scooter Conversion?
You need a battery designed for the electrical requirements of your motor/controller system, with the correct nominal and maximum voltage, sufficient discharge capability, appropriate battery-management protection, secure mounting, and a compatible charger. A random battery with a matching connector is not enough.
Can I Use a Higher-Voltage Battery to Make the Scooter Faster?
Do not install a higher-voltage battery unless the motor, controller, charger, display, accessories, connectors, and other electrical components are specifically designed for it. Excess voltage can damage components, increase heat, and create a safety hazard.
Does Regenerative Braking Replace Normal Scooter Brakes?
No. Regenerative braking is an optional electrical feature and should not replace a dependable mechanical braking system. Its braking force may vary with speed, battery state, controller programming, and system design.
Conclusion
Converting a normal scooter into an electric scooter is possible when the original chassis is suitable and every new component is compatible. Start by checking the frame, fork, wheels, folding mechanism, and brakes. Choose a matched motor, controller, manufactured battery, approved charger, throttle, and brake cut-off system rather than combining parts only by voltage or wire color.
Mount everything securely, route wiring away from moving parts, follow the manufacturer’s wiring diagram, and test the motor and brake controls before your first low-speed ride. Continue inspecting the scooter after the conversion because motor torque, vibration, higher speed, and battery weight can loosen or stress parts that were not heavily loaded when the scooter was human-powered.
Sources
- U.S. Consumer Product Safety Commission — Micromobility Information Center — riding, inspection, battery, charging, and local-law safety guidance.
- U.S. Consumer Product Safety Commission — Universal Charger Warning — charger compatibility and lithium-ion fire risk.
- U.S. Consumer Product Safety Commission — Ride Smart: Always Wear a Helmet — helmet guidance for bikes and scooters.
- UL Solutions — Personal e-Mobility Evaluation, Testing and Certification — ANSI/CAN/UL 2272 and micromobility electrical-system safety.
- UL Solutions — Micromobility Device Testing and Certification — UL 2271 battery and UL 2272 personal e-mobility standards.
