Last Updated on September 10, 2026 by Daniel Globe
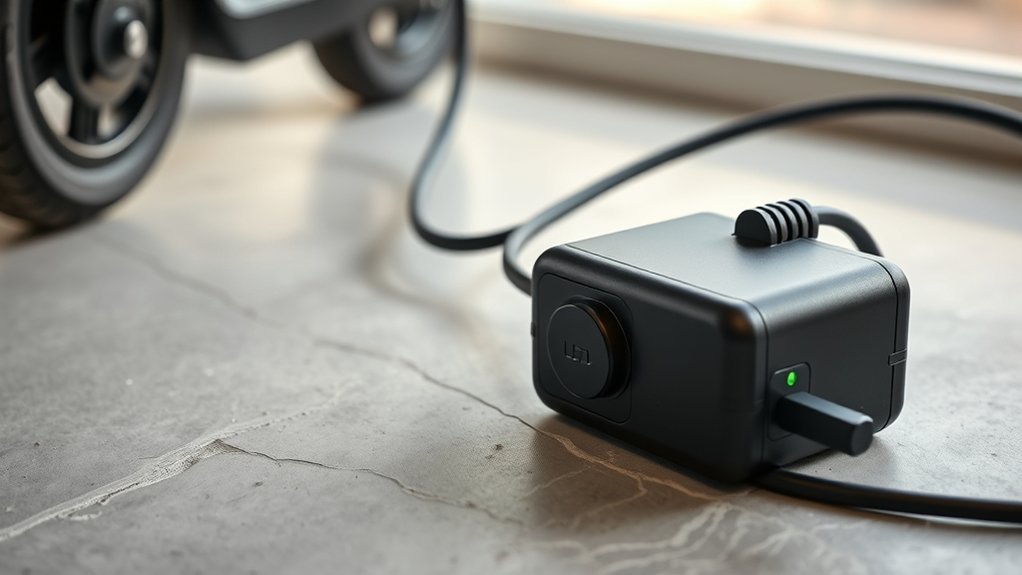
An electric scooter charger usually looks like a small rectangular power brick with an AC wall cord or plug on one side and a cable leading to the scooter on the other. The case normally carries a label showing its input and output ratings, model number, and manufacturer information. Many chargers also have an LED status light, although the colors and meanings vary by model. Some scooters use built-in charging hardware instead of a separate external brick.
Quick Answer
Most electric scooter chargers are small rectangular power bricks with an AC wall input, a DC output cable, and a round or model-specific plug for the scooter. The label usually lists input and output ratings, model information, and sometimes certification marks. Some scooters use built-in charging hardware instead of an external brick.
Key Takeaways
- Many scooter chargers look like compact laptop-style power bricks, but appearance varies by model.
- Do not match a charger by connector shape or battery nominal voltage alone; use the exact charger specification approved by the scooter manufacturer.
- A 36 V nominal battery can require a charger with a higher output voltage, such as about 42 V, so read the manufacturer’s specifications rather than guessing.
- Use the supplied or manufacturer-approved charger, stay present while charging, and never charge a micromobility battery while sleeping.
Disclosure: As an Amazon Associate I earn from qualifying purchases. Some links on this page are affiliate links, at no extra cost to you.
What Does an Electric Scooter Charger Look Like?
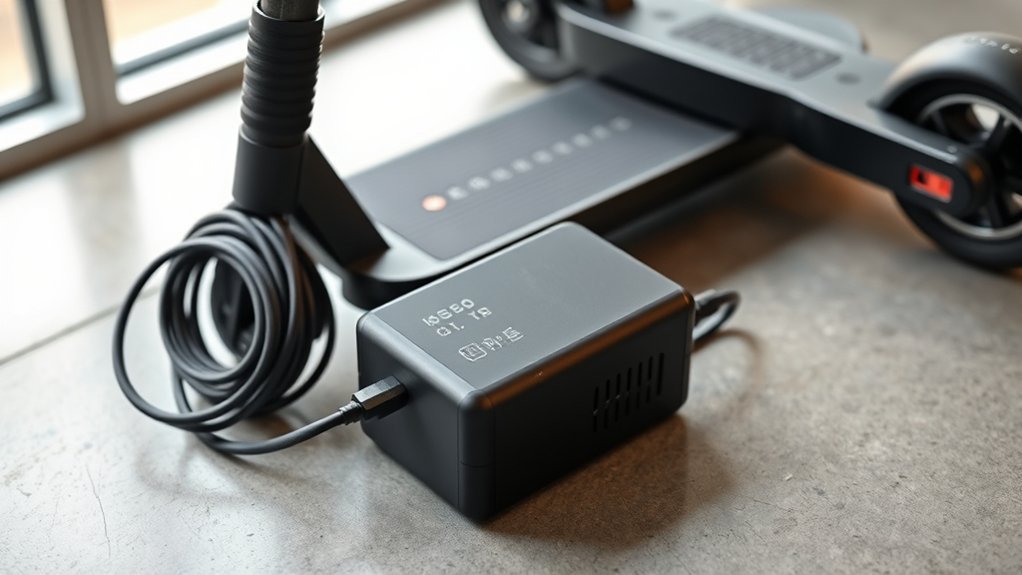
An electric scooter charger commonly looks like a compact black or dark-colored rectangular box similar to a laptop charger. One side receives AC power from the wall, and the other side sends controlled DC power to the scooter’s charging system.
The housing may be small enough to carry in a backpack, although size varies considerably. A higher-output charger may be larger because it has to handle more power and heat. Some chargers cool passively through their casing, while others may use additional ventilation or a fan. Size alone does not tell you whether a charger is faster or compatible with your scooter.
Look closely at the case and you will usually find a printed label. It may show the manufacturer’s name, charger model, AC input range, DC output voltage and current, and regulatory or certification markings. An LED may indicate that the charger has power or that charging is underway, but you should use the manufacturer’s manual to interpret its colors.
Note: Not every scooter uses a separate power brick. Some models have charging electronics built into the scooter and connect to AC power through an appropriate charging cable. Always identify the charging system from the model’s manual rather than appearance alone.
What Are the Main Parts of an Electric Scooter Charger?
Although designs vary, an external electric scooter charger normally has several recognizable parts:
| Part | What it looks like | Purpose |
|---|---|---|
| AC input | Wall plug, detachable AC cord, or AC inlet | Takes power from the wall outlet |
| Power brick | Rectangular plastic or metal enclosure | Converts and regulates AC power for the scooter’s charging system |
| DC output cable | Cable running from the brick to the scooter | Carries charging power to the scooter |
| Connector | Round, multi-pin, magnetic, or model-specific plug | Mates with the scooter’s charging port |
| Status indicator | One or more LEDs on some chargers | Shows power or charging status according to the manufacturer’s design |
| Rating label | Printed sticker or laser-marked panel | Identifies the charger’s electrical ratings, model and manufacturer information |
The power brick contains the electronics that regulate charging power. The scooter and its battery-management system also play important roles in controlling the charging process, so a charger should be treated as one part of a matched charging system rather than a generic power supply.
What Shapes and Sizes Do Charger Blocks Come In?
Electric scooter charger blocks are commonly rectangular, but there is no standard size. Slim, lower-output units can resemble laptop adapters, while chargers designed to handle more power may have larger cases, ventilation openings, heat-dissipating surfaces, or active cooling.
A larger charger is not automatically better or faster. Housing size can depend on power output, internal design, cooling method, regional electrical requirements, and the manufacturer’s construction choices.
You may also encounter scooters without the familiar external rectangular brick. Some models integrate part or all of the charging equipment into the scooter itself. For example, Segway lists a built-in charger on certain KickScooter models, showing why appearance is not a reliable way to determine compatibility.
Where Do Voltage and Amp Ratings Appear?
The electrical ratings are normally printed on a label on the bottom, side, or back of the charger. Read the entire label rather than looking for only one voltage number.
| Label term | What it means |
|---|---|
| INPUT | The AC power the charger is designed to receive from the wall, often including voltage and frequency. |
| OUTPUT | The regulated DC voltage and current supplied to the scooter. |
| Current / A | The charger’s rated output current in amperes. Do not substitute a different value unless the manufacturer approves it. |
| Model number | Identifies the exact charger and helps confirm whether it is the specified unit for your scooter. |
| Polarity or pin information | Where provided, identifies how positive and negative connections are arranged. |
One of the most important points is that the scooter battery’s nominal voltage is not necessarily the same as the charger’s output voltage. For example, Segway specifications show models with a 36 V nominal battery and a maximum charging voltage of 42 V, paired with a charger that outputs 42 V DC.
That means you should not shop for a replacement simply by seeing “36 V battery” and buying a charger labeled “36 V.” Use the charger model and electrical specification stated by the scooter manufacturer.
Pro Tip: Take a clear photo of the original charger’s label before you need a replacement. The model number, OUTPUT rating and connector information are much more useful than trying to identify a charger by its shape.
Which Connector Types Do Scooter Chargers Use?
Electric scooter charging connectors vary widely by manufacturer and model. You may encounter:
- Round DC or barrel-style plugs on some scooters.
- Multi-pin connectors, including locking connector designs on certain models.
- Proprietary or model-specific connectors designed for a particular scooter family.
- Integrated AC charging connections on scooters with built-in charging hardware.
- USB-type charging on certain small electronic mobility products only when the manufacturer specifically supports it.
Some scooter communities refer to particular multi-pin connectors as XLR- or GX-style connectors, but these names do not create a universal compatibility standard. Two plugs can look identical while having different voltage, polarity, current capacity, pin assignments, or charging-control requirements.
Warning: A connector that physically fits is not proof that a charger is safe for your scooter. The U.S. Consumer Product Safety Commission warns that chargers marketed as “universal” can fit a micromobility product while still being electrically incompatible. Use the supplied charger or a replacement that has been tested and approved for your exact device.
CPSC received 156 reports of fire or thermal incidents involving “universal” micromobility chargers between January 1, 2023 and May 16, 2024.
How Can You Tell If a Charger Is Genuine?
A genuine or manufacturer-approved scooter charger should be identifiable by more than its shape. Look for the manufacturer’s name or brand, charger model number, complete input and output ratings, and a part number that matches the scooter manufacturer’s documentation.
Check these details:
- Manufacturer and model: Compare the charger model or part number with the scooter manual or manufacturer’s support page.
- Output specification: Confirm that the exact output rating matches the approved charger specification.
- Connector and cable quality: Look for secure strain relief, intact insulation, straight pins, and a properly fitted case.
- Certification claims: If a charger claims UL certification, the certification information should correspond to the actual product. UL Solutions explains what its safety marks mean and provides tools for verifying certification information.
- Seller and source: For replacement chargers, buying through the scooter manufacturer or an authorized source reduces uncertainty about compatibility.
Note: CE, UL and FCC markings do not mean the same thing. A UL certification mark indicates certification to applicable requirements. CE marking indicates conformity with applicable European requirements and is commonly based on the manufacturer’s conformity process. FCC markings relate to applicable radio-frequency or electromagnetic-compliance requirements; they are not a substitute for electrical or battery-charger safety certification.
Misspelled branding, incomplete electrical ratings, a missing model number, loose casing, poor strain relief, or a charger whose specifications do not match the manufacturer’s documentation should make you stop and verify the product before using it.
What Safety Checks Should You Do Before Charging?
Before charging, confirm that you are using the charger supplied with the scooter or a replacement specifically recommended, tested, or approved for that model. Current CPSC micromobility guidance recommends using the manufacturer-provided or recommended charger, remaining present during charging, never charging while sleeping, and unplugging the device when charging is complete.
- Check the charger identity. Verify the model and manufacturer-approved specification.
- Inspect the cord and casing. Do not use a charger with frayed insulation, exposed conductors, cracked housing, bent pins, burn marks, unusual swelling, or other damage.
- Inspect the scooter’s charging port. It should be dry, clean, undamaged, and free of foreign material.
- Use an appropriate wall outlet. Follow the scooter manufacturer’s instructions and avoid damaged outlets or improvised electrical connections.
- Keep the charging area clear. Charge away from combustible materials and avoid blocking an exit.
- Stay present. Do not charge the scooter while sleeping or when you are away from home.
- Stop for warning signs. Unusual heat, odor, smoke, hissing, leaking, swelling, or changes in battery shape are reasons to stop using the product and follow emergency/manufacturer guidance.
- Unplug when charging is complete. Follow the manufacturer’s sequence and instructions for disconnecting the charger.
FDNY lithium-ion battery safety guidance also recommends keeping micromobility batteries and devices away from flammable material and monitoring for unusual odors, changes in shape or color, leaking, or odd noises.
Warning: Do not substitute a generic “universal” charger simply because its plug fits or its listing mentions your scooter brand. CPSC warns that an incompatible micromobility charger can cause the connected battery to ignite.
What Should You Do If the Charger Stops Working?
If your charger stops working, begin with simple checks that do not require opening or modifying the charger. Confirm that the outlet works, inspect the charger and connectors for visible damage, and compare any LED behavior with the manufacturer’s troubleshooting instructions.
Do not open a sealed charger, splice its cable, bend damaged pins back into place, bypass protective components, or substitute an unapproved power supply. If the basic checks do not identify a safe, simple cause, contact the scooter manufacturer or an authorized service provider.
Check Power And Connections
Start at the wall and follow the power path toward the scooter:
- Test the wall outlet with another known-working device if it is safe to do so.
- Check a detachable AC cord, if your charger uses one, to make sure it is fully seated and undamaged.
- Inspect the output cable and plug for cuts, crushed sections, looseness, bent pins, corrosion, discoloration, or heat damage.
- Check the scooter’s charging port for moisture, dirt, looseness, or physical damage.
- Read the charger LED according to the manufacturer’s manual rather than assuming red or green always has the same meaning.
- Consider temperature limits. Some scooters prevent charging when the battery is outside its permitted charging-temperature range. Let the scooter return to the manufacturer’s allowed temperature range before trying again.
If another appliance works in the outlet but the scooter charger remains completely unresponsive, the fault may be in the charger, cable, scooter charging port, battery-management system, or another internal component. Manufacturer troubleshooting is the safest next step.
Inspect Charger For Damage
Do a visual and smell check without opening the charger case.
| Check | What to look for | Action |
|---|---|---|
| Cable | Fraying, cuts, exposed wire, crushed insulation | Stop using the charger and obtain an approved replacement or service |
| Plug | Bent pins, corrosion, discoloration, loose or damaged housing | Do not bend or modify it; stop use and contact the manufacturer |
| Case | Cracks, swelling, melting, burn marks, unusual odor | Disconnect safely and stop using it |
| LED | No light or an unfamiliar flashing pattern | Confirm outlet power and check the manufacturer’s LED/error guide |
| Scooter | Charging error, abnormal battery behavior, damaged port | Stop charging and seek manufacturer or authorized service support |
If the charger becomes excessively hot, smells burned, makes unusual noises, or shows physical damage, discontinue use. Replacing a suspect charger with the correct manufacturer-approved unit is safer than attempting a home repair.
Frequently Asked Questions
What Type of Charger Do Electric Scooters Take?
Electric scooters use chargers designed for their specific battery and charging system. Use the charger supplied with the scooter or a replacement explicitly recommended or approved by its manufacturer. Match the exact charger model or specified output voltage, current, connector, polarity or pin arrangement, and any other compatibility requirements rather than choosing a charger solely by the scooter battery’s nominal voltage.
Where Do You Plug in the Charger for an Electric Scooter?
Plug the charger into the scooter’s designated charging port according to the owner’s manual. Depending on the model, the port may be on the deck, stem, frame, or another protected area. Some scooters with built-in charging hardware use an AC charging connection instead of a conventional external DC power brick.
How Do You Charge a Scooter Without Its Original Charger?
Do not improvise with a generic universal charger, power bank, car-battery setup, or unrelated scooter charger. Contact the scooter manufacturer for the correct replacement charger or a replacement that has been tested and approved for that exact device. A plug that fits can still have incompatible electrical characteristics and create a fire risk.
Do All Electric Scooters Have the Same Charger?
No. Charger output voltage, current, connector shape, polarity or pin arrangement, charging controls, and manufacturer requirements vary between scooters. Never assume two chargers are interchangeable just because their plugs look the same.
Can I Use a Charger With the Same Voltage and Connector?
Not automatically. Matching the printed voltage and connector is not enough to establish safe compatibility. Current rating, polarity or pin configuration, charging control, battery requirements, and manufacturer approval can also matter. Use the replacement specified for your exact scooter model.
What Do the Red and Green Lights on a Scooter Charger Mean?
On many chargers, one color may indicate active charging and another may indicate standby or a completed charge, but there is no universal color rule. Flashing lights may also indicate a fault on some models. Check the charger or scooter manual for the exact LED meanings before diagnosing a problem.
Conclusion
Most electric scooter chargers are easy to recognize: a compact rectangular power brick, an input for wall power, an output cable, a scooter-specific connector, and a label showing electrical information. However, appearance is only the starting point.
The safest way to identify or replace a charger is to check the manufacturer’s charger model and exact specifications. Do not assume that a 36 V battery needs a charger labeled 36 V, that two matching plugs are interchangeable, or that a generic universal charger is safe. Use the supplied or approved charger, inspect it for damage, stay present while charging, and follow the scooter manufacturer’s charging instructions.
Sources
- U.S. Consumer Product Safety Commission — Micromobility Information Center — current charging and micromobility battery-safety guidance.
- U.S. Consumer Product Safety Commission — Universal Charger Warning — compatibility and fire-risk guidance for aftermarket micromobility chargers.
- Segway Support — KickScooter Specifications — example showing the difference between 36 V nominal battery voltage and 42 V charging/output voltage.
- UL Solutions — Micromobility Charging Equipment Testing and Certification — charging-equipment and applicable safety-standard information.
- UL Solutions — UL Safety Mark Guidance — explanation of UL certification marks.
- FDNY Smart — Lithium-Ion Battery Safety — charging-area, fire-warning, and battery-condition safety guidance.