Last Updated on August 2, 2026 by Mason Reed
Taped seams and seam sealing both stop water from entering through stitched areas, but they are not opposing technologies. A taped seam is one type of seam-sealed construction, usually applied at the factory. Liquid seam sealer is commonly used for tents and gear that were not factory taped or when old tape, sealant, or stitching begins to leak.
Quick Answer
Taped seams use adhesive waterproof tape to cover stitching, usually with factory-controlled heat and pressure. Seam sealing is the broader process of waterproofing a seam and may use tape, liquid sealant, adhesive bonding, or welding. For DIY tent repairs, a fabric-compatible liquid seam sealer is usually more practical than applying new factory-style tape.
Key Takeaways
- Seam sealing is the umbrella term: Taping is one way to seal a seam.
- Factory tape and DIY sealant are different: Seam tape normally requires controlled heat, pressure, and compatible materials, while liquid sealer can be brushed onto suitable tent fabrics.
- Fabric compatibility matters: Silicone-coated fabric needs a silicone-compatible product; polyurethane-coated fabric needs a compatible urethane- or water-based sealant.
- Do not coat sound tape automatically: Factory-taped seams usually need attention only when instructions require it or inspection reveals lifting, damage, or leakage.
- Sealed seams are only part of waterproof performance: Fabric coatings, membranes, zippers, vents, design, wear, and condensation also affect how dry you stay.
Disclosure: As an Amazon Associate I earn from qualifying purchases. Some links on this page are affiliate links, at no extra cost to you.
Taped Seams vs. Seam Sealing at a Glance
At a Glance
| Relationship | A taped seam is a type of seam-sealed seam. “Seam sealing” also includes liquid sealants, welded seams, and other bonding methods. |
| Taped Seams | Adhesive tape covers the stitch line. It is normally installed during manufacturing with controlled heat and pressure, typically in narrow strips a few centimeters wide. |
| Liquid Seam Sealer | A compatible liquid is brushed over stitching and allowed to cure. It is common for DIY tent maintenance and repair. |
| Best Use | Factory tape works well in new waterproof garments and many tents. Liquid sealer is useful on untaped seams, specified perimeter seams, small leaks, or areas where old tape has failed. |
| Main Limitation | Tape is difficult to apply correctly without proper equipment. Liquid products can fail if they are incompatible, applied too thickly, or packed before they cure. |
Note: Product descriptions are not standardized weather ratings. “Fully taped” describes seam coverage, but it does not reveal the waterproof rating or condition of the fabric, zippers, vents, closures, and other parts of the product.
What Are Taped Seams?
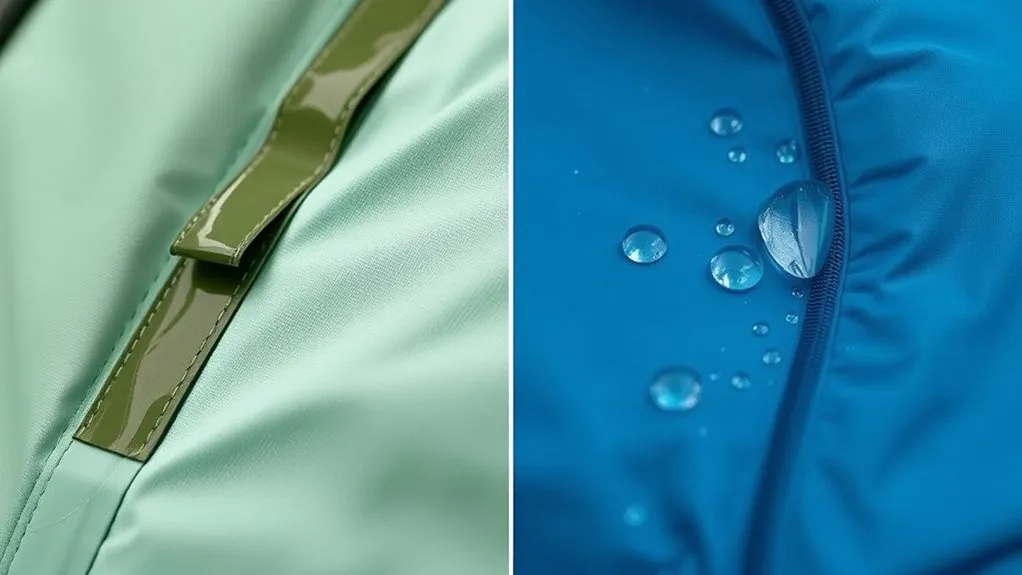
Sewing creates small needle holes in fabric. Even when the fabric itself has a waterproof membrane or coating, those holes can provide paths for water. Seam tape covers the stitched line with a thin waterproof strip and closes those paths.
In products such as waterproof jackets, pants, tents, dry bags, and packs, the tape is normally bonded to the inside of the seam. According to GORE-TEX membrane guidance, seam tape complements the waterproof laminate by sealing the openings created during sewing.
Seam tape must be compatible with the face fabric, backing, coating, membrane, adhesive, and expected use. A tape that bonds well to one laminate may not bond correctly to another. For that reason, factory seam taping is a controlled manufacturing process rather than a universal strip that can be ironed onto any tent or jacket.
Fully Taped and Critically Taped Seams
Fully taped seams generally means that all sewn seams in the product’s waterproof shell or panel system have been taped. This provides more complete stitch-line coverage and is common in gear intended for prolonged rain, snow, or exposed conditions.
Critically taped seams means that only selected high-exposure seams have been taped. In rainwear, these may include the hood, neck, shoulders, upper chest, and other areas that receive direct rainfall. Untaped seams elsewhere may still allow moisture through during long or heavy exposure.
Critical taping can reduce weight, stiffness, manufacturing time, and cost. However, the term does not guarantee that the product is suitable for a particular storm, activity, or exposure time. Always consider the complete product specification and intended use.
How Are Taped Seams Applied?
Manufacturers normally apply seam tape after sewing the product. A seam-sealing machine guides the tape over the stitching while applying controlled heat and pressure. The adhesive layer softens, bonds to the fabric or laminate, and then cools into a flexible seal.
The correct settings depend on the tape, adhesive, fabric, membrane, coating, seam shape, feed speed, and pressure. Too little heat or pressure can cause weak adhesion. Too much can deform, glaze, melt, or damage lightweight material.
Application Techniques Explained
Good factory application requires more than placing tape over a visible stitch line. The operator or automated system must keep the tape centered, maintain even pressure, avoid wrinkles, and seal curves and seam intersections without leaving gaps.
Bulky areas around pockets, zippers, hood adjustments, reinforcement patches, and multiple layers are harder to seal than straight seams. Some designs use narrower tape to save weight, while others use wider or specialized tape for demanding areas.
Welded or bonded seams use heat, pressure, adhesive films, ultrasonic energy, or another bonding process to join compatible materials. These methods can avoid sewing holes in the bonded area, but they still create a seam and are not automatically stronger or more waterproof than every sewn-and-taped construction.
Importance of Adhesion
Adhesion determines whether seam tape stays attached as the product flexes, folds, stretches, gets wet, and moves through temperature changes. Reliable adhesion comes down to a few things:
- Material compatibility: The adhesive must bond to the fabric, membrane, or coating beneath it.
- Clean surfaces: Oil, finishing residue, dirt, and old adhesive can prevent a secure bond.
- Controlled heat and pressure: Factory settings must activate the adhesive without damaging the material.
- Accurate positioning: The tape must cover the stitch holes and remain flat through corners and intersections.
- Proper storage and care: Long-term heat, moisture, contamination, and coating breakdown can contribute to lifting or delamination.
A waterproof fabric can still leak at its needle holes. Seam tape or compatible sealant closes those holes, but the rest of the product must also remain intact.
Understanding Seam Sealing
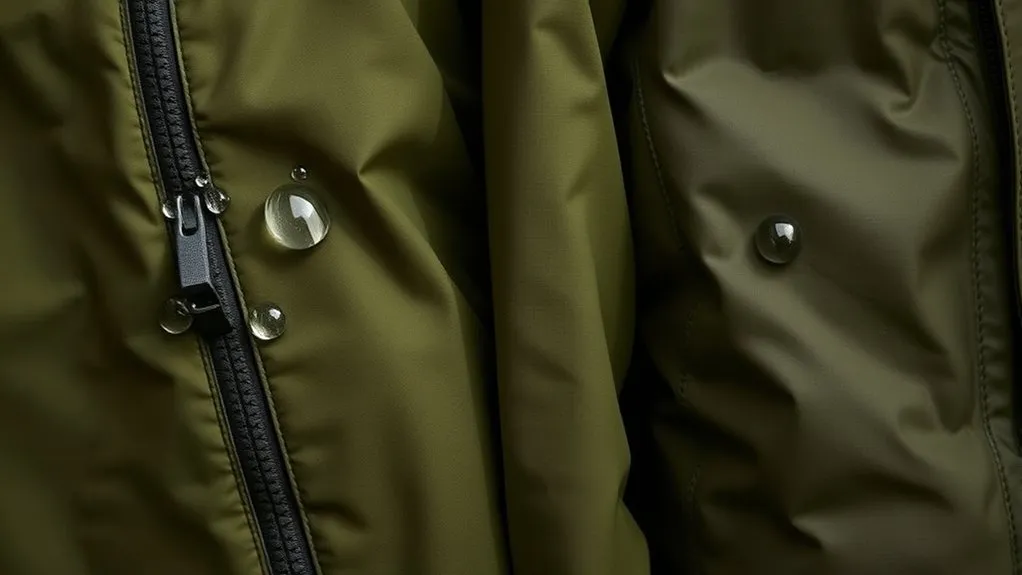
Seam sealing is the general process of closing water-entry paths at a seam. It may be completed with factory-applied tape, a brush-on liquid, an adhesive film, welding, or another construction method.
For tent owners, “seam sealing” often refers to applying a liquid sealant over stitching. This is common when a shelter has untaped seams, when specific perimeter or tie-out seams require treatment, or when old factory tape or sealant has failed.
Many modern tents arrive with factory-sealed seams. For example, Big Agnes tent-care guidance states that its taped seams normally do not require an additional liquid product while the tape is working correctly. Adding sealant without checking the instructions can be unnecessary and may create warranty or adhesion problems.
Liquid Seam Sealer Types
The correct product depends on the fabric coating rather than the color or weight of the tent:
- Polyurethane-coated nylon or polyester: Use a seam sealer that the product maker identifies as compatible with polyurethane-coated fabric.
- Silicone-coated fabric or true silnylon: Use a silicone-based seam sealer designed to bond to silicone.
- Mixed or dual-coated fabric: Some materials have silicone on one side and polyurethane on the other. Identify which side you are treating and follow the manufacturer’s instructions.
- Waterproof-breathable laminates and garments: Use the garment maker’s approved repair process. A tent sealant can permanently mark, stiffen, or damage technical rainwear.
Gear Aid’s sealant guide separates polyurethane-compatible, fast-curing water-based, and silicone-based products because no single formula is suitable for every fabric.
Warning: Do not guess at the coating or use a household adhesive as a permanent repair. Check the tent or garment instructions first. Wear gloves, work with good ventilation, follow all label precautions, and keep the material away from flames or heat sources when required by the product label.
The Effectiveness of Taped Seams
Correctly applied seam tape is highly effective at stopping water from passing through stitch holes. Its real-world performance still depends on the condition and design of the entire product.
- Seam coverage: Fully taped construction covers more sewn seams than critically taped construction.
- Application quality: Centered, wrinkle-free tape with secure adhesion performs better than tape with gaps, bubbles, or poorly bonded edges.
- Seam design: Flat, simple seams are easier to seal than bulky intersections, folded edges, or attachment points.
- Fabric condition: Tape cannot compensate for torn fabric, widespread coating failure, or a damaged membrane.
- Other openings: Water may enter through zippers, vents, cuffs, doors, pockets, or uncovered hardware even when the stitched seams remain sealed.
Seam tape can fail gradually. Common signs include lifting edges, wrinkles, bubbles, cracked adhesive, cloudy patches, sticky residue, or sections that separate when the material is flexed. There is no universal service life because use, storage, heat, humidity, cleaning, abrasion, fabric chemistry, and manufacturing quality vary widely.
The Benefits of Seam Sealing
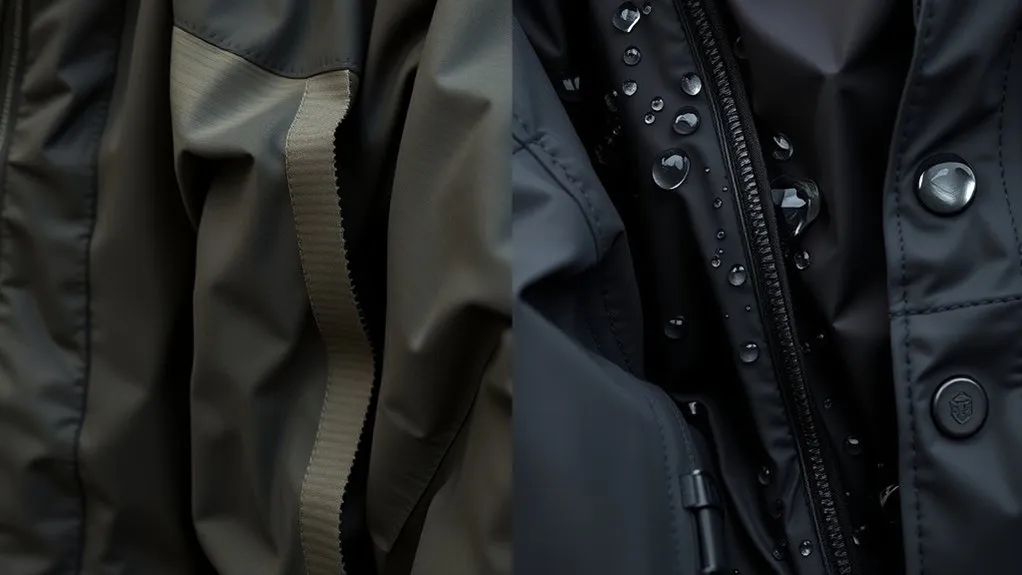
Whether the seam is sealed with factory tape or a compatible liquid product, the main benefit is reduced water entry through stitching. Proper treatment can also protect thread and reduce wicking along the seam.
| Benefit | What It Means | Important Limit |
|---|---|---|
| Moisture Protection | Closes many leakage paths around needle holes and thread. | It does not repair damaged fabric, zippers, vents, or failed coatings. |
| Longer Useful Life | Timely repair may keep a localized leak from becoming a larger problem. | Widespread delamination or sticky, decaying coatings may justify replacement. |
| Targeted Repair | Liquid sealant can treat a leaking seam, corner, or tie-out point without replacing the whole shelter. | The product must match the fabric coating and cure completely. |
| Reliable Preparation | Inspection and repair before a trip reduce the chance of discovering a known leak during a storm. | No treatment replaces a complete pre-trip setup and water test. |
Comparing Fully Taped and Critically Taped Seams
Fully taped and critically taped products differ mainly in the amount of stitched-seam coverage. They should not be treated as universal waterproof performance grades.
Protection Level Comparison
Fully taped construction provides the more complete seam treatment because every relevant sewn seam is covered. It is often preferred for extended exposure to rain or snow, but overall protection still depends on the material, design, closures, condition, and fit.
Critically taped construction protects selected high-exposure seams. It may be enough for brief showers, casual use, or products designed around lower weight and cost. However, untaped stitching may allow water through during prolonged exposure.
Application in Design
Designers balance waterproof coverage with weight, bulk, flexibility, breathability, production complexity, and price. Seam tape can add small amounts of weight and stiffness, especially where several taped seams overlap.
In waterproof apparel, critical taping is often concentrated around the hood, neck, shoulders, and upper body. Tent makers are more likely to describe a shelter as factory seam sealed, fully seam taped, or as requiring user-applied sealer on specified seams. Check the exact model instructions rather than assuming apparel terminology applies to every tent.
Cost vs. Performance
Fully taped products can cost more because they use additional material and require more application time. That extra cost may be worthwhile for users who expect long storms, wet snow, exposed terrain, or frequent use.
Critically taped construction can be a reasonable choice for lower-risk conditions, but cost alone should not decide the purchase. Compare fabric specifications, hood and zipper design, ventilation, fit, intended activity, warranty, and independent testing where available.
Factors Affecting Waterproof Performance
The weight or thickness of a fabric does not reliably determine how waterproof it is. A few other factors matter more:
- Membrane or coating: Waterproof performance depends heavily on the type, quality, and condition of the barrier applied to or built into the fabric.
- Seam construction: Stitch size, thread, seam shape, needle holes, tape width, and sealant coverage affect leakage.
- Application quality: Gaps, wrinkles, contamination, and incorrect curing can weaken a seam treatment.
- Design: Zippers, vents, hoods, doors, cuffs, hems, pockets, tie-outs, and panel orientation can admit or redirect water.
- Wear and storage: Abrasion, repeated folding, body oils, dirt, prolonged heat, and damp storage can damage coatings and adhesives.
- Water pressure: Kneeling on a wet tent floor or pressing saturated material against another surface can force water through a weak area.
- Condensation: Moisture generated inside a tent or garment can feel like leakage even when rain is not passing through a seam.
Does Seam Sealing Affect Breathability?
Seam tape and liquid sealant do not transmit moisture vapor in the same way as an exposed breathable panel. However, seams occupy a relatively small part of most garments, so the overall effect is usually modest. Fabric choice, vents, fit, temperature, humidity, exertion, and layering have a larger effect on comfort.
Most tent fly and floor fabrics are not intended to breathe like waterproof-breathable clothing. In a tent, ventilation and campsite humidity are usually more important to condensation control than the narrow sealed strips over the seams.
Choosing the Right Option for Your Needs
Choose based on the product, conditions, and purpose rather than assuming one label is always superior:
- Buying rainwear for sustained storms: Favor fully taped construction along with a suitable membrane, protective hood, storm-resistant zippers, and usable ventilation.
- Buying gear for occasional showers: Critically taped construction may be enough when lower weight, flexibility, or price matters more than extended storm protection.
- Buying a tent: Check whether the fly, floor, perimeter, corners, and attachment points are factory sealed or require treatment before first use.
- Maintaining sound factory-taped gear: Leave the tape alone unless the manufacturer recommends additional treatment or you find a confirmed problem.
- Repairing a leaking tent seam: Identify the fabric coating, remove only loose or failed material, and apply a compatible liquid sealer as directed.
- Repairing technical rainwear: Follow the garment maker’s repair instructions or use an approved repair service rather than applying tent sealant.
- Dealing with extensive or high-value damage: For expensive waterproof-breathable jackets or large-scale tape failure, a manufacturer-approved repair service can restore performance more reliably than a home fix.
Pro Tip: Set up a new or repaired tent at home and test it with gentle, sustained water before a trip. This gives you time to distinguish a seam leak from condensation, a puncture, a zipper problem, or a failing fabric coating.
How to Inspect and Seal a Leaking Tent Seam
Most users should repair a tent with compatible liquid seam sealer rather than trying to install new heat-applied factory tape. Review the tent maker’s instructions before beginning because application sides, surface preparation, and cure times differ.
1. Identify the Source of Moisture
Dry the tent, set it up, and inspect the suspected area in good light. Look for:
- Peeling, bubbling, wrinkled, or missing seam tape
- Cracked, flaking, or separated liquid sealant
- Punctures, tears, or abrasion beside the seam
- Leaks around corners, pole attachments, clips, or stake-out points
- Sticky, peeling, or foul-smelling polyurethane coating
- Water entering through a door, zipper, vent, or improperly tensioned rainfly
Uniform droplets across a cool interior surface are more likely to be condensation than a single seam leak. Increase ventilation and keep wet equipment away from the walls before assuming the seams have failed.
2. Check the Fabric and Coating
Read the care label, owner’s manual, or manufacturer support page. Determine whether the repair surface is polyurethane-coated, silicone-coated, or part of a waterproof-breathable laminate.
When the coating is unknown, contact the manufacturer. A silicone product may not adhere correctly to polyurethane, and a polyurethane-compatible product may not bond to a silicone surface.
3. Clean and Dry the Area
Brush away loose dirt. Clean only as directed for the selected sealant and fabric. Some products call for a mild cleaner, while others specify isopropyl alcohol on a limited repair area. Do not soak, scrub, or use a solvent unless both the tent maker and sealant instructions allow it.
Allow the seam to dry fully. Applying sealant over dirt, moisture, oil, or loose adhesive can trap contamination and weaken the repair.
4. Handle Old Seam Tape Carefully
If one small edge has lifted, the sealant maker may allow it to be bonded back down with a compatible adhesive. If the tape is failing across a large area, remove only sections that are loose and no longer bonded. Do not pull firmly attached tape away from delicate fabric.
REI tent-care guidance recommends removing peeling sections and applying compatible seam sealer to the appropriate side of the seam. Gear Aid’s Seam Grip instructions also distinguish between reattaching a small lifted area and removing broadly failing tape before resealing.
5. Apply a Thin, Even Coat
Pitch the tent or hold the fabric so the seam is flat and slightly taut. Apply a thin coat that covers the stitching and extends just beyond the needle holes. Avoid thick ridges, puddles, and wide patches unless the product instructions call for them.
The correct application side varies by fabric and product. Some sealants are applied to the inside or underside for appearance and protection, while others may be applied to an exterior seam. Follow the specific directions rather than using one rule for every tent.
6. Let the Sealant Cure Completely
Keep the repaired material level, open, and protected from dust while it cures. Drying time varies by formula, humidity, temperature, and coat thickness. Some fast-curing products are ready in a few hours, while other products require overnight curing or longer.
Gear Aid’s tent-sealing instructions list different cure ranges for different products. Use the time printed on the exact container and do not pack, fold, or expose the tent to rain early.
7. Test the Repair
After the sealant has cured, set up the tent and apply gentle water from a hose or sprinkler. Do not use a pressure washer or force a concentrated jet into the seam. Inspect the repaired area from inside and allow the tent to dry completely before storage.
Troubleshooting Seam and Waterproofing Problems
Water Appears Along One Stitch Line
A localized seam leak may respond well to compatible liquid sealant. Check both the stitching and nearby attachment points before treating it.
The Inside Is Damp but No Drip Path Is Visible
This is often condensation. Improve ventilation, tension the rainfly correctly, keep wet clothing outside the sleeping area, and avoid allowing the inner tent to touch the fly.
The Tape Is Lifting in One Small Area
Clean the area and follow the tape, garment, or adhesive maker’s repair instructions. A small section may be reattached, but technical garments may be better handled by an approved repair service.
The Tape Is Peeling Throughout the Product
Widespread failure may indicate age, heat damage, contamination, or breakdown of the underlying coating. Contact the manufacturer before removing large amounts of tape. Repair may be possible, but replacement can be more practical if the fabric is also sticky, brittle, peeling, or delaminating.
The Fabric Leaks Away From the Seams
Seam sealer will not correct widespread coating or membrane failure. Inspect for abrasion, pinholes, peeling polyurethane, loss of water repellency, or torn fabric and use the repair method intended for that problem.
The Repaired Seam Stays Sticky
The coat may be too thick, incompletely cured, or affected by the environment. Follow the product instructions. Some urethane products permit a small amount of talcum powder after complete curing to reduce surface tack, but do not apply powder before the sealant has finished curing.
Maintaining Taped and Sealed Seams
- Inspect seams before long trips and after severe weather.
- Allow tents and garments to dry completely before storage.
- Store gear in a cool, dry place rather than a hot vehicle, attic, or damp container.
- Clean with products and methods approved by the manufacturer.
- Avoid repeatedly folding the same taped area into a sharp crease.
- Repair small lifting sections, punctures, and leaks before they spread.
- Do not apply liquid sealer over every sound factory-taped seam as routine maintenance.
- Seek professional repair for valuable waterproof-breathable clothing, extensive delamination, or complicated seam intersections.
Sources
- GORE-TEX: Get to Know the Membrane — explains why waterproof sewn seams require seam tape.
- Gear Aid: How to Waterproof and Seam Seal a Tent — supports surface preparation, compatible products, thin application, and cure guidance.
- Gear Aid: Which Sealant Should I Use? — explains polyurethane-compatible, water-based, and silicone-based sealant uses.
- REI: How to Clean, Waterproof and Care for a Tent — supports seam inspection, removal of peeling tape, and material-specific repair.
- Big Agnes Tent Care Guidance — confirms that sound factory-taped seams normally do not require added liquid sealer.
Frequently Asked Questions
Can I tape the seams on my tent myself?
You can sometimes reattach a small piece of lifted tape with a compatible adhesive, but installing new factory-style tape is difficult without the correct tape, heat, pressure, and material settings. For most DIY tent repairs, use the liquid seam sealer recommended for the tent’s coating.
How long do taped seams typically last?
There is no standard lifespan. Tape may remain secure for many seasons or fail sooner because of heat, damp storage, repeated folding, abrasion, contamination, coating breakdown, or heavy use. Inspect it for lifting edges, bubbles, cracks, sticky residue, and leaks before important trips.
Does seam sealing affect breathability?
The sealed strip has less vapor transmission than an exposed breathable panel, but seams cover a small part of most garments. Fabric, vents, fit, humidity, temperature, activity, and layering usually have a greater effect on overall comfort.
Are there downsides to seam sealing?
Seam tape and liquid sealant can add weight, bulk, stiffness, cost, or visible residue. Liquid products also require surface preparation and curing time. The main risk is using an incompatible product or applying it too thickly, which can cause poor adhesion, damage, or an untidy repair.
Can I use liquid seam sealer over taped seams?
Sometimes, but it is not automatically beneficial. Leave sound factory tape alone unless the manufacturer calls for extra treatment. Use compatible liquid sealant on specified untaped seams, a confirmed leaking area, or a seam where failed tape has been handled according to the repair instructions.
How can I tell whether my tent is silicone- or polyurethane-coated?
Check the product page, care label, manual, or manufacturer support information. Do not rely on appearance alone. Some fabrics have silicone on one side and polyurethane on the other, so you also need to know which surface will receive the sealer.
How do I know whether moisture is a seam leak or condensation?
A seam leak usually follows a specific stitch line or attachment point during water exposure. Condensation is more likely to form as widespread droplets on cool inner surfaces. Test the dry tent with gentle water, improve ventilation, and trace the moisture path before applying sealant.
Conclusion
Taped seams and seam sealing are closely related rather than competing waterproofing methods. Factory seam tape offers clean, controlled coverage of stitch holes, while liquid seam sealer provides a practical way to treat specified untaped seams and repair many tent leaks.
Fully taped construction gives more complete seam coverage than critical taping, but neither label tells the full waterproofing story. Fabric coatings, membranes, zippers, vents, design, condition, and condensation all matter. Before repairing gear, identify the actual leak, check the fabric coating, follow the manufacturer’s instructions, and allow the correct sealant to cure completely.