
Last Updated on September 11, 2026 by Daniel Globe
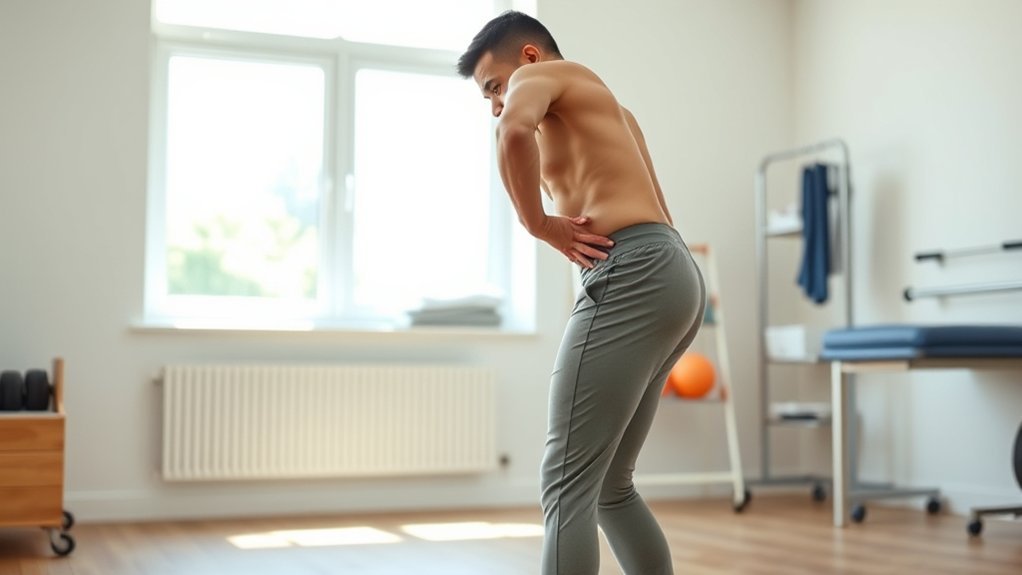
Sharp or focal pain on the outside of your hip is not an expected part of a hip hike exercise. You should mainly feel controlled effort in the outer buttock of the leg you are standing on. Pain can appear when the movement range or training load is too high, when form breaks down, or when a sensitive structure such as a gluteal tendon is being compressed or overloaded. This guide also explains why similar pain may flare during trail hiking and backpacking.
Quick Answer
Hip hikes should create muscular effort, not sharp outer-hip pain. Pain over the bony side of the hip may reflect excessive range, poor control, a sudden jump in training load, or greater trochanteric pain syndrome. Reduce the range, slow the movement, and stop if pain is sharp, worsening, or lingering into the next day.
Key Takeaways
- During a hip hike, the outer glute of the stance leg should work; sharp pain directly over the side of the hip is a warning to reduce or stop.
- Greater trochanteric pain syndrome (GTPS), which often involves the gluteal tendons, is a common cause of lateral hip pain.
- Classic iliotibial band syndrome usually causes pain near the outside of the knee, while an IT band snapping over the hip is called external snapping hip.
- Progressive strengthening and load management are better supported than simply stretching or aggressively foam rolling the painful area.
- Seek urgent care after major injury, with inability to bear weight, a deformed joint, sudden swelling, fever, or a hot and discolored hip.
Medical note: This article provides general education, not a diagnosis. Outer-hip pain can also come from the lower back, hip joint, nerves, trauma, or other conditions. A clinician should assess symptoms that are severe, recurrent, unexplained, or limiting your normal activity.
Disclosure: As an Amazon Associate I earn from qualifying purchases. Some links on this page are affiliate links, at no extra cost to you.
Why Hip Hikes Shouldn’t Hurt Your Outer Hips
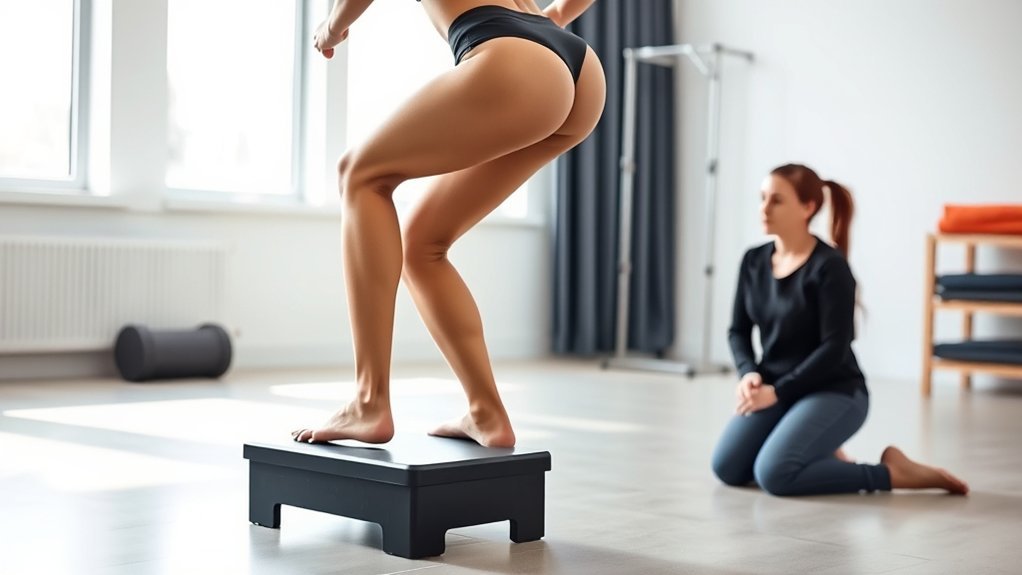
A hip hike, also called a pelvic drop or hip hitch exercise, is usually performed while standing on one leg at the edge of a step. The pelvis on the unsupported side lowers slightly, then rises as the muscles on the stance side control the movement. The gluteus medius and gluteus minimus help keep the pelvis steady during single-leg support.
The exercise is meant to create controlled muscle effort. It can still hurt even when your form looks reasonable if the stance-side gluteal tendon is already sensitive or if the exercise exceeds your current load tolerance. That is why pain is not proof of “weak glutes,” and perfect posture alone does not rule out a tendon problem.
At a Glance
| Time Required | About 5–10 minutes for a short practice session |
| Difficulty | Beginner for pain-free exercisers; intermediate when balance or symptoms are limited |
| Tools Needed | A stable step or stair and a railing, wall, or chair for balance |
| Cost | $0 when using a safe step at home |
Which Hip Should Feel a Hip Hike?
The stance-side hip does most of the work. For example, if your right foot is on the step and your left leg hangs off the edge, you should mainly feel effort in the upper outer part of your right buttock. You may also feel your trunk and foot muscles working to keep you balanced.
- Expected: mild-to-moderate muscle effort or fatigue in the stance-side outer buttock.
- Reduce the exercise: pinching, a sharp focal pain over the greater trochanter, or pain that increases with each repetition.
- Check your form: strong effort in the lower back, front of the hip, or stance-side thigh while the pelvis barely moves.
- Seek assessment: groin pain, numbness, weakness, catching, giving way, or pain that continues to worsen after the session.
How to Do a Hip Hike Correctly
- Stand sideways on a stable step with one foot fully supported. Hold a rail or wall lightly for balance.
- Keep the stance knee soft rather than locked. Face your hips and chest straight ahead.
- Let the unsupported side of your pelvis lower a small amount. Do not bend the stance knee to create the motion.
- Keep your trunk tall. Avoid leaning your shoulders over the stance hip.
- Use the outer glute of the stance leg to bring the unsupported side of the pelvis back to level. A small lift above level is enough.
- Move slowly and stop before your form breaks. Begin with a few controlled repetitions rather than chasing a large range or a strong burn.
Pro Tip: Place your fingertips on the front points of your pelvis. They should move up and down with minimal trunk sway or twisting. A mirror can also help you see whether the stance knee is bending or the torso is leaning.
How Much Pain Is Acceptable?
Pain-free movement is the safest starting target when you are learning the exercise. For people already following a rehabilitation plan for GTPS, some physiotherapy services use a pain-monitoring guide: discomfort up to about 4 out of 10 may be acceptable if it settles within roughly 45 minutes and does not disturb sleep or make normal activity worse the next day. This is a guide, not a universal rule. Reduce the range, repetitions, or difficulty when symptoms exceed that response. The Dynamic Health physiotherapy service provides a similar graded-exercise framework.
What Outer Hip Pain Usually Means
Pain centered over the bony side of the hip often fits the pattern of greater trochanteric pain syndrome (GTPS). GTPS is an umbrella term for pain involving the soft tissues around the greater trochanter, commonly including the gluteus medius or minimus tendons and sometimes the nearby bursa. It is more common in women and in midlife, but it can affect adults of different ages and activity levels.
A primary-care review reported that GTPS accounts for about 10%–20% of people who present with hip pain, rather than “1 in 4 to 10 people” in the general population. Symptoms commonly include tenderness over the outer hip, pain when lying on that side, pain during single-leg loading, and discomfort with stairs, hills, prolonged walking, or standing with weight shifted onto one leg. Pain may spread down the outer thigh, but it is usually not accompanied by numbness or tingling.
Outer-hip pain is a symptom pattern, not a diagnosis. Location, aggravating activities, strength, gait, and clinical tests all matter.
Gluteal tendinopathy is not simply tissue “breaking down faster than it repairs.” Tendon pain is influenced by load, tendon structure, nervous-system sensitivity, sleep, general health, and how much the area is compressed. Positions that bring the thigh across the body can compress the gluteal tendons against the greater trochanter. That helps explain why crossing your legs, hanging on one hip, and side-lying without support may aggravate symptoms.
- GTPS or gluteal tendon-related pain: tenderness over the outer hip, side-lying pain, and pain with stairs or single-leg loading.
- External snapping hip: a visible, audible, or palpable snap as the IT band or gluteus maximus moves over the greater trochanter.
- Hip-joint pain: more often felt in the groin or front of the hip, sometimes with stiffness, catching, or reduced motion.
- Referred pain: back or nerve problems may cause pain with numbness, tingling, weakness, or symptoms extending below the knee.
Gluteal Tendinopathy vs. IT Band Pain
These terms are often mixed together, but they describe different clinical patterns. Gluteal tendinopathy affects the tendons that attach the gluteus medius and minimus muscles to the greater trochanter. It commonly hurts with side-lying, standing on one leg, climbing stairs, or repeated loading.
Classic iliotibial band syndrome usually causes pain near the outside of the knee, especially during repetitive running or cycling. It should not be used as a catch-all label for any pain at the side of the hip. When the IT band moves over the greater trochanter and produces a snap, the more accurate term is external snapping hip.
Treatment also differs. Education, load management, and progressive strengthening have good evidence for gluteal tendinopathy. Stretching and foam rolling may temporarily change how the surrounding muscles feel, but aggressive cross-body hip stretching can increase tendon compression and aggravate GTPS. Foam rolling should not be presented as a way to lengthen or “release” the IT band itself.
Warning: Do not repeatedly press or roll directly over a sharply tender greater trochanter. If a technique causes increasing pain, bruising, numbness, or symptoms that last into the next day, stop and choose a gentler option.
Common Hip Hike Mistakes
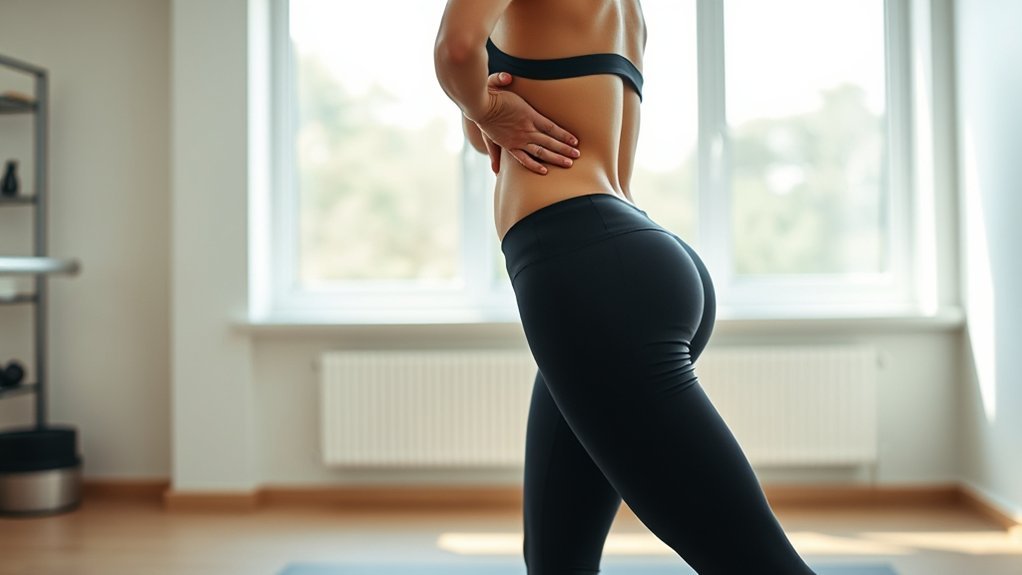
The phrase “hip hike” can refer to the exercise above, while “hip pain on a hike” refers to trail walking or backpacking. Both involve single-leg loading, but their causes and fixes are not identical. Start by identifying which activity triggers your symptoms.
Movement Errors During the Exercise
- Using too much range: dropping the free side of the pelvis far below level can increase hip adduction and tendon compression.
- Bending and straightening the stance knee: this turns the drill into a mini squat instead of a controlled pelvic movement.
- Leaning the trunk: shifting the shoulders over the stance hip reduces the intended pelvic-control challenge and may strain the lower back.
- Rotating the pelvis: turning the belt line toward or away from the step changes the exercise and can hide poor control.
- Locking the stance knee: a rigid knee can make balance harder and encourage compensations at the foot, hip, or trunk.
- Doing too much too soon: adding high repetitions, a heavy backpack, or extra resistance before you tolerate the basic version can trigger a flare.
Poor Pack Fit
A poorly fitted backpack can create direct pressure around the iliac crest and change how you balance during trail hiking. The hip belt should wrap securely over the top of the pelvis so the pack stays stable without pinching. A shifting or uneven load may increase fatigue and encourage trunk lean, but it does not automatically cause IT band syndrome.
- Check shoulder-strap, sternum-strap, load-lifter, and hip-belt tension before you start.
- Reassess the fit after adding water, food, or other gear.
- Keep dense items close to your back and centered from side to side.
- Loosen and readjust pressure points during breaks instead of tolerating numbness or sharp pain.
A stable pack can improve comfort and reduce unnecessary movement. If the belt presses directly on a painful spot, change its position, reduce the load, or use a different pack rather than tightening it harder.
Overpronation Issues
Foot pronation is a normal part of walking. Excessive or poorly controlled motion may influence movement farther up the leg in some people, but overpronation alone does not prove why an outer hip hurts. Uneven shoe wear is also not a reliable diagnosis by itself.
Choose footwear that feels stable and comfortable for the terrain. Orthotics may help selected hikers with foot-related symptoms or a clearly identified mechanical problem, but they are not a universal treatment for GTPS. A physiotherapist, podiatrist, or sports-medicine clinician can assess the whole chain—from foot and knee to hip and trunk—before recommending a device.
Thin Sleeping Pads
A thin sleeping pad can increase direct pressure on a sore outer hip during backpacking trips, especially for side sleepers. The problem is usually compression of sensitive soft tissue rather than the hip joint being damaged by one night on the ground.
- Inflatable pads often provide more adjustable cushioning than a single thin closed-cell foam pad.
- Under-inflation may let the hip contact the ground, while over-inflation can create a hard pressure point.
- A folded blanket, spare clothing, or an additional foam layer can spread pressure more evenly.
- If one side is painful, lie on the other side with a pillow or clothing bundle between the knees, or sleep on your back with support under the knees.
Test the setup before a long trip. Better cushioning may reduce overnight irritation and help you recover between hiking days.
Fix Hip Hikes With Better Form
Better form cannot cure every source of lateral hip pain, but it can reduce unnecessary load. The goal is a small, controlled pelvic motion while the stance foot, knee, hip, and trunk remain steady.
Form and Alignment
Keep your chest and belt line facing forward. Let the pelvis move instead of bending deeply through the stance knee. A light hand on a support is useful because the exercise is for pelvic control, not a balance test.
- Use a small range and a slow tempo.
- Keep the stance knee pointing in the same general direction as the second and third toes.
- Keep pressure across the whole stance foot rather than rolling to one edge.
- Stop the set when your trunk begins to sway or your pelvis rotates.
You do not need to force the pelvis high or squeeze the glutes as hard as possible. Smooth control matters more than range.
Reduce Outer Hip Stress
During trail hiking, take shorter steps on steep ground and avoid sudden jumps in distance, elevation, speed, or pack weight. A balanced load and steady foot placement may reduce compensatory trunk movement. Trekking poles can provide balance and let you share some effort through the upper body, although they are an aid rather than a treatment for tendon pain.
If you have a GTPS-like pattern, also reduce prolonged positions that compress the outer hip. Avoid hanging your weight on one leg, sitting with tightly crossed legs, or sleeping directly on the painful side without support. These changes should be paired with gradual strengthening rather than complete rest.
Regress and Progress the Exercise
Choose the easiest version that you can control without a meaningful flare.
- Regress: stand on the floor and practice shifting the pelvis slightly while holding a counter.
- Build control: use a low step and a very small range.
- Add repetitions: increase slowly only when the current dose feels stable during the session and the next day.
- Add challenge: use less hand support, a slightly larger range, or a higher step—one change at a time.
- Add load last: hold a light weight or wear a pack only after the unweighted version is comfortable and controlled.
Note: If symptoms are worse at night or the following morning, the previous session was probably too demanding. Return to the last well-tolerated level rather than stopping all activity.
How to Return to Trail Hiking Without a Flare
Use your response over the next 24 hours to guide progression. Begin with a short, flat walk and a light pack. If pain stays mild, settles promptly, and is not worse that night or the next morning, increase only one variable at a time.
- Distance: add a small amount before adding steep elevation.
- Elevation: introduce short hills before long climbs or descents.
- Pack weight: increase after you tolerate the route without a flare.
- Speed: keep an easy pace while rebuilding tolerance.
- Back-to-back days: add these last because recovery time is shorter.
Turn around or shorten the route if your gait changes, pain becomes sharp, or you begin leaning away from the painful side. Persistent limping increases the chance that other areas will become irritated.
Hip Strengthening Moves That Help
Progressive strengthening can improve the capacity of the gluteal muscles and tendons to handle walking, stairs, and single-leg tasks. A randomized clinical trial found that education about tendon load plus a targeted exercise program produced better global improvement than a wait-and-see approach and better long-term global improvement than a corticosteroid injection for gluteal tendinopathy. The trial does not prove that one exercise is best for everyone.
Lower-Irritability Options
- Standing wall press: stand side-on to a wall and press the outside of the bent knee into it while the other leg supports you. This creates an isometric hip-abductor effort with little pelvic movement.
- Double-leg bridge: lift the pelvis while keeping the knees comfortably apart. This trains the gluteal muscles without direct side-lying pressure.
- Standing hip abduction: hold a support and move one leg gently out to the side without leaning the trunk.
- Sit-to-stand: rise from a chair with the knees tracking over the feet and the weight shared evenly.
Later-Stage Options
- Clamshells: train hip external-rotation control, but side-lying may compress a painful lower hip. Use a pillow and stop if the position itself hurts.
- Lateral band walks: challenge the lateral hip muscles. Keep the steps short and the pelvis level rather than taking very wide steps.
- Hip hikes: add these once you can tolerate basic standing and single-leg loading with good control.
- Single-leg squats: improve strength and control but are an advanced option, not a starting exercise during an irritable flare.
- Leg swings and hip circles: may help warm up and maintain comfortable motion, but they are mobility drills rather than primary strengthening exercises.
Keep the progression steady. Add repetitions, resistance, range, or complexity only when the movement remains smooth and your symptoms return to baseline within the agreed pain-monitoring window.
When to See a Physiotherapist
There is no universal rule that every outer-hip pain episode lasting more than two weeks requires treatment. Arrange an assessment when pain is not improving with sensible load reduction, keeps returning, disturbs sleep, causes a limp, or limits work, exercise, stairs, or normal walking. Seek help sooner if you are unsure of the diagnosis or have groin pain, neurological symptoms, significant weakness, or a recent injury.
A physiotherapist or other qualified clinician can examine the hip, back, knee, gait, strength, and symptom response. GTPS is usually diagnosed from the history and clinical examination. Imaging may be used when the diagnosis is unclear, symptoms are severe or persistent, or a tendon tear or another condition is suspected.
Warning: Seek urgent medical care after a significant injury if the hip looks deformed, you cannot move the leg or bear weight, pain is intense, swelling is sudden, or the hip is hot or discolored with fever or chills. New severe weakness, spreading numbness, or loss of bladder or bowel control also needs urgent evaluation.
Treatment may include education, activity modification, a graded strengthening plan, and advice on sleep, sitting, walking, or hiking. The aim is to restore load tolerance and function rather than to chase perfect alignment or eliminate every normal movement variation.
Frequently Asked Questions
Why do my hips hurt when I hike?
Common possibilities include a sudden increase in distance or elevation, gluteal tendon-related pain, muscle fatigue, direct pack pressure, hip-joint irritation, or pain referred from the back. Reduce the provoking load, check your pack and stride, and seek an assessment if pain persists, causes a limp, or includes groin pain, numbness, or weakness.
Why are the outsides of my hips hurting so badly?
Severe lateral hip pain can fit GTPS, especially when it is tender over the greater trochanter and worse with side-lying, stairs, hills, or standing on one leg. However, severe pain should not be self-diagnosed. Trauma, infection, a tendon tear, hip-joint disease, or referred pain may need to be ruled out.
Can a meniscus tear cause hip pain?
A meniscus tear is a knee injury and does not usually refer pain directly to the outer hip. It can change the way you walk, which may increase or decrease loading at the hip and contribute to secondary discomfort. Hip pain should still be assessed on its own rather than assumed to come from the knee.
What is the number-one exercise for hip strength?
There is no single best hip exercise for every person or condition. A bridge, standing wall press, standing hip abduction, lateral band walk, hip hike, or squat may be useful at different stages. The best choice is one that targets the needed function, is performed well, and can be progressed without a significant symptom flare.
Should hip hikes burn in the glutes?
A mild muscular burn or fatigue in the stance-side outer buttock can be normal near the end of a set. Sharp pain, pinching over the bony side of the hip, or pain that grows with each repetition is not the target and means you should reduce or stop.
Can I do hip hikes if I have GTPS?
Possibly, but a full-range hip hike may be too demanding during an irritable flare. Start with lower-compression options such as a wall press, bridge, or supported standing exercise. Add hip hikes later with a small range and use your clinician’s pain-monitoring plan.
Should I stretch outer-hip pain?
Gentle motion may feel good, but strong cross-body stretches can compress the gluteal tendons and worsen GTPS. Do not force a stretch into pain. Favor comfortable movement and progressive strengthening, and ask a clinician which stretches fit your diagnosis.
Conclusion
Hip hikes should produce controlled effort in the stance-side glutes, not sharp outer-hip pain. Use a small range, keep the pelvis and trunk steady, and build volume gradually. If the outer hip is already sensitive, begin with easier strengthening and reduce positions that compress the area. Persistent, worsening, or function-limiting pain deserves a clinical assessment, while severe post-injury pain, inability to bear weight, deformity, sudden swelling, or fever requires urgent care.
Sources
- BMJ: Education plus exercise versus corticosteroid injection or wait and see for gluteal tendinopathy — supports load-management education and progressive exercise.
- Sports Medicine: Gluteal Tendinopathy—Mechanisms, Assessment and Management — supports the role of tendon loading, compression, and hip adduction.
- Dynamic Health NHS: Greater Trochanteric Pain Syndrome — supports symptom patterns, postural advice, exercise progression, and pain monitoring.
- Current Reviews in Musculoskeletal Medicine: Iliotibial Band Syndrome—Evaluation and Management — supports that classic IT band syndrome commonly presents as lateral knee pain.
- NCBI/PubMed: Snapping Hip Syndrome — supports the distinction between external snapping hip and distal IT band syndrome.
- Mayo Clinic: Hip Pain—When to See a Doctor — supports urgent warning signs after hip injury.

