

Last Updated on July 29, 2026 by Mason Reed
Winter camping can turn a familiar landscape into a quiet, snow-covered adventure, but cold, wind, short daylight, and slow travel leave less room for mistakes. For a first trip, choose an accessible campground, go with an experienced partner, test your gear before leaving, and build your plan around the coldest realistic forecast—not the average temperature.
Quick Answer
For a safe first winter camping trip, use a weather-appropriate shelter, a sleeping bag with a comfort rating below the expected low, and a high-R-value sleeping pad. Dress in dry layers, cook outside the tent, check avalanche and road conditions, share your itinerary, and choose an easy site with a fast exit route.
Key Takeaways
- Start at a developed or easily reached site, not a remote winter route.
- Match your tent, sleeping bag, and sleeping pad to the forecasted wind, snow, and overnight low.
- Keep your body and insulation dry by managing sweat, ventilation, and spare clothing.
- Never use a fuel-burning stove, lantern, grill, or heater inside a normal camping tent.
- Check local closures, weather, avalanche forecasts, fire rules, and food-storage requirements before leaving.
At a Glance
| Time Required | Begin planning several days ahead; allow extra daylight for travel, camp setup, cooking, and melting water. |
| Difficulty | Moderate at a developed campground; advanced in remote, high-elevation, or avalanche terrain. |
| Tools Needed | Cold-rated sleep system, suitable tent, stove and fuel, shovel, headlamp, navigation tools, first-aid kit, repair kit, and emergency communication. |
| Cost | Varies widely with existing gear. Borrowing or renting a tent, pad, and sleeping bag can reduce the cost of a first trip. |
Note: This guide provides general outdoor-safety information. Local ranger guidance, posted regulations, current forecasts, and formal avalanche training take priority over general advice.
Disclosure: As an Amazon Associate I earn from qualifying purchases. Some links on this page are affiliate links, at no extra cost to you.
Preparing for Your First Winter Camping Trip

Preparing for your first winter camping trip can be exciting, but the safest first outing is simple and easy to leave. Choose a developed campground, a park site near a staffed area, or another legal location with reliable road access. Avoid making your first overnight trip a long backcountry approach.
Check the site’s official page for permits, winter access, parking rules, road closures, fire restrictions, wildlife requirements, and seasonal facility closures. Then review the point forecast, wind, snowfall timing, apparent temperature or wind chill, and the forecast for any higher terrain on your route. The National Park Service winter camping guidance also recommends allowing more time for winter travel, testing cold-sensitive gear, and carrying an emergency plan.
Choose a Beginner-Friendly Plan
- Go with a partner: A companion can notice cold-injury symptoms or help if equipment fails.
- Share a trip plan: Give a trusted person your campsite, route, vehicle details, group names, and return time.
- Set turnaround rules: Leave if the access road worsens, the wind exceeds your shelter’s safe use, clothing or insulation becomes wet, or anyone cannot get warm.
- Practice at home: Pitch the tent, light the stove outdoors, inflate the pad, test the headlamp, and pack the sleep system with gloves on.
- Carry backup navigation: Bring a paper map and compass in addition to a phone or GPS. Cold can reduce battery performance.
Pro Tip: Make your first winter overnight a one-night test close to your vehicle. You can learn how your sleep system, stove, boots, and layering work without committing to a remote route.
Selecting the Right Campsite
Look for a legal site on durable ground with shelter from the prevailing wind, enough space to pitch the tent correctly, and a safe route back to the trailhead or vehicle. Avoid avalanche paths, cornices, frozen waterways, steep slopes above camp, dead trees, hanging limbs, and depressions where cold air or drifting snow can collect.
Natural Windbreaks and Shelter
Trees, terrain, and rock features can reduce wind, but each has hazards. Do not pitch beneath dead limbs, in tree wells, next to unstable rock, or directly below slopes that can shed snow. Leave enough open space around the tent for ventilation and safe stove use.
| Natural Windbreak | Benefit and Safety Check |
|---|---|
| Healthy trees | Can reduce wind. Check overhead for dead branches and avoid deep tree wells. |
| Hills or terrain rises | Can block strong wind. Stay out of avalanche runout zones and areas where blowing snow will drift. |
| Stable rock formations | May provide limited shelter. Check for rockfall, icefall, and snow shedding before camping nearby. |
Ground Conditions and Elevation
Choose flat, stable ground and inspect what is under the snow before driving stakes or building a platform. Pack down deep snow with snowshoes or skis, then let it firm up before pitching the tent. Do not dig into fragile plants or build where meltwater may flow if temperatures rise.
- Account for elevation: In the standard atmosphere, temperature decreases by roughly 3.5°F per 1,000 feet, but storms and temperature inversions can produce very different conditions. Use the actual point forecast rather than relying on a formula. The average lapse rate is described in this National Weather Service weather theory guide.
- Avoid cold-air pockets: Low basins can become colder than nearby slopes during clear, calm nights.
- Stay away from water hazards: Ice thickness can vary, and snow can hide open water, thin ice, or unstable snow bridges.
Sunlight Exposure Considerations
Morning sun can make it easier to dry frost, warm boots, and break camp. A site with safe southern or southeastern exposure may receive more winter light, but sunlight is secondary to wind protection, avalanche safety, overhead hazards, and legal campsite rules. Expect shaded valleys to cool quickly after sunset.
Leave No Trace in Snow
Camp on durable surfaces such as deep snow, rock, or established sites. Follow local waste rules, pack out trash and wipes, and keep food and scented items secured. Leave No Trace winter guidance recommends checking avalanche and weather reports, avoiding avalanche paths and cornices, camping at least 200 feet from recognizable water sources, and dismantling snow structures before leaving.
Do not depend on finding firewood. Carry a stove for cooking. Where fires are legal, use an established fire ring and only wood permitted by the land manager; never cut live or standing trees.
Essential Gear for Winter Camping
Your three most important comfort systems are shelter, sleep insulation, and clothing. The correct choice depends on the forecast and location rather than the season name alone.
- Sleeping Bag: Use the tested comfort rating if you sleep cold and the lower-limit rating only if you know you sleep warm. A 10°F to 15°F buffer below the expected low is a useful starting point, but clothing, metabolism, wind exposure, shelter, and pad insulation all affect comfort. See REI’s explanation of sleeping-bag ratings.
- Sleeping Pad: Choose an ASTM-rated pad suitable for the expected ground temperature. Pads with R-values from 4.0 to 5.4 are commonly used for cold conditions, while 5.5 or higher is a better starting range for very cold conditions. Stacked pad R-values can be added. See the sleeping-pad R-value guide.
- Tent: Use a shelter rated for the wind and snow load you may face. A sturdy three-season tent may work at a sheltered, mild, low-snow campground, while a four-season tent is the safer choice for exposed sites, strong wind, heavy snowfall, or above-treeline conditions.
Winter Camping Checklist
- Tent, complete pole set, stakes or snow anchors, guylines, and repair sleeve
- Sleeping bag, insulated pad, closed-cell foam backup pad, and dry sleep clothes
- Moisture-wicking base layers, insulating layers, weatherproof shell, spare gloves, warm hat, and face protection
- Insulated waterproof boots, gaiters when needed, and dry wool or synthetic socks
- Stove, stable base, windscreen approved for the stove, extra fuel, lighter, and backup ignition
- Insulated water bottles, pot for melting snow, water treatment, meals, and extra food
- Map, compass, GPS or phone, headlamp, spare batteries, whistle, and satellite messenger or personal locator beacon where appropriate
- First-aid kit, emergency bivy, fire starter, knife or multitool, repair tape, and small shovel
- Traction devices, snowshoes, skis, or poles when route conditions require them
- Sunscreen and sunglasses or goggles; snow can reflect strong ultraviolet light
Dressing for Cold Weather

Use a three-part layering system: a moisture-wicking base layer, one or more insulating mid-layers, and a wind- and weather-resistant shell. Avoid cotton next to your skin because it holds moisture and dries slowly. Wool and synthetic fabrics manage moisture better.
Adjust layers before you sweat heavily. Remove a hat, open pit zips, slow your pace, or shed a mid-layer during hard travel. Put insulation back on before stopping. Sweat that soaks clothing can cool you quickly once activity ends.
Protect your feet, hands, face, and head. Wear insulated waterproof boots with enough room to wiggle your toes; boots that are too tight can restrict circulation. Use dry wool or synthetic socks, insulated gloves or mittens, a warm hat, and face protection when wind chill is severe. Change into dry base layers before bed, and store tomorrow’s gloves, socks, batteries, and boot liners where they will not freeze.
Pro Tip: Pack one dry set of base layers and socks in a waterproof bag and reserve them for sleeping. Do not hike in them.
Setting Up Your Tent
Set up early enough to finish before dark. Pack down the snow, wait for it to firm, and pitch the tent according to the manufacturer’s instructions. Point the strongest or lowest-profile end into the prevailing wind unless the tent manual says otherwise. Fully tension the structure and use every required guy point in exposed weather.
- Use snow anchors: Purpose-built snow stakes, skis, poles, or buried stuff sacks filled with snow can work as deadman anchors. Compact the snow over buried anchors and allow it to set before tightening.
- Build only a low, safe wind wall: A modest snow wall can reduce wind, but place it far enough away that drifting snow will not bury the tent or block ventilation.
- Ventilate the shelter: Keep vents open and clear of snow. Brush frost away and avoid breathing into the sleeping bag.
- Manage snow load: Check the shelter during heavy snowfall and remove accumulating snow before the frame is overloaded.
- Keep exits clear: Maintain a shovel and boots where you can reach them, and make sure drifting snow cannot trap the door.
Warning: Never seal tent vents with blankets, tarps, or snow. Reduced airflow increases condensation and can allow dangerous carbon monoxide to build up if a fuel-burning device is used nearby.
Creating a Comfortable Sleeping Environment
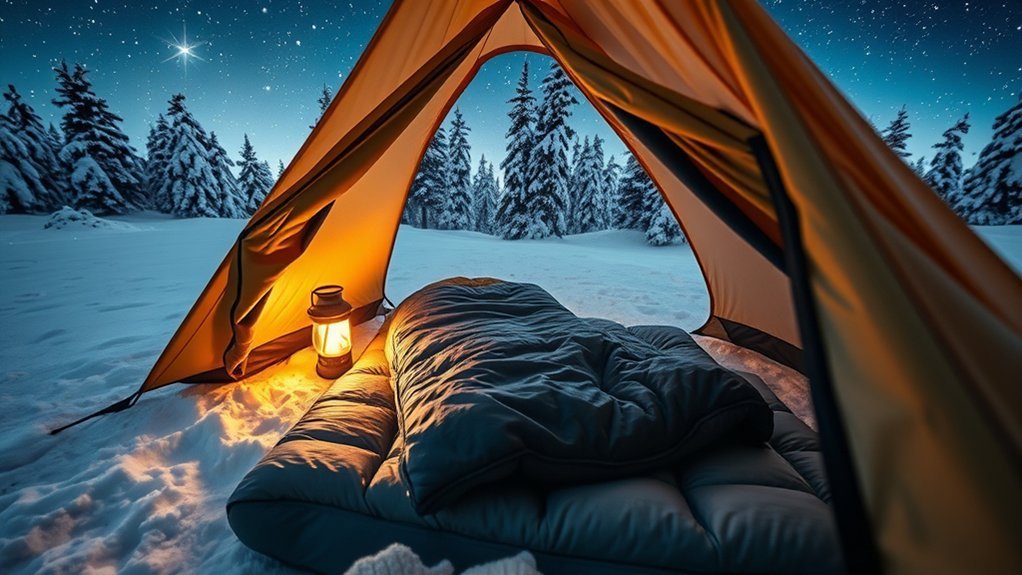
A warm night starts with insulation beneath you. Sleeping bags compress under body weight, so the pad—not the bag—provides most of the protection from the ground. Combine a high-R-value inflatable pad with a closed-cell foam pad when you need more insulation or a backup against punctures.
| Item | Purpose | Best Practice |
|---|---|---|
| Sleeping pads | Limit heat loss to the ground | Stack pads when needed; add their ASTM R-values to estimate total insulation. |
| Sleeping bag | Trap warm air around the body | Use a tested comfort or lower-limit rating and keep the insulation dry and uncompressed. |
| Tent ventilation | Reduce condensation and frost | Keep vents open, avoid touching the tent wall with the bag, and dry frost when conditions allow. |
Eat enough, drink water, use the bathroom before bed, and do a few light movements to warm yourself without sweating. Change into dry clothing. A leak-proof bottle filled with hot—not boiling—water can warm the footbox; wrap it in clothing and check the cap carefully.
Keep only small, dry, non-sharp items such as batteries or boot liners in the bag if needed. Do not stuff wet clothes or bulky gear inside because they can add moisture and compress insulation. Store damp clothing where it can vent without touching your dry sleep system.
Cooking and Staying Warm
Cold weather increases the value of simple meals. Pack foods that are easy to prepare and appealing when you are tired: oatmeal, soup, stew, rice meals, nut butter, cheese, trail mix, jerky, and hot drinks. Bring extra food in case travel takes longer than planned.
Use a stove on a stable, nonflammable surface outside the tent and away from doors, fabric, and stored fuel. Protect the stove from wind only with the manufacturer-approved windscreen and clearances. Keep a lighter and backup ignition warm and dry, and test the stove with winter fuel before the trip.
Warning: The U.S. Consumer Product Safety Commission warns that camping stoves, lanterns, grills, and heaters can produce deadly carbon monoxide in tents, vehicles, and other enclosed spaces. Use fuel-burning equipment outdoors, never while sleeping, and keep it away from tent fabric.
Melting Snow for Water
Carry liquid water at the start and store bottles upside down in insulated sleeves so ice forms near the bottom rather than at the cap. When melting snow, put a small amount of liquid water in the pot first, then add clean snow gradually. Melted snow still needs treatment when contamination is possible. Do not eat large amounts of snow as your main water source because your body must spend energy warming it.
Plan enough fuel for meals and water. Melting snow can use far more fuel than ordinary cooking, especially in wind or very low temperatures.
Safety Considerations in Winter Camping
Winter safety depends on noticing problems early. Check each other for cold stress, poor judgment, unusual quietness, fumbling, and changes in speech or movement. Do not wait for a person to admit that something is wrong.
Hypothermia and Frostbite
Hypothermia is a medical emergency. Warning signs include shivering, exhaustion, confusion, fumbling hands, memory loss, slurred speech, and drowsiness. Move the person out of wind and wet conditions, replace wet clothing with dry insulation, warm the center of the body gradually, and seek emergency help. Do not give food or drink to someone who is not fully alert.
Frostbite commonly affects fingers, toes, nose, ears, cheeks, and chin. The CDC lists numbness, firm or waxy skin, and white or grayish-yellow skin as warning signs. Protect the area, seek medical care, and do not rub it with snow or apply direct heat. Do not thaw frozen feet if they may refreeze during evacuation.
Shivering plus confusion, fumbling, or slurred speech is not “just being cold.” Treat it as a possible hypothermia emergency and act immediately.
Avalanche and Snow Hazards
If your route or campsite is in avalanche terrain, equipment alone is not enough. Check the regional forecast, take recognized training, identify avalanche paths and terrain traps, and travel with partners who can perform a rescue. The National Avalanche Center summarizes the core approach as getting the forecast, gear, and training. Each person should carry a transceiver, probe, and metal shovel on their body and know how to use them.
Beginners should avoid avalanche terrain rather than trying to manage it without training. Also avoid cornices, loaded slopes, gullies, creek beds, and the runout below steep snow-covered slopes.
Wildlife, Food, and Fire Safety
Winter does not remove wildlife risk. Follow the land manager’s food-storage rules, keep food and scented items away from the sleeping area, and pack out all scraps. Use a bear-resistant container where required. Keep campfires small and legal, and extinguish them until cold before sleeping or leaving.
Emergency Communication and Getting Lost
Do not depend on cellular coverage. Carry a whistle and consider a satellite messenger or personal locator beacon for remote trips. Know how to share coordinates and how to call for help.
If you become lost, stop and assess your location. Retrace your steps only when you can do so safely and confidently. Otherwise, call 911 or activate your emergency device, provide your coordinates and trip details, find shelter, conserve energy, stay visible, and remain in place unless there is an immediate threat. This follows the National Park Service outdoor emergency plan.
Enjoying Your Winter Camping Experience
Comfort makes winter camping memorable. Plan one or two simple activities instead of filling every hour. A short snowshoe walk, photography, stargazing, or an early meal can leave enough time to manage clothing, water, and camp chores before dark.
- Prepare warm meals and drinks: Hot soup, oatmeal, cocoa, coffee, or tea can make camp more comfortable, but they do not replace proper clothing and insulation.
- Choose the right campsite: A sheltered, flat, legal site with a quick exit is more enjoyable than an exposed site chosen only for the view.
- Stay lightly active before bed: A brief walk or a few squats can warm you, but stop before sweating.
- Protect your morning routine: Keep boots, gloves, headlamp, and breakfast supplies organized so you can get moving without exposing yourself to cold for long.
When fires are permitted, a small campfire can be enjoyable, but never use it as your only warmth plan. Your sleep system and clothing must be able to keep you safe after the fire is out.
Frequently Asked Questions
How do I keep my tent from collapsing under snow?
Use a tent rated for the expected snow and wind, assemble every pole, tension all guylines, and anchor it correctly. During ongoing snowfall, monitor accumulation and brush snow off before it overloads the frame. Do not strike the fabric hard from inside, because frozen fabric or poles can be damaged.
What food is best for winter camping?
Choose calorie-dense foods that are easy to eat and cook in the cold, such as oatmeal, soup, rice meals, nut butter, cheese, trail mix, jerky, chocolate, and hot drinks. Avoid meals that require long simmer times unless you have enough fuel for cooking and snow melting.
Can I use my summer sleeping bag in winter?
Usually not by itself. Compare the bag’s tested comfort or lower-limit rating with the coldest expected temperature and pair it with an adequately insulated pad. A liner or extra quilt may add warmth, but it does not turn a lightly insulated summer bag into a reliable severe-cold sleep system.
How do I prevent frostbite while winter camping?
Cover exposed skin, manage sweat, keep socks and gloves dry, wear boots that do not restrict circulation, eat and hydrate, and check fingers, toes, ears, nose, and cheeks often. At the first sign of persistent numbness, pain, or unusual skin color, protect the area and get out of the cold.
What should I do if I get lost in winter?
Stop, stay calm, and determine your location with a map, compass, GPS, or visible landmarks. Retrace your route only if it is safe and certain. Otherwise, call for help, share your coordinates, find shelter, put on dry layers, conserve energy, signal with a whistle or light, and stay put unless your location is immediately dangerous.
Do I need a four-season tent for every winter trip?
No. A strong three-season tent may be suitable for a sheltered campground with light snow and moderate wind. A four-season tent is the safer option when heavy snowfall, strong wind, exposed terrain, or severe weather is possible. Always follow the shelter manufacturer’s limits.
Can I cook inside my tent when it is snowing?
Do not use a normal camping stove inside a tent. Fuel-burning devices create carbon monoxide and can ignite tent fabric. Cook outdoors on a stable surface away from the shelter. Specialized expedition practices require equipment-specific procedures and expert risk management and are not appropriate guidance for beginners.
Sources
- National Park Service: Winter Backcountry Camping — winter planning, shelter, communication, water, and equipment guidance.
- Centers for Disease Control and Prevention: Winter Weather Safety — hypothermia and frostbite prevention and response.
- U.S. Consumer Product Safety Commission: Portable Heaters and Camping Equipment — carbon-monoxide hazards from stoves, lanterns, and heaters in enclosed spaces.
- National Avalanche Center: Avalanche Basics — forecasts, rescue gear, training, and terrain awareness.
- Leave No Trace: Winter Recreation — campsite selection, waste, campfires, wildlife, and snow-surface practices.
- REI Co-op: Sleeping-Bag Ratings and Sleeping-Pad R-Values — practical interpretation of standardized sleep-system ratings.
Conclusion
Winter camping can feel like stepping into a snow globe, but the best trips are built on conservative choices. Start close to help, check current conditions, bring a sleep system with a real temperature margin, keep clothing and insulation dry, and cook outside the tent. When the plan, gear, or weather no longer supports safety, turn back. With that discipline, a cold night can become a calm, cozy, and unforgettable adventure.
