Last Updated on August 21, 2026 by Caleb Warren
You can’t fully waterproof an electric scooter, but you can dramatically improve its rain resistance. Check its IP rating first, then power it off and clean and dry the frame, ports, connectors, and deck after every wet ride. Seal battery areas, exposed wiring, and charging ports with silicone, waterproof tape, or caps. Add dielectric grease to connectors, protect screws and electronics with covers, and store it in a dry, ventilated place. A few careful upgrades make a big difference — just know the trade-offs before you start.
Quick Answer
You can’t make an electric scooter fully waterproof, but you can boost its rain resistance: check its IP rating, seal the battery compartment, ports, and wiring with silicone or waterproof tape, coat connectors in dielectric grease, and dry it thoroughly after every wet ride to prevent corrosion and electrical damage.
Key Takeaways
- Check the manufacturer’s IP rating before you do anything else — it tells you your real starting point.
- Seal the battery compartment, charging port, and exposed wiring with silicone sealant, waterproof tape, or caps.
- Dielectric grease on connectors fights corrosion without blocking conductivity.
- Opening the battery area yourself can void your warranty — weigh that before you seal anything.
- Dry the scooter and inspect seals after every wet ride; that habit matters more than any single upgrade.
At a Glance
| Time Required | 1–2 hours |
| Difficulty | Beginner to intermediate |
| Tools Needed | Silicone sealant or waterproof tape, dielectric grease, heat-shrink tubing or liquid electrical tape, waterproof port caps, soft brush, microfiber cloths |
| Cost | $15–$40 for sealing and grease supplies |
Disclosure: As an Amazon Associate I earn from qualifying purchases. Some links on this page are affiliate links, at no extra cost to you.
Check Your Scooter’s IP Rating First
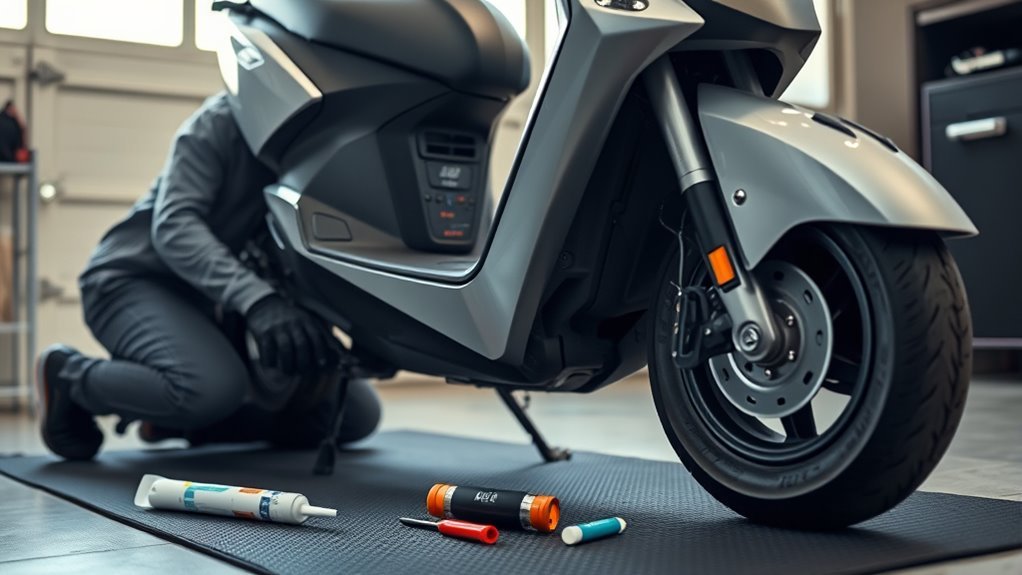
Before you ride in wet conditions, check your scooter’s IP rating in the manufacturer’s specifications. The IP rating importance is simple: it follows the international IEC 60529 standard, where the first digit shows solid protection and the second shows liquid protection. For electric scooters, you’ll often see ratings from IPX4, which resists splashes, to IPX7, which tolerates brief immersion (up to about 1 meter of water for roughly 30 minutes). If you expect light rain, aim for at least IPX4. Don’t trust marketing claims alone; many “water-resistant” models only offer minimal defense. Read the exact specification sheet so you know what your scooter can and can’t handle.
Even a high rating doesn’t promise perfect real-world performance, so pair it with practical waterproofing methods. Use the rating as your baseline, then plan extra protection based on your terrain, weather, and commute. When you understand the limits, you ride with more control and less risk.
Note: An IPX4 body rating and an IP54 rating share the same water-resistance digit (4) — the extra “5” in IP54 just adds dust protection. Either one is fine for light rain; neither means your scooter can handle a downpour or a puddle.
Clean and Dry Key Components Safely
Start with safety: power off your scooter and unplug it before cleaning so you don’t push moisture into the electrical system. For reliable scooter maintenance, use precise cleaning techniques that protect components. Wipe the frame, deck, and handlebars with a damp microfiber cloth plus mild soap; skip high-pressure sprays that can drive water into sealed areas — most manufacturers, including Segway-Ninebot, explicitly warn against high-pressure washing.
| Component | Method |
|---|---|
| Frame | Damp cloth |
| Wheels | Soft brush |
| Brakes | Separate cleaning |
| Drying | Air dry fully |
Clean the wheels and braking parts separately so grime doesn’t spread. Use a soft brush to lift debris from crevices without scouring surfaces. After washing, dry every part thoroughly, especially connectors and the battery compartment area, to limit corrosion and trapped moisture. Inspect your scooter after wet rides and repeat this routine often.
Seal the Battery, Ports, and Wiring
Start by sealing the battery compartment with silicone sealant or waterproof tape so you close every gap around the housing and block moisture ingress. Cover charging ports with waterproof caps when you’re not using them, and add dielectric grease to the connectors to reduce corrosion. Protect exposed wiring with liquid electrical tape or heat-shrink tubing, and use O-rings at any non-sealed screw holes to keep water out.
Battery Compartment Sealing
Seal the battery compartment first, since even small gaps can let moisture reach critical electronics. Clean the housing, then apply silicone sealant or waterproof tape along seams, fasteners, and any cable pass-throughs. Coat connectors with dielectric grease to resist corrosion and keep contact points stable. Keep charging ports capped with robust waterproof covers whenever you’re not charging. Inspect exposed wiring regularly, and if you find abrasion or cracked insulation, use liquid electrical tape or a waterproof coating to restore integrity. Finally, clear drainage holes so trapped water can escape; if the compartment pools liquid, improve drainage before riding in wet conditions.
Warning: Opening or sealing a lithium-ion battery compartment yourself will usually void your manufacturer’s warranty, and done incorrectly it can trap heat or let moisture reach the cells instead of keeping it out. The U.S. Consumer Product Safety Commission and National Fire Protection Association both flag water- and debris-exposed micromobility batteries as a fire and overheating risk. Never charge a scooter that’s still damp inside, and if a battery has been soaked, smells unusual, swells, or gets hot, stop using it and have it inspected by a certified technician.
Port and Wire Protection
Protect the battery, ports, and wiring before you ride in wet conditions, because a few exposed openings are all it takes for water to reach the scooter’s electronics.
| Task | Method |
|---|---|
| Battery | Seal edges |
| Connectors | Dielectric grease |
| Charging port | Waterproof cap |
| Openings | Rubber gaskets |
| Wires | Liquid electrical tape |
Add wire insulation where conductors run exposed, then spray a waterproofing coating for extra defense. Pack screw holes with O-rings, and cover the charge port whenever you park. These steps block moisture and cut corrosion, keeping your machine ready for wet-weather commutes.
Protect the Motor, Deck, and Screws
To keep water from reaching vulnerable parts, apply a light coat of lithium grease inside the motor to resist rust and maintain smooth operation, but don’t block any ventilation paths or you could trap heat. This step reduces friction and protects bearings without sacrificing cooling. Next, seal the deck edges and battery compartment with silicone sealant so moisture can’t sneak into your electronics. Keep the bead continuous and thin for a clean, durable barrier. For screw sealing, fit O-rings around any non-sealed screw holes to stop capillary water entry and slow corrosion. Check that deck drainage holes stay open; clear debris after rides, and drill extra drainage only if the design allows safe runoff. Inspect the motor and deck often for wear, cracks, or lifting sealant, then reapply protection when needed.
Use Dielectric Grease and Gaskets
Next, add dielectric grease to your scooter’s electrical connectors to keep moisture and corrosion at bay without interfering with conductivity. Before any grease application, clean the connectors thoroughly and let them dry completely; this improves adhesion and reduces trapped water. Keep the compound off switches and moving parts, since those areas need free mechanical action. For the battery bay and other access points, check rubber gaskets for cracks, compression, or hardening. Good gasket maintenance matters because worn seals can let water into sensitive electronics and undo your work.
Apply dielectric grease to clean, dry connectors and inspect gaskets regularly to keep moisture and corrosion out.
- Apply a thin, even film on connector pins and sockets.
- Inspect gasket edges after every wet ride.
- Replace damaged seals before leaks start.
- Pair both methods for stronger, longer-lasting protection.
Pro Tip: Test dielectric grease on one hidden connector first. A thin film is all you need — packing it on attracts dust and grit that’s harder to clean out later than the moisture you were trying to block.
Cover Exposed Electronics and Controls
Once the critical electrical connections are sealed, focus on the parts you handle most: the display, throttle, buttons, and charging port. Apply a clear waterproof film over the display and throttle so moisture can’t reach the electronic components, yet the controls stay visible and responsive. Around buttons and switches, run a thin bead of silicone sealant at the edges to block ingress without interfering with actuation. Fit handlebar covers made from waterproof materials to shield exposed controls from rain, spray, and dust. For every charging port, keep a robust cap in place whenever you’re not charging; an open port invites corrosion and short circuits. Recheck the film, sealant, and covers after cleaning or hard use. If you see lifting edges, cracked sealant, or a loose cap, replace them immediately.
What to Do If Your Scooter Gets Wet Anyway
Even a well-sealed scooter can take on water in a downpour or deep puddle. If that happens, don’t panic — but don’t ride it or charge it either until you’ve gone through a few checks.
- Power off immediately and, if the battery is user-removable, disconnect it.
- Do not plug it in to charge — charging a wet battery is when short circuits and heat damage happen.
- Wipe down the exterior, then set it in a dry, ventilated space for 24–48 hours before trying to power it on again.
- Check accessible connectors, the charging port, and the battery compartment for discoloration, corrosion, or a lingering damp smell.
- If the scooter won’t power on, throws error codes, trips a breaker, or the battery feels warm, swollen, or smells odd, stop and take it to a certified repair shop rather than troubleshooting the battery yourself.
Note: Skip the rice-in-a-bag trick — it’s a myth for electronics and can leave dust and starch residue in ports. Plain air-drying in a ventilated space works better.
Ride Safely in Wet Weather
Before you ride in wet weather, check your scooter’s IP rating; a water-resistance digit of 4 or higher (IPX4/IP54) is the minimum for light rain, and higher ratings give you better moisture protection. Use rain protection such as waterproof gloves and a reflective jacket, and keep extra distance because wet surfaces reduce traction and brake response. After riding, dry the scooter thoroughly and inspect seals and coatings so water doesn’t stay trapped in vulnerable components.
Check IP Ratings
Check the scooter’s IP rating before you buy, because it tells you how well the unit resists dust and water. Read the first digit for solids and the second for liquids. IPX4 suits light rain; IPX6 or higher gives stronger splash defense, but it isn’t true waterproofing. Many listings overstate protection, so verify the maker’s specs before you commit. Use these waterproofing techniques as a baseline, not a promise, and inspect seals often after wet rides to keep your setup reliable.
- IPX4: light-rain tolerance
- IPX6+: stronger water resistance
- First digit: solid-object defense
- Second digit: liquid resistance
Use Rain Protection
When you ride in wet weather, lower your speed to preserve traction and steer clear of puddles that can hide hazards or splash water into sensitive components. Fenders or mudguards also cut down significantly on the spray that reaches your battery compartment and connectors from below. Fit waterproof covers snugly over your scooter when you park or transport it; they block rain and reduce moisture buildup on electronics. For commuting, use a waterproof bag or pouch to keep accessories dry. Inspect seals and gaskets around the battery compartment and connectors often, because intact moisture barriers improve resistance during storms.
Dry After Riding
As soon as you finish riding in wet conditions, power off the scooter and disconnect the battery if it’s user-removable, to cut the risk of electrical damage. Then wipe the frame with a microfiber cloth, focusing on connectors, seams, and controls to remove trapped moisture. Clear drainage holes so water doesn’t pool and trigger rust or corrosion. Let the scooter air dry completely in a ventilated space before you store it. Inspect seals and waterproofing regularly, and replace worn parts before the next ride.
- Wipe sensitive zones first
- Check drains for blockages
- Dry in moving air only
- Refit the battery after full drying
Dry and Inspect Your Scooter After Rain
After a rainy ride, power off your scooter right away and disconnect the battery to reduce the risk of electrical damage. Wipe the frame, deck, and handlebars with a dry microfiber cloth, and work carefully around switches, ports, and seams. Don’t leave pooled water near sensitive components. Check drainage holes for mud, grit, or leaves, then clear them so water can escape instead of lingering inside the shell. Inspect connectors, wiring, and the battery compartment for corrosion, discoloration, or dampness. If you spot moisture, dry the area completely before you restore power. Store the scooter in a ventilated, dry place and let it air out fully before recharging. That simple routine protects your ride and preserves electrical integrity.
Federal safety regulators have tied water- and debris-exposed micromobility batteries to real fire risk — treating water as a hazard, not an inconvenience, is the whole point of waterproofing in the first place.
Frequently Asked Questions
How Do I Make My Electric Scooter Waterproof?
You’ll make your scooter more rain-resistant, not truly waterproof, by sealing gaps with silicone, coating connectors with dielectric grease, adding waterproof materials over controls, fitting fenders, and doing regular maintenance to keep moisture out and performance strong.
How to Make Something Electric Waterproof?
Seal every opening with waterproof materials, add electrical insulation, and coat exposed boards or connectors. Use gasketed covers, dielectric grease, and sealed connectors to protect the device, and never assume a sealed device can be submerged unless it’s rated for it.
How to Protect an Electric Scooter From Rain While Riding?
Use rain gear and cautious riding techniques: wear waterproof clothing, fit fenders, avoid puddles, reduce speed, keep weight centered, and seal connectors beforehand. This limits splash ingress, preserves traction, and keeps you safer in wet conditions.
Can You Waterproof a Scooter?
Yes, you can improve a scooter’s water resistance with waterproof materials, but you can’t make it fully submersible. You’ll improve resistance by sealing joints, protecting connectors, and doing routine maintenance to keep water out and performance reliable.
Does Waterproofing My Scooter Void the Warranty?
Usually, yes. Most manufacturer warranties cover damage from normal use, not aftermarket modification of the battery compartment, ports, or seals. Check your manual before you seal anything, and if keeping coverage matters to you, ask the manufacturer about factory-approved covers or fenders instead of DIY sealant.
Conclusion
Waterproofing your scooter isn’t magic, and it’s definitely not an invitation to audition for a lake crossing. Check the IP rating, seal weak points, and protect the battery, ports, motor, and controls before moisture does what moisture does best: destroy expensive electronics. Just go in with your eyes open about warranty trade-offs and battery safety. After wet rides, dry, inspect, and repair fast. Treat water as a hazard instead of a suggestion, and your scooter won’t become a stylish, battery-powered paperweight.
Sources
- IEC 60529, International Electrotechnical Commission — the official international standard defining IP (Ingress Protection) ratings
- U.S. Consumer Product Safety Commission — Batteries — guidance on battery overheating and fire hazards in consumer electronics
- National Fire Protection Association — Safety with E-Bikes and E-Scooters — lithium-ion battery fire safety guidance for micromobility devices
- Segway-Ninebot Official FAQ — manufacturer cleaning and water-exposure guidance for electric scooters