
Last Updated on August 26, 2026 by Caleb Warren
Building an electric scooter from scratch means combining a mechanically sound frame, steering system, wheels, brakes, motor, controller, battery, charger, controls, and wiring into one compatible system. The safest route is to fabricate the chassis yourself if you have the skills, while using a professionally assembled battery pack, matched charger, and documented motor-controller combination rather than improvising high-current electrical parts.
Quick Answer
To build an electric scooter from scratch, first define the rider load, wheel size, brakes, range, and legal speed target. Build or source a rigid chassis, then install a compatible hub motor, controller, certified battery and charger, throttle, brake cutoff, and display. Finish with electrical protection, staged testing, and regular inspections.
Key Takeaways
- Design the frame, steering, wheels, brakes, motor, battery, and controller as one system instead of choosing parts independently.
- Do not assume electrical wire colors are universal. Follow the exact controller, motor, throttle, brake, and display pinouts.
- Choose battery size in watt-hours, not just amp-hours, and use a professionally assembled pack with a compatible charger and appropriate safety certification where available.
- Use mechanical brakes capable of stopping the scooter without relying on regenerative braking.
- Bench-test first, then test at walking speed in a controlled area before gradually increasing speed or load.
At a Glance
| Time Required | Usually several weekends for design, fabrication, wiring, setup, and staged testing; longer if machining or welding is outsourced. |
| Difficulty | Advanced. The project combines structural fabrication, steering and brake setup, high-current DC wiring, and control-system configuration. |
| Tools Needed | Measuring and CAD tools, hand tools, torque wrench, wire crimper/strippers, multimeter, and suitable machining or welding equipment or professional shop access. |
| Cost | Highly variable. A quality battery and charger, motor, controller, brakes, wheels, fabrication, and tooling can make a one-off build cost as much as or more than a complete commercial scooter. |
Warning: A homemade scooter can fail through frame fracture, steering failure, brake failure, wiring faults, or lithium-ion battery fire. Do not fabricate a rideable structural frame, modify a lithium battery pack, or energize high-current wiring unless you have the required skills. CPSC advises using micromobility batteries and charging systems designed and tested for the intended device and warns against reworked packs, repurposed cells, and unsuitable chargers.
Disclosure: As an Amazon Associate I earn from qualifying purchases. Some links on this page are affiliate links, at no extra cost to you.
Choose Your Scooter Frame and Wheel Layout
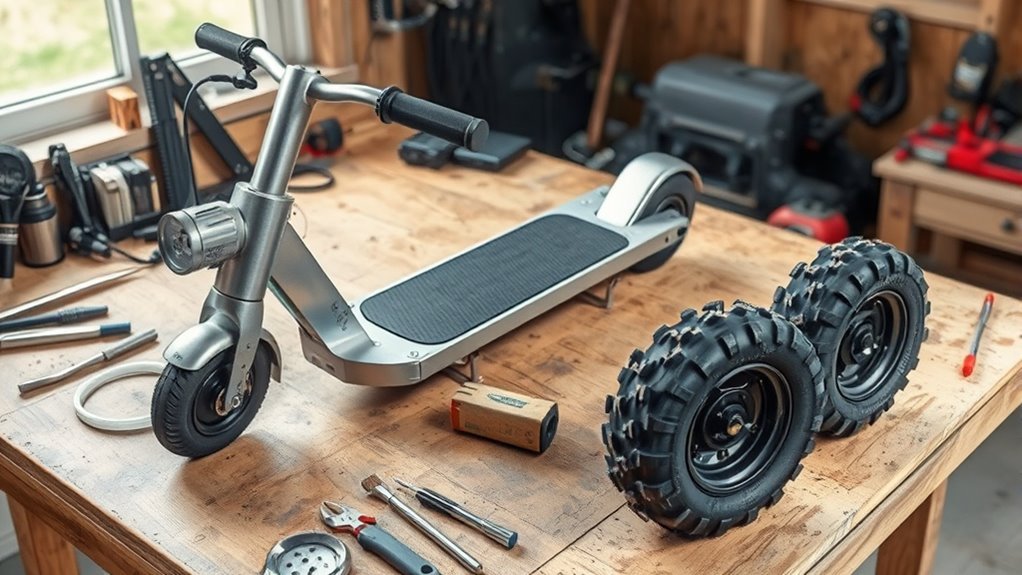
Start with a design brief before cutting metal. Record the maximum rider and cargo load, desired wheel diameter, expected terrain, deck size, braking arrangement, approximate range, and the maximum speed permitted where you plan to ride. Those requirements determine how strong the frame must be and how much motor and battery capacity makes sense.
Aluminum and steel are both common structural choices, but material alone does not make a frame safe. Tube dimensions, wall thickness, joints, weld quality, heat treatment where applicable, axle supports, and stress concentration around the steering tube and deck all matter. If you cannot confidently evaluate those loads, use a proven donor chassis or have the structural design reviewed by a competent fabricator or engineer.
Use a conventional scooter layout in which the steering column and front fork rotate independently from the deck. Keep enough tire, brake, motor-cable, and deck clearance for full steering movement and suspension travel if the scooter has suspension.
Do not copy a single steering or “caster” angle without considering the rest of the geometry. Head angle, fork offset, trail, wheel diameter, wheelbase, deck height, and speed work together. A geometry that feels stable on a low-speed scooter may become nervous or difficult to steer at higher speeds. A proven production chassis is a safer reference than an arbitrary angle.
Define Load, Wheels, and Brakes
- Load rating: Design for the rider, clothing, backpack, battery, and dynamic loads from bumps and braking rather than rider weight alone.
- Wheel size: Larger wheels generally handle cracks and obstacles better, while small wheels keep the scooter compact but can stop more abruptly on rough surfaces.
- Tires: Use tires and rims intended for the required load and speed, and maintain the tire manufacturer’s specified pressure.
- Brakes: Fit dependable mechanical friction brakes. Regenerative braking can supplement them but should not be the only way to stop.
- Visibility: If the scooter will be ridden around traffic, include a headlight, rear light, reflectors, and an audible warning device where appropriate or legally required.
The U.S. Consumer Product Safety Commission’s micromobility guidance specifically recommends inspecting handlebars, brakes, throttle, lights, tires, cables, and the frame before riding and warns that small scooter tires are vulnerable to road obstacles.
Pick the Motor, Controller, and Battery Pack
A brushless hub motor is a common choice because the motor is integrated into the wheel and needs fewer chains, belts, sprockets, and external moving parts than many separate-drive systems. It is not automatically the best choice for every build, however. Motor selection should follow the scooter’s intended load, hill grade, wheel size, legal speed, cooling, and braking requirements.
Choose the motor and controller together. Check the controller’s supported battery-voltage range, maximum battery current, maximum phase current, Hall-sensor compatibility, throttle type, brake inputs, display/protocol compatibility, thermal inputs, and programming requirements. Never assume that two components are compatible simply because both are labeled “48 V.”
Battery sizing should use watt-hours (Wh) instead of amp-hours alone:
Battery energy in Wh = nominal battery voltage × amp-hour capacity.
For example, a nominal 36 V 10 Ah pack contains about 360 Wh, while a nominal 48 V 10 Ah pack contains about 480 Wh. Actual usable energy and riding range are lower and vary with speed, hills, rider mass, wind, tire pressure, temperature, controller settings, and battery reserve.
Pro Tip: For a one-off scooter, buy the motor, compatible controller, display, throttle, and brake sensors as a documented system whenever possible. It removes much of the guesswork around connectors, Hall mapping, communication protocols, and controller setup.
Choose a Safer Battery and Charger
For a DIY chassis, the safer approach is to use a professionally assembled lithium-ion battery pack with an integrated battery-management system (BMS) rather than building a traction pack from loose cells. The BMS should be designed for the pack’s chemistry, series-cell count, charge voltage, discharge current, and temperature sensing.
Use a charger specifically approved for that battery. Do not substitute a “universal” charger just because the plug fits. CPSC advises using the charger supplied or recommended for the product and warns against modified or reworked battery packs and repurposed cells.
For safety context, UL 2272 addresses electrical systems for personal e-mobility devices, while UL 2271 addresses batteries used in light electric vehicle applications. A homemade scooter will not automatically become UL-certified simply because one component carries a certification mark, but choosing appropriately certified components can reduce avoidable risk.
Gather the Tools and Safety Gear
Gather the tools around your actual fabrication method. A fully custom metal chassis may require CNC machining, drilling, cutting, fixturing, and professional welding, while a conversion based on an existing scooter chassis may need mostly hand tools. In either case, you need accurate measuring tools and electrical test equipment.
Essential Tools
A practical workshop setup includes the following:
| Tool | Function | Why it matters |
|---|---|---|
| CAD/measuring tools | Plans frame and component positions | Reduces interference and alignment errors |
| Drill/machine tools | Creates brackets and mounting features | Improves dimensional accuracy |
| Torque wrench and hand tools | Installs structural fasteners | Helps achieve documented fastener torque |
| Wire strippers and proper crimper | Prepares electrical conductors | Creates reliable terminations |
| Multimeter | Checks polarity, voltage, continuity, and faults | Finds wiring errors before power-up |
If your design requires structural welding or machined steering/axle parts, use a qualified shop rather than treating the scooter frame as a first welding project. A cosmetic-looking joint can still fail under braking or impact loads.
Safety Gear
Wear safety glasses or a face shield when drilling, cutting, grinding, machining, or soldering. Use gloves appropriate to the task, but keep loose gloves away from rotating machinery. Wear closed-toe footwear and suitable hearing protection where required.
For ride testing, wear a properly fitted helmet appropriate to the activity. CPSC recommends wearing a bicycle helmet when riding e-scooters and following local helmet and roadway rules. Gloves, knee protection, elbow protection, and sturdy footwear are sensible additions during early testing.
Keep a suitable fire-safety plan for the workshop and know how to leave the area quickly if a lithium battery begins smoking, swelling, hissing, leaking, giving off unusual odor, or becoming abnormally hot. Do not continue using a damaged battery.
Build the Frame and Motor Mount
Lay out the scooter in CAD or a full-scale drawing before fabrication. Position the steering tube, deck, wheels, brake hardware, controller, battery, charging port, wiring channels, lights, and service access so that none interfere with steering or suspension movement.
Frame Layout
Keep heavy components, particularly the battery, low and near the center of the wheelbase where practical. This can reduce the amount of mass carried high on the steering structure and keep the deck balanced.
Provide enough deck space for stable footing and use a high-grip standing surface. The steering column and folding mechanism, if used, must resist play under braking and repeated impacts. Avoid placing holes or sharp inside corners in highly loaded frame areas unless the structure is specifically designed for them.
The battery enclosure should restrain the pack mechanically so it cannot slide or strike the enclosure during acceleration, braking, or bumps. Provide abrasion protection and service access without allowing tools or fasteners to short battery terminals.
Motor Mount Fabrication
With a hub motor, the wheel itself contains the motor. Your critical mounting features are therefore the fork, swingarm, or dropouts that capture the motor axle rather than a separate motor plate.
Machine or fabricate those supports to the motor manufacturer’s axle dimensions. The axle must seat fully, remain aligned with the wheel, and resist the reaction torque created when the motor accelerates or regeneratively brakes. Use the axle washers, anti-rotation hardware, torque arms, fasteners, and tightening procedure specified for the motor or axle system.
- Verify that the axle seats completely without forcing the dropouts apart.
- Confirm that the wheel is centered and clears the frame through its full rotation.
- Check brake-disc or drum alignment before tightening the axle.
- Route the motor cable so the axle exit cannot pinch, twist, or rub it.
Platform And Housing
Build the deck and enclosure around serviceability as well as appearance. Avoid crushing the battery with enclosure screws, and isolate cable runs from sharp metal edges. Use grommets, edge protection, clamps, and strain relief anywhere wiring passes through the chassis.
| Element | Requirement | Benefit |
|---|---|---|
| Frame | Appropriate material, section size, joints, and verified alignment | Structural rigidity and predictable handling |
| Battery housing | Secure restraint, insulated terminals, protected cable exits | Reduces impact, short-circuit, and abrasion risk |
| Controls | Rigid handlebar and accessible brake/throttle placement | Better rider control |
Wire the Controller and Battery System
Before making any electrical connection, compare the motor, controller, battery, BMS, charger, display, throttle, brake sensors, and connectors against their documentation. Check both nominal and maximum voltage. Also verify current limits, connector ratings, polarity, communication protocols, and sensor types.
Warning: Do not identify a high-current connection by wire color alone. Different manufacturers can use the same color for different functions. A wrong connection can destroy a controller, damage a battery, create an arc, or start a fire.
A published Grin Technologies controller manual, for example, explains that some motor families match its yellow/green/blue phase and Hall colors while other motors use a different mapping. Treat the exact wiring diagram for your hardware as the authority.
- Keep the battery disconnected. Identify every controller connector and pin by function from its documentation.
- Install appropriate overcurrent protection. Use the fuse, circuit breaker, contactor, disconnect, and precharge arrangement required by the controller/battery design. Some controllers specifically require precharge to limit inrush current.
- Connect motor phases and Hall/sensor wiring according to the documented pinout. Do not guess by color.
- Connect throttle, brake cutoff, display, temperature sensor, and other low-voltage signals according to their specified pinouts.
- Use appropriately rated conductors and connectors. Size them for the controller’s current, cable length, connector limits, insulation rating, installation temperature, and manufacturer recommendations rather than using a universal AWG rule.
- Add abrasion and strain protection. Secure cables so steering motion and suspension travel cannot pull on connectors.
- Check polarity and continuity with a multimeter before connecting the battery.
Configure Controller Protection
Before riding, configure the controller conservatively. The exact names vary by controller, but important settings commonly include:
- Maximum battery current that does not exceed the battery/BMS rating.
- Motor or phase-current limit appropriate for the motor and controller.
- Low-voltage cutoff appropriate for the battery system.
- Throttle deadband and acceleration ramp.
- Brake cutoff or regenerative-brake input.
- Maximum speed or electrical RPM limit where available.
- Motor/controller temperature rollback if supported.
Do not raise current limits simply because the scooter feels slow. Excess current can overheat the motor, controller, connectors, wiring, or battery.
Install the Throttle, Brake, and Display
Mount the throttle where it can be reached without loosening your grip. Connect it according to its documented supply, ground, and signal pins; do not assume red, black, and white have the same meaning on every throttle/controller combination.
With the driven wheel safely off the ground, verify that the throttle returns to zero on its own and that the motor responds smoothly. The wheel must not begin turning unexpectedly at startup.
Install the mechanical brake system and adjust pads, rotors, cables, or hydraulic components according to their manufacturer’s instructions. If the brake lever includes a motor-cutoff switch, test it independently: applying the brake should cancel drive torque even if the throttle is still commanded.
Mount the display where it can be read without blocking normal steering. Configure wheel diameter, units, speed limits, battery parameters, and other settings using the controller/display documentation. Confirm that displayed battery voltage and wheel speed are plausible before relying on the readout.
Set Up the Speed Sensor and LCD
You may not need a separate speed sensor. Many hub motors and controllers already provide a wheel-speed signal from an internal sensor or Hall circuit. Check the controller/display manual first.
If your system requires an external sensor, mount the specified Hall or reed sensor and magnet with the gap and orientation recommended by the manufacturer. Secure both pieces so road vibration cannot move them into the wheel.
If you choose to build a separate microcontroller-based speed display, keep it on the controller’s intended low-voltage signal side and use a correctly regulated supply. Program the display using the measured wheel circumference and verified pulses per wheel revolution. Compare its reading with another reliable speed measurement during low-speed testing.
- Confirm whether your motor/controller already provides a speed output.
- Set the correct wheel diameter or circumference.
- Set the correct number of pulses per wheel revolution when required.
- Verify speed and distance readings at low speed before normal riding.
Test, Tune, and Waterproof the Scooter
Do not move directly from assembly to a full-speed road test. Use several test stages so a minor setup error does not become a crash.
Bench Test Before Riding
- Support the driven wheel off the ground so the scooter cannot launch forward.
- Check battery voltage and polarity with a multimeter.
- Power the system on with the throttle released.
- Confirm smooth low-throttle motor rotation.
- Check for abnormal vibration, grinding, rough commutation, hot connectors, or error codes.
- Apply each brake cutoff and confirm motor power stops.
- Turn the handlebar fully left and right while watching for stretched or pinched cables.
- Power down and recheck axle hardware, steering fasteners, brake hardware, and cable restraint.
Low-Speed Ground Test
Move to a flat area closed to traffic and pedestrians. Start at walking speed. Test steering, throttle return, brake feel, and stability before increasing speed. Stop immediately if the scooter pulls to one side, develops steering play, makes new noises, overheats, loses braking force, or surges unexpectedly.
| Check | Target | Action if Wrong |
|---|---|---|
| Throttle | Smooth and self-returning | Stop and inspect throttle/controller setup |
| Brakes | Predictable mechanical stopping | Inspect pads, rotors, cables/hydraulics, and adjustment |
| Steering | No looseness, binding, or wobble | Stop riding and inspect bearings, stem, fork, and frame |
| Wiring | Secure and cool | Inspect connectors, conductor sizing, routing, and current limits |
| Motor/controller | Normal sound and temperature | Reduce load and diagnose setup before continuing |
Make the Electronics Weather-Resistant
A homemade scooter should not be described as “waterproof” unless its assembled system has actually been designed and tested to a defined ingress-protection level. Instead, make the electrical system as weather-resistant as practical.
- Use purpose-designed sealed connectors where possible.
- Use cable glands and grommets where wires enter enclosures.
- Add strain relief so cable movement does not break the seal.
- Keep drainage paths away from the battery and controller.
- Do not coat connectors or electronics with arbitrary construction sealants unless the product manufacturer approves that material.
- Do not block controller cooling surfaces or trap heat inside a sealed box.
- Do not charge a wet scooter or battery.
- Avoid pressure washing.
Charge, Store, and Maintain the Battery Safely
Lithium-ion battery safety continues to receive regulatory attention. In June 2026, CPSC approved publication of a proposed mandatory safety standard aimed at hazards including thermal runaway, fires, explosions, overheating, burns, and smoke inhalation in micromobility products.
CPSC’s April 2026 micromobility report identified motor-vehicle collisions as the leading fatal hazard among reviewed e-scooter cases and also documented fatal battery-fire incidents, showing why both road safety and electrical safety matter in a DIY build.
Follow CPSC’s micromobility battery-charging guidance:
- Use only the charger supplied or specifically recommended for the battery/system.
- Be present while the battery is charging.
- Do not charge while sleeping or when nobody is home.
- Unplug the charger when charging is complete according to the manufacturer’s instructions.
- Do not use a pack that has been modified or reworked by unqualified personnel.
- Do not use repurposed or used cells to improvise a traction battery.
- Stop using a battery that swells, leaks, smokes, changes shape or color, smells unusual, or becomes excessively hot.
- Do not put lithium-ion batteries in household trash; use an appropriate battery-recycling or hazardous-waste program.
Check Local Laws Before Riding
A mechanically functional scooter is not automatically legal on public roads, sidewalks, trails, or bike lanes. Rules can differ by state, province, country, and city and may regulate maximum speed, motor power, rider age, helmets, lighting, registration, road position, and where scooters may be used.
CPSC advises riders to follow local traffic laws, posted speed limits, signals, helmet rules, and riding-location requirements. Check those rules before choosing your final controller speed limit or taking the scooter onto public property.
If you are designing a recreational scooter for a child or teenager, also be aware that ASTM F2641-24 covers certain recreational powered scooters for children ages 8–12 and adolescents 13 and older, with specific scope and speed categories. It does not cover every adult or roadway-use scooter.
Inspect and Maintain Your Homemade Scooter
A custom scooter has no factory service schedule, so create one. Inspect it frequently during the first rides because fasteners, brake parts, cables, and newly fabricated joints may settle.
- Before every ride: Check tire condition and pressure, brakes, steering play, throttle return, lights, axle security, folding mechanism, and visible battery damage.
- After early test rides: Recheck structural fasteners, axle retention, brake mounting, cable clamps, and connectors.
- Regularly: Inspect welds and high-stress frame areas for cracks, deformation, corrosion, or movement.
- After an impact: Stop riding until the steering, frame, fork, wheels, brakes, battery enclosure, and battery have been inspected.
- After water exposure: Let the scooter dry in a safe location and inspect electrical enclosures before charging.
Common Problems and What to Check
| Problem | What to Check First |
|---|---|
| Motor shakes or growls instead of spinning smoothly | Stop the test; verify motor phase/Hall mapping and controller setup using the exact manuals. |
| Motor does not start | Battery voltage, main fuse/disconnect, brake cutoff state, throttle signal, controller errors, and connectors. |
| Motor cuts out under acceleration | Battery/BMS current limit, loose high-current connections, controller limits, low-voltage cutoff, and overheating. |
| Brake lever does not cut motor power | Brake-switch wiring, controller input configuration, and sensor operation. Mechanical brakes must still function independently. |
| Steering develops play | Stop riding; inspect headset/bearings, stem, folding mechanism, fork, axle, and structural joints. |
| Connector or cable becomes hot | Stop using the scooter and inspect current rating, crimp quality, contact resistance, conductor size, and controller limits. |
| Battery becomes unusually hot, swollen, damaged, or emits odor | Stop using and charging it, move away from the hazard if safe to do so, and follow battery/manufacturer and emergency guidance. |
Frequently Asked Questions
Can I build my own electric scooter?
Yes, but a safe build requires more than connecting a motor and battery. You need a structurally sound frame and steering system, adequate mechanical brakes, compatible electrical components, correctly rated wiring and connectors, a suitable battery and charger, protective equipment, and staged testing. Outsource structural or high-current electrical work that is beyond your experience.
Is it cheaper to build your own electric scooter?
Not always. Reusing a suitable chassis or already-owned tools can reduce costs, but a quality battery and charger, motor, controller, brakes, tires, machining, welding, connectors, and test equipment add up quickly. A one-off custom scooter may cost more than a mass-produced scooter with comparable performance.
What battery voltage should I use for a DIY electric scooter?
Use a voltage supported by the exact controller, motor, display, accessories, BMS, and charger you selected. Common nominal voltages exist, but there is no universal best voltage. Check maximum charged voltage as well as nominal voltage, then stay within every component’s documented limits.
How fast is a 5000W electric scooter?
Motor wattage alone cannot tell you the scooter’s top speed. Speed depends on battery voltage, motor winding, wheel diameter, controller settings, gearing if present, aerodynamic drag, rider mass, temperature, and software limits. A 5,000 W-class system can be capable of dangerous speeds, so set the controller around the chassis, brakes, tires, rider skill, and local law rather than chasing a wattage-based speed target.
Do I need a BMS in an electric scooter battery?
A lithium-ion traction battery should use protection designed for its cell chemistry, voltage, current, and temperature limits, but a BMS by itself does not make a poorly designed battery safe. For a DIY scooter, use a professionally assembled pack with appropriate protection and a charger specifically matched to that pack.
Can I use a universal charger with my scooter battery?
Do not choose a charger simply because its connector fits. The charge voltage, current, connector polarity, battery chemistry, BMS, and charging protocol must all be compatible. CPSC recommends using the charger supplied with or recommended for the micromobility product or battery system.
Are scooters good for autistic kids?
Some autistic children enjoy scooters and may benefit from physical play, but suitability depends on the individual child’s balance, coordination, judgment, sensory needs, and ability to follow safety instructions. Use age-appropriate equipment within the manufacturer’s rider limits and consider advice from the child’s occupational therapist or other qualified professional when needed. A custom high-power electric scooter is not an appropriate default choice for a child.
Sources
- U.S. Consumer Product Safety Commission — Micromobility Information Center — riding, inspection, helmet, charging, and local-law safety guidance.
- U.S. Consumer Product Safety Commission — Micromobility Battery Charging Safety — charger, battery-pack, charging, and disposal guidance.
- UL Solutions — Personal E-Mobility Evaluation, Testing and Certification — UL 2272 and UL 2271 safety-standard context.
- ASTM International — ASTM F2641-24 — current recreational powered-scooter safety specification within its stated scope.
- Grin Technologies — Sinewave Grinfineon Controller Manual — demonstrates why third-party motor/controller Hall and phase wiring cannot always be matched by color.
- U.S. Consumer Product Safety Commission — Micromobility Products-Related Deaths, Injuries, and Hazard Patterns 2017–2024 — current injury, fatality, crash, and battery-fire context.
Conclusion
Building an electric scooter from scratch is a systems-engineering project, not simply a matter of attaching a motor and battery to a frame. The frame, steering, wheel retention, brakes, controller limits, battery, charger, wiring, and software settings all affect whether the finished scooter behaves predictably.
Use documented, compatible electrical components, keep the battery and charger within their specified limits, verify structural and brake work carefully, and test in controlled stages. A well-built scooter should feel uneventful: the steering stays tight, the throttle responds smoothly, the brakes stop it consistently, the wiring remains cool, and the battery stays mechanically secure from one ride to the next.
