
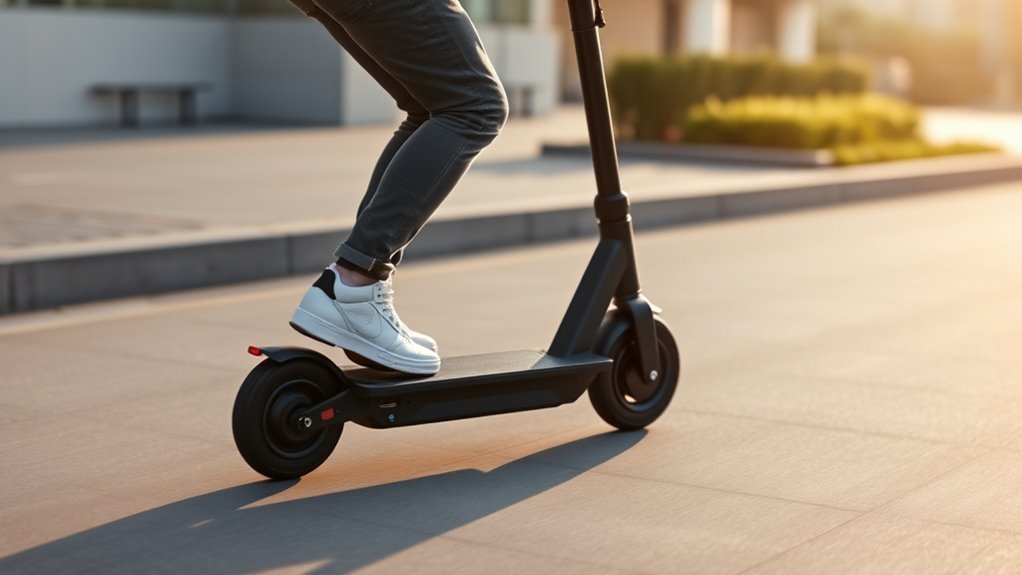
Last Updated on July 24, 2026 by Caleb Warren
Learning how to ride an electric scooter is easier when you start slowly and practice the basic controls before entering traffic. Wear a properly fitted helmet, inspect the scooter, choose a smooth open area, and keep your first session at walking or jogging speed. Your scooter’s manual always takes priority because controls, tire pressure, braking systems, speed modes, and charging instructions vary by model.
Quick Answer
To ride an electric scooter for the first time, wear a helmet, check the tires and brakes, place one foot on the deck, push off gently, and apply the throttle slowly. Keep both hands on the handlebars, look ahead, bend your knees, practice gradual braking, and avoid traffic until you can start, turn, and stop smoothly.
Key Takeaways
- Read the manual and learn the throttle, brakes, riding modes, lights, horn, and display before moving.
- Wear a properly fitted bicycle helmet and use closed-toe shoes; pads add useful protection while learning.
- Use the tire pressure printed in the manual or on the tire, not a universal pressure range.
- Practice starts, straight-line riding, wide turns, and controlled stops in a dry, traffic-free area.
- Use only the manufacturer-supplied or approved charger, stay present while charging, and never charge while sleeping.
At a Glance
| Time Required | Allow 30 to 60 minutes for a first practice session; take longer if you do not yet feel comfortable stopping or turning. |
| Difficulty | Beginner, but balance, judgment, and braking practice are required. |
| Tools Needed | Electric scooter, owner’s manual, properly fitted helmet, closed-toe shoes, tire gauge or pump if required, and optional knee and elbow pads. |
| Cost | No extra cost if you already own the scooter and safety gear; helmet and protective-gear prices vary. |
Warning: Do not ride a damaged scooter, carry a passenger, use a phone, hang bags from the handlebars, or ride under the influence of alcohol or drugs. Check local rules before using roads, bike lanes, paths, or sidewalks.
Disclosure: As an Amazon Associate I earn from qualifying purchases. Some links on this page are affiliate links, at no extra cost to you.
How Electric Scooters Work
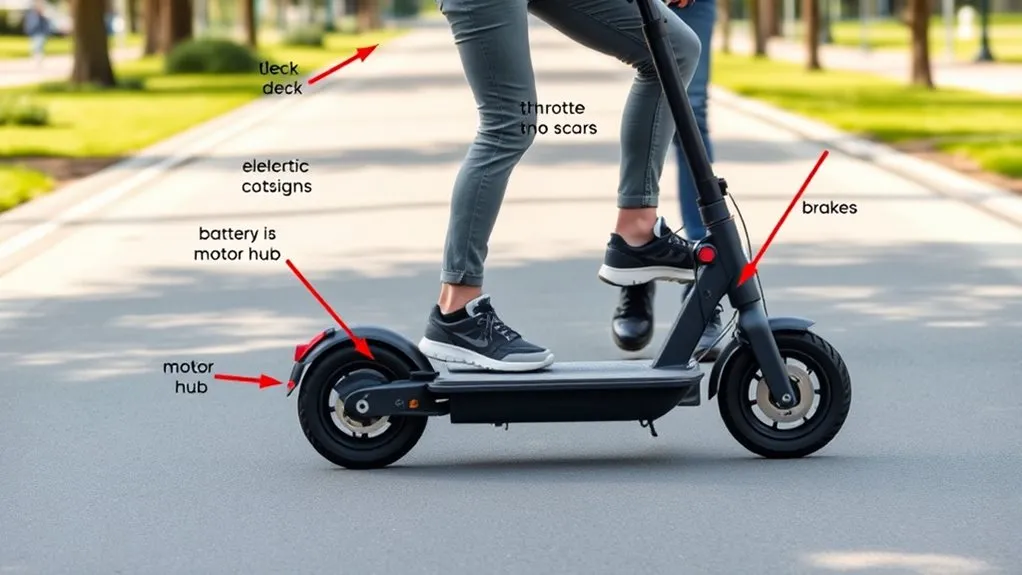
An electric scooter uses a rechargeable battery to power an electric motor. You control speed with a thumb or finger throttle, while one or more braking systems slow the scooter. The display may show speed, battery level, riding mode, lights, and warning icons.
Do not assume every scooter works the same way. Some models require a push before the motor engages, while others can start from a standstill. Braking may involve a hand-operated disc or drum brake, an electronic brake, a rear fender brake, or a combination. Read the owner’s manual before your first ride so you know exactly which controls your scooter uses.
Learn the Controls Before Moving
- Power button: Learn how to switch the scooter on and off and how to change riding modes.
- Throttle: Test its direction and sensitivity while the drive wheel is safely off the ground only if the manual allows it.
- Brakes: Identify every brake control and learn which wheel each brake affects.
- Lights and horn: Know how to activate them without looking down for long.
- Display warnings: Check the manual for error codes, temperature alerts, low-battery warnings, and speed-mode symbols.
Note: Beginner or eco mode can make the throttle less sensitive on some scooters. Use the lowest available mode during practice, but confirm how your model’s modes work in its manual.
Gear Up for Your First Ride
Before you ride, wear a properly fitted bicycle helmet. In the United States, look for a label showing compliance with the CPSC bicycle helmet standard. The helmet should sit level, cover your forehead, and stay secure when you shake your head. Replace a helmet after a significant impact or when the manufacturer says it has reached the end of its service life.
Essential Safety Gear
- Helmet: Fasten the straps and adjust the fit before every ride.
- Knee and elbow pads: These can reduce cuts and impact injuries while you are learning.
- Closed-toe shoes: Choose shoes with secure laces and grippy soles. Keep loose laces away from wheels.
- Eye protection: Clear glasses or goggles can help in dusty or windy conditions.
- Visible clothing: Wear bright or reflective clothing in low light, even when the scooter has lights.
Protective gear cannot prevent every injury, but it gives you an extra layer of protection when a small wheel catches a crack or your balance shifts unexpectedly.
Pre-Ride Protective Checks
Complete a brief pre-ride inspection before every trip. The U.S. Consumer Product Safety Commission advises riders to check the handlebars, brakes, throttle, bell, lights, tires, cables, and frame for damage before riding.
- Confirm the stem and folding latch are fully locked and do not move when you push and pull them.
- Check that the handlebars are straight, grips are secure, and controls are not loose.
- Make sure the deck is dry and free of mud, oil, or loose objects.
- Verify that lights, reflectors, and the horn or bell work.
- Check the scooter for an active safety recall before riding a newly purchased or used model.
Check Tires, Brakes, and Battery
Your scooter’s tires, brakes, and battery directly affect handling and reliability. Check all three before you practice. Stop and arrange qualified service if you find a cracked stem, loose folding mechanism, damaged wheel, exposed wire, fluid leak, swollen battery area, burning smell, or repeated error warning.
Tire Condition Check
Use the pressure listed in your scooter’s manual or printed on the tire sidewall. Electric-scooter tire pressures vary widely by tire size, construction, rider load, and model, so a single 40 to 60 psi range is not safe for every scooter.
- Check pressure when the tires are cool if the model uses pneumatic tires.
- Inspect the tread and sidewalls for cuts, bulges, cracking, exposed cords, or embedded debris.
- Spin each wheel and watch for rubbing, wobbling, or unusual noise.
- Make sure wheel fasteners appear secure. Do not tighten them unless you know the correct procedure and torque specification.
Solid tires do not need air, but they still need inspection for chunks, splits, flat spots, and looseness.
Brake Function Test
Squeeze each brake control while standing beside the scooter. The lever should feel predictable, and the brake should engage without excessive looseness, scraping, or grinding. Then perform a low-speed rolling test in an open area. Learn the scooter’s stopping distance before you ride near people or vehicles.
Do not copy brake-adjustment instructions from another model. Cable tension, hydraulic systems, electronic braking strength, and rear-fender brakes require different procedures. If the brake feels weak or inconsistent, follow the manual or use a qualified repair service.
Battery Level Inspection
Check that the battery has enough charge for your planned route, including a reasonable reserve. Range changes with rider weight, hills, wind, temperature, tire pressure, speed, and repeated acceleration. Treat the display’s range estimate as approximate.
- Do not ride if the battery enclosure is swollen, cracked, unusually hot, leaking, hissing, or giving off an unusual odor.
- Use only a replacement battery approved for the exact scooter model.
- Do not open, rebuild, or modify the battery pack.
- Remember that electronic or regenerative braking may feel different when the battery is full, low, cold, hot, or faulted. Your model’s mechanical brake remains essential.
Check Local Rules Before You Ride
Electric-scooter laws are not the same everywhere. Rules may cover minimum age, helmet use, speed limits, road access, bike lanes, sidewalks, lights, parking, insurance, and whether privately owned scooters are allowed in certain areas. State rules can also allow cities to set stricter local limits.
Check your state, city, campus, park, or property rules before riding. The National Conference of State Legislatures provides a U.S. overview, but your local transportation or government website should be the final source for current requirements.
Find a Safe Place to Practice
Choose a legal, dry, traffic-free practice area with a smooth and level surface. An empty private parking area with permission, a designated training space, or another open area allowed by local rules is better than a public street for your first session.
Walk the area first. Look for potholes, gravel, sand, wet leaves, glass, drain covers, curbs, painted lines, steep slopes, and vehicle entrances. Avoid wet pavement, poor lighting, crowds, and any place where a driver may reverse from a parking space.
Pro Tip: Mark two practice points about 30 to 50 feet apart. Ride slowly between them, stop before the second point, turn the scooter around by walking it, and repeat until your starts and stops feel consistent.
Start and Mount the Scooter
Place the scooter on level ground and confirm that the stem is locked. Raise the kickstand, hold both grips, and keep the handlebars straight. Put your non-dominant foot near the front of the deck and keep your dominant foot on the ground for the push-off.
Start slower than you think you need to. Smooth control matters more than speed during your first ride.
- Switch on the scooter and select its lowest suitable riding mode.
- Look ahead, not down at the front wheel or display.
- Push off gently with the foot on the ground.
- If your scooter uses kick-start, wait until it reaches the speed stated in the manual before applying light throttle.
- Bring your pushing foot onto the deck behind the front foot.
- Keep both hands on the handlebars and hold a relaxed, secure grip.
Do not press the throttle before you are ready to move. A sudden start can pull the handlebars away from you or make you step off awkwardly.
Ride With Balance and Control
Stand with one foot slightly ahead of the other rather than placing both feet side by side. Keep your knees soft, shoulders relaxed, and weight centered over the deck. Avoid locking your knees because this makes bumps harder to absorb.
Look well ahead so you have time to react. Scan between the path immediately in front of you and the area farther ahead. Keep both hands on the handlebars, but do not pull on them to hold yourself upright. Let your legs and core support your body.
- Use small throttle changes instead of sudden bursts.
- Keep a safe speed that lets you stop within the clear distance ahead.
- Do not ride one-handed while learning.
- Do not hang bags or heavy objects from the handlebars because they can affect steering.
- Leave extra space around pedestrians, cyclists, parked cars, and opening doors.
Brake and Turn Safely
Practice normal braking before emergency braking. Release the throttle, keep the handlebars straight, shift your hips slightly back, and apply the brake controls progressively. Use the braking method specified for your scooter. Some models coordinate braking through one lever, while others have separate front, rear, electronic, or fender brakes.
- Start slowing earlier than you would on a bicycle or in a car.
- Add braking pressure smoothly instead of grabbing the control.
- Keep your knees bent and your body low enough to stay stable.
- Reduce pressure if a wheel skids, then reapply it smoothly when traction returns.
- Practice on a dry, level surface before trying slopes.
For turns, slow down before entering the corner. Keep your eyes on the path you want to follow, turn the handlebars gently, and keep your body aligned with the scooter. Beginners should make wide, low-speed turns and avoid abrupt leaning or sharp steering.
Practice an Emergency Stop
Choose a clear area, start at a very low speed, and pick a visible stopping line. Release the throttle and apply the brakes firmly but progressively while shifting your hips back. Repeat only after the brakes cool if the manual warns about heat buildup. Increase speed gradually only when you can stop without locking a wheel, stepping off, or swerving.
Dismount Safely
Come to a complete stop before stepping off. Keep one foot on the deck, place the other foot firmly on the ground, switch off the throttle or power if needed, and lower the kickstand only after the scooter is stable. Never jump from a moving scooter unless remaining on it would create a greater immediate danger.
Ride Over Bumps and Obstacles
Electric scooters have small wheels, so cracks, gravel, curbs, potholes, and debris can stop a wheel quickly. The CPSC micromobility safety guidance advises riders to slow down and lean back when approaching bumps.
- Scan ahead and reduce speed before reaching the obstacle.
- Keep both hands on the handlebars and bend your knees.
- Shift your hips slightly back without pulling hard on the bars.
- Cross small cracks or track-like grooves as close to a right angle as conditions safely allow.
- Step off and walk around any curb, pothole, debris field, or obstacle you are not sure you can cross safely.
Do not brake sharply while the wheel is crossing a slippery or uneven surface. Finish most of your braking before the obstacle, then roll over it slowly and steadily.
Ride Near Traffic, at Night, and in Bad Weather
Do not enter traffic until you can start, turn, signal where required, scan behind you safely, and stop without swerving. Follow local traffic rules, use bike facilities only where scooters are allowed, and assume drivers and pedestrians may not see or hear you.
Traffic Safety
- Ride predictably and avoid weaving between vehicles or pedestrians.
- Slow down near driveways, intersections, parking-lot aisles, and vehicle doors.
- Use the horn or bell when needed, but never assume it guarantees that someone has noticed you.
- Keep enough following distance to avoid sudden braking.
- Never ride under the influence of alcohol, cannabis, sedating medicine, or other drugs that affect judgment or balance.
Night and Low-Light Riding
Use the required front and rear lights and reflectors, and wear reflective clothing. Clean dirty light lenses before riding. Even with lights, reduce speed because potholes, wet patches, and debris are harder to see at night.
Rain, Snow, and Poor Traction
Avoid rain, snow, ice, standing water, and wet leaves whenever possible. Water-resistance ratings do not make a scooter safe to ride through deep water, and wet surfaces increase stopping distance. Painted road markings, metal covers, wooden bridges, and smooth tiles can become especially slippery.
What to Do After a Fall or Impact
Stop riding and check yourself first. Seek urgent medical help for a head impact with loss of consciousness, worsening headache, repeated vomiting, confusion, weakness, seizure, severe bleeding, breathing trouble, neck pain, or suspected fracture.
Inspect the scooter before riding again. Look for a bent stem, loose latch, cracked weld, damaged wheel, rubbing brake, broken cable, exposed wire, battery damage, or an error message. Replace a helmet that took a significant impact according to its manufacturer’s instructions. When in doubt, have the scooter inspected by a qualified technician.
Park, Lock, and Store Your Scooter
Park on a stable surface without blocking sidewalks, ramps, doors, stairs, fire exits, or access for people with disabilities. Switch the scooter off, lower the kickstand, and lock the frame or manufacturer-approved locking point to a secure fixed object where parking is allowed.
- Choose a well-lit location that allows scooter parking.
- Lock through a structural part of the frame, not only through a removable wheel or thin accessory.
- Take removable displays, batteries, or accessories with you when the manufacturer recommends it.
- Store the scooter in a dry area away from heat, direct sun, water, flammable materials, and escape routes.
Charge and Store the Battery Safely
Use only the charger supplied with the scooter or a replacement specifically tested and approved by the manufacturer for that model. The CPSC warns that so-called universal chargers can be electrically incompatible even when the plug fits.
- Charge in a dry, ventilated area on a stable surface.
- Stay present while charging and never charge while sleeping.
- Keep the scooter and charger away from exits and combustible materials.
- Unplug the charger when the charge cycle is complete, following the manual.
- Do not charge a battery that is damaged, wet, swollen, unusually hot, or giving off an odor.
- For long-term storage, follow the manufacturer’s recommended charge level and recharge interval. Do not assume every battery should be stored fully charged.
- Do not place lithium-ion batteries in household trash or general recycling. Use an approved local battery or hazardous-waste program.
Frequently Asked Questions
How to Ride an Electric Scooter for the First Time for Beginners?
Wear a helmet, inspect the scooter, select the lowest suitable mode, place one foot on the deck, push off gently, and add light throttle only when ready. Keep both hands on the bars, look ahead, practice wide turns, and learn controlled stopping in a dry, traffic-free area.
What’s the Hardest Trick to Do on a Scooter?
Advanced freestyle riders may consider multi-rotation tailwhips or other aerial combinations difficult, but a commuter electric scooter is not designed for skatepark tricks. Jumping, tailwhips, curb drops, and similar moves can damage the stem, folding system, deck, wheels, or battery and may void the warranty.
How to Not Fall off an Electric Scooter?
Keep your knees slightly bent, use a staggered stance, look ahead, accelerate gradually, and slow before turns or rough surfaces. Keep both hands on the handlebars and avoid wet pavement, loose gravel, sudden braking, one-handed riding, and speeds that exceed your ability to stop safely.
What Not to Do on an Electric Scooter?
Do not carry a passenger, use your phone, ride one-handed, hang bags from the handlebars, ignore warning lights, use a damaged battery, ride under the influence, or enter prohibited roads and sidewalks. Avoid deep water, ice, tricks, abrupt steering, and hard braking on slippery surfaces.
How Fast Should a Beginner Ride?
Start at walking or easy jogging speed in the lowest suitable mode. Increase speed only after you can look ahead, make wide turns, brake without swerving, and stop within the space you can clearly see. Local speed limits and the scooter’s manual always apply.
Can You Ride an Electric Scooter in the Rain?
It is safer to avoid rain. Wet pavement reduces traction and increases stopping distance, while standing water can exceed the scooter’s water-resistance limits. Check the manual, slow down, avoid metal covers and painted lines, and never ride through deep water.
Can Two People Ride One Electric Scooter?
No. Stand-up electric scooters are generally designed for one rider. A passenger changes steering, braking, balance, and load, increasing the risk and severity of a crash. Follow the manufacturer’s rider and weight limits.
Sources
- U.S. Consumer Product Safety Commission: Micromobility Information Center — pre-ride checks, riding hazards, one-rider guidance, and battery-charging safety.
- U.S. Consumer Product Safety Commission: Bicycle Helmets — CPSC helmet standard, labeling, fit instructions, and replacement warnings after impact.
- CPSC Warning on Universal Micromobility Chargers — charger compatibility and supervised charging.
- National Conference of State Legislatures: State Electric Scooter Laws — examples of age, helmet, speed, roadway, and sidewalk rules.
- Centers for Disease Control and Prevention: Concussion Signs and Symptoms — danger signs that require immediate emergency medical care after a head impact.
- UL Solutions: Personal E-Mobility Testing and Certification — UL 2272 electrical-system safety coverage for personal e-mobility devices.
Conclusion
Your first electric-scooter ride should focus on control, not speed. Wear a helmet, inspect the scooter, follow the model-specific manual, and practice smooth starts, wide turns, and progressive braking in a safe area. Stay alert for small-wheel hazards, obey local rules, avoid poor weather, and charge the battery only with approved equipment. Build each skill slowly, and you will ride with better balance, judgment, and confidence.
