
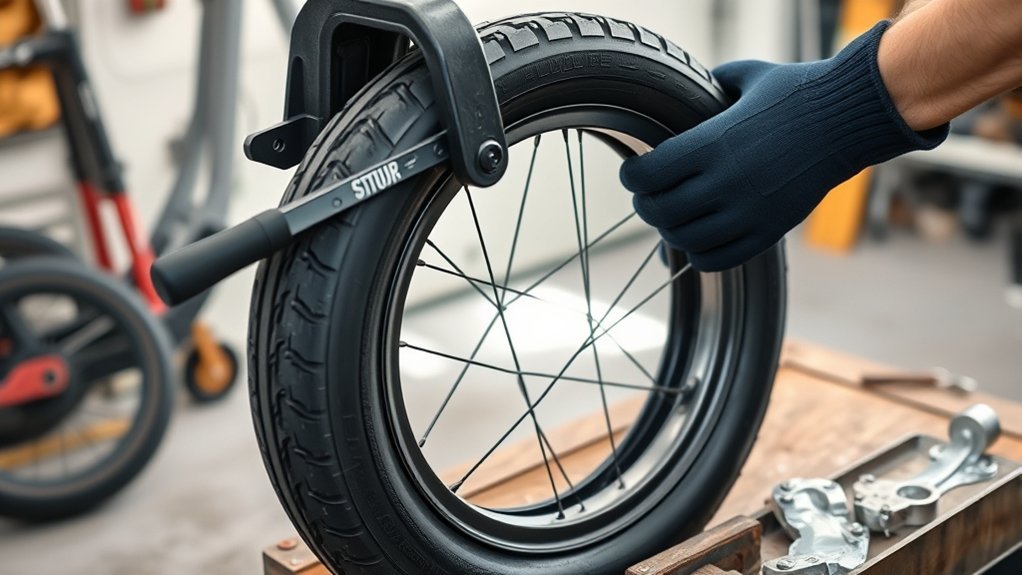
Last Updated on September 10, 2026 by Daniel Globe
Removing an electric scooter tire from the rim is possible on many pneumatic-tire models, but small scooter rims and hub-motor wheels can be stubborn. The safest approach is to identify the tire type first, follow your scooter’s wheel-removal instructions, fully deflate the tire, break both beads, keep the loose bead in the rim’s center well, and use proper tire tools instead of improvised prying, cutting, or grinding.
Quick Answer
To remove a pneumatic electric scooter tire, power the scooter off, remove the wheel according to its manual, remove the valve core so all pressure is gone, break both beads, apply approved tire-mounting lubricant, and work one bead over the rim in small sections. Never use WD-40, silicone spray, screwdrivers, or a file on the tire.
Key Takeaways
- Confirm whether the scooter uses a tube, tubeless tire, solid tire, or split rim before taking anything apart.
- Support the scooter on a stable work surface or service stand, not crates, cardboard boxes, or anything that can shift.
- Remove the valve core to fully deflate a pneumatic tire before breaking either bead.
- Use an approved tire-mounting lubricant. Do not use WD-40, silicone spray, petroleum products, or solvent-based lubricants on the bead.
- If the bead will not seat within the tire manufacturer’s safe pressure limit, deflate it and correct the problem instead of adding more pressure.
- Never grind, rasp, or shave a scooter tire to correct wobble. Diagnose bead seating, tire condition, rim condition, bearings, and wheel installation instead.
At a Glance
| Time Required | Plan about an hour for a typical pneumatic tire change; tight tubeless tires or complicated hub-motor wheel removal can take longer. |
| Difficulty | Moderate to difficult, depending on tire stiffness, rim design, and whether the wheel contains a hub motor. |
| Tools Needed | Correct sockets or hex keys, valve-core tool, two or three suitable tire levers or spoons, rim protectors, approved tire-mounting lubricant, nylon brush, pump or inflator with gauge, and a torque wrench for reassembly when the manufacturer specifies torque. |
| Cost | Varies by scooter. Budget for the correct replacement tire, tube or valve if required, mounting lubricant, and any tire tools you do not already own. |
Warning: Tire and wheel service can cause injury if the scooter is unstable, the wheel is assembled incorrectly, or a bead is overinflated. Some scooter manufacturers specifically direct tire mounting to professional repairers. Follow the service information for your exact model, and stop if the procedure requires battery-compartment work, unfamiliar motor wiring, damaged wheel parts, or inflation beyond the tire manufacturer’s seating limit.
Disclosure: As an Amazon Associate I earn from qualifying purchases. Some links on this page are affiliate links, at no extra cost to you.
Gather Tools and Prep the Scooter
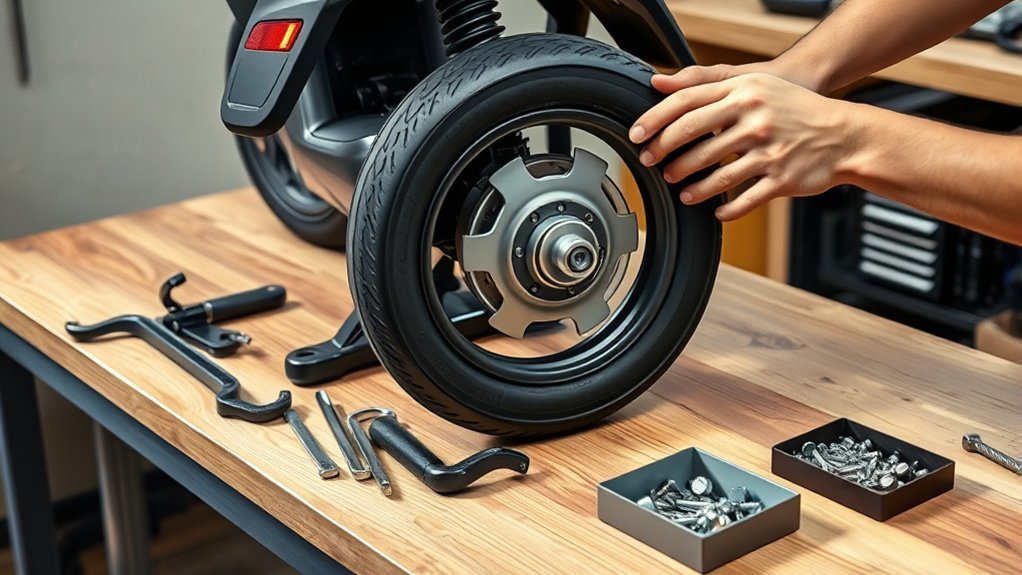
Before you begin, gather the correct hand tools for your scooter, a valve-core tool, two or three suitable tire levers or tire spoons, rim protectors, an approved tire-mounting lubricant, a nylon or plastic brush, clean cloths, and an accurate pump or inflator with a gauge. Safety glasses and work gloves are also worthwhile when you are handling a stiff small-diameter tire.
Turn the scooter completely off and unplug the charger. Support it on a sturdy workbench, repair stand, or other stable setup that cannot roll, tip, or collapse. Do not balance the scooter on crates, cardboard boxes, or loose blocks.
Wheel removal is model-specific. Some wheels are purely mechanical, while others contain a hub motor and cable. Follow the scooter manufacturer’s instructions for axle nuts, brake components, cable connectors, covers, washers, spacers, and anti-rotation hardware. Do not automatically remove the deck or open the battery compartment just because another scooter uses that method. Some manufacturers, including Segway on certain models, recommend professional tire installation because wheel removal and reassembly can be complicated. See the Segway Air T15 user manual for an example.
Before moving any washers or spacers, take a clear photo of both sides of the axle. Keep each fastener in order so it returns to the same position during reassembly. Protect the brake rotor from bending and never let a motor wheel hang by its cable.
Identify the Tire Type Before Removal
Do not start prying at the tire until you know what type of wheel system you have. Electric scooters commonly use several different designs:
- Tube-type pneumatic tire: an outer tire contains a separate inflatable inner tube.
- Tubeless pneumatic tire: the tire bead seals directly against the rim and there is no inner tube.
- Self-sealing tubeless tire: a tubeless tire contains sealant or a sealing layer that can close some small tread punctures.
- Solid or honeycomb tire: there is no air chamber or valve-core deflation step, and removal may require a completely different procedure.
- Split rim: the wheel separates into sections after its fasteners are removed, so conventional bead-levering instructions may not apply.
The same brand can use different tire systems across model years. For example, Apollo’s current tire guidance describes tubeless self-healing tires on its present scooter lineup while listing legacy models that use different systems. Check your manual, the existing tire, and the replacement part before proceeding.
Note: The bead-removal steps below are for pneumatic tires on conventional one-piece rims. A solid tire or split rim can require a different service procedure.
Deflate the Tire and Break the Bead
For a pneumatic tire, remove the valve cap and use a valve-core tool to unscrew the valve core. Let all air escape before applying force to either bead. Simply pressing the valve pin can release air, but removing the core makes it easier to confirm the assembly is completely depressurized.
Current U.S. Tire Manufacturers Association motorcycle-tire guidance likewise calls for removing the valve core before demounting. Scooter tires are not identical to motorcycle tires, so your scooter and tire manufacturer’s instructions still take priority.
Once the tire is completely deflated, apply a small amount of approved tire-mounting lubricant around the bead. Push the sidewall inward near the rim until the bead drops away from the rim flange. Work around the full circumference on both sides.
A purpose-made bead breaker is the cleanest option for a stubborn bead. A broad, padded clamp may also help on some small tires when the scooter or tire manufacturer permits it, but the pressure should be applied to the tire rather than directly through unprotected metal jaws onto the rim or bead. Avoid channel locks, locking pliers, screwdrivers, pry bars, and other sharp or narrow tools that can gouge the wheel or damage the tire bead.
Pro Tip: The biggest source of extra slack is the rim’s deeper center well. As you work one section of bead over the rim, keep the bead on the opposite side pushed down into that center channel. If the opposite side climbs back onto the bead seat, the tire will suddenly feel much tighter.
Remove the Scooter Tire From the Rim
With both beads completely loose, place the wheel on a protected work surface. Keep the brake rotor, motor cable, valve, and wheel finish away from anything that can bend, pinch, or scratch them.
Push the bead opposite your working area into the center well. Slip a suitable tire lever or spoon under a small section of the first bead, using a rim protector if the tool is metal. Lift only a short section over the rim lip. Hold that section in place and move the next lever a few inches along the rim. Working in small increments requires less force and reduces the risk of bead or rim damage.
Do not substitute a screwdriver or general-purpose pry bar. Tire levers and spoons have shapes intended for working around a bead, while sharp-edged tools can score an aluminum rim, cut the bead, or damage a tube.
Remove the Inner Tube if Fitted
If the scooter uses an inner tube, stop after the first bead is free. Reach into the tire and carefully pull the tube out, leaving the valve area until last. Push the valve stem back through the rim hole without forcing it sideways.
If you are repairing a flat, locate the puncture and inspect the matching area inside the tire. Remove any nail, glass, wire, thorn, sharp molding defect, or rim problem that caused the first failure before installing another tube. Installing a new tube without finding the cause often produces another flat immediately.
Remove a Tubeless Tire
A tubeless tire may contain liquid sealant or a self-sealing compound, so keep cloths or a tray nearby. Once the first bead is over the rim, continue working around it while keeping the loose portion in the center well. Lubricate the second bead with approved tire-mounting lubricant and remove it in the same controlled way.
If the tire bead is torn, stretched, exposed, or otherwise damaged during removal, do not reinstall that tire.
Clean the Scooter Rim Before Installing the New Tire
Clean the rim thoroughly so dirt, dried sealant, rubber residue, or other debris cannot interfere with the replacement tire. Use a nylon or plastic brush, plastic scraper when appropriate, and a cleaner approved for the wheel and tire system.
Do not use WD-40, silicone spray, gasoline, petroleum solvents, or similar products as tire-bead lubricant. USTMA’s current motorcycle-tire procedure says silicone-, petroleum-, and solvent-based lubricants must not be used for mounting. Continental’s tire-mounting safety guidance gives the same general warning.
- Inspect the rim for dents, cracks, deep gouges, corrosion, or pitting.
- Check the bead seats for dried sealant, rubber, or foreign material.
- Inspect the valve stem and valve core on a tubeless wheel.
- Inspect rim tape or the rim strip when the wheel design uses one.
- Check for sharp burrs that could damage an inner tube.
- Make sure the bead-contact surfaces are clean and smooth.
- Remove all loose cleaning residue before mounting the tire.
If the rim is bent, cracked, badly corroded, or unable to provide a smooth bead seat, stop and replace or professionally repair the affected component rather than trying to force a new tire onto it.
Check the Replacement Tire Size and Direction
Before mounting the replacement, compare its size markings with the original tire and your scooter manufacturer’s specification. The tire must be compatible with the rim diameter, width, tire system, and available clearance around the fork, fender, brake, and motor.
If the tire has a rotation arrow, orient it so the arrow points in the correct forward-rotation direction when the wheel is installed. Also check whether the tire is marked for a particular front or rear position.
For a tube-type setup, use the correct tube size and valve type. Do not assume that a tube can safely be added to any tubeless wheel; use a tube only when the tire, rim, and scooter manufacturer permit that configuration.
Seat the New Tire by Hand
Apply a thin, even coat of approved tire-mounting lubricant to the tire beads and appropriate rim-contact surfaces. Proper lubrication reduces friction and helps the bead move into position without excessive stretching. Do not substitute silicone spray, WD-40, or another petroleum- or solvent-based product.
Hand-Slip First Bead
Inspect the new tire first. The bead should be clean, undamaged, and free of foreign material. Align the tire with the rim and its required rotation direction, then push the first bead over the rim by hand wherever possible.
- Start with as much of the bead as possible in the rim’s center well.
- Press the bead evenly around the wheel.
- Use a rim-protected tire lever only where hand pressure is not enough.
- Take small sections instead of trying to force a large section at once.
- Stop if the bead begins to kink, tear, or stretch abnormally.
Once the first bead is inside the rim, check that it is not twisted and that the tire direction is still correct.
Work Second Bead On
If the tire uses an inner tube, lightly inflate the new tube only enough to give it a round shape. Insert it evenly inside the tire and guide the valve through the rim hole without pulling it sideways. Make sure the tube is not folded or twisted.
For either tube-type or tubeless installation, work the second bead over the rim a few inches at a time. Keep the already-installed portion pushed toward the center well to create slack at the final tight section.
If a clamp is genuinely needed, use only a broad, padded clamp that acts on the tire without cutting the sidewall or contacting the rim with bare metal. A purpose-made tire clamp is preferable. Do not crush the carcass simply to force the final section into place.
On a tube-type tire, take extra care during the last section. A tire lever can pinch the tube between the tool and rim. Before inflation, inspect both sides and confirm that no part of the tube is trapped beneath the bead.
Inflate the Tire and Check Both Beads
Inflation is the stage where extra caution matters most. Secure the wheel so it cannot jump or move unexpectedly, keep your face and body out of the possible trajectory of the tire and rim, and use an accurate pressure gauge.
Apply approved mounting lubricant if the bead has dried or is binding, then add air gradually while watching both sides of the tire. Most pneumatic tires have a molded line near the bead. That line should remain an even distance from the rim all the way around.
- Inflate gradually while watching both bead edges.
- Stop if one section rises much faster than another.
- Never exceed the tire manufacturer’s maximum bead-seating pressure.
- If the tire or scooter specifies a lower maximum than another general guideline, the lower limit controls.
- If the bead is still uneven at its permitted seating pressure, completely deflate it, relubricate, reposition, and try again.
- After both beads are seated, adjust the tire to the operating pressure specified for your scooter and tire.
USTMA’s motorcycle-tire procedure says to follow the tire manufacturer’s bead-seating limit and, when no limit is provided in that application, not to exceed 40 psi for seating. That 40 psi figure is not permission to exceed a lower limit printed on a scooter tire, rim, or specified by the scooter manufacturer.
Note: Some tubeless scooter manufacturers describe using a belt or ratchet strap around the center of the tread to help the sidewalls contact the rim during initial inflation. Apollo, for example, documents this for its tubeless scooters. Treat it as a model-specific technique rather than a universal requirement, and use it only when compatible with your tire manufacturer’s procedure.
Check for Air Leaks
After the tire is seated at the correct operating pressure, use a simple soapy-water leak test. Apply the solution around the valve core, valve base, both bead-to-rim joints, and any suspected puncture area. Growing bubbles indicate escaping air.
For a tubeless tire, persistent bubbles at the bead can indicate dirt, dried sealant, rim damage, bead damage, or an incorrectly seated tire. Bubbles at the valve can point to a loose or damaged valve core or valve stem. Apollo’s current flat-tire guidance uses the same general leak-testing method for its tubeless scooter tires.
Balance the Tire for Smooth Riding
Once both beads are seated, spin the wheel slowly and watch the molded bead line on both sides. The line should stay at a consistent distance from the rim. Also look for obvious vertical hop or side-to-side movement.
If the tire appears out of round, do not use a rasp, coarse file, knife, grinder, or other tool to remove tread rubber. First check whether one section of the bead is sitting deeper in the rim. If so, fully deflate the tire, apply approved mounting lubricant, reposition the bead, and seat it again.
If the bead line is even but the wheel still wobbles, inspect for a bent rim, incorrectly installed axle spacers or washers, loose bearings, a defective tire, or another wheel problem. A tire with a bulge, damaged bead, separation, or other structural defect should be replaced.
Some higher-speed wheels may use balancing weights, but balancing should be performed with suitable equipment and according to the scooter or wheel manufacturer’s procedure. Removing rubber from the tire is not an appropriate substitute for diagnosis or proper balancing.
Reinstall the Wheel and Check the Scooter
Return every washer, spacer, anti-rotation washer, bracket, and fastener to the same position recorded during disassembly. Reinstall the wheel according to your scooter’s service instructions.
- Tighten axle and brake fasteners to the manufacturer’s specified torque where a torque value is provided.
- Reconnect the motor cable only as the manufacturer directs.
- Make sure motor wiring cannot touch the tire, brake rotor, or another moving component.
- Confirm the brake rotor or drum is correctly positioned.
- Spin the wheel by hand with the scooter powered off and check for abnormal rubbing or binding.
- Squeeze the brake lever and confirm the brake operates before riding.
- Check the tire pressure again with an accurate gauge.
After the scooter passes those checks, perform a slow test ride in a safe area. Listen and feel for rubbing, vibration, pulling, brake problems, or an unusual motor sound. Stop immediately if anything feels wrong.
Troubleshooting Common Scooter Tire Problems
The Bead Will Not Break
Confirm the valve core is removed and no pressure remains. Apply approved tire-mounting lubricant around the bead, then work gradually around the wheel with a suitable bead-breaking tool. Do not compensate by crushing the rim with pliers or driving a screwdriver between the bead and wheel.
The Tubeless Bead Will Not Seat
Deflate the tire and check that both beads are in the correct position, the rim and bead are clean, the valve is functioning, and no section of bead is folded inward. Relubricate with approved tire lubricant and retry. If proper seating would require exceeding the tire’s permitted pressure, stop and use professional tire service.
The Tire Loses Air After Installation
Use soapy water to check the tread, valve core, valve base, and both bead edges. A recurring leak may come from a damaged tube, trapped debris, a defective valve, damaged bead, bent rim, or a puncture that the tire’s self-sealing material cannot close.
The Wheel Wobbles After Replacement
Check the bead witness line first. If it is uneven, deflate and reseat the tire. If it is even, inspect the wheel installation, axle hardware, rim, bearings, and tire for defects. Do not shave or file the tread to hide the symptom.
When Should You Use Professional Service?
Use a qualified repairer when the wheel is difficult to remove without opening unfamiliar electrical compartments, a hub-motor cable cannot be disconnected safely, the rim is bent or cracked, the bead is damaged, the tire requires unsafe force or pressure to seat, the brake system has been disturbed beyond your experience, or the manufacturer’s documentation tells you to use professional service.
Frequently Asked Questions
How do you take off an e-scooter tire?
Turn the scooter off, remove the wheel according to the model’s instructions, remove the valve core to fully deflate a pneumatic tire, break both beads, push the opposite bead into the rim’s center well, and use suitable tire levers or spoons to work the bead over the rim in small sections.
What’s the easiest way to get an electric scooter tire off the rim?
The key is creating slack. Completely deflate the tire, break the bead on both sides, apply approved tire-mounting lubricant, and keep the bead opposite your working area pushed into the rim’s deeper center well. Then move around the rim with tire levers in short sections rather than trying to pry a large section at once.
What tools do I need to take off an e-scooter wheel and tire?
Typical tools include the correct sockets or hex keys for the wheel, a valve-core tool, two or three tire levers or spoons, rim protectors, approved tire-mounting lubricant, a nylon brush, an accurate inflator or pump, and a torque wrench when the scooter manufacturer specifies wheel-fastener torque. Hub-motor models may require additional model-specific tools.
Can you remove a tubeless scooter tire without special tools?
Some small tubeless tires can be worked partly by hand, but tight scooter beads usually benefit from proper tire levers, rim protection, a valve-core tool, approved mounting lubricant, and sometimes a bead-breaking tool. Using screwdrivers, sharp pry bars, or unprotected metal pliers increases the risk of damaging the bead or rim.
Can I use WD-40 or silicone spray to install a scooter tire?
No. Current tire-industry mounting guidance says not to use silicone-, petroleum-, or solvent-based lubricants for tire mounting. Use an approved tire-mounting or rubber-mounting lubricant recommended for the tire and rim instead.
Do I need to disconnect the motor wire to change an electric scooter tire?
Only if the service procedure for your scooter requires the hub-motor wheel to be disconnected. Connector location and cable routing differ by model. Follow the manufacturer’s instructions and never pull a motor wheel out by its cable or open the battery compartment simply because another scooter uses that procedure.
Why does my new scooter tire wobble?
An unevenly seated bead is a common first thing to check. Compare the molded bead line with the rim on both sides. If the line is even, inspect the tire for defects and check the rim, axle spacers, bearings, and wheel installation. Do not file or shave the tread to correct the wobble.
Sources
- U.S. Tire Manufacturers Association — Demounting and Mounting Procedures for Motorcycle Tires — supports complete deflation, proper tools, approved mounting lubricant, bead-seating precautions, and tire/rim inspection.
- Apollo Scooters — Tubeless, Self-Healing Tire Guidance — supports scooter tire-type differences, tubeless bead inspection, bead-line checks, and model-specific tire requirements.
- Apollo Scooters — Flat and Punctured Tire Guidance — supports stable preparation, tubeless leak diagnosis, soapy-water testing, and bead/valve troubleshooting.
- Segway — Ninebot KickScooter Air T15 User Manual — demonstrates that some scooter manufacturers recommend professional tire mounting and model-specific wheel service.
- Continental — Tire Mounting Safety Instruction — supports avoiding silicone, petroleum, and solvent-based mounting lubricants and following controlled bead-seating procedures.
Conclusion
Removing an electric scooter tire becomes much easier when you create bead slack instead of relying on brute force. Fully deflate the tire, keep the opposite bead in the rim’s center well, use proper tire tools and approved mounting lubricant, and protect the rim, valve, tube, motor wiring, and brake components throughout the job.
After installation, make sure both beads are evenly seated, set the correct operating pressure, test for leaks, and inspect the wheel for wobble before riding. If the tire will not seat safely, the rim is damaged, the motor-wheel wiring is unfamiliar, or the manufacturer’s instructions call for professional service, stop and have the wheel repaired correctly rather than forcing the job.
