
Last Updated on September 10, 2026 by Daniel Globe
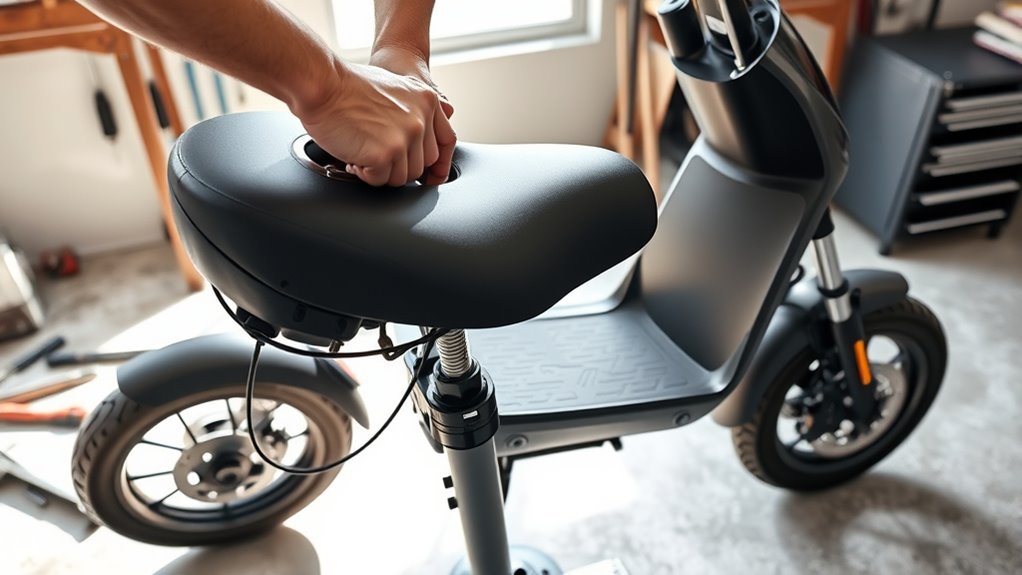
To put a seat on an electric scooter, first confirm that the scooter is designed to accept a seat and that the seat kit is approved for your exact model. Turn the scooter off, place it on a stable surface, install the supplied mount according to the manufacturer’s instructions, adjust the seat, secure every fastener or quick release, and test the setup at low speed before normal riding.
Quick Answer
Use a model-compatible seat kit with the scooter’s approved mounting points. Follow the kit’s exact hardware, tightening sequence, height limits, and torque instructions if provided. Never force mismatched brackets or drill the scooter unless the manufacturer specifically instructs you to. Check the seat for movement before every ride.
Key Takeaways
- Buy a seat kit that specifically lists your electric scooter model as compatible.
- Use only the approved mounting points, hardware, and tightening procedure.
- Keep an adjustable seat post above any minimum-insertion mark required by the manufacturer.
- Do not assume threadlocker, a particular bolt pattern, or a torque value applies to every scooter.
- Test steering, braking, seat stability, and riding position slowly before returning to normal speeds.
At a Glance
| Time Required | Model-dependent; allow enough time to read the instructions, install the mount, adjust the seat, and perform a careful safety check. |
| Difficulty | Beginner to moderate when the scooter has a manufacturer-supported bolt-on seat kit; not suitable for improvised structural modification. |
| Tools Needed | Compatible seat kit, supplied hardware, and the wrench, hex key, screwdriver, or torque wrench specifically required by the kit. |
| Cost | Varies by scooter model and whether the seat is an original manufacturer accessory or an approved aftermarket kit. |
Warning: Do not drill into the deck, frame, battery compartment, or other structural parts, weld on a bracket, or force an incompatible seat mount unless the scooter manufacturer specifically provides instructions for that modification. Damage to structural parts or the battery enclosure can create serious crash, electrical, or fire hazards.
Disclosure: As an Amazon Associate I earn from qualifying purchases. Some links on this page are affiliate links, at no extra cost to you.
Why Add a Seat to Your Electric Scooter

Adding a seat to an electric scooter can reduce the amount of time you spend standing and may make longer rides more comfortable for some riders. Your legs do not have to support your full body weight throughout the trip, and a correctly adjusted saddle can reduce fatigue during commuting or errands.
However, a seat does not automatically make a scooter safer or more stable. Sitting changes your center of gravity, riding posture, steering inputs, and the way you shift weight during braking and turns. A seated scooter may therefore feel noticeably different from the same scooter in its original standing configuration.
Note: Treat a seat as a model-specific accessory, not a universal upgrade. If your scooter manufacturer does not list a compatible seat or approved mounting method, do not assume a generic bracket is safe simply because it can be made to fit.
What You Need for Seat Installation
Before you start, make sure you have a seat designed for your scooter model, the complete mounting kit, the manufacturer’s installation instructions, and the tools specified for that kit. Some seats attach to factory mounting holes, while others use dedicated locking blocks, bases, clamps, or quick-release components.
Compatible Seat Options
The safest choice is a seat that specifically lists your scooter’s make and model. Manufacturers such as Segway and Hiboy publish model-specific seat products or installation information rather than treating every scooter frame as interchangeable. See the Segway Scooter Seat User Manual and Hiboy repair instructions for examples of manufacturer-specific guidance.
Check the seat’s load rating, the scooter’s rider-weight limit, the mounting design, seat-post adjustment range, and any restrictions involving other accessories. Do not exceed the lower of the applicable scooter or seat limits.
Adjustable height and saddle angle can improve comfort, but they must remain inside the range permitted by the seat manufacturer. If the seat post has a minimum-insertion mark, that mark must remain inside the post or tube rather than being exposed above it.
Essential Installation Tools
The required tools vary by seat kit. Gather everything before beginning so you do not have to leave the scooter partially assembled.
| Tool or Part | Why You May Need It |
|---|---|
| Model-compatible seat kit | Provides the saddle, post, base, brackets, or clamps intended for the scooter |
| Supplied mounting hardware | Secures the mount using the hardware specified by the manufacturer |
| Hex key or wrench | Tightens bolts, nuts, clamps, or quick-release hardware |
| Screwdriver | Required by some kits for specific fasteners |
| Torque wrench | Use when the manufacturer provides a specific torque value |
| Threadlocker | Use only if the manufacturer specifically recommends or permits it |
Do not substitute random bolts simply because their diameter appears similar. Thread pitch, bolt length, strength, washers, spacers, and locking components can all affect how securely the mount attaches.
Check Scooter and Seat Compatibility
Start by comparing the scooter’s exact model number with the seat manufacturer’s compatibility list. A seat intended for a visually similar scooter may still use different hole spacing, deck construction, bolt threads, brackets, or clearances.
Inspect the mounting points before installation. Factory holes should be undamaged, properly threaded where applicable, and located exactly where the seat instructions expect them. The mount should sit flat and square without forcing, bending, prying, or enlarging holes.
Verify the weight limits for the scooter and the seat. Also check whether the seat interferes with the folding mechanism, rear brake, suspension, charging port, lights, fender, or any other component.
User reviews and rider forums can help you identify common fit complaints, but do not use an unofficial “workaround” to override a manufacturer’s compatibility warning. Safety-critical mounting decisions should come from the scooter or seat manufacturer.
Pro Tip: Find the scooter’s exact model number before ordering a seat. Product families often contain several versions that look alike but use different decks, mounting holes, or hardware.
Check Warranty and Local Rules Before Modifying the Scooter
Before installing a seat, review the scooter’s warranty and accessory policy. An approved factory accessory is different from drilling, welding, cutting, or otherwise altering a structural component. Unauthorized changes can affect warranty coverage and may make future repairs more difficult.
Also check the rules where you plan to ride. The U.S. Consumer Product Safety Commission advises micromobility riders to follow applicable local traffic laws because helmet requirements, riding locations, and roadway rules vary by community. See the CPSC Micromobility Information Center for current general safety guidance.
Prepare Your Scooter for Installation
Turn the scooter completely off and place it on a flat, stable surface. Engage the kickstand if it provides enough stability, or support the scooter according to the manufacturer’s service instructions.
If your scooter has a user-removable battery and its manual instructs you to disconnect or remove it before service, follow that procedure. Do not attempt to open a sealed battery compartment simply to install a seat.
Gather the seat, mounting hardware, instructions, and tools before beginning. Clean dirt from the mounting area so the bracket can sit directly against the intended surface and you can inspect the mounting points for cracks, bent metal, damaged threads, or other problems.
Read the complete seat instructions before tightening anything. Model-specific manuals may specify the order in which bolts are tightened, the position of locking blocks or washers, the orientation of a folding base, and the correct way to lock quick-release mechanisms.
Attach the Seat Mount to the Frame
Position the seat mount exactly where the manufacturer specifies. Factory-supported kits may use dedicated mounting holes, a base plate, locking blocks, clamps, or another model-specific system.
Check Frame Compatibility
Before inserting any bolts, confirm that the mount rests against the frame or deck as designed. The hardware should enter the mounting points smoothly by hand for the first turns. If a bolt immediately binds, stops, or enters at an angle, remove it and check alignment rather than forcing it.
- Verify the scooter model and seat kit again.
- Confirm the correct bolt length and thread.
- Use all required washers, spacers, or locking blocks.
- Check that cables and wiring are not trapped under the mount.
- Stop if the bracket requires bending or drilling to line up.
A secure seat starts with a mount that fits correctly without forcing the scooter’s structure.
Align Mount Brackets
Place the brackets or base over the designated mounting holes. Start all fasteners loosely before fully tightening any one of them unless the manufacturer’s instructions specify another sequence. This helps confirm that the entire mount is correctly aligned.
Keep the brackets seated flush against the intended mounting surface. Check that the mount is centered and that it does not interfere with the rear wheel, fender, suspension, brake components, folding mechanism, or wiring.
Tighten Mount Bolts
Tighten the bolts using the exact sequence and tools specified for your seat. Do not assume every mount should use the same crisscross pattern. For example, Segway’s official Ninebot seat instructions show a numbered tightening order for that particular mounting system.
- Start with the correct supplied hardware.
- Follow the manufacturer’s tightening sequence.
- Use published torque values when they are provided.
- Do not over-tighten bolts in an attempt to remove a fit problem.
- Use threadlocker only when the instructions permit or recommend it.
Install the Seat and Hardware
Once the base is secure, install the seat post and saddle according to the kit instructions. Some designs slide the seat post into a tube or offset bracket, while others use a clamp or folding mechanism.
Make sure every required insert, sleeve, spacer, washer, or locking component remains in place. The Segway seat manual, for example, warns users not to discard the plastic tube inside its seat post because it is part of the seat-post assembly.
Line up the saddle with its mounting hardware and tighten or lock it as instructed. The saddle should remain centered and should not rotate freely once secured.
If the system uses quick releases, fully close and lock them. A quick-release lever that is merely touching the post without adequate clamping force is not secure.
Adjust the Seat Height and Position
Set the saddle at a height that allows you to sit comfortably while maintaining reliable control of the handlebars and scooter. You should be able to place your feet where the scooter manufacturer intends without stretching or sitting so low that your knees interfere with steering.
Never raise an adjustable seat post beyond its stated limit. If the post has a minimum-insertion mark, keep that mark inside the receiving tube. Segway’s official seat instructions specifically warn riders not to expose the minimum-insertion mark while adjusting saddle height.
Check the saddle angle as well. It should support you without sliding you sharply forward or backward. After adjustment, lock the height and saddle-position mechanisms securely.
Tighten All Bolts Securely
Perform a final fastener check after the seat and saddle are positioned. If the manufacturer provides torque specifications, use a suitable torque wrench and tighten to those values. If no torque value is provided, follow the manufacturer’s supplied-tool and tightening instructions instead of inventing a torque.
- Check every mounting bolt in the specified sequence.
- Confirm washers, nuts, spacers, and locking blocks are seated correctly.
- Make sure adjustable clamps and quick releases are fully locked.
- Inspect for stripped threads, bent brackets, or cracked mounting areas.
- Recheck the hardware after the initial test rides as instructed by the manufacturer.
Over-tightening can be as problematic as under-tightening because damaged threads or distorted parts can weaken the connection.
Test Seat Stability Before Riding
Before riding, hold the scooter securely and try to move the saddle from side to side and front to back. The seat should not wobble, rotate, slide down the post, or shift at the mounting base.
Shake Test Check
Perform a controlled wobble check at the saddle, seat post, quick releases, and mounting base. Check the hardware visually while applying light pressure.
- Check for side-to-side wobble.
- Confirm each bolt remains tight.
- Make sure quick releases are fully locked.
- Listen for new creaks or clicking.
- Look for movement between the bracket and scooter.
Then sit on the saddle while the scooter is stationary and keep both feet firmly on the ground. If the post slips, the saddle rotates, or the bracket moves, stop and correct the problem before riding.
Brief Ride Assessment
Take a short test ride in a low-traffic, open area at low speed. A seat changes your body position, so pay attention to steering response, balance, brake feel, turning clearance, and your ability to place your feet safely.
Make several gentle stops and turns before increasing speed. Avoid hard acceleration, sharp leaning, or heavy traffic until you are familiar with the new riding position.
After the test ride, park the scooter and repeat the seat-stability check. Look for any fastener that has shifted or loosened.
Troubleshoot a Seat That Wobbles or Will Not Fit
Do not solve a poor fit by forcing the hardware. Most installation problems point to incorrect compatibility, assembly, alignment, or damaged parts.
| Problem | What to Check |
|---|---|
| Mounting holes do not line up | Confirm the exact scooter and seat-kit model. Check bracket orientation and required spacers. Do not enlarge or drill holes unless the manufacturer instructs you to. |
| Seat wobbles at the base | Check all bolts, washers, locking blocks, and mounting surfaces. Stop using the seat if the frame or bracket is cracked or bent. |
| Seat post slides downward | Inspect the quick release, clamp, internal sleeve or insert, and minimum-insertion requirement. Replace damaged components rather than overtightening them. |
| Saddle rotates | Check the saddle clamp or adjustment nut and tighten it according to the seat instructions. |
| Creaking or clicking develops | Inspect for loose hardware, movement between mating surfaces, damaged washers, cracked brackets, or worn quick-release parts. |
| Bolt will not thread smoothly | Stop. Check bolt size, thread pitch, alignment, and mounting-hole damage. Do not force or cross-thread the fastener. |
Stop riding: Do not use the seat if you find a cracked bracket, damaged frame, stripped mounting thread, bent hardware, seat post that will not stay locked, or a mount that continues to move after correct assembly.
Ride Safely With a Scooter Seat
A properly installed seat can make longer rides more comfortable, but riding safety still depends on speed, visibility, road conditions, braking, rider judgment, and the condition of the scooter.
The U.S. Consumer Product Safety Commission recommends wearing a bicycle helmet, checking the scooter for damage before riding, keeping both hands on the handlebars, watching for road obstacles, avoiding abrupt movements, and following local traffic rules.
- Wear a properly fitted helmet every ride.
- Keep both hands available for steering and braking.
- Stay within the scooter and seat weight limits.
- Slow down for bumps, potholes, gravel, and uneven pavement.
- Avoid sudden body movements or aggressive leaning in turns.
- Do not carry another passenger on a single-rider scooter.
- Check brakes, tires, lights, handlebars, and the seat before riding.
CPSC estimated 79,300 emergency-department-treated e-scooter injuries in 2024. However, its April 2026 report defines the e-scooters in that dataset as powered standing scooters and excludes other seated motorized scooters, so the figure should be treated as general micromobility safety context rather than evidence about seat-equipped scooters specifically.
You can review the current CPSC Micromobility Products-Related Deaths, Injuries and Hazard Patterns 2017–2024 report for the latest national data available at the time of this update.
Check and Maintain the Seat Regularly
Inspect the seat and hardware regularly for looseness, cracks, bending, corrosion, damaged threads, or wear. Include the saddle, seat post, quick releases, clamps, base, brackets, and mounting points in your inspection.
Before riding, gently check the seat for movement and make sure all quick releases are locked. Manufacturer seat instructions may specifically call for these checks before every ride.
Clean the saddle and exposed hardware using methods approved for their materials. Mild soap and a damp cloth are appropriate for many surfaces, but avoid soaking electrical areas or spraying water into openings.
Lubricate hinges, sliders, or other moving parts only when the manufacturer recommends it and specifies an appropriate lubricant. Do not apply oil to friction surfaces that depend on clamping force unless instructed to do so.
Recheck fasteners after initial use and at the intervals specified in the scooter or seat manual. Vibration and repeated loading can reveal a mounting problem that was not obvious during the first stationary test.
Frequently Asked Questions
Are scooters good for autistic kids?
Autism by itself does not determine whether a scooter is appropriate. A non-powered scooter may help some children practice balance and coordination, but an electric scooter adds speed and greater crash risk. Follow the manufacturer’s age and weight limits, use protective equipment and close supervision, and consider guidance from the child’s clinician or occupational therapist when motor-control or sensory needs are a concern.
Can you buy seats for electric scooters?
Yes. Some electric-scooter manufacturers sell dedicated seat kits, and approved aftermarket options also exist. Compatibility is more important than appearance: confirm the exact scooter model, mounting method, load rating, included hardware, adjustment range, and manufacturer instructions before buying.
How do you put a seat on an electric scooter?
Use a compatible seat kit, position its base on the manufacturer-approved mounting points, install the supplied hardware in the required sequence, attach and adjust the seat post and saddle, lock all clamps or quick releases, and test the seat for movement before taking a slow test ride.
What is the most common injury on electric scooters?
In CPSC’s current micromobility data, fractures are the most common diagnosis, followed by contusions and abrasions. Upper and lower limbs as well as the head and neck are frequently injured. These statistics cover the micromobility products included in CPSC’s dataset and should not be interpreted as a seat-specific injury study.
Can I put a universal seat on any electric scooter?
No. A “universal” label does not guarantee that a seat will mount safely to every scooter. Use it only when its manufacturer specifically confirms compatibility with your model and the installation does not require unsafe structural modification.
Should I use threadlocker on electric scooter seat bolts?
Only when the scooter or seat manufacturer recommends or permits it. Different fasteners and materials require different assembly methods, so threadlocker should not be treated as a universal substitute for the correct hardware or tightening procedure.
Why does my electric scooter seat keep wobbling?
Common causes include loose mounting bolts, an unlocked quick release, missing washers or spacers, a poorly adjusted saddle clamp, incompatible brackets, worn hardware, or damaged mounting points. Stop riding until the cause is identified and corrected.
Conclusion
Adding a seat to your electric scooter can make longer rides more comfortable when the scooter is designed for a seat and the correct kit is installed properly. The most important steps are confirming model compatibility, using approved mounting points and hardware, following the manufacturer’s tightening and adjustment instructions, and checking the finished installation for movement.
Do not improvise around a mount that does not fit, exceed a seat-post adjustment limit, or continue riding with loose or damaged hardware. After installation, test the scooter slowly because sitting changes your riding position and handling. Regular seat, brake, tire, and fastener checks will help keep the modified setup dependable.
Sources
- U.S. Consumer Product Safety Commission — Micromobility Information Center — helmet, inspection, riding, charging, and local-traffic-law safety guidance.
- U.S. Consumer Product Safety Commission — Micromobility Products-Related Deaths, Injuries and Hazard Patterns 2017–2024 — current injury statistics and product-scope definitions.
- Segway — Scooter Seat for Ninebot KickScooter User Manual — mounting sequence, seat-post adjustment, minimum-insertion mark, quick-release, and pre-ride checks.
- Hiboy — Repair Instructions — model-specific electric-scooter seat installation support.
