

Last Updated on July 28, 2026 by Mason Reed
Hanging a lantern the right way turns a dark tent into a cozy, safe basecamp — but it only works if you pick the right hook, the right spot, and the right lantern type. Get those three things right and you’ll have even light, no fire risk, and no midnight head bumps.
Quick Answer
Hang your lantern near the tent’s peak using a hook or carabiner rated for its weight — orange hooks for lightweight lanterns, black hooks for heavier setups, or built-in ceiling loops for standard dome tents. Keep it at least a few feet from tent walls at roughly 6–7 feet off the ground, and always use a battery or LED lantern indoors rather than a fuel-burning one.
Key Takeaways
- Match the hook to the lantern’s weight: orange corkscrew hooks for lightweight lanterns, heavy-duty black hooks for larger frame tent rafters, and mini carabiners for standard fabric ceiling loops.
- Hang the lantern near the tent’s peak, centered, and clear of walls and fabric to maximize ambient illumination.
- Aim for roughly 6–7 feet of ground clearance and a few feet of distance from any flammable materials or gear.
- Use battery-powered or LED lanterns inside the tent — fuel-burning lanterns must stay outside due to severe fire and carbon monoxide hazards.
- Check the hook, attachment loop, and line regularly, especially in windy weather.
At a Glance
| Time Required | 5–10 minutes |
| Difficulty | Easy |
| Tools Needed | Orange or black lantern hook, mini carabiner, measuring tape |
| Cost | Around $5–$20 for hooks or carabiners |
Disclosure: As an Amazon Associate I earn from qualifying purchases. Some links on this page are affiliate links, at no extra cost to you.
Selecting the Right Hook for Your Lantern

When you’re ready to hang your lantern, selecting the right hook is crucial for safety and stability. For campers using specialized frame or wall tents, hardware options depend on structural conduit size. If you’re using lightweight lanterns, the orange hook is a practical choice. With its corkscrew feature and compatibility with one-inch EMT conduit, it securely holds your lighter items, and you can grab three hooks for around $12. For heavier lantern styles, opt for the black hook. This hook offers a higher weight capacity and stabilizing support, making it perfect for both indoor and outdoor settings—two hooks are available for $20. Both hook materials serve effectively at the peak of your tent, providing versatile solutions for any lantern style.
If you are camping in a standard dome or backpacking tent without rigid conduit, look for built-in fabric loops or O-rings at the peak. Pairing these built-in loops with a lightweight locking carabiner or an S-hook gives you the same secure overhead hold as heavy-duty frame hardware. Remember, the orange hook pairs well with traditional poles featuring inch and 3/8 tubing, while the black hook excels with heavy rafters. Choose wisely to guarantee your lantern hangs safely and enhances your space.
Finding the Ideal Location in the Tent
After you’ve selected the right hook or carabiner for your lantern, the next step is finding the ideal location in your tent. Aim for a spot near the peak to maximize light distribution and minimize fire hazards from flammable materials. A central location in your tent layout guarantees even illumination, making all areas accessible and safe. Avoid hanging the lantern too close to the walls; this prevents heat buildup and promotes airflow around the light source.
Consider the lighting angles—positioning the lantern to reflect light evenly off the ceiling fabric can enhance your overall cabin experience. Confirm the spot allows for secure attachment, ideally using hooks compatible with the tent’s internal frame or reinforced fabric peak loops. Finally, think about accessibility; you want to reach the lantern easily for brightness adjustments without maneuvering around sleeping bags or gear. By following these guidelines, you’ll create a well-lit, inviting space that keeps you safe and comfortable.
Warning: Never burn a fuel-powered (gas, propane, liquid fuel, or candle) lantern inside a tent. Fire-safety authorities at Cheshire Fire and Rescue Service warn that combustion sources used in enclosed or poorly ventilated spaces cause fatal carbon monoxide poisoning, and tent fabric can melt or ignite even when treated as flame-resistant. Save fuel lanterns for outdoor cooking and patio lighting, and choose a battery-powered or LED lantern for anything hung inside the tent.
Attaching the Hook Securely
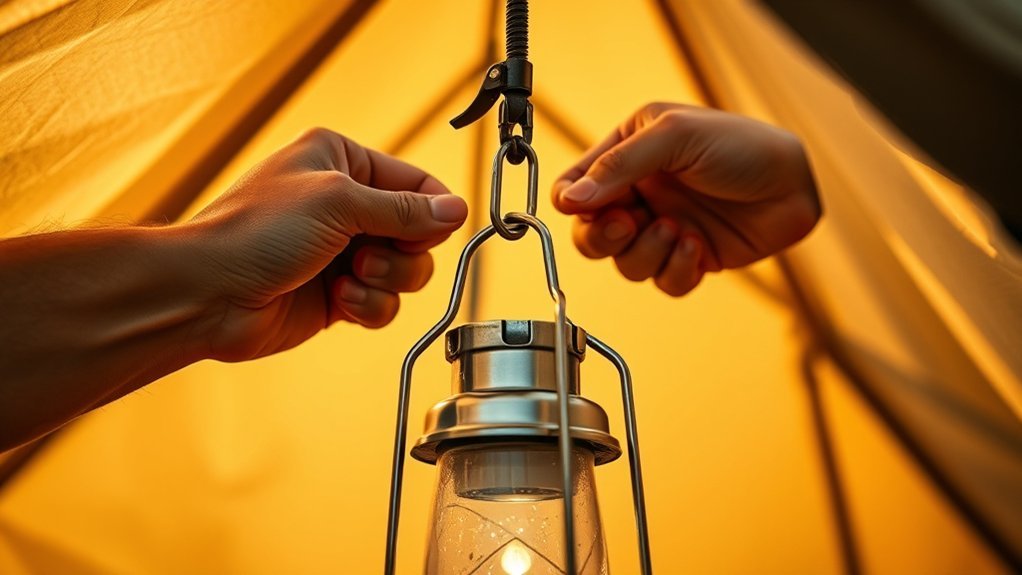
To hang your lantern securely, choose the right hook based on its weight capacity. For heavier lanterns, the black hook with its spring assembly offers the best support, while the orange corkscrew design works well for lighter options. Make sure to attach it firmly to one-inch EMT conduit, compatible tubing, or a reinforced fabric loop to prevent accidental falls.
Choose Appropriate Hook
Choosing the right hook is essential for safely hanging your lantern in a tent. For lightweight lanterns, opt for the orange hook, designed with a simple corkscrew attachment that securely grips one-inch EMT conduit or traditional poles. If you’re dealing with heavier items, the black hook is your best bet; it features a stabilizing component that enhances support, ensuring your lantern hangs safely. Always verify that the hook materials and designs you choose are compatible with the tubing size or loop strength in your tent. This compatibility is vital for a stable attachment. Position the lantern at the peak for ideal light distribution, and be sure to check the weight capacity of your selected hook to avoid any accidents.
Secure Attachment Method
Before you hang your lantern, it’s essential to confirm that the hook is securely attached. Use the black hook for heavier lanterns; its higher weight capacity and stabilizing part provide robust support. Attach it firmly to a one-inch EMT conduit or compatible tubing to create a stable hanging point. If you’re using lightweight lanterns, the orange hook’s corkscrew design offers easy and secure attachment. If your tent features fabric loops, thread a mini carabiner through the loop and clip the lantern handle directly to it. Always double-check that the hook or clip is firmly in place before letting go to prevent damage to your equipment. Proper attachment techniques will enhance your overall camping experience and backcountry preparation.
Pro Tip: If you’re camping somewhere breezy, anchor the lantern with a short length of paracord or a secondary carabiner in addition to the primary hook. This stops the lantern from swinging into tent walls and keeps the light steady instead of casting disorienting shadows all night.
Preparing the Lantern for Hanging
Start by confirming your lantern is suitable for hanging, equipped with a secure handle, bail, or loop. Check your lantern type and verify it’s designed for overhead suspension. For lanterns you’ll hang inside the tent, choose a battery-powered or USB-rechargeable LED model — fuel-burning lanterns pose fire and carbon monoxide risks in an enclosed space and are best kept for outdoor or vestibule use only, with good ventilation.
Here’s a quick guide to help you choose the right hook based on your lantern type:
| Hook Type | Lantern Category | Best Mounting Surface |
|---|---|---|
| Black Hook | Heavy lanterns / Power stations | 1-inch EMT conduit / Rafter poles |
| Orange Hook | Lightweight LED lanterns | 1-inch conduit / 3/8-inch poles |
| Mini Carabiner | Compact battery lanterns | Ceiling fabric loops / O-rings |
For heavier lanterns, a black hook will provide superior stability. Conversely, an orange hook is ideal for lightweight lanterns thanks to its easy corkscrew design. Preparing your lantern properly not only enhances its function but also guarantees a safer camping experience. Always position the lantern at a safe height to prevent contact with the tent walls, minimizing fire hazards and fabric abrasion.
Ensuring Proper Height and Clearance
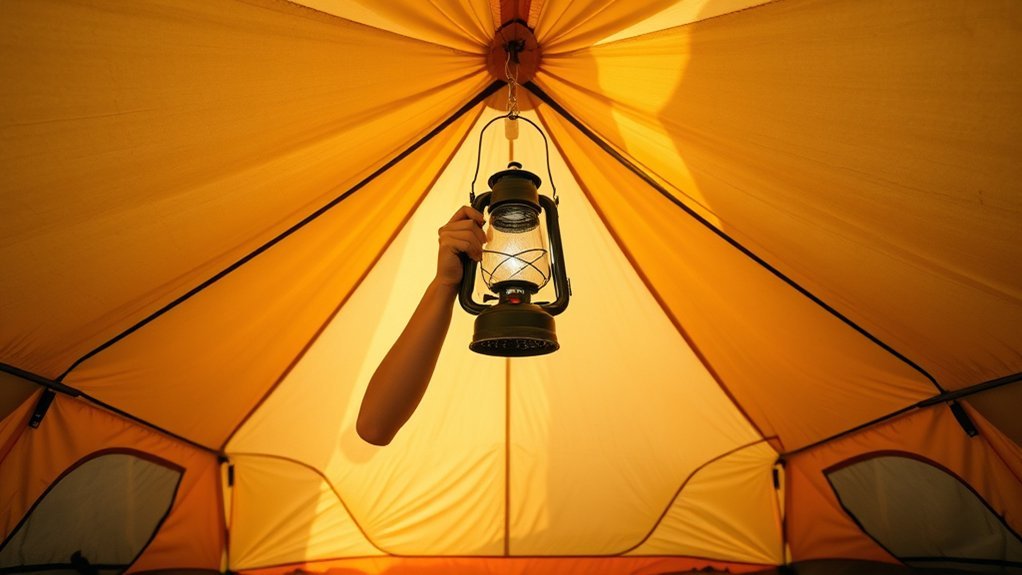
To guarantee your lantern is safe, start by measuring the height of your tent to find the ideal hanging spot. Keep in mind the necessary clearance space from any flammable materials, and check for any overhead hazards that could pose a risk while you’re moving around inside the tent.
Measure Tent Height
Measuring the height of your tent is essential for hanging your lantern safely and effectively. Start by measuring from the floor to the interior peak, guaranteeing you account for any natural roof sag. Use a reliable measuring tape to get accurate tent dimensions. Aim for around 6–7 feet of clearance from the ground whenever tent headroom permits, according to experts at PeakCamper. This height helps prevent head bumps, minimizes shadows, and allows for easy movement underneath the light source. Remember to factor in the drop length of the hook or lanyard you’ll use, as it can alter how low the lantern hangs. Always double-check your measurements before finalizing the hanging point to promote safety and avoid accidents.
Consider Clearance Space
After you’ve measured your tent height, it’s important to think about clearance space when hanging your lantern. To guarantee safety and comfort, follow these guidelines:
- Suspend the lantern roughly 6–7 feet above the ground (or as high near the peak as possible in smaller tents) for proper clearance and even illumination.
- Keep several feet of space around the lantern so gear like sleeping bags, clothing, or tent walls cannot brush against it.
- Use sturdy hooks, like the black hook or locking carabiners, to maintain a safe distance from the ceiling fabric.
- Ascertain the lantern is stable and won’t swing excessively in wind, reducing the risk of falling or knocking over gear.
Avoid Overhead Hazards
While hanging your lantern, it’s crucial to verify it’s at a safe height to avoid any overhead hazards. Aim for adequate clearance to prevent head injuries when sitting up or standing. Use sturdy hooks to guarantee stability and resist swinging. Keep the lantern well clear of tent walls and stored gear, ideally centering it for maximum safety. Regularly check your setup for loose connections, worn fabric loops, or hardware fatigue.
| Hook Type | Weight Capacity | Ideal Use |
|---|---|---|
| Black Hook | Heavy | Heavy frame lanterns & power packs |
| Orange Hook | Light | Lightweight LED lamps |
| Loop / Carabiner | Medium | Standard dome tent ceiling loops |
| Magnetic Hook | Variable | Temporary metal pole setups |
Double-Checking Stability and Safety
Before you settle in for the night, it’s essential to double-check the stability and safety of your lantern setup. Performing these stability checks and safety inspections guarantees you can enjoy your evening without worry. Here’s what to do:
Ensure your lantern setup is stable and safe before settling in for the night for a worry-free evening.
- Use the black hook for heavier lanterns, ensuring it’s securely attached to stable rafter pieces or heavy frame poles.
- Regularly inspect the hook, carabiner, and fabric attachment point for wear, especially in windy conditions.
- If using the orange corkscrew hook for lighter items, twist it properly into place on conduit to avoid accidental detachment.
- Verify that your lantern is hung at a safe height, well clear of tent walls and flammable materials.
Additional Tips for Lantern Use in Tents
Once you’ve confirmed your lantern is stable and secure, consider a few additional tips to enhance your lighting experience:
- Diffuse Direct LED Glare: Bare LED lanterns can cast harsh glare. Hang a frosted lantern, slip a light diffuser over the globe, or hang a translucent water bottle in front of the light to create a soft, warm ambient glow throughout the tent.
- Utilize Gear Lofts: If your tent lacks a central ceiling loop, install a mesh gear loft across the roof peak and clip a lightweight micro-lantern to the underside mesh.
- Manage Battery Safety: Keep lithium-ion battery lanterns at moderate temperatures and avoid hanging battery packs directly against hot tent roofs in direct daytime sun.
- Maintain Fire Safety: Keep all flammable materials well clear of the lantern. Position it near the peak of the tent to maximize light distribution and minimize the risk of accidental contact.
Regularly check the stability of both the hook and the lantern; this simple lantern maintenance step can prevent unexpected drops. If you’re using the corkscrew design of the orange hook for lightweight lanterns, make sure it’s attached properly to avoid falls. By following these guidelines, you’ll create a cozy atmosphere while prioritizing safety in the great outdoors.
Frequently Asked Questions
Can I use a battery-operated lantern instead of a fuel one?
Yes — and for hanging inside a tent, a battery-powered or LED lantern is the safer choice. Just check battery life and choose a lantern with adequate brightness for your needs. It’s a practical, hassle-free option recommended by gear experts at REI that avoids the fire and carbon monoxide risks that come with fuel-burning lanterns indoors.
What type of lantern is best for camping in cold weather?
For cold weather camping, LED lanterns offer efficiency and long battery life and are safe to use inside a tent. Keep lithium-ion rechargeable batteries warm during the day inside your sleeping bag, as freezing temps reduce battery life. Fuel-burning lanterns should only be used outside or in a well-ventilated space, never inside a closed tent.
How do I prevent my lantern from swinging in the wind?
Use a sturdy hook matched to the lantern’s weight, and add a short paracord tie-off or carabiner to anchor it in place. This keeps the lantern from swaying into tent walls in gusty conditions and keeps light steady rather than casting moving shadows all night.
Are there any lanterns specifically designed for tent use?
Yes, many LED lanterns are designed specifically for tent use, featuring lightweight materials, collapsible globes, and built-in carabiners or magnetic hooks. Look for these features to make hanging and securing the lantern easier while eliminating fire risks.
What should I do if my lantern gets too hot?
If your battery or LED lantern gets hot, power it off immediately, move it away from fabric, and inspect the battery compartment. If a fuel-burning lantern is mistakenly ignited indoors and overheats, extinguish it and move it outside right away according to Bass Pro Shops Fire Safety guidelines — fuel units should never be used inside tents.
Conclusion
By following these steps, you’ll transform your tent into a cozy haven, illuminated by the gentle glow of your lantern. Remember, safety is key—secure your hook, find the perfect spot, keep flammable materials well clear, and choose a battery-powered or LED lantern for anything hung inside the tent. With a flicker of light, your tent will feel like a starry night under canvas. Embrace the adventure, and let your lantern guide you through the shadows, creating memories that will shine long after the campfire fades.
Sources
- REI Expert Advice: Camping & Emergency Lanterns — backs guidance on choosing safe electric lanterns and distance from tent fabrics.
- Cheshire Fire and Rescue Service: Camping Safety — backs safety regulations against burning fuel lanterns inside tents to prevent carbon monoxide hazards.
- Bass Pro Shops: Fire Safety Tips for Campers — backs general fire prevention and heating equipment clearance inside camp shelters.
- PeakCamper: How to Hang a Camping Lantern for Maximum Light — backs the recommended 6–7 foot hanging clearance height.
