
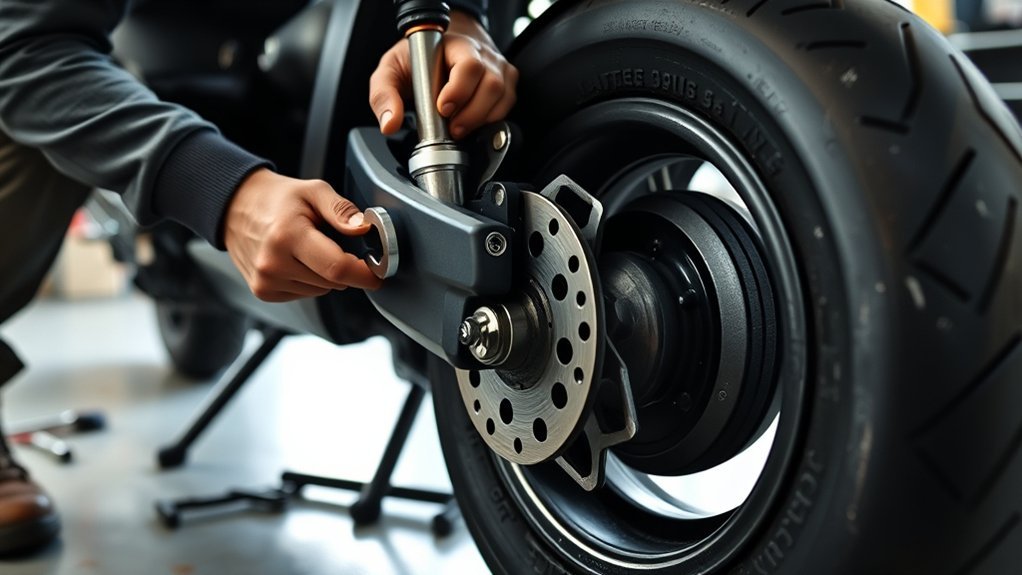
Last Updated on July 23, 2026 by Caleb Warren
Electric scooter brake problems can come from worn friction parts, loose cables, hydraulic leaks, poor alignment, damaged wiring, or an electronic fault. Because brake designs vary widely, start by identifying the scooter and brake model. Do not ride until both the mechanical braking system and any electronic braking functions have been inspected and tested.
Quick Answer
If your electric scooter brakes are not working, stop riding and check the lever, pads or shoes, cable, rotor, caliper, hydraulic lines, and brake-sensor wiring. Adjust only the system your scooter uses. Replace damaged or contaminated parts, follow the exact manufacturer procedure, and test the brakes at walking speed before normal riding.
Key Takeaways
- Do not ride with weak, delayed, inconsistent, leaking, or completely nonfunctional brakes.
- Use the pad, rotor, cable, fluid, torque, and bleeding specifications for your exact brake model.
- Mineral oil and DOT brake fluid are not interchangeable.
- Replace oil- or brake-fluid-contaminated pads instead of relying on surface cleaning.
- Check the scooter model and serial number for an active safety recall before attempting a repair.
- Test the repaired brake off the ground and then at walking speed in a clear, flat area.
At a Glance
| Time Required | 10–20 minutes for inspection; 30–90 minutes for common cable, pad, or alignment work |
| Difficulty | Basic for inspection and minor cable adjustment; advanced for hydraulic, drum, controller, or wiring repairs |
| Tools Needed | Owner’s manual, hex keys or sockets, clean lint-free cloth, isopropyl alcohol, ruler or caliper, torque wrench, and model-specific parts |
| Cost | Inspection and minor adjustment may cost nothing; replacement parts and professional labor vary by scooter and brake model |
Warning: Do not ride the scooter if the lever reaches the handlebar, braking is delayed or inconsistent, fluid is leaking, a cable is frayed, a rotor or caliper is loose, or a warning code prevents normal operation. Turn the scooter off, unplug the charger, and keep fingers away from the wheels before inspection.
Disclosure: As an Amazon Associate I earn from qualifying purchases. Some links on this page are affiliate links, at no extra cost to you.
Why Electric Scooter Brakes Fail
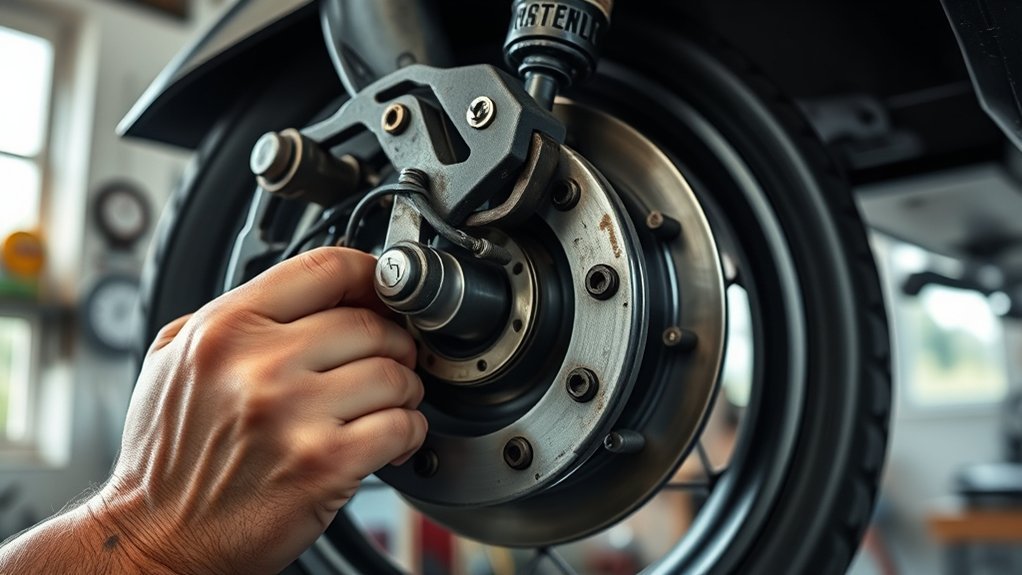
Electric scooter brakes usually stop working because a friction part is worn, a cable has lost tension, a rotor or caliper has moved, hydraulic pressure has been lost, or the controller is receiving the wrong brake signal. Water, dirt, oil, crash damage, loose fasteners, and incorrect previous repairs can also reduce braking.
Many scooters use more than one system. A scooter may combine a front drum or disc brake with a rear electronic or regenerative brake. The electronic system can support deceleration, but it does not make a damaged mechanical brake safe to ignore.
A brake that works once but fails on the next pull is not repaired. Braking must be firm, repeatable, and free from leaks, looseness, and warning codes.
Identify Your Brake Type Before Repair
Find the scooter model, serial number, and brake manufacturer before adjusting anything. Check the owner’s manual and look for names or model numbers on the brake lever, caliper, hub, or controller. The correct repair depends on which system is fitted.
- Mechanical disc brake: A cable pulls a caliper so the pads clamp a visible rotor.
- Hydraulic disc brake: A sealed hose carries fluid from the lever to the caliper.
- Drum brake: Brake shoes operate inside a covered wheel hub, usually through a cable.
- Electronic or regenerative brake: A lever sensor tells the controller to reduce motor power or use the motor to slow the scooter.
- Foot brake: A rear fender presses against the tire and may be the primary or backup brake on a small scooter.
Before ordering parts, compare the old pad, shoe, cable, rotor, connector, or lever with the manufacturer’s compatibility information. Similar-looking brake components are not always interchangeable.
Check the Manual and Safety Recalls
Follow the exact adjustment direction, free-play specification, fluid type, torque value, and error-code procedure in the manufacturer’s manual. A method that works on one scooter may tighten, loosen, or damage another model.
Also search the scooter brand, model, and serial number in the U.S. Consumer Product Safety Commission recall database. Stop using the scooter and follow the official remedy if it is included in a recall.
Note: A recall-related brake failure may require a refund, replacement, or manufacturer repair. Cable adjustment or new pads will not correct a defective recalled component.
Diagnose the Brake by Its Symptoms
The Lever Pulls to the Handlebar
A lever that travels too far may point to a loose or stretched mechanical cable, worn pads or shoes, an incorrectly adjusted fixed pad, air in a hydraulic line, a fluid leak, or excessive pad clearance. Do not keep tightening a cable if the cable housing is damaged or the caliper itself is loose.
The Lever Feels Hard but Braking Is Weak
A firm lever with little stopping power often suggests worn, glazed, incompatible, or contaminated friction material. It can also come from a dirty rotor, a seized caliper mechanism, a drum problem, or a tire with poor grip. Inspect the complete system instead of assuming the lever adjustment is the only cause.
The Brake Rubs or the Wheel Drags
Continuous rubbing may come from an off-center caliper, bent rotor, excessive cable tension, a fixed pad that sits too close, a stuck hydraulic piston, an overtightened drum cable, or a wheel that is not seated correctly. Lift the driven wheel safely and spin it by hand to find where the drag occurs.
The Brake Squeals, Pulses, or Grabs
Noise can come from moisture, dirt, oil, glazed pads, loose hardware, uneven deposits, or a bent rotor. Pulsing felt through the lever may indicate rotor runout, uneven wear, or loose mounting hardware. Do not apply lubricants to a rotor, drum, pad, shoe, or tire-contact braking surface.
The Scooter Will Not Accelerate After Releasing the Brake
The brake lever may be stuck, the sensor may remain active, or a damaged wire or connector may be telling the controller that the brake is still applied. Check that the lever returns fully and read the model-specific error code. Do not bypass, cut, short, or permanently disconnect a safety sensor to make the scooter run.
Check Pads, Cables, and Rotors
Inspect the friction parts, cable system, rotor, caliper, wheel, and fasteners before making an adjustment. Use the manufacturer’s replacement limit rather than a universal pad-thickness number.
Pad Wear Inspection
- Turn the scooter off and unplug the charger.
- Secure the scooter so it cannot fall or roll.
- Use a light to inspect both pads without touching the friction surfaces.
- Compare the remaining material with the minimum thickness specified by the brake manufacturer.
- Check for uneven wear, cracks, missing material, glazing, or oil and brake-fluid contamination.
- Replace pads as a matched set when either side has reached its limit or has been damaged.
Do not assume every pad should be replaced at 1–2 mm. Some manufacturers measure only the friction layer, while others specify a combined measurement that includes the backing plate.
Pro Tip: Photograph the pad orientation, spring, retaining pin, washers, and spacers before removal. This gives you a model-specific reference during reassembly.
Cable and Rotor Check
Inspect the full cable path from the lever to the brake. Replace a cable or housing that is frayed, kinked, crushed, corroded, split, or slow to return. Confirm that cable-end caps, guides, and anchor bolts are secure.
For a disc brake:
- Spin the wheel and watch the rotor pass through the caliper.
- Look for side-to-side wobble, deep scoring, cracks, discoloration, or a raised wear lip.
- Check rotor thickness against the minimum printed on the rotor or listed in its manual.
- Confirm that the rotor and caliper fasteners are present and tightened to the specified torque.
- Make sure the wheel is fully seated before judging caliper alignment.
A slightly bent rotor may require a proper rotor-truing tool. Replace a cracked, severely bent, heat-damaged, or undersized rotor rather than repeatedly bending it by hand.
Clean Electric Scooter Brakes Safely
Clean only with products approved for the brake material. Keep all oil, grease, silicone spray, chain lubricant, tire dressing, and hydraulic fluid away from friction surfaces.
Safe Cleaning Supplies
- Clean lint-free cloths
- Isopropyl alcohol or the cleaner approved by the brake manufacturer
- Nitrile gloves
- A soft brush for dry dust around non-friction areas
- Eye protection when using a spray product or hydraulic fluid
Work in a ventilated area and follow the product label. Do not spray cleaner directly into wheel bearings, a sealed drum, the motor, wiring connectors, the display, or the controller compartment.
Brake Cleaning Steps
- Power off the scooter, unplug the charger, and allow hot brake parts to cool.
- Wear clean gloves so skin oil does not transfer to the rotor or pads.
- Wipe both rotor faces with a clean cloth lightly moistened with isopropyl alcohol or an approved cleaner.
- Use a fresh area of the cloth for each pass until no residue appears.
- Inspect the pads separately. Replace pads contaminated by oil or hydraulic fluid.
- Let the rotor dry fully before reassembly.
- Keep the clean rotor away from lubricants while reinstalling the wheel and caliper.
Cleaning may remove surface dirt or temporary moisture, but it cannot repair a worn pad, cracked rotor, leaking seal, damaged cable, or defective sensor.
Fix Loose Mechanical Brakes
Mechanical brakes lose response when the cable stretches, the housing settles, a pad wears, or the cable anchor slips. Start with the adjustment method listed for your scooter.
Adjust Cable Tension
- Check that the wheel, brake mount, cable housing, and cable anchor are secure.
- Use the barrel adjuster only for small corrections, if your system has one.
- Turn it a small amount, operate the lever several times, and recheck the engagement point.
- Keep the amount of lever free play specified by the manufacturer.
- Spin the wheel after every adjustment and listen for continuous rubbing.
- Secure the adjuster lockring when the lever feel and wheel clearance are correct.
If the cable needs a large correction, follow the model-specific cable-anchor procedure. Do not guess which direction tightens a drum or disc brake. For example, Xiaomi publishes different mechanical adjustment instructions for individual scooter designs.
Warning: Excessive cable tension can make the brake drag or lock a wheel. A locked front wheel can throw the rider forward.
Center a Mechanical Disc Caliper
First confirm that the wheel is seated correctly and the rotor is not badly bent. Loosen the caliper mounting bolts only enough for the caliper to move. Center it according to the brake manual, then tighten the bolts evenly to the specified torque.
Some mechanical calipers move only one pad and require a separate fixed-pad adjustment. Holding the lever while tightening the caliper may help on some systems, but it is not correct for every design. Verify that both pads meet the rotor squarely and that the wheel turns without heavy drag.
Fix Drum Brake Problems
A drum brake hides its shoes and braking surface inside the hub. You can usually inspect the cable, anchor, lever movement, and external adjuster without opening the drum.
- Check the cable and housing for damage or slow return.
- Confirm that the external brake arm returns when the lever is released.
- Adjust cable tension only as directed in the scooter manual.
- Spin the wheel and verify that the drum releases fully.
- Stop if you hear grinding, feel severe grabbing, or find that external adjustment does not improve braking.
Internal drum service may involve springs, shoes, seals, bearings, or motor wiring. Have a qualified technician open the hub unless the manufacturer provides a complete service procedure for the exact model.
Bleed Hydraulic Brake Lines
A soft hydraulic lever can result from air in the line, but it can also indicate worn pads, a leak, a loose fitting, damaged hose, stuck piston, or incorrect previous service. Inspect for wetness around the lever, hose, fittings, and caliper before bleeding.
Do not begin until you have identified:
- The brake manufacturer and exact model
- Whether the system uses mineral oil, DOT 4, DOT 5.1, or another specified fluid
- The correct bleed kit, adapters, bleed block, hose, and fluid
- The required lever position and bleeding direction
- The torque values for bleed screws and fittings
Warning: Never mix mineral oil with DOT brake fluid. The wrong fluid can damage seals and make the brake unsafe. Do not use a syringe or hose that has previously held an incompatible fluid.
A typical manufacturer procedure may require removing the wheel and pads, inserting a bleed block, positioning the lever, attaching one or two syringes or a funnel, moving fluid through the system, removing bubbles, closing the ports in a specified order, cleaning spills, and checking for leaks. These details vary enough that one generic sequence is not safe for every scooter.
Replace pads if brake fluid or oil touches them. Clean a compatible rotor with isopropyl alcohol. If a leak remains, the lever still reaches the grip, or the correct bleed does not restore firm pressure, stop and have the brake serviced professionally.
Test Brake Sensors and Lights
Electronic braking systems may control regenerative braking, motor cut-off, a brake light, or all three. One function can work while another fails, so test each one separately.
- Turn the scooter on without touching the throttle or brake lever.
- Check whether the display shows a brake icon or model-specific error code.
- Pull and release the lever slowly. Confirm that it returns fully without sticking.
- Check whether the brake light activates and turns off correctly.
- Inspect visible sensor wires and connectors for pinching, looseness, corrosion, or crash damage.
- Follow the model’s error-code chart for sensor, lever, controller, or dashboard faults.
Some scooters report a brake-lever fault when the lever is held during startup or does not return to its normal position. A normal power cycle may clear a temporary startup condition after the lever is released. Do not disconnect the battery, perform a factory reset, replace the controller, or bypass the sensor unless the manufacturer specifically directs you to do so.
Replace Worn Brake Parts
Replace damaged or worn parts with components approved for the scooter or brake model. Match the pad shape, backing plate, compound, spring, retaining pin, cable end, connector, rotor diameter, rotor thickness, and mounting standard.
- Document the original arrangement before disassembly.
- Remove the retaining hardware without touching clean friction surfaces.
- Inspect the caliper, piston area, cable arm, and mounting points for damage.
- Install the matched replacement parts in the correct orientation.
- Use new retaining clips, pins, or locking hardware when the manufacturer requires them.
- Center the caliper and tighten all fasteners to the listed torque.
- Operate the lever repeatedly to seat the pads and confirm normal return.
- Spin the wheel and check for clearance, secure retention, and smooth engagement.
Replace a frayed cable rather than clamping it farther along the damaged section. Replace a leaking hose or fitting instead of wrapping, gluing, or sealing it from the outside.
Bed In New Disc Pads
New disc pads and rotors may need a controlled bedding process to develop full friction. Use the brake manufacturer’s procedure. A common method uses repeated smooth stops in a safe, flat, traffic-free area while avoiding a complete stop with the brake clamped during the early cycles.
Do not attempt bedding on a hill, near vehicles, or at full scooter speed. Stop immediately if braking fades, pulls to one side, produces a warning code, or feels inconsistent.
Test the Brakes After Repair
Use a staged test rather than returning directly to normal riding.
- Static test: With the scooter off, squeeze the lever firmly several times. Check for cable slip, fluid leaks, loose parts, and changing lever travel.
- Wheel test: Safely lift one wheel at a time, spin it by hand, apply the brake, and confirm that it stops and releases consistently.
- Walking test: Walk beside the scooter and apply each brake separately where the design permits.
- Low-speed test: Ride at walking speed on dry, level, private ground away from traffic and obstacles.
- Repeated-stop test: Make several controlled stops and confirm that the lever feel and stopping response remain consistent.
Do not test at normal speed until the scooter passes every earlier stage. Follow the CPSC micromobility safety guidance by checking for damage and testing the brakes before riding.
When to Stop DIY Repair
Use a qualified scooter or brake technician when:
- The scooter is included in a safety recall.
- A hydraulic hose, fitting, lever, or caliper leaks.
- You cannot identify the required hydraulic fluid.
- The brake remains soft after the correct bleeding procedure.
- A rotor, caliper mount, fork, wheel, axle, or frame is cracked or bent.
- A drum must be opened but no model-specific service manual is available.
- A cable anchor repeatedly slips.
- The lever, sensor, dashboard, controller, or wiring harness is damaged.
- The brake warning or error code returns after the approved checks.
- The scooter accelerates while the brake input remains active.
- The braking response changes between repeated tests.
Prevent Future Brake Problems
Use a simple inspection routine and follow the service intervals in the scooter and brake manuals.
- Before every ride: Check lever feel, lever return, visible cables, lights, tires, loose parts, and basic stopping response.
- After wet or dirty rides: Dry the scooter, inspect the rotor or drum area, and remove surface dirt without applying lubricant to friction parts.
- Regularly: Measure pads, shoes, and rotors according to the manufacturer’s procedure.
- After transport or a crash: Check rotor alignment, caliper position, cable routing, lever damage, wheel seating, and sensor wiring.
- During storage: Keep the scooter dry and away from products that can spray oil or silicone onto the brakes.
- After any repair: Recheck the fasteners, lever feel, and wheel clearance after the first few controlled rides.
Do not wait for complete brake failure. Increasing lever travel, scraping, pulsing, repeated warning codes, fluid residue, and changing stopping distance are reasons to inspect the system promptly.
Frequently Asked Questions
Why are my electric scooter brakes not working?
Common causes include worn pads or shoes, a loose or damaged cable, an off-center caliper, a bent or contaminated rotor, a hydraulic leak, air in a hydraulic line, a stuck lever, or a sensor and wiring fault. Stop riding and inspect the system that your scooter uses.
What causes an electric or regenerative brake to stop working?
The lever sensor may be stuck or damaged, a connector may be loose, a wire may be broken, or the controller, motor sensor, dashboard, or firmware may have a fault. Read the model-specific error code and do not bypass the brake sensor.
How do I reset electric scooter brakes?
There is no universal electric-brake reset. Release the lever fully, turn the scooter off normally, wait briefly, and restart it without touching the throttle or brake. If the warning returns, follow the manufacturer’s error-code procedure. Disconnect the battery or perform a factory reset only when the official manual specifically requires it.
What causes an e-brake lever to stop working?
A brake lever may fail because its pivot is overtightened, the return spring is damaged, the cable is binding, the hydraulic system has lost pressure, or the internal sensor or wire is faulty. Confirm whether “e-brake” means the physical lever, electronic motor cut-off, or regenerative braking before replacing parts.
Can I ride if one electric scooter brake still works?
Do not assume one remaining brake provides enough stopping power. The scooter may have been designed to use both systems together, and the failure may affect motor cut-off or stability. Repair and test the complete braking system before normal riding.
Why does my scooter brake rub after adjustment?
The cable may be too tight, the caliper may be off-center, the fixed pad may sit too close, the rotor may be bent, a hydraulic piston may be sticking, or the wheel may not be seated correctly. Correct the cause instead of riding until the parts wear themselves clear.
Conclusion
If your electric scooter brakes are not working, stop riding and diagnose the system before replacing or adjusting parts. Identify the brake model, inspect the friction components, cable, rotor, caliper, hydraulic lines, lever, sensor, and wiring, then follow the exact manufacturer procedure. Do not mix hydraulic fluids or reuse contaminated pads.
After the repair, test the brake off the ground, while walking the scooter, and at very low speed on level ground. If the brake leaks, changes between pulls, produces a recurring fault, or still lacks dependable stopping power, have the scooter professionally serviced.
Sources
- U.S. Consumer Product Safety Commission: Micromobility Safety — pre-ride inspections, brake testing, damage checks, and safe scooter use
- U.S. Consumer Product Safety Commission: Recalls — current scooter recalls, affected models, hazards, and official remedies
- Xiaomi Electric Scooter 5 Mechanical Brake Adjustment — model-specific adjustment and front-wheel lock warning
- Xiaomi Electric Scooter 6 Pro Error-Code Guide — brake-lever fault diagnosis and wiring checks
- Tektro Brake FAQ — soft hydraulic lever, trapped air, fluid level, and contamination precautions
- SRAM Hydraulic Brake Bleed Manual — hydraulic-fluid compatibility, contaminated-pad replacement, rotor cleaning, and bleeding precautions
