
Last Updated on August 26, 2026 by Caleb Warren
An E4 error on an electric scooter does not have one universal meaning. The code can identify over-current protection, a controller problem, a brake-related fault, or another condition depending on the exact scooter model. Before replacing parts, identify your model, check its manual or manufacturer support page, and use the E4 definition listed for that scooter.
Quick Answer
To fix an E4 error on an electric scooter, first check what E4 means for your exact model. Power the scooter off, let it cool if it is hot, make sure the brake and throttle return normally, inspect accessible cables and connectors, and restart it normally. If E4 returns, follow the manufacturer’s model-specific repair instructions or get professional service.
Key Takeaways
- E4 is model-specific. Do not assume it always means a brake, motor, battery, Hall-sensor, or controller fault.
- Check the model manual or official manufacturer support page before testing or buying parts.
- Safe first checks include cooling the scooter, checking brake/throttle movement, and inspecting accessible wiring for obvious damage.
- Do not open or disconnect an internal lithium-ion battery simply to perform a generic reset.
- Persistent E4 codes, brake problems, overheating, damaged wiring, smoke, unusual odors, or multiple error codes require service before you ride again.
At a Glance
| Time Required | About 10–30 minutes for basic owner checks; professional diagnosis may take longer |
| Difficulty | Easy for visual checks; advanced for internal electrical diagnosis |
| Tools Needed | Scooter manual, flashlight, clean dry cloth; multimeter only when the service procedure specifies how to use it |
| Cost | $0 for basic checks; replacement parts and labor vary by scooter and fault |
Warning: Stop using the scooter if you see smoke, swelling, melted wiring, exposed conductors, significant heat, liquid leaking from the battery area, or signs of water damage, or if the brakes do not work correctly. Do not open, puncture, bypass, modify, or probe a lithium-ion battery pack unless you are qualified and the manufacturer provides an approved service procedure.
Disclosure: As an Amazon Associate I earn from qualifying purchases. Some links on this page are affiliate links, at no extra cost to you.
What Does the E4 Error Mean?
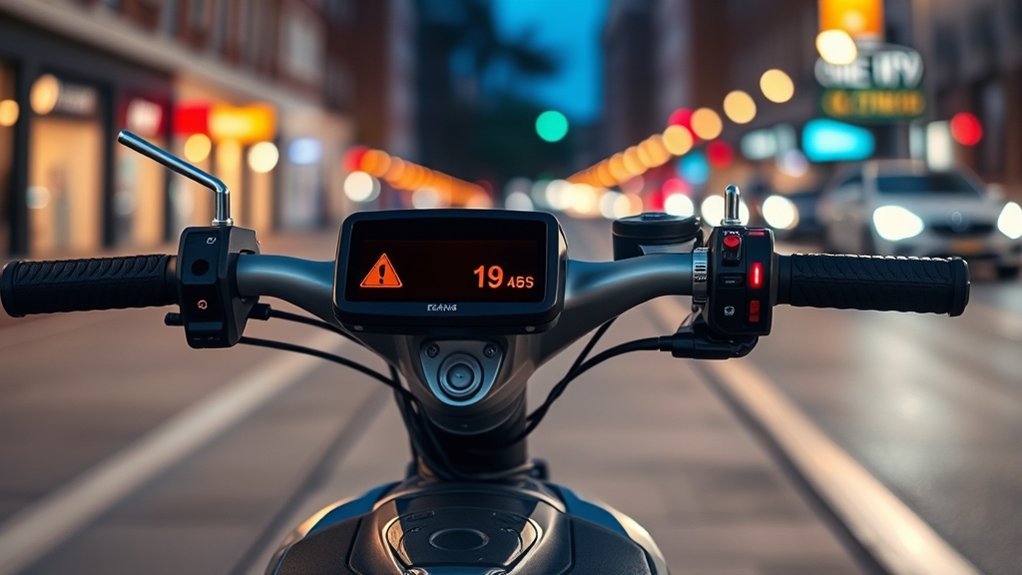
The E4 error means the scooter’s controller or display has detected a condition that its firmware associates with code E4. The important point is that the condition depends on the manufacturer and model. E4 is not a standardized diagnostic code shared by every electric scooter.
For example, Hiboy’s official troubleshooting guidance lists E4 as over-current protection on several models, including its S2-family scooters, while the same manufacturer’s S2 Lite uses E4 for a controller error. That variation within one brand is why the correct manual must come before component testing.
Other manufacturers may use entirely different numbering systems. The Segway E2 Pro manual, for example, assigns separate numerical codes to throttle Hall, brake Hall, motor Hall, over-current, communication, and other faults instead of treating them as a single E4 condition.
The safest interpretation of E4 is not “replace this part.” It is “look up what E4 means for this exact scooter before diagnosing it.”
Why E4 Codes Differ by Scooter Brand
Error codes are programmed by each scooter manufacturer, and sometimes by the supplier of a particular controller or display. A code can therefore change when the manufacturer changes the electronics, firmware, controller, or product platform.
| Example | Documented Meaning | Recommended Direction |
|---|---|---|
| Hiboy S2/S2 Pro family | E4: over-current protection | Let the scooter cool; recurring E4 may indicate a controller problem |
| Hiboy S2 Lite | E4: controller error | Follow Hiboy’s controller-service guidance |
| Other scooter models | May be different or may not use E4 at all | Check the exact model’s fault-code table |
Pro Tip: Before restarting the scooter, take a photo of the error display and the model/serial label. Also note whether E4 appeared during startup, braking, acceleration, climbing, after charging, after rain, or after an impact. Those details can make manufacturer support much faster.
Before Troubleshooting E4: Do a Safety Check
Turn the scooter off and place it on a stable surface away from traffic. Do not continue riding simply because the scooter still moves. A displayed fault can indicate that the controller has detected a condition affecting acceleration, braking, motor control, temperature, or another safety-related system.
Check for obvious problems before touching connectors:
- Burning or chemical odors
- Smoke, swelling, or unusual heat near the deck or battery
- Exposed, melted, crushed, or badly frayed wires
- Water inside the deck, display, controls, or connectors
- A brake lever or throttle that does not return freely
- Grinding, violent vibration, wheel binding, or abnormal motor noise
- Multiple error codes appearing together
If any of these conditions are present, stop troubleshooting and arrange service. The U.S. Consumer Product Safety Commission’s micromobility guidance also recommends using manufacturer-approved batteries and chargers and avoiding battery packs that have been modified or reworked by unqualified personnel.
Check the Brake Sensor Housing First
If your model’s manual specifically associates E4 with a brake, brake sensor, or brake-lever fault, inspect the brake control before moving deeper into the scooter. If your manual says E4 means over-current, controller failure, or something unrelated to the brake, follow that diagnostic path instead.
| Check | Normal | Possible Fault |
|---|---|---|
| Housing shell | Intact | Cracked or deformed |
| Internal mechanism | Secure | Loose or broken |
| Brake lever | Returns freely | Sticks or does not return |
| Sensor connection | Secure and dry | Loose, wet, or corroded |
| Next action | Continue model-specific checks | Repair or replace as specified by manufacturer |
Remove surface dirt that prevents the lever from returning normally, but do not spray cleaner into switches or electronic housings unless the manufacturer says the product is safe for that component. If the housing is cracked or the lever cannot return properly, do not ride until it is repaired.
Inspect the Brake Sensor Cable
If the fault table sends you to the brake circuit, inspect the accessible brake sensor cable for cuts, fraying, crushing, sharp bends, corrosion, or a connector that has partly separated. Keep the scooter powered off while reseating an owner-accessible connector unless the manufacturer specifies another procedure.
Brake Sensor Cable Check
Trace the visible cable from the brake lever toward the stem or harness. Pay particular attention to folding points and areas where a cable can rub against metal.
- Look for cuts, crushed insulation, and exposed conductors.
- Confirm accessible plugs are fully seated.
- Check for moisture, dirt, bent pins, or corrosion.
- Move the handlebar through its normal range and make sure the cable is not stretched or pinched.
A continuity test can help identify a broken wire only when the circuit is powered down and the manufacturer’s service information identifies the correct conductors. Do not guess at pins inside a powered controller harness.
Broken Housing Inspection
Examine the brake sensor housing closely for cracks, splits, loose pieces, or deformation around the lever pivot and cable entry. A damaged housing can prevent a switch or sensor from returning to its normal position. That matters when the scooter’s fault logic monitors whether the brake appears to be applied during startup or acceleration.
Also check whether the lever itself is bent or obstructed. If the housing is damaged, replace it with the correct model-specific part rather than trying to glue, bypass, or permanently hold a brake sensor in one position.
Sensor Reconnection Test
After checking an owner-accessible brake connector, reconnect it securely with the scooter powered off. Restore power normally and see whether the brake indicator, display, and lever behavior return to normal.
- Make sure the lever is fully released before startup.
- Confirm the brake light or display indicator behaves normally, if equipped.
- Do not bypass the brake cutoff circuit to make the scooter accelerate.
- If the code immediately returns, follow the manual’s next service step.
If movement of the cable causes the error to appear or disappear, an intermittent connection is possible. Stop using the scooter until the damaged cable, connector, or control is repaired.
Test the Battery, Wiring, and Throttle
Battery, wiring, and throttle checks should also follow the scooter’s fault table rather than being treated as automatic E4 fixes. First check the displayed charge level and charge the scooter normally with the manufacturer-supplied or manufacturer-approved charger if the battery is low.
Do not assume that a low battery directly causes E4. On some scooters, low voltage has its own separate error code. For example, Hiboy documents low-voltage protection as E5 on several S2-family models rather than E4.
With the scooter powered off, inspect accessible wiring between the controls, stem, motor, and deck for:
- Loose plugs
- Pinched or cut insulation
- Corrosion or moisture
- Discolored connectors
- Melted plastic or other heat damage
Check that the throttle moves freely and springs back to its resting position. A throttle that sticks, feels rough, has been damaged in a crash, or gives an abnormal display indication should be repaired before riding.
Note: Measuring live battery, throttle, controller, or motor voltages is not a universal DIY step. Use a multimeter on these circuits only when you have the correct service documentation, connector pinout, expected readings, and the skill to avoid short circuits or component damage.
Check the Controller and Hall Sensors
If the manufacturer’s E4 definition points to the controller, motor, Hall sensors, or over-current protection, start with non-invasive checks. Let an overheated scooter cool completely, inspect accessible motor/controller wiring, and look for evidence of water, damaged plugs, crushed cables, or overheated connectors.
Do not assume Hall sensors are the cause simply because the scooter will not accelerate. Major manufacturers often diagnose Hall faults separately. Segway, for example, uses distinct error codes for throttle Hall, brake Hall, and motor Hall problems on the E2 Pro.
Controller Signal Check
The controller coordinates battery power, throttle input, braking signals, and motor operation. If your manual says E4 represents a controller or over-current fault, check the conditions surrounding the error first.
- Did E4 appear during a steep climb or heavy acceleration?
- Was the scooter unusually hot?
- Is the wheel difficult to turn or mechanically obstructed?
- Are accessible motor/controller connectors loose or heat-damaged?
- Does E4 return immediately after the scooter has fully cooled?
For Hiboy models that identify E4 as over-current protection, the manufacturer’s guidance says the code may disappear after the scooter cools. If it repeatedly returns, Hiboy directs the user toward controller replacement/service. Follow the equivalent procedure for your own model rather than applying Hiboy’s instructions to another scooter.
Live controller input/output testing should be left to a qualified repairer unless the manufacturer provides a user-service procedure with exact test points and values.
Hall Sensor Test
Hall sensors help many brushless scooter motors report rotor position to the controller. A damaged sensor, broken Hall wire, loose plug, or controller problem can interfere with motor operation, but there is no universal E4 Hall-sensor test.
Start with a visual inspection of the accessible motor harness. If the service manual specifically instructs you to test Hall-sensor outputs, follow its pinout and expected readings exactly. Hall devices are commonly evaluated by observing their electrical output as the rotor position changes, but the required supply voltage, connector layout, signal range, and procedure depend on the scooter.
If the manual does not provide that information, do not probe random motor or controller pins. A repair technician can test the motor sensor circuit without risking a short or damaging the controller.
Replace Faulty Components
Replace a controller, brake assembly, throttle, motor, Hall-sensor assembly, or wiring harness only after the fault has been narrowed to that component or the manufacturer specifically instructs replacement for the displayed code.
- A controller must match the scooter’s voltage, motor, display, firmware, connectors, and current limits.
- A throttle or brake control must use the correct connector and signal type.
- A replacement motor must be electrically and mechanically compatible.
- Battery packs and chargers should be manufacturer-approved for the scooter.
Do not install a higher-current controller or mismatched battery as an E4 “upgrade.” Changing electrical-system specifications can create new faults and can increase fire, component, and braking risks.
How to Reset the E4 Error on Your Scooter
There is no universal E4 reset sequence. The safest generic reset is a normal power cycle: stop the scooter, release the brake and throttle, turn it off using its normal power control, allow it to cool if necessary, and restart it according to the owner’s manual.
| Check | Action |
|---|---|
| Brake lever | Make sure it returns fully before startup |
| Throttle | Release it completely and check for free movement |
| Temperature | Allow an overheated scooter to cool in a safe location |
| Power | Turn off and restart normally according to the manual |
| Error returns | Stop repeating resets and diagnose the documented fault |
Do not routinely open the deck and disconnect an internal battery for five or ten minutes. If your scooter has a genuinely user-removable battery and its manual prescribes removing it as part of troubleshooting, follow that exact procedure. Otherwise, leave the high-energy battery connections alone.
Likewise, do not rely on a generic “hold the brake and power button for 10 seconds” sequence. Button combinations differ between displays and models. Use only the reset, calibration, or firmware process published for your scooter. If the manufacturer provides an official app, install firmware only through that supported method and follow any error information shown in the app.
When to Get Scooter Repair Help
If the E4 code returns after the safe checks recommended for your model, stop troubleshooting by substitution and get repair help. A repeated error often needs model-specific diagnostic equipment, electrical measurements, or replacement testing.
- E4 returns immediately after every restart.
- The scooter will not accelerate or brake normally.
- The motor grinds, jerks, binds, or makes abnormal noises.
- The controller, wiring, motor connector, or deck becomes unusually hot.
- You see melted plugs, exposed conductors, smoke, swelling, or water intrusion.
- Several error codes appear together.
- The scooter was recently crashed, submerged, modified, or electrically repaired.
If the scooter is under warranty, contact the manufacturer or seller before opening sealed areas or replacing parts. Give support the exact model and serial number, the E4 code, photos of the display, when the error occurs, and anything that happened immediately before it first appeared.
After a repair, check the brake lever, throttle return, steering, wheel rotation, lights, and visible wiring before riding. If the manufacturer permits a functional test, begin at walking or very low speed in a clear area. Stop immediately if the error, unusual noise, heat, braking problem, or erratic acceleration returns.
Frequently Asked Questions
How do I fix E4 on an electric scooter?
Find the E4 definition for your exact scooter model first. Then follow that manufacturer’s troubleshooting path. Safe first steps usually include powering the scooter off, checking brake and throttle movement, inspecting accessible cables, letting an overheated scooter cool, and restarting normally. Persistent E4 errors need model-specific diagnosis.
Can I fix the E4 error myself?
You can usually perform visual checks, confirm that the brake and throttle return normally, inspect accessible plugs, and follow owner-level reset instructions. Controller testing, battery work, internal wiring repair, and powered electrical measurements are better left to a qualified technician unless your service manual provides an approved procedure.
What does E4 mean on an electric scooter?
E4 has no universal meaning. Depending on the scooter, it can identify over-current protection, a controller problem, a brake-related fault, or another condition. Check the fault-code table for your exact model instead of diagnosing from the code alone.
How do I reset an electric scooter with an E4 code?
Turn the scooter off normally, release the brake and throttle, allow it to cool if it is hot, and restart it according to the owner’s manual. Do not assume that disconnecting an internal battery or holding a particular button combination is a universal reset procedure.
Can a low battery cause an E4 error?
Only if your model’s diagnostic system associates E4 with low voltage or a related condition. Many scooters use a different code for low voltage. Charge a low battery with the approved charger, but do not assume that battery voltage is the cause of every E4 error.
Why does E4 sometimes disappear after the scooter cools down?
On models where E4 represents over-current or a related protection event, reducing temperature and electrical load may allow the protection condition to clear. Hiboy documents this behavior on several models. A code that repeatedly returns still needs diagnosis because cooling does not repair an underlying controller, motor, wiring, or overload problem.
Can I ride my scooter while E4 is showing?
No. Stop riding until you know what the code means and the scooter operates normally. Error codes can involve systems that affect motor power, braking, temperature, or controller operation, and continuing to ride can turn a minor fault into a safety problem.
Does an E4 error mean I need a new controller?
Not necessarily. Some models do use E4 for controller or over-current problems, but others can use the code differently. Replace the controller only when your model’s documentation or a proper diagnosis identifies it as the failed component.
Conclusion
So, what does an E4 error on an electric scooter mean? The correct answer depends on the scooter. E4 can represent different faults even between models from the same manufacturer, so start with the exact model manual instead of immediately replacing a brake sensor, Hall sensor, battery, motor, or controller.
Once you know what E4 means for your scooter, work from the safest checks to the most advanced: let the scooter cool, confirm the brake and throttle return normally, inspect accessible wiring, and use only the reset and diagnostic procedures approved for that model. If the error remains, the scooter behaves abnormally, or the battery/electrical system shows signs of damage, stop riding and get qualified repair help.
Sources
- Hiboy Troubleshooting Guide — official model-specific error-code guidance, including differing E4 definitions.
- Segway E2 Pro Product Manual — manufacturer fault-code examples for controller, throttle Hall, brake Hall, motor Hall, and over-current conditions.
- U.S. Consumer Product Safety Commission Micromobility Information Center — battery, charger, riding, and micromobility safety guidance.
- UL Solutions Personal E-Mobility Safety — information on UL 2272 and electrical-system safety for personal e-mobility devices.
