
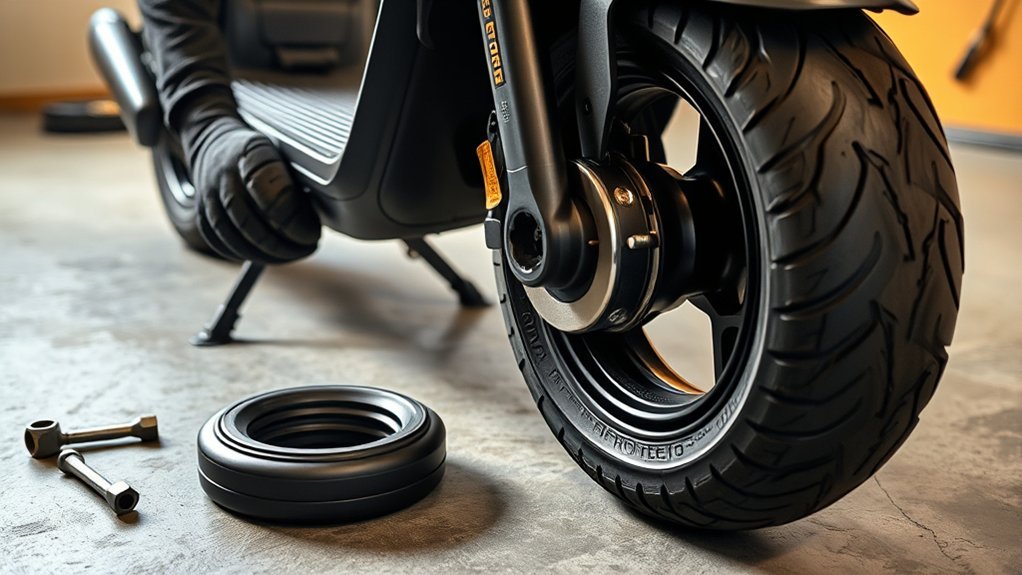
Last Updated on September 10, 2026 by Daniel Globe
Changing the front tire on a Xiaomi M365 is more involved than changing a normal bicycle tire because the front wheel contains the hub motor and its power cable. The job is manageable with the right tools, but the tube, tire bead, valve, axle hardware, and motor cable all need careful handling. Xiaomi specifies an 8.5-inch pneumatic tire for the M365 and recommends 45–50 PSI after installation.
Quick Answer
To change a Xiaomi M365 front tire, power the scooter off, remove the fork covers and 18 mm axle nuts, support the hub-motor wheel without pulling its cable, deflate and remove the tire and tube, fit the compatible replacement tube and tire, check bead alignment at 15–20 PSI, then inflate to 45–50 PSI and reinstall the wheel securely.
Key Takeaways
- The original Xiaomi M365 uses an 8.5-inch pneumatic tire; Xiaomi’s 8.5-inch replacement tire is specified as 8 1/2 × 2 inches.
- Match the replacement inner tube and valve arrangement to the original wheel rather than relying only on a generic tube label.
- Do not routinely remove the valve core to install the tube. Xiaomi’s procedure calls for lightly pre-inflating the tube so it becomes round.
- Inflate first to 15–20 PSI and check that the tire is seated evenly before increasing pressure.
- Xiaomi recommends a final tire pressure of 45–50 PSI and periodic pressure checks.
- Protect the front hub-motor cable throughout the repair. If the cable, axle, rim, bearings, or threads are damaged, use professional service.
At a Glance
| Time Required | Plan roughly 1–2 hours for a first DIY attempt; a very tight tire bead or stubborn axle hardware can make the job longer. |
| Difficulty | Moderate; the small rim and front hub-motor cable make it more demanding than a typical bicycle tube change. |
| Tools Needed | 2.5 mm Allen key or T10 Torx as required by your cover screws, 18 mm wrench, two sturdy tire levers, pump with pressure gauge, protected work surface, and a compatible replacement tube/tire. |
| Cost | Varies by region and by whether you replace the inner tube, outer tire, or both. If you already own the tools, the main expense is the compatible replacement part. |
Warning: The M365 front wheel is the motor wheel. Turn the scooter completely off before starting, support it securely, and never pull, twist, crush, or suspend the wheel by its motor cable. Xiaomi’s safety guidance recommends professional service if you are not confident performing a repair or if safety-critical parts are damaged.
Disclosure: As an Amazon Associate I earn from qualifying purchases. Some links on this page are affiliate links, at no extra cost to you.
What Tools Do You Need for a Xiaomi M365 Front Tire Change?
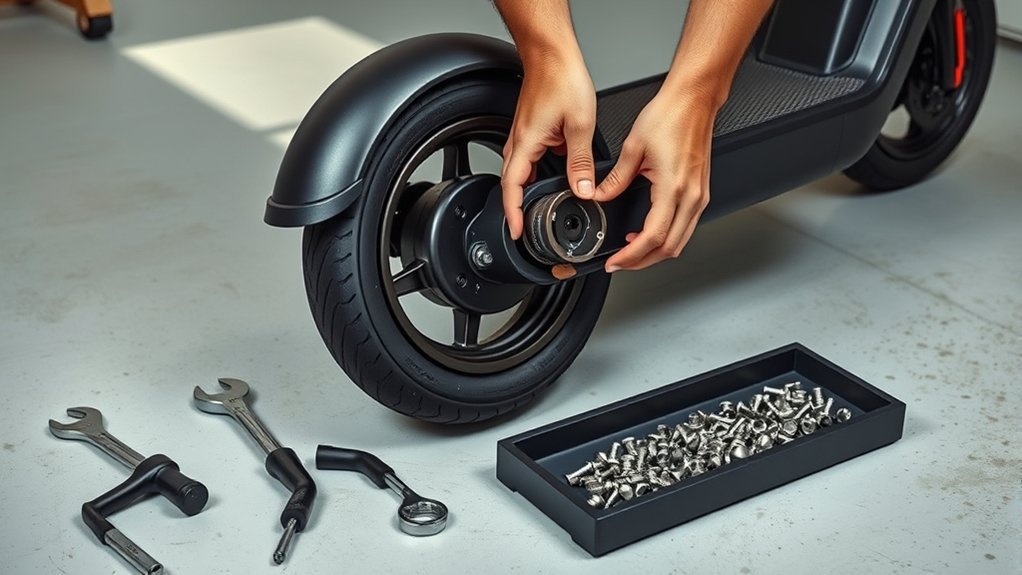
Prepare your tools before lifting the scooter. Many original M365 wheel-cover fasteners use a 2.5 mm Allen key, while some versions or replacement hardware may use a T10 Torx head. Inspect the screw before turning it so you do not strip the head. The front motor axle nuts commonly require an 18 mm wrench.
- 2.5 mm Allen key or T10 Torx key: use the tool that matches your actual cover screws.
- 18 mm wrench: for the front motor axle nuts.
- Two sturdy tire levers: preferably with smooth or protected tips so they do not cut the tube or gouge the rim.
- Pump with an accurate pressure gauge: needed for the 15–20 PSI seating check and final 45–50 PSI inflation.
- Compatible replacement inner tube: match the original tube size and valve position/orientation.
- Compatible 8.5-inch outer tire: if the existing tire is cut, badly worn, deformed, or otherwise unsafe to reuse.
- Plastic pick or thin pry tool: useful for lifting trim or stickers without damaging them.
- Optional cable ties: some DIYers use them to control a stubborn tire bead, but they are not required by Xiaomi’s tire-installation procedure.
Xiaomi lists the M365 with 8.5-inch tires. Xiaomi’s current 8.5-inch pneumatic replacement tire is specified as 8 1/2 × 2 inches with a 50 PSI maximum pressure. When buying an inner tube, compare the replacement with the original tube and valve rather than assuming every tube sold as “8.5-inch” has the same valve geometry.
What Should You Check Before Starting?
First decide whether the repair needs a new inner tube, a new outer tire, or both. A simple puncture may only require a tube replacement, but do not reuse an outer tire with exposed cords, a split sidewall, a badly damaged bead, a large cut, severe cracking, or a bulge.
Turn the scooter off, unplug the charger, and place the scooter on a stable work surface where the front wheel can be removed without the scooter falling. Take a photo of both sides of the axle before removing anything. That gives you a reference for the order and orientation of washers, locking hardware, covers, and the motor-cable side.
Pro Tip: Keep the left-side and right-side axle hardware in separate containers as you remove it. Reinstalling washers or locating hardware in the wrong position can leave the wheel misaligned.
How Do You Remove the Front Wheel?
Remove the cosmetic trim and fork covers first, then loosen the two axle nuts while supporting the hub-motor wheel. Work carefully on the motor-cable side so the cable is never used as a handle or placed under tension.
Remove Cover Screws
Carefully lift any sticker or trim that hides the fork-cover fasteners. A plastic pick is safer for the surrounding finish; if you use a thin blade, cut away from your hands and avoid pushing the blade toward the motor cable.
Inspect the fastener head before choosing a tool. Use a 2.5 mm Allen key on a matching hex socket or a T10 Torx key on a matching Torx head. Seat the tool fully and turn counterclockwise with controlled pressure.
| Task | Action |
|---|---|
| Expose covers | Lift the trim or sticker without tearing it |
| Match the tool | Inspect the screw head before using 2.5 mm hex or T10 Torx |
| Remove fasteners | Keep firm inward pressure to reduce stripping risk |
| Organize hardware | Keep each side’s screws and covers together |
Once the covers are free, set them and their screws aside in order.
Loosen Axle Nuts
With the scooter secure, use an 18 mm wrench on the motor axle nuts. Turn each nut counterclockwise while keeping the wrench square on the flats. Do not use the motor cable to stop the wheel from turning.
If an axle nut is severely seized, rounded, cross-threaded, or requires unsafe force, stop. Damaging the axle or motor cable can turn a tire repair into a motor-wheel replacement. A professional scooter technician is the safer option when the axle hardware will not release normally.
As the nuts come off, note the exact position and orientation of every washer or locating piece. Support the wheel as the axle becomes free and lower it out of the fork without stretching the motor cable.
Deflate And Free Valve
Deflating the tire makes bead removal much easier. Remove the valve cap and press the small center pin of the valve core until the tube is fully deflated. Squeeze the tire around its circumference to push out trapped air.
You do not need to push the entire valve stem through the rim just to remove the wheel from the fork. Free the valve from the rim later, when you are actually removing the inner tube.
How Do You Take Off the Front Tire?
With the tire fully deflated, press both sidewalls inward toward the center channel of the rim. This reduces tension at the bead. Start using the tire levers at a point away from the valve, where there is less risk of trapping or damaging the valve stem.
- Push the tire bead toward the center of the rim around the entire wheel.
- Insert one protected tire lever under the bead at a point well away from the valve.
- Lift a short section of bead over the rim edge.
- Use the second lever nearby and work around the circumference in small sections.
- Once enough of the bead is over the rim, continue by hand where possible instead of using excessive leverage.
If the bead is exceptionally tight, a small amount of mild soapy water around the bead can reduce friction. Use it sparingly and wipe the wheel dry afterward. Never use a lubricant that could attack rubber or leave a slippery residue on riding components.
Note: Xiaomi’s user instructions recommend protecting the pointed end of the tire lever or crowbar with cloth so the lever does not damage the inner tube or wheel finish.
How Do You Remove the Inner Tube?
After one side of the outer tire is off the rim, start at the valve. Push the valve stem inward enough to release it from the rim hole, then carefully pull the valve and tube out of the tire.
Work around the circumference without yanking the tube. If you plan to inspect the old tube for the puncture location, keep its orientation relative to the tire. Matching the puncture location on the tube to the corresponding point inside the tire can help you find the object that caused the flat.
What Should You Inspect Before Installing a New Tube?
Do not immediately put a fresh tube into the old tire. First find out why the original tube failed.
- Inside the tire: carefully feel for glass, wire, thorns, metal fragments, or other sharp debris.
- Tire tread and sidewalls: check for deep cuts, exposed casing, cracking, bulges, or damage around the bead.
- Rim: inspect for sharp edges, burrs, dents, corrosion, or debris that could cut the new tube.
- Valve hole: make sure its edges are not damaged and that the new valve can sit straight.
- Old tube: a single small puncture suggests road debris; paired cuts or pinch marks can indicate the tube was trapped or run at inadequate pressure.
Remove the cause of the puncture before continuing. Installing a new tube while a sharp object remains inside the tire can puncture the replacement immediately.
How Do You Install the New Inner Tube?
Use a replacement tube that matches the M365’s 8.5-inch wheel and the original valve arrangement. Before insertion, add only enough air for the tube to become slightly rounded. This helps prevent folds and twists while you position it.
Xiaomi’s own tire-installation procedure uses this light pre-inflation approach rather than instructing the user to remove the valve core.
Valve Alignment
Insert the valve stem through the rim hole and make sure it sits straight rather than leaning hard to one side. Then feed the lightly inflated tube evenly into the tire.
- Keep the valve centered in the rim hole.
- Work the tube into the tire a little at a time.
- Make sure the tube is not twisted.
- Do not stretch the tube tightly around the wheel.
If the valve sits at a strong angle, stop and reposition the tube before mounting the second tire bead.
Core Removal
Do not routinely remove the valve core for this installation. The valve core should normally remain installed so you can lightly pre-inflate the tube and perform the staged pressure checks specified in Xiaomi’s tire procedure.
| Step | Action |
|---|---|
| 1 | Confirm the replacement tube and valve match the original |
| 2 | Add a small amount of air until the tube is just rounded |
| 3 | Insert the valve straight through the rim hole |
| 4 | Position the tube evenly inside the tire |
| 5 | Check for twists or trapped sections before seating the bead |
Only remove a valve core when the valve itself specifically needs service and you have the correct valve-core tool and replacement parts. It is not a required step in a normal M365 tube change.
Tube Positioning
Run your fingers around both sides of the tire and make sure the tube remains completely inside the casing. No section of tube should sit between the tire bead and the rim.
Keep a small amount of air in the tube while positioning it. A totally flat tube can fold over itself and is easier to catch with a tire lever.
Warning: A tube trapped beneath the tire bead can be cut when the tire is inflated. Before adding full pressure, inspect both sides of the wheel and confirm that no tube is visible between the bead and rim.
How Do You Mount the New Front Tire?
Confirm that the tire is compatible with the M365 and look for a directional arrow on its sidewall. If the tire is directional, its arrow must point in the wheel’s forward rotation direction when the wheel is installed on the scooter.
- Seat one tire bead fully in the rim.
- Insert the lightly inflated tube and align the valve.
- Begin fitting the second bead on the side opposite the final tight section.
- Keep already-installed sections pushed toward the deeper center channel of the rim to create more slack.
- Use your hands wherever possible.
- If a lever is required for the final section, take small bites and make sure the tube is not underneath the lever.
Cable ties can be used as an optional DIY aid to hold sections of a stubborn tire in place, but they are not necessary for the manufacturer-described method. Do not force the bead with enough leverage to damage the rim, tire bead, or tube.
Once the bead is installed, inspect the tire on both sides before applying substantial pressure.
How Do You Inflate the Front Tire?
Xiaomi’s installation procedure uses two inflation stages. This is important because it gives you a chance to catch a crooked bead before the tire reaches full pressure.
- Connect a pump with a reliable pressure gauge.
- Inflate the tire to approximately 15–20 PSI.
- Inspect the molded reference or safety line around both sides of the tire.
- Make sure the distance between that line and the rim edge remains even around the full circumference.
- If one section sits noticeably higher or lower, release pressure and reseat the bead.
- Once the tire is seated uniformly, continue to 45–50 PSI.
- Disconnect the pump and reinstall the valve cap.
Xiaomi’s support guidance recommends keeping the pneumatic tires at 45–50 PSI. The company’s current 8.5-inch replacement tire lists 50 PSI as its maximum pressure, so do not exceed the limit marked on your installed tire.
For the M365-style pneumatic setup, the important inflation sequence is not “pump it hard and check later.” Seat the tire at 15–20 PSI first, verify both bead-reference lines, and only then continue to 45–50 PSI.
How Do You Reassemble the Front Wheel?
Before putting the wheel back in the fork, confirm the tire is seated correctly, the valve is straight, and the motor cable has not been damaged during the tire work.
Lift the wheel into the fork while keeping the motor cable relaxed. Return every locking washer, spacer, or locating piece to the same side and orientation in which it was originally installed. Your photos from disassembly are useful here.
| Step | Tool | Purpose |
|---|---|---|
| Position wheel | None | Seat the axle fully in the fork |
| Restore washers | None | Return locking hardware to its original orientation |
| Secure axle nuts | 18 mm wrench | Hold the motor wheel securely in the fork |
| Reinstall covers | 2.5 mm Allen or T10 Torx as applicable | Restore fork protection and trim |
Center the wheel before fully securing the axle hardware. Tighten both axle nuts securely and evenly, but do not invent or use an unverified torque specification. If you have an official service specification for your exact M365 revision, follow that value. If the axle threads or nuts are damaged, replace or professionally service the affected hardware rather than relying on excessive tightening.
Route the motor cable exactly as it was before disassembly. It must not be pinched beneath the axle hardware, trapped under a cover, pulled tight, or positioned where the tire can rub it.
What If the Tire Does Not Seat or Hold Air?
The Tire Bead Will Not Seat Evenly
Release most of the pressure and push the problem section of the bead back toward the center of the rim. Check that the tube is not trapped beneath it. A very small amount of mild soapy water can help the bead move, but wipe away excess before finishing.
Reinflate only to 15–20 PSI and inspect the reference line again. Do not continue to full pressure while part of the bead is visibly uneven.
The New Tube Loses Air Immediately
If the tire goes flat immediately after installation, do not keep pumping it up. Remove the tube and inspect for:
- a lever pinch or cut;
- tube trapped beneath the tire bead;
- an embedded sharp object that was left inside the tire;
- a damaged valve stem;
- a sharp rim edge or burr;
- incorrect tube positioning.
Find and correct the cause before installing another tube.
The Wheel Binds or Sits Crooked
If the wheel does not sit squarely in the fork, remove the load from the axle and recheck the washer and axle-flat positions. Do not ride with a visibly crooked wheel, loose axle hardware, unusual motor-cable tension, or side-to-side movement.
The Motor Does Not Work After the Repair
Turn the scooter off and inspect the visible motor cable for pinching, stretching, cuts, or a disturbed connection. Do not repeatedly apply throttle to a wheel with suspected cable damage. Motor wiring and controller faults should be diagnosed professionally if the cause is not obvious and safely accessible.
What Should You Check Before Riding?
Complete a final inspection before putting your full weight on the scooter.
- Tire pressure: verify 45–50 PSI without exceeding the pressure limit marked on your tire.
- Bead seating: check both reference lines around the entire tire.
- Valve: confirm the stem remains straight and the cap is installed.
- Axle: confirm both sides are fully seated and securely fastened.
- Motor cable: make sure it is routed safely and is not pinched or stretched.
- Tire condition: inspect for bulges, cuts, or exposed tube.
- Wheel movement: lift the front end and rotate the wheel by hand to check for wobble, unexpected rubbing, or looseness.
- Braking: perform a controlled low-speed brake test in a safe area before returning to normal riding.
Xiaomi recommends checking tire pressure roughly every 20–30 days. Keeping the pneumatic tires properly inflated helps reduce excessive tube-and-tire movement associated with running at low pressure.
Note: Owners of older M365 scooters can also review Xiaomi’s M365 safety notice and repair programme information, particularly if the scooter was produced during the affected period described by Xiaomi.
Frequently Asked Questions
How do you remove the front wheel of a Xiaomi M365?
Turn the scooter off, expose and remove the fork covers, then loosen the front motor axle nuts with an 18 mm wrench. Support the wheel while lowering it from the fork and keep the hub-motor cable relaxed. Note the original position of every washer and locating piece before removal.
Can you change tires on electric scooters yourself?
Yes, many pneumatic scooter tires and tubes can be changed with ordinary hand tools, but difficulty varies by model. On the M365, the front wheel contains the hub motor, so cable and axle handling are safety-critical. If the motor cable, axle threads, rim, bearings, or mounting hardware are damaged, professional service is the safer choice.
How do you get a Xiaomi M365 front wheel off?
Remove the trim and fork covers, use the correct 2.5 mm hex or T10 Torx tool for the cover fasteners, then remove the two 18 mm axle nuts. Keep the scooter stable and lower the wheel carefully without pulling its motor cable.
How do you put a front tire on an e-bike?
The basic pneumatic-tire principles are similar: confirm tire direction, lightly inflate and position the tube, seat both beads without pinching the tube, and inflate to the pressure specified for that particular tire. However, e-bike axle, brake, washer, torque, and motor-cable requirements can differ substantially from the Xiaomi M365, so follow the e-bike manufacturer’s instructions rather than copying M365 hardware steps.
What PSI should a Xiaomi M365 tire use?
Xiaomi’s support guidance specifies 45–50 PSI for the Mi Electric Scooter’s pneumatic tires. During a tire installation, first inflate to about 15–20 PSI to confirm that the bead is seated evenly, then continue to 45–50 PSI. Never exceed the maximum pressure marked on the installed tire.
Do you need to remove the valve core when changing an M365 inner tube?
No. Normal installation does not require valve-core removal. Xiaomi’s tire procedure calls for adding a small amount of air so the tube becomes rounded before installation. Keep the valve core installed unless the valve itself specifically requires repair.
Should you replace the outer tire when replacing the tube?
Not always. A sound outer tire can normally be reused after the puncture cause is removed. Replace the tire if it has a damaged bead, large cut, exposed casing, serious sidewall cracking, bulge, deformation, or excessive tread wear.
Conclusion
A successful Xiaomi M365 front tire change depends on more than simply getting the new tire onto the rim. Protect the front hub-motor cable, keep the inner tube free of twists and pinches, verify that the directional tire is facing the correct way, and use Xiaomi’s staged inflation procedure. Check the bead at 15–20 PSI before finishing at 45–50 PSI.
After reinstalling the wheel, confirm the axle hardware is secure, the motor cable is routed correctly, the tire runs straight, and the scooter passes a controlled low-speed brake and handling test. If you find damaged axle threads, motor wiring, bearings, rim damage, or hardware you cannot reinstall confidently, stop riding and have the scooter serviced professionally.
Sources
- Xiaomi Mi Electric Scooter User Guide — manufacturer documentation for operation, tire care, removal, installation, and safety.
- Xiaomi Mi Electric Scooter Specifications — confirms the M365 model and 8.5-inch tire specification.
- Xiaomi Mi Electric Scooter FAQ — supports the 45–50 PSI tire-pressure guidance.
- Xiaomi Electric Scooter Pneumatic Tire 8.5-inch Specifications — confirms 8 1/2 × 2-inch dimensions and 50 PSI maximum pressure for Xiaomi’s 8.5-inch pneumatic replacement tire.
- Xiaomi M365 Safety Notice — manufacturer safety, maintenance, inspection, and professional-service guidance for the M365.

