
Last Updated on October 4, 2026 by Daniel Globe
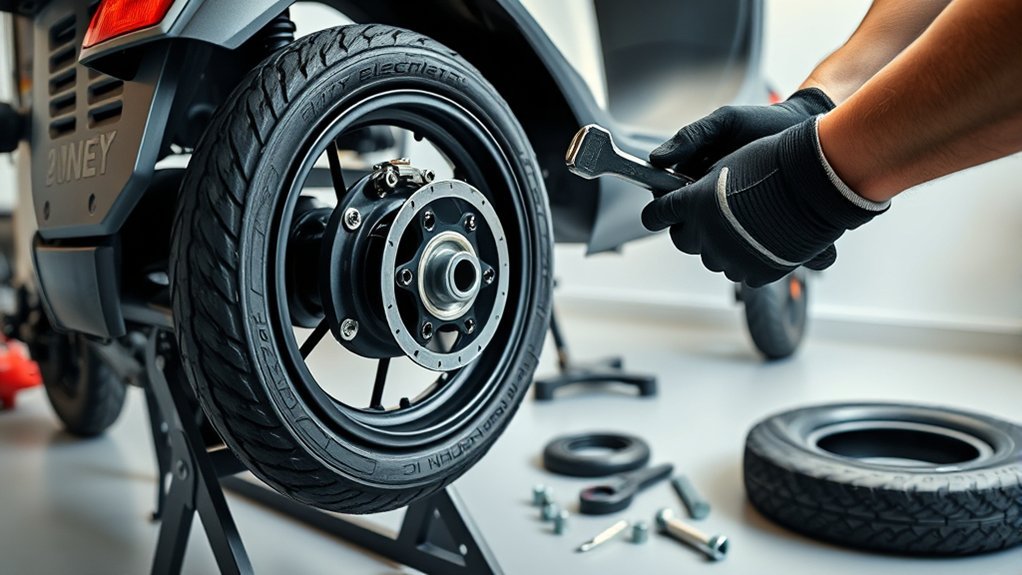
Changing the rear tire on an electric scooter can be a manageable DIY repair, but the exact process depends on the scooter, wheel, brake system, and tire construction. Some rear wheels contain a hub motor and electrical cable, while others use different axle nuts, spacers, split rims, tubeless tires, or solid tires. Identify your setup before loosening anything, and use your scooter manufacturer’s service instructions whenever they are available.
Quick Answer
To change an electric scooter rear tire, identify your exact model and tire type, power off and unplug the scooter, disconnect any hub-motor cable as directed, remove the rear wheel, fully deflate and replace the tire or tube, reinstall the hardware in its original order, tighten it to specification, align the brake, inflate correctly, and test at low speed.
Key Takeaways
- Rear-wheel hardware is not standardized. Axle nuts, bolts, and tool sizes vary from model to model.
- Check whether the rear wheel contains a hub motor and disconnect its cable only as your manufacturer instructs.
- Identify whether the tire is tubed, tubeless, solid/hollow, or mounted on a split rim before starting.
- Keep every spacer, washer, slider, clip, and axle part in its original order and use the manufacturer’s torque specification during reassembly.
- After installation, verify tire seating, wheel tracking, brake operation, motor-cable clearance, and correct tire pressure before normal riding.
At a Glance
| Time Required | Varies by model and tire design; hub-motor wiring, solid tires, and difficult tubeless beads can add substantial time. |
| Difficulty | Intermediate for many owner-serviceable pneumatic tires; harder when internal wiring, split rims, hydraulic brakes, or solid tires are involved. |
| Tools Needed | Model-specific axle and cover tools, tire levers for pneumatic tires, pump with gauge, and a torque wrench when the manufacturer publishes tightening specifications. |
| Cost | Varies widely depending on whether you need only an inner tube, a tire, a valve, or an entire hub-motor wheel assembly. |
Warning: Turn the scooter off, disconnect the charger, and follow your model’s service instructions before opening covers or disconnecting electrical parts. Never pull a hub-motor wheel away while its cable is still attached. If you find damaged wiring, stripped axle threads, a bent rim or rotor, leaking hydraulic fluid, or a procedure the manufacturer reserves for service technicians, stop and use qualified service.
Disclosure: As an Amazon Associate I earn from qualifying purchases. Some links on this page are affiliate links, at no extra cost to you.
Identify Your Scooter, Wheel, and Tire Type First
Before removing the rear wheel, confirm the exact scooter model and replacement part. Electric scooter wheel assemblies vary too much for one tool list or disassembly sequence to fit every model. A rear wheel may contain the drive motor, brake rotor, drum brake, electronic brake components, or a combination of these.
Next, identify the tire construction. A tubed pneumatic tire contains a removable inner tube. A tubeless tire seals against the rim and uses no separate tube. A solid or hollow tire does not use normal inflation. A split rim separates into sections and must be opened and reassembled according to the manufacturer’s procedure.
Confirm the replacement tire’s size, construction, valve arrangement, and compatibility with your exact wheel. Do not assume that a tire with a similar outside diameter will fit correctly.
Note: Xiaomi’s current scooter range illustrates why tire type must be checked first: some models use inflatable tubeless tires, while others use non-inflatable hollow tires. The repair procedure is not interchangeable between these designs.
Gather the Right Tools and Secure the Scooter
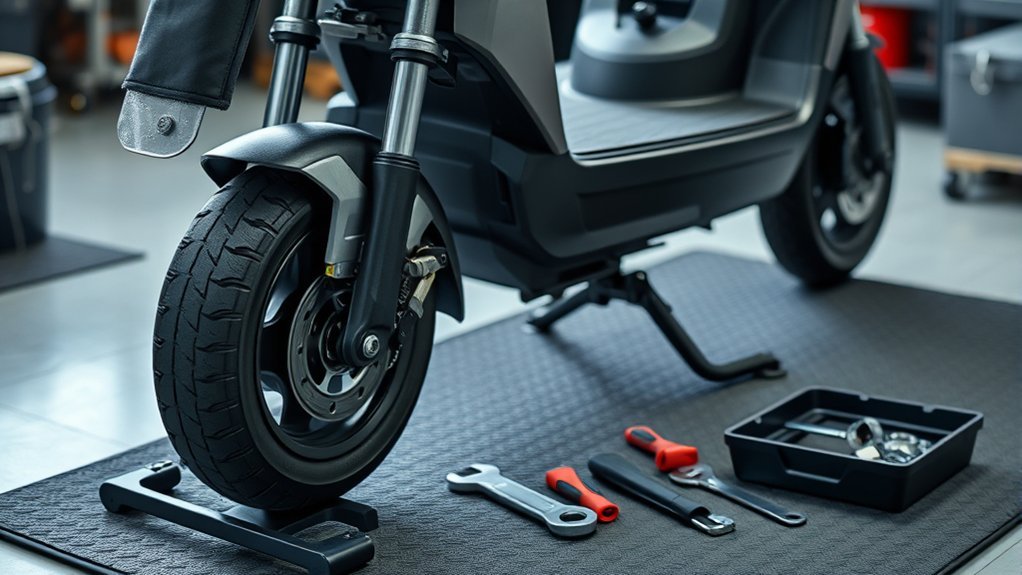
Gather the tools specified for your scooter before you start. You may need 3 mm, 4 mm, or 5 mm hex keys for covers, brackets, or brake components, but do not assume those sizes fit the rear axle. Some scooters use large axle nuts or other hardware. A plastic fairing tool may help when fasteners are hidden behind body panels.
For a pneumatic tire, also prepare suitable tire levers, a replacement tire or tube, and an air pump with an accurate pressure gauge. If your manufacturer publishes axle or brake-caliper torque specifications, use an appropriate torque wrench for reassembly.
Power off the scooter completely and disconnect it from its charger. Work on a flat, stable surface with the scooter supported so it cannot roll, tip, or suddenly shift. Protect the brake rotor, wiring, and motor cable from impact while the wheel is unsupported.
Manufacturer guidance reinforces the need for model-specific tools. Apollo’s electric scooter tire repair guide advises using the appropriate screwdrivers, wrenches, or hex tools specified for the scooter, while other manufacturers document different axle hardware.
Pro Tip: Before removing any spacer, washer, axle plate, slider, cable guide, or retaining hardware, photograph both sides of the wheel. Lay each part on a clean surface in removal order. These photos can prevent incorrect reassembly later.
Remove the Rear Wheel and Brake Caliper Bolts
Expose the rear axle hardware according to the scooter’s service instructions. If a plastic side fairing or axle cover blocks access, remove only the fasteners required for that model. Do not force body panels or pry against electrical wiring.
Before loosening the axle, check whether the rear wheel contains a hub motor. Trace the motor cable from the axle toward its connector. If the manufacturer’s procedure requires disconnecting that cable, separate the correct connector as instructed and support the cable so it cannot be stretched or twisted.
If the brake caliper prevents wheel removal, detach it using the correct tool for your brake system. Keep the rotor clean and avoid touching its braking surfaces with greasy hands.
Wheel Bolt Removal
Use the axle tool specified for your scooter. Depending on the design, the wheel may be held by axle nuts, socket-head bolts, coupling bolts, keyed washers, torque washers, spacers, retaining clips, or other model-specific hardware.
Loosen the axle fasteners in the sequence recommended by the manufacturer. Keep every part in its original position and orientation. Do not hammer the axle or force the wheel out if it remains trapped; first check for hidden retainers, brake components, fender brackets, or a connected motor cable.
For comparison, VMAX’s documented motor-wheel procedure calls for a 21 mm open-end wrench, which shows how much axle hardware can differ between models.
Brake Caliper Detachment
If your scooter’s disc brake caliper must be moved before the wheel can come out, loosen its mounting bolts with the specified tool while supporting the caliper. Do not allow a hydraulic caliper to hang by its hose, and do not pull, kink, or sharply bend a mechanical brake cable.
Place the caliper on a clean protected surface or support it securely. Keep oil, grease, tire lubricant, and dirty tools away from the brake pads and rotor. If the brake uses a different removal method, follow the manufacturer’s instructions rather than forcing the caliper off its mount.
Take Off the Old Rear Wheel
Once the axle hardware, brake components, and any required motor connector are free, support the rear wheel with one hand while guiding it out of the frame or swingarm. Do not use the motor cable as a handle.
If the scooter uses axle clips, keyed washers, metal sliders, torque washers, spacers, or other retainers, remove only the parts required by your model and keep them in order. Not every scooter uses the same hardware.
Inspect the axle area before continuing. Look for damaged threads, distorted washers, cracked parts, bent brackets, cable abrasion, unusual bearing play, or debris. A damaged axle or motor cable should be addressed before the scooter is returned to service.
The safest rear-tire replacement is model-specific: preserve the hardware order, protect the motor cable, and tighten every critical fastener to the scooter manufacturer’s specification.
Remove the Old Tire or Inner Tube
If you are replacing only the tire or inner tube rather than the complete wheel, the next step is to separate the tire from the rim. The method depends on whether the wheel is tubed, tubeless, solid, or split-rim.
Fully Deflate a Pneumatic Tire
For a pneumatic tire, remove the valve cap and release all air before using tire levers or separating a split rim. Do not begin levering a pressurized tire from the rim.
With the tire fully deflated, push the bead away from the rim edge and toward the center channel where the wheel design allows. Use proper tire levers to lift one bead over the rim. Work gradually around the circumference instead of forcing one point excessively.
Remove and Inspect the Inner Tube
If the tire has an inner tube, push the valve stem carefully through the rim and work the tube out without tearing it. If the tube failed, identify the puncture location before installing the replacement.
Inspect the corresponding area inside the tire for glass, wire, thorns, sharp rim edges, damaged rim tape, or another object that could immediately puncture the new tube. Check the tire bead and sidewall for cuts, cracking, deformation, or damage.
Handle Tubeless, Solid, and Split-Rim Tires Correctly
For a tubeless tire, inspect the bead, valve, and rim sealing surface carefully. Apollo’s current tire-reseating guidance recommends checking the tire bead, tread, sidewall, and rim for damage before reseating a tubeless tire.
If the wheel uses a split rim, follow its specific disassembly sequence and seal arrangement. Do not separate rim sections until the tire is fully deflated. For solid or hollow tires that require special equipment or substantial force, use the manufacturer’s replacement procedure or professional service rather than improvising with unsafe heating or excessive leverage.
Install the Replacement Tire or Tube
Clean the rim and remove any debris before fitting the replacement. Confirm that the new tire or tube is the correct size and construction for the wheel.
If the tire has a directional arrow, orient it for forward wheel rotation before fully seating it. For a tubed tire, place the tube evenly inside the tire without twists or folds. A small amount of air can help the tube take its natural shape, but keep it soft enough that the bead can be installed without trapping the tube.
Work the tire bead onto the rim gradually. Keep the opposite side of the bead in the rim’s center channel where the design permits, and take extra care near the valve. Do not pinch the inner tube between a tire lever and the rim.
After both beads are in position, inspect the full circumference on both sides. The bead should sit evenly without sections trapped too high or too low.
Seat and Inflate a Pneumatic Tire
Inflate the tire gradually while watching the bead. For tubeless setups, a high-volume pump or compressor may be needed to establish the seal, but do not exceed the pressure limit specified by the tire or scooter manufacturer.
Once the tire holds air, verify that the bead indicator line, if present, is consistently positioned around the rim. Check the valve area for leakage and spin the wheel to look for an unevenly seated tire.
Use the scooter manufacturer’s recommended operating pressure rather than copying the PSI from another scooter. Published values vary: for example, Segway lists 42–48 psi for the Ninebot F2, while Xiaomi specifies 45–50 psi for the Electric Scooter 4 Pro (2nd Gen). Follow the specification for your own model.
Install the New Rear Wheel
Whether you are installing a complete replacement wheel or reinstalling the original wheel with a new tire, return every axle component to its original location and orientation. Some scooters use metal sliders, keyed washers, torque washers, spacers, or retainers; install only the hardware designed for your model.
| Step | Check |
|---|---|
| Hardware order | Spacers, washers, sliders, and retainers match their original positions |
| Axle seating | Wheel sits fully and evenly in both mounting points |
| Motor cable | Cable is not twisted, pinched, stretched, or touching the tire or rotor |
| Axle tightening | Fasteners are tightened to the manufacturer’s specified torque |
Do not rely on a subjective “tight enough” feel for critical axle hardware. Use the specified tool and torque value when your manufacturer provides one. If the service documentation specifies thread-locking compound, washer orientation, or a tightening sequence, follow those instructions exactly.
Before reinstalling covers, confirm that the wheel has no abnormal side-to-side movement and that the motor cable follows its original routing.
Reattach the Brake Caliper and Fairing
If you removed a disc brake caliper, return it to its mounting points without contaminating the pads or rotor. Start its bolts by hand to avoid cross-threading, then align and tighten them using the brake or scooter manufacturer’s procedure and torque specification.
Do not assume every caliper uses the same bolt size. If the caliper shifts while tightening, loosen it slightly, recenter it, and repeat the adjustment procedure.
Reinstall the plastic side fairing or axle cover only after you have confirmed the wheel, brake, motor cable, and axle hardware are correctly positioned. Seat every clip gently and tighten small plastic-panel screws only enough to secure the part; excessive force can strip threads or crack the fairing.
Check and Adjust the Rear Brake Alignment
Spin the rear wheel by hand and observe the brake rotor, if fitted. The rotor should run through the caliper without continuous unwanted rubbing. The right pad clearance depends on your brake design.
Some systems require manual pad adjustment, while others use self-adjusting hydraulic or mechanical arrangements. Segway, for example, documents a self-adjusting caliper procedure on certain GT-series models. Use the adjustment method for your scooter and brake system.
Inspect Brake Disc Contact
View the rotor from above and from behind the caliper. Look for persistent pad contact, a visibly bent rotor, unusual scoring, contamination, or a rotor that moves side to side as the wheel turns.
If the rotor is badly bent, the caliper leaks hydraulic fluid, or the brake pads or rotor are damaged beyond the manufacturer’s service limit, replace or service the affected parts before riding.
Align Caliper Position
If the caliper needs centering, loosen its mounting bolts only enough to allow controlled movement. Position it according to the brake manufacturer’s procedure, then retighten the mounting bolts to specification.
Apollo’s brake service guidance likewise notes that the caliper may need to be loosened and tightened during centering after reinstallation.
After tightening, spin the wheel again. A light intermittent sound may indicate a slightly imperfect rotor, but strong continuous drag, binding, or a wheel that stops quickly needs correction before riding.
Test Brake Response
Operate the brake lever several times while the scooter remains stationary. The lever should engage consistently and the braking system should stop the rear wheel as designed. If a hydraulic lever feels unusually soft or pulls toward the handlebar, check for fluid leakage or air in the system and follow the manufacturer’s service procedure.
| Check | Target | Action if Incorrect |
|---|---|---|
| Lever feel | Consistent engagement | Inspect adjustment, cable, hydraulic system, and pads |
| Rotor contact | No strong continuous drag | Recenter caliper or inspect rotor |
| Wheel spin | Smooth and correctly tracked | Check axle seating, tire bead, and brake alignment |
| Ride test | Predictable braking and handling | Stop and recheck the installation |
Troubleshoot Common Problems After a Rear Tire Change
The Wheel Wobbles
Stop riding and inspect the tire bead, axle seating, washers, spacers, and wheel bearings. An uneven pneumatic tire may simply have a bead that is not seated uniformly. Deflate and reseat it according to the tire manufacturer’s procedure. If the rim itself is bent or the axle has abnormal play, use qualified service.
The Brake Rubs After Reassembly
Check that the wheel is seated squarely in the frame before adjusting the brake. If the axle is crooked, caliper adjustment alone will not solve the problem. Once wheel alignment is confirmed, center the caliper according to the brake manufacturer’s procedure and inspect the rotor for bending.
The Tire Loses Air
For a tube tire, inspect for a pinched tube, damaged valve, missed puncture source, or incorrect tube position. For a tubeless tire, check the bead and valve area for leakage and verify that the bead is fully seated. Do not continue riding on an underinflated pneumatic tire.
The Motor Does Not Work After Wheel Installation
If the rear wheel contains a hub motor and the motor no longer operates normally after reassembly, turn the scooter off and inspect only the connectors and cable routing that the manufacturer permits the owner to access. Check for a loose connector, pinched cable, or visible cable damage. Do not probe or modify unknown motor-controller wiring. If the fault remains, use the manufacturer’s service support.
Finish With a Safety Check and Test Ride
Before riding, inspect the complete rear-wheel assembly. Confirm that the axle hardware is secure, all required retainers are installed, the wheel is centered, the motor cable is protected, the brake is functional, and the tire bead is evenly seated.
- Inflate a pneumatic tire to the pressure specified for your scooter and tire.
- Spin the wheel by hand and check for wobble, rubbing, abnormal bearing play, or cable contact.
- Squeeze the rear brake several times and confirm consistent engagement.
- Check that the tire rotates in the correct direction if it has a directional marking.
- Confirm that all axle covers, fairings, and fasteners are securely reinstalled.
Then perform a short test ride at low speed in a traffic-free area. Make several gentle stops before increasing speed. Pay attention to wheel tracking, vibration, unusual sounds, motor operation, and braking response.
If the scooter pulls, wobbles, produces a new motor error, loses tire pressure, or has weak or dragging brakes, stop immediately and inspect the installation again.
When to Use Professional Service
Not every rear tire should be changed at home. Professional or manufacturer-authorized service is the safer choice when you find damaged motor wiring, stripped or cross-threaded axle hardware, a bent axle, cracked or badly deformed rim, persistent tubeless sealing problems, leaking hydraulic brakes, electrical connectors you cannot identify, or a solid tire that requires equipment you do not have.
You should also stop if the manufacturer’s documentation specifically says the wheel, battery compartment, motor connector, or related component is not intended for user service.
Frequently Asked Questions
How do you change an e-scooter back tire?
Identify the scooter and tire type, power off and unplug the scooter, remove any required covers, disconnect a rear hub-motor cable if the manufacturer’s procedure requires it, remove the wheel, fully deflate a pneumatic tire, replace the tire or tube, reinstall the wheel in the original hardware order, tighten it to specification, adjust the brake, inflate correctly, and complete a low-speed test.
Can you change tires on electric scooters?
Yes, many electric scooter tires are replaceable. However, the procedure depends on the exact model and whether the tire is tubed, tubeless, solid, hollow, or mounted on a split rim. Some wheel or motor procedures may be intended for a service center rather than the owner.
Can I replace a scooter tire myself?
You can replace many owner-serviceable scooter tires yourself if you have the correct tools, compatible replacement part, and model-specific instructions. Use professional service if the repair involves unfamiliar internal wiring, damaged axle threads, a bent rim, leaking hydraulic brakes, or a procedure the manufacturer does not recommend for owners.
How do you change your rear tire without replacing the whole wheel?
Remove the rear wheel according to the scooter’s instructions, fully deflate the pneumatic tire, remove one bead from the rim, remove the inner tube if fitted, inspect the tire and rim, fit the replacement tire or tube, seat the bead evenly, inflate to the correct pressure, and reinstall the same wheel.
Do I need to disconnect the motor cable to remove the rear wheel?
If your scooter uses a rear hub motor, you may need to disconnect its motor cable before removing the wheel. The connector location and procedure vary by model, so follow the manufacturer instructions and never pull the wheel away while an attached cable is under tension.
What PSI should an electric scooter rear tire use?
There is no universal electric-scooter PSI. Use the pressure specified for your scooter and compatible tire. Different manufacturers and models publish different ranges, so do not copy the pressure used by another scooter.
Why does my brake rub after changing the rear tire?
First confirm that the wheel and axle are seated squarely. Then inspect the rotor and recenter the brake caliper according to the manufacturer’s procedure. Persistent rubbing can also come from a bent rotor, incorrect spacer placement, or damaged brake components.
Conclusion
Changing an electric scooter’s rear tire is safest when you treat the scooter’s own service information as the primary reference. Identify the tire and wheel design first, protect any hub-motor cable, preserve the axle hardware order, fully deflate pneumatic tires before removal, and use the correct tightening specifications during reassembly.
Before returning to normal riding, check tire seating and pressure, spin the wheel, verify brake operation, inspect cable clearance, and perform a low-speed test. If the wheel, axle, brake, rim, or electrical system shows damage you cannot confidently correct, stop and use qualified service.
Sources
- Apollo Scooters — Electric Scooter Tire Repairs — supports model-specific tool selection, hub-motor cable precautions, wheel removal, deflation, and tire/tube replacement steps.
- Apollo Scooters — How to Reseat Tires — supports tubeless tire inspection, bead seating, rim inspection, and pressure precautions.
- Apollo Scooters — Brake Pad and Caliper Service — supports recentering the brake caliper after reinstallation.
- VMAX — Change Motor / Tire Service Guide — demonstrates model-specific rear axle tools, motor-plug disconnection, and pneumatic tire replacement.
- Segway Ninebot KickScooter F2 Product Manual — supports model-specific tire pressure and tire-maintenance requirements.
- Xiaomi Electric Scooter 4 Pro (2nd Gen) Tire Guidance — demonstrates model-specific tubeless tire construction and inflation pressure.
