
Last Updated on July 23, 2026 by Caleb Warren
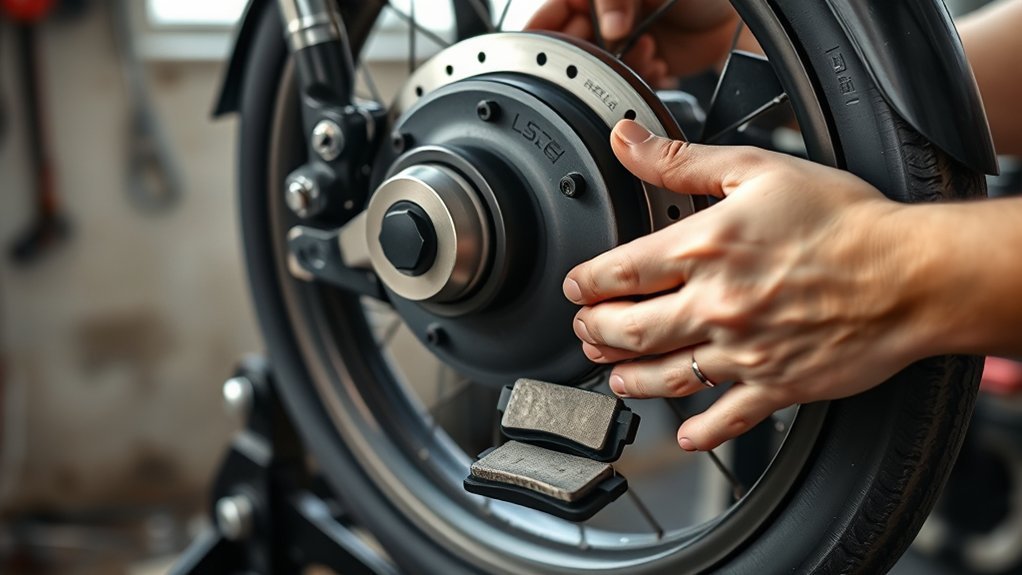
Replacing worn electric scooter brake pads can restore braking power, reduce scraping sounds, and protect the rotor. The job is manageable on many scooters with mechanical or hydraulic disc brakes, but the exact fasteners, pad shape, adjustment method, and torque values depend on the scooter and caliper model. Check the correct service manual before removing any parts.
Quick Answer
Power off and unplug the scooter, confirm it has a serviceable disc brake, and obtain pads made for its exact caliper. Remove the retaining hardware and old pads, reset the adjusters or pistons, clean the rotor and caliper with isopropyl alcohol, install the new pads, align the caliper, test the brake, and bed in the pads.
Key Takeaways
- This guide applies to replaceable disc-brake pads, not drum brakes or electronic braking alone.
- Match the replacement pads to the exact caliper model, not only the scooter brand.
- Keep oil, grease, general-purpose degreaser, and dirty fingers away from the pad faces and rotor.
- Mechanical pad adjusters or hydraulic pistons must be reset before thicker new pads are installed.
- Do not ride until the lever feels firm, the retaining hardware is secure, the wheel turns correctly, and the scooter passes a low-speed brake test.
At a Glance
| Time Required | About 30 to 60 minutes for a straightforward disc-brake pad change |
| Difficulty | Moderate; model identification and careful brake adjustment are required |
| Tools Needed | Correct hex, Torx, socket, or screwdriver bits; torque wrench where specified; needle-nose pliers if required; piston or pad spreader; isopropyl alcohol; lint-free cloth; gloves; safety glasses |
| Cost | Varies by caliper and pad compound; the main required purchase is the model-compatible pad set |
Warning: Brakes are a safety-critical system. Do not ride if you find a leaking hydraulic hose or caliper, a cracked mount, damaged threads, a badly scored or cracked rotor, missing retaining hardware, or a lever that pulls to the handlebar without firm resistance. Use a qualified repair shop when the correct procedure or parts are uncertain.
Disclosure: As an Amazon Associate I earn from qualifying purchases. Some links on this page are affiliate links, at no extra cost to you.
What You Need to Replace Scooter Brake Pads
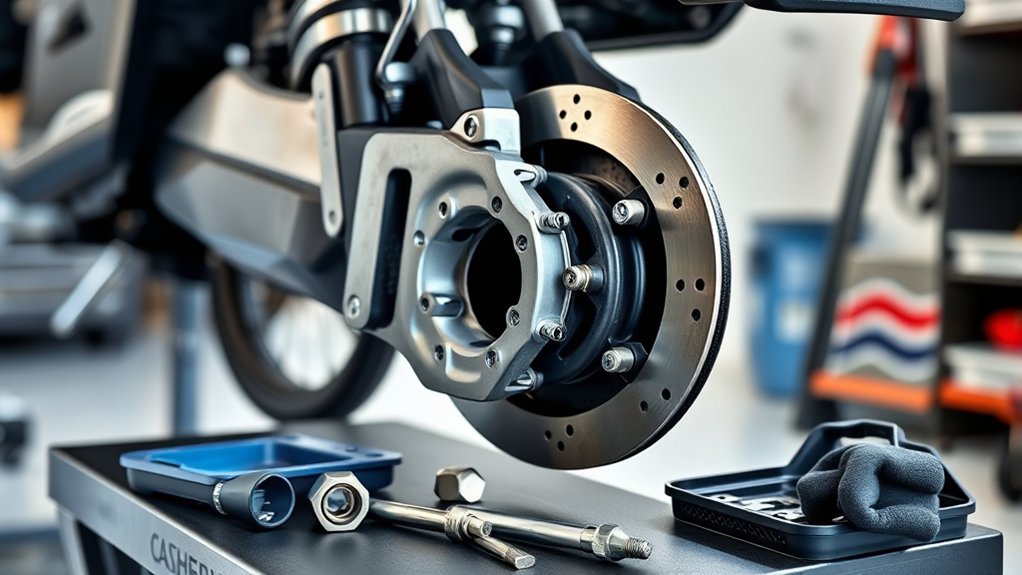
Start by confirming that your scooter has a disc brake with removable pads. Some electric scooters use an enclosed drum brake, electronic regenerative braking, or a combination of systems. A drum brake uses internal shoes rather than the exposed pads covered in this guide.
Identify the Scooter and Caliper
Find the scooter model number and inspect the markings on the brake caliper. Search the manufacturer’s manual, parts diagram, or official support page for the replacement pad number. Two scooters from the same brand can use different calipers, and pads that look similar may have different widths, backing plates, springs, or compounds.
Segway, for example, publishes separate repair resources for specific scooter families rather than one universal brake procedure. You can see this model-based approach on the Segway F-Series support page.
Gather the Correct Tools and Supplies
- Replacement pads listed as compatible with the exact caliper
- The correct hex, Torx, socket, or screwdriver bits
- A torque wrench and suitable bit when the manual gives torque values
- Needle-nose pliers for a cotter pin or tight retaining clip, when applicable
- A plastic tire lever, non-marring piston press, or proper pad spreader
- High-purity isopropyl alcohol or the brake manufacturer’s approved cleaner
- Clean lint-free cloths and a small soft brush
- Nitrile gloves and safety glasses
- A brake pad spacer for a hydraulic caliper, when specified
- A stable stand or blocks that safely support the scooter
Note: TEKTRO recommends isopropyl alcohol for cleaning its disc brakes because it cuts through grime, dries quickly, and leaves no residue. Do not assume that a household cleaner or general-purpose degreaser is safe for a braking surface.
When to Replace Electric Scooter Brake Pads
Replace pads according to their condition, not a fixed mileage alone. Hills, rider and cargo weight, speed, rain, mud, pad compound, rotor condition, and brake adjustment can change pad life significantly.
Remove or inspect the pads when you notice any of these signs:
- The friction material has reached the brake manufacturer’s minimum thickness.
- The pad material is wearing unevenly or has separated from its backing plate.
- Braking power has dropped even after correct adjustment.
- The brake makes a harsh grinding sound.
- The pads or rotor have been contaminated by oil, grease, or leaking brake fluid.
- The lever travel has increased because a mechanical brake has used up its adjustment range.
- The pad surface is glazed, cracked, chipped, or heat damaged.
Wear limits are model-specific. TEKTRO, for example, says to replace applicable pads when their remaining pad material reaches 0.5 mm or less. Use that figure only for a TEKTRO system covered by its guidance, and follow the stated limit for your own caliper.
Pro Tip: Photograph the caliper, retaining hardware, pad spring, washers, and cable routing before disassembly. The pictures provide a reliable reference when several small parts have a specific direction or order.
Prepare the Scooter Safely
- Move the scooter to a clean, dry, well-lit work area.
- Power the scooter off completely.
- Disconnect the charger and close the charging-port cover.
- Wait for the rotor and caliper to cool if the scooter was recently ridden.
- Support the scooter so it cannot roll, fall, or switch on accidentally.
- Wear clean gloves before handling the rotor or replacement pads.
- Read the model’s brake-service instructions and note every torque value.
Xiaomi’s current mechanical-brake guidance also tells owners to make sure the scooter is powered off and not charging before adjustment. See the Xiaomi Electric Scooter 5 Max FAQ for an example of this safety step.
Remove the Caliper and Old Brake Pads
You may not need to remove the whole caliper. On some designs, the pads slide out after the wheel and retaining hardware are removed. Other scooters require the caliper to be unbolted for access. Follow the model-specific order instead of forcing the pads through an opening that is too small.
1. Create Space for the New Pads
New pads are thicker than worn pads, so the caliper must be opened before installation.
- Mechanical disc brake: Back out the inner and outer pad adjusters as directed by the caliper manual. Loosen cable tension only when the design requires it.
- Hydraulic disc brake: With the old pads still installed, use a proper pad spreader or a wide, flat, non-marring tool to press the pistons back slowly and evenly. Do not press directly against a fragile piston with a sharp screwdriver.
Warning: Do not squeeze a hydraulic brake lever while the wheel, rotor, and pads are removed unless the manufacturer tells you to do so with a proper spacer installed. The pistons can move too far outward and may leak or require additional service.
2. Remove the Wheel When Required
Some scooter calipers do not provide enough clearance to remove the pads with the wheel installed. If the wheel must come off, disconnect only the parts listed in the official service procedure. A hub-motor wheel may have a motor cable, washers, spacers, or anti-rotation hardware that must return to the same position.
3. Remove the Retaining Hardware
Inspect the caliper for a threaded pad-retaining bolt, straight pin, cotter pin, locking clip, or spring. Remove the clip before the pin when that is the designed order. Keep each part clean and arranged in the order it came out.
Do not use a flathead screwdriver to pry against the rotor or scrape the pad-retaining surfaces. If the old pads are stuck, confirm that all retaining hardware has been removed before applying gentle pressure with the correct tool.
4. Remove and Compare the Old Pads
Slide the pads and spring from the caliper while noting their direction. Compare the new and old sets before continuing. The backing-plate outline, retaining hole, spring location, thickness, and pad compound must be suitable for the caliper and rotor.
Clean and Inspect the Caliper
Use a soft brush and a lint-free cloth lightly dampened with isopropyl alcohol to clean accessible dirt from the caliper body and mounting faces. Wipe the rotor’s braking surface with a separate clean cloth. Allow every cleaned part to dry fully.
Do not spray lubricant, chain cleaner, polish, silicone, penetrating oil, or greasy degreaser near the pads or rotor. Do not blow brake dust around the work area with compressed air.
Inspect the Complete Brake Assembly
- Caliper body: Check for cracks, impact damage, bent parts, and stripped threads.
- Mounting points: Remove dirt or corrosion that prevents the caliper from sitting flat.
- Rotor: Look for cracks, deep scoring, severe discoloration, contamination, looseness, or side-to-side warping.
- Mechanical cable: Check for broken strands, rust, crushed housing, sharp bends, and poor anchor-bolt grip.
- Hydraulic system: Check the hose, fittings, lever, and caliper for wetness or fluid leakage.
- Pistons: Confirm that they retract evenly and are not chipped, cracked, or stuck.
- Old pads: Compare both sides. Strongly uneven wear can point to poor alignment, a stuck piston, or an incorrect mechanical adjustment.
If oil or hydraulic fluid has soaked into the pad material, replace the pads and correct the source of the leak or contamination. Cleaning the rotor may be possible, but contaminated porous pad material often cannot be restored reliably.
Install the New Brake Pads
Handle the new pads by their edges and backing plates. Do not touch the friction surfaces. If the pad set includes a spring, place it between the pads in the direction shown by the caliper or pad manufacturer.
- Confirm that the mechanical adjusters are backed out or the hydraulic pistons are fully and evenly retracted.
- Place the pads and spring together in their correct orientation.
- Slide the assembly into the caliper without scraping the friction material on oily or dirty parts.
- Reinstall the retaining pin or bolt.
- Install the locking clip, cotter pin, or other secondary retainer.
- Tighten a threaded retaining fastener to the manufacturer’s stated torque.
- Confirm that the pads cannot fall from the caliper.
| Check | Correct Condition | Problem to Correct |
|---|---|---|
| Pad fit | Pad shape and retaining hole match the caliper | Pad requires force, sits outside its guides, or uses the wrong retainer |
| Pad face | Clean, dry, and facing the rotor | Oil, grease, fingerprints, chips, or reversed installation |
| Spring and clip | Installed in the specified direction and fully retained | Bent spring, missing clip, or loose retaining pin |
| Pad movement | Pads move as designed but cannot leave the caliper | Binding, crooked seating, or excessive uncontrolled movement |
Reassemble and Check Alignment
Reinstall the wheel, axle hardware, spacers, washers, motor-cable supports, and caliper parts in their original positions. Tighten every safety-critical fastener to the scooter or brake manufacturer’s specification.
Reset the Brake
- Hydraulic brake: After the rotor is back between the pads, squeeze and release the lever several times until it becomes firm and the pads move into their working position.
- Mechanical brake: Adjust the fixed and moving pads, cable tension, and lever travel according to the caliper manual. Do not make the brake so tight that the wheel locks unexpectedly or drags continuously.
Xiaomi warns that an overly tight brake adjustment can lock a wheel and cause the scooter to tip. This is another reason to use the exact procedure for your model rather than adjusting by feel alone.
Center the Caliper
Sight through the caliper and check the gap on both sides of the rotor. If the caliper is off-center, use the alignment procedure specified for that brake. A common hydraulic method is to loosen the caliper mounting bolts slightly, hold the brake lever so the caliper centers over the rotor, and retighten the bolts evenly. Mechanical calipers may require separate fixed-pad and moving-pad adjustments instead.
Spin the wheel by hand. The wheel should rotate normally without heavy drag. A repeated scrape at one point can indicate a bent or incorrectly seated rotor. Continuous rubbing usually means the caliper or pad adjustment still needs correction.
Complete the Stationary Safety Check
- Confirm that every retaining clip, pin, bolt, axle nut, washer, and caliper bolt is present and secure.
- Squeeze the lever firmly several times. It should not sink slowly or touch the handlebar.
- Hold the brake and try to push the scooter forward. The braked wheel should resist strongly.
- Release the lever and confirm that the wheel can turn again.
- Check that no hose, cable, or motor wire contacts the rotor or tire.
Bed In the New Brake Pads
New pads need a controlled wear-in process so the pad and rotor surfaces develop consistent contact. This is called bedding-in. Braking may feel weaker than expected before the process is complete.
- Choose a flat, dry, traffic-free area with plenty of stopping space.
- Wear a helmet and other suitable protective equipment.
- Begin at walking speed and make several smooth stops.
- Increase to a moderate speed only after the brake responds predictably.
- Apply firm, controlled braking to slow almost to a stop, then release the brake and repeat.
- Do not lock the wheel, skid the tire, or hold the brake on continuously until it overheats.
- Allow the brake to cool, then check the caliper alignment and lever feel again.
Use the bedding sequence provided by the brake manufacturer whenever one is available. SRAM explains that bedding new pads and rotors creates an even transfer layer that improves consistency, power, and noise control. See SRAM’s disc-brake bed-in guidance.
Warning: Stop the test immediately if the brake cannot slow the scooter firmly, the lever reaches the handlebar, the scooter pulls sharply to one side, a fastener moves, or fluid appears around a hydraulic component.
Troubleshoot Problems After Replacement
The New Pads Rub Constantly
- Confirm that the wheel and axle hardware are fully seated.
- Make sure the hydraulic pistons were pushed back evenly.
- Back out mechanical pad adjusters before setting the final clearance.
- Center the caliper over the rotor.
- Check the rotor for a bent section or loose mounting hardware.
- Verify that the pads and spring are installed in the correct direction.
The Lever Pulls Too Far
On a mechanical brake, adjust the pad position and cable tension using the manufacturer’s method. Replace a stretched, frayed, or corroded cable. On a hydraulic brake, pump the lever to set the pads. A lever that remains soft or reaches the handlebar may indicate air, a leak, a stuck piston, or a need for professional bleeding.
The Brake Squeals or Feels Weak
Confirm that the pads are compatible and have been bedded correctly. Clean the rotor with fresh isopropyl alcohol and a clean lint-free cloth. Replace pads that have absorbed oil or brake fluid, and find the source of the contamination before installing another set.
One Pad Wears Faster Than the Other
Uneven wear may come from a misaligned caliper, a seized mechanical adjuster, a sticking hydraulic piston, a bent mounting bracket, or a rotor that does not run centrally through the caliper. Correct the cause instead of repeatedly replacing only the worn pad.
Maintain the Brake After Replacement
Inspect brake condition regularly and before important rides. The U.S. Consumer Product Safety Commission recommends checking scooter brakes, cables, tires, frame, and other controls before riding. Its current guidance is available through the CPSC Micromobility Information Center.
- Check pad thickness according to the brake manufacturer’s limit.
- Test the lever before every ride.
- Keep aerosol lubricants away from the brake.
- Inspect the rotor after impacts or crashes.
- Service the brake more often after wet, muddy, sandy, or steep riding.
- Investigate new grinding, scraping, pulsing, or weak braking immediately.
Brake-pad replacement is complete only after the retaining hardware, alignment, lever feel, low-speed stopping performance, and bedding process have all been checked.
Frequently Asked Questions
Can I Replace Brake Pads Myself?
You can replace pads yourself when you can identify the exact brake system, obtain the correct parts, follow the model’s service instructions, and test the repair safely. Use a professional technician if the caliper leaks, the rotor or mount is damaged, the lever remains soft, or you are unsure about the retaining hardware or adjustment.
How Often Should I Change the Brake Pads on an Electric Scooter?
There is no universal mileage interval. Inspect the pads and replace them at the caliper manufacturer’s wear limit or sooner if they are contaminated, cracked, separated, unevenly worn, or unable to provide reliable braking. Hills, heavy loads, water, dirt, speed, and frequent hard stops can shorten pad life.
Is It Worth Fixing an Electric Scooter?
Replacing normal wear items such as brake pads is often worthwhile when the scooter’s frame, battery, controller, motor, folding system, and wiring remain in safe condition. Compare the total repair cost with the scooter’s condition and replacement value. Do not keep riding a scooter with structural damage or an unsafe battery simply because the brake repair is inexpensive.
Is 30 Mph Fast for an E-Scooter?
Yes. A speed of 30 mph is fast for a standing scooter with small wheels. Higher speed increases stopping distance and crash severity, while road conditions, tire grip, rider weight, brake temperature, and reaction time can increase the distance further. A scooter capable of that speed needs correctly maintained brakes and careful, legal riding.
Do All Electric Scooters Have Replaceable Brake Pads?
No. Replaceable pads are used in disc brakes. Other scooters may use enclosed drum-brake shoes, regenerative motor braking, a foot brake, or a combined system. Identify the brake type and read the scooter manual before ordering parts.
Can I Clean and Reuse Oil-Contaminated Brake Pads?
Replacement is the safer choice when oil, grease, or hydraulic fluid has soaked into the friction material. Clean the rotor with the approved cleaner, fix the leak or contamination source, and install a clean compatible pad set.
Why Do My New Brake Pads Feel Weak?
New pads may need bedding-in. Weak braking can also result from contamination, an incorrect pad compound, poor caliper alignment, excessive mechanical clearance, air or leakage in a hydraulic system, or a damaged rotor. Do not continue normal riding until the cause is corrected.
Conclusion
Changing electric scooter brake pads is more than sliding one set out and another set in. You must match the pads to the caliper, keep the braking surfaces clean, reset the adjusters or pistons, secure the retaining hardware, align the caliper, and bed in the new pads. Finish with controlled stopping tests and correct any weakness, rubbing, leakage, or loose hardware before returning to normal riding. Charging and optimism are not a brake-maintenance plan, but a careful inspection and a proper test are.
Sources
- U.S. Consumer Product Safety Commission: Micromobility Information Center — supports pre-ride brake and scooter safety checks.
- TEKTRO Brake FAQ — supports isopropyl-alcohol cleaning, pad wear inspection, contamination guidance, alignment, and bedding-in.
- SRAM Disc Brake Pad Service Resources — supports model-specific pad identification, replacement instructions, and professional service guidance.
- SRAM Disc Brake Bed-In Procedure — supports bedding new pads and checking caliper alignment.
- Segway F-Series Support — demonstrates model-specific scooter disc-brake and caliper replacement resources.
- Xiaomi Electric Scooter 5 Max FAQ — supports powering off and disconnecting charging before brake work and warns against excessive brake tightening.
