
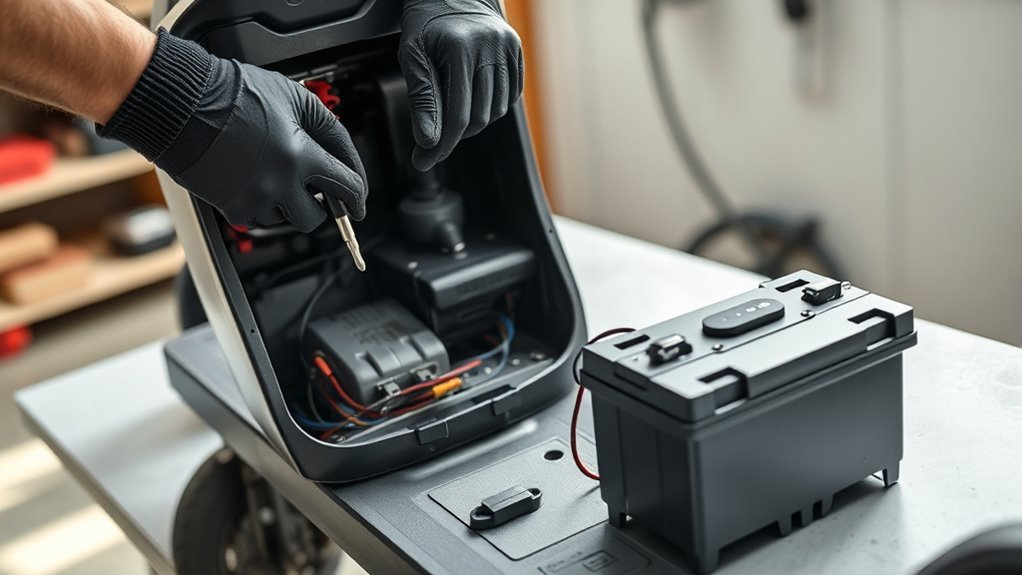
Last Updated on September 10, 2026 by Daniel Globe
Replacing an electric scooter battery starts with two checks: make sure the battery is actually the problem, and confirm that your scooter is designed for owner battery replacement. If it is, use only a replacement pack approved for your exact model, follow the manufacturer’s service instructions, power the scooter off, disconnect the charger, install the pack without altering its wiring, fully close the battery compartment, and test the scooter carefully.
Quick Answer
To replace an electric scooter battery safely, first confirm the battery is user-serviceable and obtain the manufacturer-approved replacement for your exact model. Power off and unplug the scooter, open the battery compartment as directed by the manual, disconnect the designed connectors, install and secure the new pack, close the compartment completely, then perform stationary and low-speed tests.
Key Takeaways
- Do not buy a battery based only on voltage, amp-hours, or physical size. Confirm the exact model or part number and manufacturer approval.
- Do not open, rebuild, puncture, jump-start, or bypass the protection system of a lithium-ion battery pack.
- Stop using a battery that is swollen, leaking, unusually hot, smoking, producing an unusual smell, or physically damaged.
- Disconnect plugs and terminals only as the manufacturer directs. Do not cut battery wires as part of a normal replacement.
- Fully secure the battery and reinstall the compartment cover before powering the scooter for testing.
- Recycle the old battery through an appropriate battery or household hazardous-waste collection program rather than household trash or curbside recycling.
At a Glance
| Time Required | Model-dependent. A removable pack can be quick; an internal pack may require significantly more disassembly. |
| Difficulty | Easy to moderate only when the manufacturer identifies the battery as owner-serviceable; otherwise use qualified service. |
| Tools Needed | Manufacturer-specified screwdriver or Allen bits, suitable insulated-handled hand tools when required, eye protection, and gloves. |
| Cost | Varies widely by scooter model, battery capacity, manufacturer, parts availability, and whether professional labor is required. |
Warning: This is a general procedure, not a substitute for your scooter’s service manual. Do not perform a DIY replacement if the manufacturer says the battery is not user-serviceable. Do not open the battery casing or work on individual lithium-ion cells, the BMS, or damaged battery wiring. If a pack is swollen, leaking, smoking, unusually hot, making unusual noises, or badly damaged, stop using it and follow the manufacturer’s emergency and disposal guidance.
Disclosure: As an Amazon Associate I earn from qualifying purchases. Some links on this page are affiliate links, at no extra cost to you.
Why Replace Your Electric Scooter Battery?
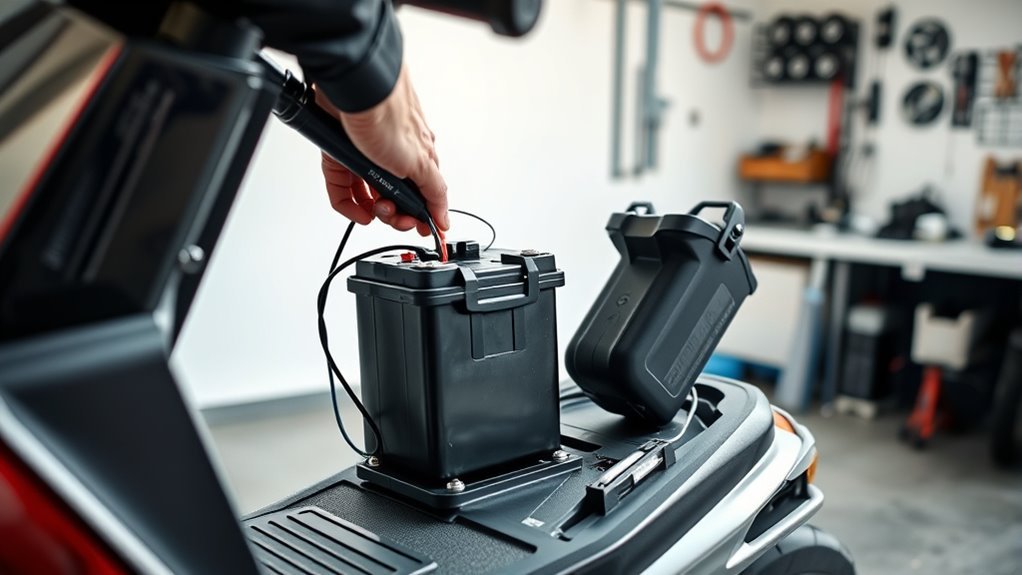
A battery may need replacement when usable range has fallen sharply, the scooter shuts down unexpectedly under normal load, the battery will no longer charge normally with the approved charger, the scooter reports a battery-related fault, or the manufacturer identifies the pack as worn out. Physical warning signs such as swelling, leakage, unusual heat, odor, smoke, discoloration, or major impact damage require more caution than an ordinary worn battery.
Do not assume every range problem comes from the battery. Cold weather, low tire pressure, heavy loads, steep hills, brake drag, a charger fault, loose external connections, or a scooter error can also reduce performance. Diagnose obvious non-battery causes before buying an expensive replacement.
A healthy replacement should restore the normal performance the scooter is designed to provide. It should not be treated as a way to exceed the scooter’s original voltage, speed, or power specification.
Confirm the Battery Is User-Serviceable
Before removing any cover, check the owner’s manual, service documentation, or manufacturer’s support page. Some scooters use a removable battery intended for owner replacement. Others use internal packs that the manufacturer expects an authorized technician to replace.
The U.S. Consumer Product Safety Commission advises consumers to use only a replacement or secondary battery pack that has been tested and approved for the device and confirmed suitable by the device manufacturer. See the CPSC Micromobility Information Center.
Note: “Electric scooter” can describe different products. Many modern stand-up e-scooters use lithium-ion packs, while some traditional mobility scooters use sealed lead-acid AGM or GEL batteries. Do not apply a mobility-scooter battery procedure to a kick scooter unless the manufacturer specifically calls for that battery system.
Check Electric Scooter Battery Compatibility
The safest starting point is the scooter manufacturer’s approved replacement part number. A pack that has the same nominal voltage or happens to fit inside the deck is not automatically compatible.
Battery Chemistry Match
Match the battery technology specified by the manufacturer. Do not convert from sealed lead-acid to lithium-ion, change lithium battery chemistry, rebuild a pack with different cells, or substitute a different battery design unless the scooter manufacturer explicitly approves that configuration.
For a modern lithium-ion scooter, the battery, charger, controller, connectors, and battery-management system work as a system. A seemingly similar pack can still be unsuitable because its protection electronics, communication requirements, connector pinout, current capability, or charging requirements differ.
Voltage And Capacity Fit
Match the manufacturer’s specified nominal voltage exactly unless the manufacturer publishes an approved upgrade. Increasing system voltage can damage the controller, motor, wiring, display, charger, or other electronics and can create a serious safety hazard.
Amp-hours (Ah) describe charge capacity, but Ah is not the only compatibility requirement. Before buying a battery, verify all of the following:
- Exact scooter model and approved battery part number
- Nominal voltage
- Battery chemistry and construction
- Physical dimensions and mounting points
- Main power and charging connector type
- Connector pinout and polarity
- BMS or scooter communication requirements
- Compatibility with the approved charger
- Required current capability and other manufacturer specifications
For personal e-mobility devices, recognized safety evaluation is another useful purchasing consideration. UL Solutions describes testing and certification for personal e-mobility electrical systems under standards such as UL 2272. Certification, however, does not make a random battery compatible with your particular scooter; manufacturer approval still matters. See UL Solutions’ personal e-mobility guidance.
Pro Tip: Before ordering, photograph the original battery label and record the scooter’s exact model and serial information. Compare those details with the manufacturer’s parts catalog or support documentation instead of relying on a marketplace listing that merely says “fits electric scooters.”
Gather the Tools You’ll Need
Use the service manual to identify the correct tools before opening the scooter. A typical owner-serviceable pack may require Phillips, Torx, or Allen drivers and sometimes a socket or wrench for approved battery terminals. Wear eye protection and suitable gloves, and work on a stable surface away from flammable clutter.
Essential Tools
Your exact tool list depends on the scooter. Common items include:
- Manufacturer-specified screwdriver, Torx, or Allen bits
- Socket or wrench if the manual specifies bolted terminals
- Insulated-handled hand tools where appropriate
- A small container for screws and fasteners
- A phone or camera for recording connector routing before disassembly
Do not include wire cutters in a routine battery replacement. Factory battery leads should normally be disconnected at their designed plugs or terminals, not cut and rejoined.
A multimeter should only be used if you know how to use it safely and the manufacturer provides a relevant diagnostic procedure. Never probe through battery insulation, open a lithium-ion pack, or short terminals to “test” the battery.
Safety Gear
Wear safety glasses and gloves to protect against sharp deck edges, hardware, and accidental contact with damaged components. Remove metal jewelry such as rings or bracelets before working around exposed electrical connections.
Keep the charger disconnected during disassembly. Do not work on a pack that is charging, unusually hot, swollen, leaking, smoking, or physically compromised.
Power Off and Remove the Old Battery
Follow the scooter’s service instructions because battery access and connector layouts differ by model.
- Turn the scooter completely off. Remove a key if the model uses one.
- Disconnect the charger from both the scooter and wall outlet as appropriate.
- Let the scooter sit as instructed by the manufacturer before opening the battery area.
- Place the scooter on a stable surface where it cannot roll or tip.
- Remove the battery-compartment fasteners with the specified tool and keep them organized.
- Inspect before touching the battery. Stop if you find swelling, leakage, burnt connectors, melted insulation, heavy corrosion, or other serious damage.
- Photograph the original wiring and connector orientation so you have a reference during reassembly.
- Disconnect the battery using its designed connector or terminals exactly as the manufacturer’s procedure specifies. Hold connectors by their housings rather than pulling on the wires.
- Release the retaining strap, bracket, latch, or mounting hardware and lift the battery out without dropping, crushing, bending, or puncturing it.
If the connector is stuck, the wiring differs from the manual, or removal would require cutting, soldering, opening the battery casing, or modifying the scooter, stop and use qualified service.
Install the New Electric Scooter Battery
Compare the new battery with the approved part before installation. Check its label, connectors, mounting points, and condition. Do not install a pack that arrives dented, swollen, cracked, wet, or otherwise damaged.
- Place the new battery in the same approved orientation as the original pack.
- Seat it fully without forcing the battery against wiring or structural parts.
- Install the original retaining hardware so the pack cannot move during riding.
- Reconnect the approved plugs or terminals according to the manufacturer’s documented orientation and polarity.
- Check every connection visually. A connector should fit normally without being forced, filed, trimmed, rewired, or held together with improvised tape.
- Route the wires as they were originally installed so they cannot be pinched by the deck, battery cover, suspension, steering components, or fasteners.
- Inspect the compartment one final time for forgotten tools, loose screws, trapped cables, or exposed conductors.
- Reinstall and fully secure the battery cover before applying power.
Warning: Never reverse battery polarity, substitute a connector because it “almost fits,” defeat a fuse or battery-management system, or connect exposed conductors temporarily to see whether the scooter works. If the approved replacement does not connect normally, stop and recheck the part number.
Test the Scooter and Reassemble It
Do not begin with a road test. Once the battery is secured and the compartment is completely closed, perform basic stationary checks first.
- Power the scooter on and confirm the display starts normally.
- Check for battery or system error messages.
- Verify normal lights and controls without applying unnecessary throttle indoors or while the driven wheel can contact people or objects.
- Watch and smell for warning signs such as unexpected heat, smoke, a burning odor, unusual noises, or intermittent power. Shut the scooter down immediately if any appear.
- Test charging only with the charger supplied or approved by the manufacturer.
- After the stationary checks pass, take a short low-speed ride in a safe area and verify smooth power delivery and normal braking.
- Recheck the scooter after the ride for error messages, loose covers, abnormal heat, or unusual behavior.
CPSC advises users to follow the manufacturer’s charging instructions, remain present while charging micromobility products, unplug when charging is complete, and use only the supplied or manufacturer-recommended charger. CPSC has also warned that so-called universal micromobility chargers can be incompatible even when the plug fits. See the CPSC charger safety warning.
Troubleshooting After Battery Replacement
If the scooter does not operate normally after installation, do not immediately assume the new battery is defective. Turn the scooter off and check only the owner-serviceable items described in the manual.
Scooter Does Not Power On
- Confirm you received the correct manufacturer-approved battery part.
- Confirm the battery is seated or latched correctly.
- Recheck that the designed connectors are fully engaged.
- Look for a manufacturer-described shipping, sleep, transport, or activation procedure.
- Check the scooter’s display or app for documented fault codes.
If the problem remains, contact the manufacturer or qualified service provider instead of bypassing the BMS, fuse, connector, or other protection device.
Battery Does Not Charge
Use only the approved charger and follow the manufacturer’s normal charging procedure. If the pack remains unresponsive, repeatedly disconnecting/reconnecting it, using a different-voltage charger, jump-starting it, or opening the battery to access individual cells is not an appropriate generic troubleshooting method.
Scooter Shuts Down or Gets Hot
Stop riding if the scooter repeatedly loses power, reports battery faults, or develops unusual battery heat, odor, swelling, smoke, or noise. Continued testing can make a battery problem more dangerous. Contact the manufacturer or an authorized repair provider.
Recycle the Old Scooter Battery Safely
Do not put a lithium-ion scooter battery in household trash or curbside recycling. The U.S. Environmental Protection Agency says lithium-ion batteries should be taken to a separate battery-recycling or household hazardous-waste collection point because damaged or crushed batteries can become a fire hazard.
EPA also recommends isolating exposed battery terminals with non-conductive tape or placing individual batteries in separate plastic bags when preparing suitable consumer batteries for collection. Follow the battery manufacturer’s instructions and the rules of your local collection program, especially for a damaged pack. See the EPA guidance for used lithium-ion batteries.
If your scooter uses sealed lead-acid batteries instead, those also require appropriate battery recycling rather than normal household disposal. Follow the manufacturer’s instructions and local recycling requirements.
How to Make Your Battery Last Longer
Battery-care recommendations vary by chemistry and scooter model, so use the charging and storage instructions supplied by the manufacturer rather than applying a universal percentage, temperature, or charging schedule.
- Use only the approved charger. A connector fitting the charge port does not prove electrical compatibility.
- Follow the manufacturer’s charging procedure and unplug the scooter when the specified charge cycle is complete.
- Do not leave a lithium-ion micromobility device charging while you are asleep or away.
- Avoid extreme heat and other storage conditions prohibited by the manufacturer.
- Do not store the scooter indefinitely with a completely depleted battery. Follow the manual’s long-term storage and recharge schedule.
- Protect the battery from impact, water intrusion, and physical damage.
- Inspect the scooter regularly and stop using it if the battery changes shape, becomes unusually hot, leaks, smells abnormal, smokes, or produces unusual noises.
Good battery care protects usable range and reliability, but no rechargeable battery lasts forever. When capacity eventually falls below what you need, replace the pack with an approved unit rather than trying to rebuild or modify it without the manufacturer’s authorization.
Frequently Asked Questions
Is It Easy to Replace an Electric Scooter Battery?
It can be easy when the scooter has a manufacturer-supported removable or owner-serviceable battery. An internal sealed pack may require substantial disassembly, special procedures, or authorized service. Check the manual before opening the scooter.
Can a Dead Scooter Battery Be Recharged?
A healthy battery that is simply discharged may recharge normally with the manufacturer-approved charger. A battery that refuses to charge, has been deeply discharged for a long period, or shows physical damage needs diagnosis. Do not jump-start a lithium-ion pack, bypass its BMS, or open it to force individual cells to charge.
Is It Worth Replacing a Scooter Battery?
Often, yes, if the scooter is otherwise in good condition, a safe manufacturer-approved replacement is available, and the total parts and labor cost makes sense compared with replacing the scooter. A new battery should restore normal usable range and performance; it should not be expected to raise the scooter’s designed top speed.
How Much Does It Cost to Replace an E-Scooter Battery?
There is no reliable universal price range. Cost depends on the scooter model, battery voltage and energy capacity, manufacturer, proprietary electronics, parts availability, shipping rules, and whether professional installation is required. Check the manufacturer’s approved replacement-pack price and service quote for your model.
Can I Install a Higher-Ah Battery for More Range?
Only if the scooter manufacturer approves that exact battery configuration. Matching voltage is not enough. The pack must also meet the scooter’s physical, connector, current, charging, BMS, and communication requirements. Do not treat a higher Ah rating as automatic proof of compatibility.
Can I Upgrade My Scooter to a Higher-Voltage Battery?
Not unless the manufacturer explicitly approves the conversion. Higher voltage can exceed the limits of the controller, motor, charger, wiring, display, or other electronics. For a normal battery replacement, match the manufacturer’s original voltage specification.
Can I Use a Universal Charger With the New Battery?
Do not assume so. CPSC warns that chargers marketed as universal or generally compatible with micromobility products may still be electrically incompatible even when the plug fits. Use the charger supplied with the scooter or one specifically approved by the manufacturer for that battery and model.
Conclusion
Replacing an electric scooter battery can be a reasonable DIY job when the manufacturer designed the battery for owner replacement. The most important step is compatibility: use an approved pack for the exact scooter rather than choosing one only by voltage, amp-hours, or physical size. Power the scooter down, disconnect the charger, preserve the original connector and wiring arrangement, secure the replacement properly, close the battery compartment before testing, and stop if anything looks damaged or abnormal.
If the battery is integrated, damaged, swollen, unusually hot, leaking, or requires wiring modification or pack-level repair, professional service is the safer choice. When the old battery is removed, recycle it through an appropriate battery or hazardous-waste program instead of putting it in household trash.
Sources
- U.S. Consumer Product Safety Commission — Micromobility Information Center — replacement battery, charging, and micromobility safety guidance.
- U.S. Consumer Product Safety Commission — Universal Charger Safety Warning — explains why plug fit alone does not establish charger compatibility.
- U.S. Environmental Protection Agency — Used Lithium-Ion Batteries — safe handling and recycling guidance for end-of-life lithium-ion batteries.
- UL Solutions — Personal e-Mobility Evaluation, Testing and Certification — information on safety evaluation and certification for personal e-mobility electrical systems.
