

Last Updated on July 30, 2026 by Caleb Warren
Carrying a heavy backpack comfortably depends on more than tightening the shoulder straps. The pack must match your torso, the hip belt must sit in the right place, and the contents must stay close to your center of gravity. A sensible load, gradual training, suitable footwear, and early attention to pressure or numbness also help you hike with better control.
Quick Answer
To carry a heavy backpack comfortably, use a pack that matches your torso, center the hip belt over your upper hip bones, and tighten the shoulder straps, load lifters, and sternum strap in order. Pack dense items close to your spine, reduce unnecessary weight, walk upright, and stop if you develop numbness, weakness, or sharp pain.
Key Takeaways
- Treat 20% of body weight as a rough backpacking guideline, not a guaranteed safe limit.
- A load-bearing hip belt should transfer much of the weight to your pelvis while the shoulder straps stabilize the pack.
- Keep dense gear in the middle of the pack and close to your spine to reduce backward pull and sway.
- Build loaded-walking distance, elevation, and weight gradually instead of starting at full trip weight.
- Stop and adjust the pack if you notice numbness, tingling, weakness, severe pain, poor balance, or a major change in your walking posture.
At a Glance
| Time Required | 10–15 minutes for the initial fit, plus short adjustments during the hike |
| Difficulty | Easy to moderate |
| Tools Needed | Body-weight scale, mirror, packed backpack, and an optional helper |
| Cost | $0 if your current pack fits; professional fitting is often available at outdoor retailers |
Warning: Numbness, tingling, weakness, sharp or increasing pain, loss of balance, chest pressure, or symptoms that continue after the pack is removed are not normal training discomfort. Stop, reduce the load, and seek medical advice when symptoms are severe, persistent, or linked to a recent injury.
Disclosure: As an Amazon Associate I earn from qualifying purchases. Some links on this page are affiliate links, at no extra cost to you.
Importance of Proper Fit for Comfort
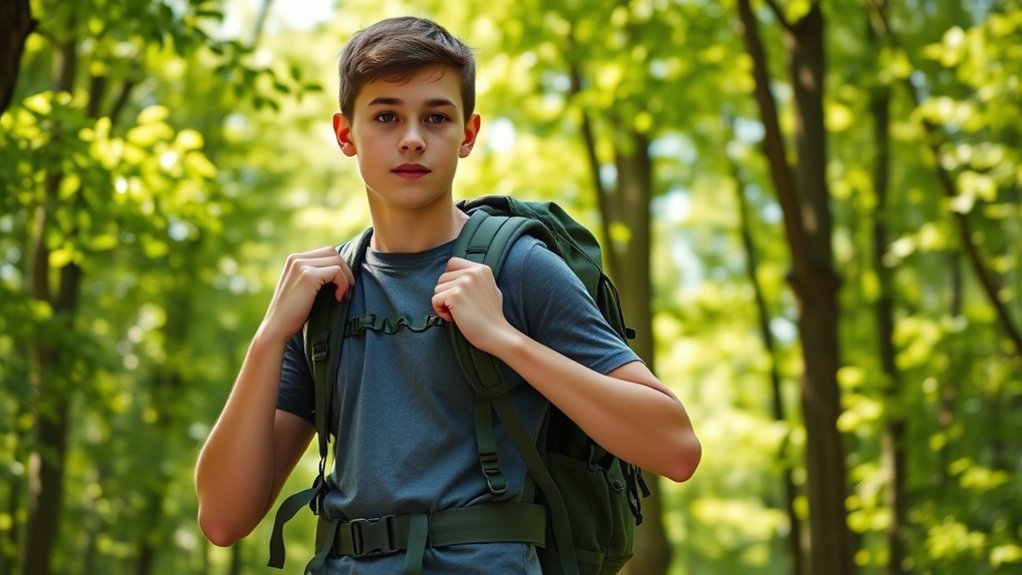
When you carry a heavy backpack, fit matters as much as weight. A load-bearing hip belt should wrap around the upper part of your pelvis so that your hips and legs carry much of the load. The shoulder straps still play an important role: they should follow the shape of your shoulders, keep the pack close, and prevent it from swaying.
Before adjusting the straps, confirm that the pack matches your torso length. A harness that sits too high, too low, or leaves a large gap behind the shoulders may indicate that the torso setting or pack size is wrong. Follow the manufacturer’s measuring instructions because sizing systems vary. Osprey’s official backpack sizing and fit guide, for example, explains how to measure the torso and place the hip belt around the iliac crest.
- Hip belt: Center the padded section over the upper hip bones rather than around the soft waist or abdomen.
- Shoulder straps: Let them wrap smoothly over the shoulders without a large gap, pinching, or concentrated pressure.
- Load lifters: Use them to bring the upper pack closer without pulling the shoulder straps painfully upward.
- Sternum strap: Position it where it improves stability without restricting breathing.
- Torso setting: Adjust it before trying to solve every problem by tightening the straps.
A good fit should feel secure rather than rigid. You should be able to breathe deeply, move your arms, look up the trail, and walk without the pack pulling you sharply backward or bouncing from side to side.
Products Worth Considering
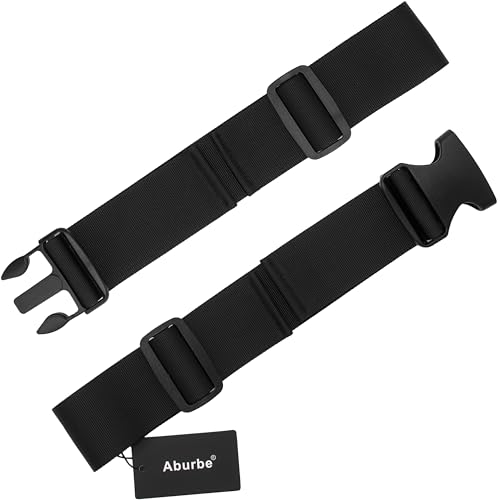
Extra Wide 2-Inch Design: Provides enhanced support and comfort for heavier loads, reducing strain during prolonged wear
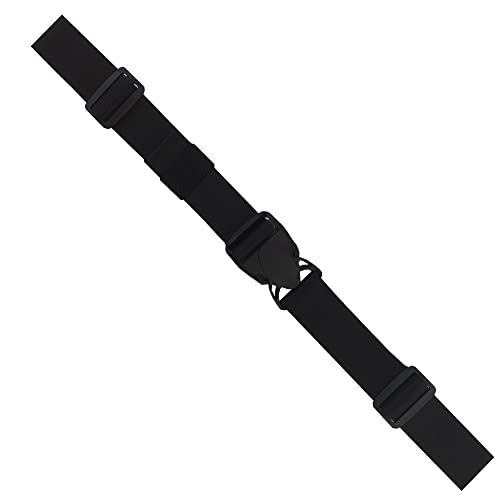
Replacement Universal Backpack Waist Strap Universal Fit with Buckle
Step-by-Step Guide to Adjusting Your Backpack
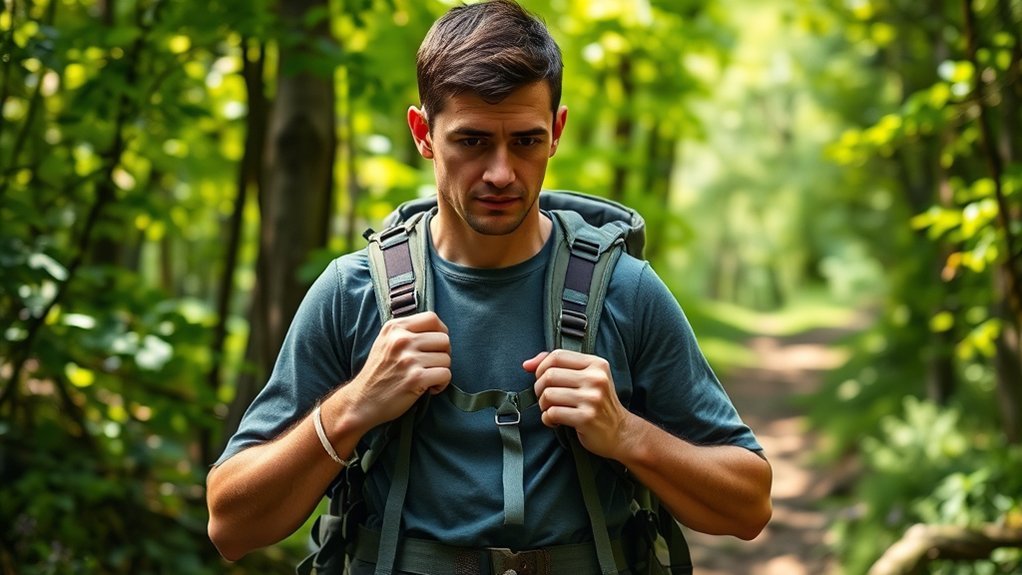
Adjust the pack while it contains a realistic load. An empty backpack can appear to fit correctly but behave differently when food, water, shelter, and clothing are added.
| Step | Action | What to Check |
|---|---|---|
| 1 | Loosen the straps | Loosen the hip belt, shoulder straps, load lifters, and sternum strap before putting on the pack. |
| 2 | Set the hip belt | Center the padding over the upper hip bones and tighten evenly. It should grip without causing sharp pressure. |
| 3 | Tighten the shoulder straps | Pull down and back until the harness follows your shoulders and the pack sits close. Do not lift the hip belt off your pelvis. |
| 4 | Adjust the load lifters | Tighten gently until the upper pack moves closer. Stop if the straps pull painfully on the front of your shoulders. |
| 5 | Fasten the sternum strap | Use light tension to stabilize the shoulder straps. Make sure you can still take a full breath. |
| 6 | Tighten compression straps | Compress loose space so the contents cannot shift, but do not crush fragile equipment. |
| 7 | Walk and reassess | Walk, climb a few steps, and turn. Check for sway, rubbing, breathing restriction, or pressure hot spots. |
Pro Tip: Make small adjustments rather than tightening every strap at once. If your shoulders hurt, first check the hip-belt position, torso setting, and internal packing before pulling the shoulder straps tighter.
Techniques for Safe Backpack Removal
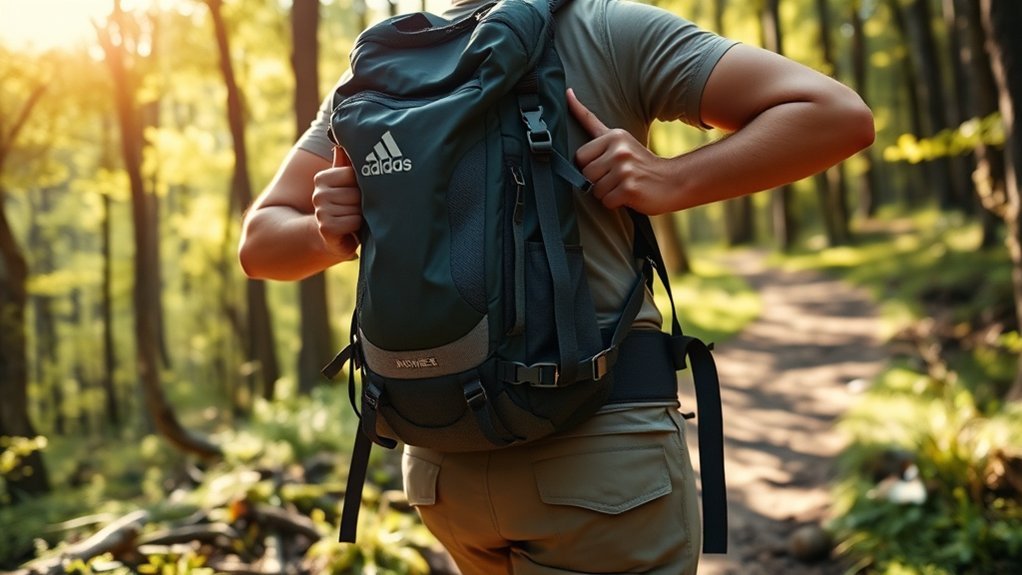
A heavy pack can shift suddenly when one shoulder strap is released. Choose a level area, move slowly, and use a bench, rock, vehicle tailgate, wall, or another person when available. The heavier or more awkward the load, the more useful assistance becomes.
Proper Technique for Removal
- Stand on stable ground and keep your feet about shoulder-width apart.
- Loosen the sternum strap, load lifters, and shoulder straps while keeping the hip belt fastened.
- Back toward a stable bench or have a partner support the pack from behind.
- Unfasten the hip belt while keeping control of both shoulder straps.
- Slide one arm out, guide the pack onto the support, and then remove the second arm.
- If no raised support is available, bend your knees and lower the pack while keeping it close to your body.
After removal, check for persistent numbness, skin injury, or pain. Mild muscle fatigue may settle with rest, but sharp or radiating pain should not be ignored.
Avoiding Sudden Movements
| Technique | Safer Approach |
|---|---|
| Use support | Rest the pack on a bench or ask a partner to hold its weight before removing your arms. |
| Lower with control | Bend through the hips and knees while keeping the load close instead of dropping it from one shoulder. |
| Avoid twisting | Turn your feet and whole body rather than twisting your torso under the load. |
| Keep a hand on the pack | Maintain control until the pack is fully supported and stable. |
| Ask for help | Use partner assistance if the load is difficult to lift from the ground or causes you to lose balance. |
Supporting Weight During Unloading
Keep the pack close as you unload it. A load held farther from the body creates more leverage and can be harder to control. The American Academy of Orthopaedic Surgeons recommends using sound lifting judgment, packing lightly, keeping loads close, and obtaining help with difficult luggage or bags. See its lifting and carrying guidance.
When putting the backpack on again, reverse the process. Place it on a bench or raised surface, back into the harness, insert both arms, fasten the hip belt, and then complete the normal adjustment sequence. If you must lift it from the ground, use the haul loop to raise it to a knee or stable surface before swinging it onto your back.
Assessing Your Backpack Weight Regularly
Weigh the complete pack, including food, water, fuel, and items attached to the outside. REI uses approximately 20% of body weight for a loaded backpacking pack as a general rule of thumb. It is not a medical limit, and it may be too much for a beginner, a person with a prior injury, or a hiker facing steep, technical, hot, or high-altitude terrain.
Your body provides more useful feedback than a percentage alone. Reduce the load or change the route if you cannot put on the pack safely, walk without major forward lean, step over obstacles with control, or maintain a normal breathing rhythm.
| Load May Be Manageable | Load May Be Too Heavy or Poorly Fitted |
|---|---|
| You can put it on and remove it under control. | You need momentum, twisting, or an unsafe swing to shoulder it. |
| Your gait remains steady on level and uneven ground. | You stumble, shorten your steps sharply, or cannot recover from small slips. |
| Pressure is broad and can be adjusted. | You develop sharp pressure, bruising, numbness, or tingling. |
| You can stand tall with only a slight natural forward lean. | You must bend far forward or arch your back to counter the load. |
| Normal effort settles during short rests. | Pain increases, changes your movement, or continues after the pack is removed. |
In a 2018 study of long-distance John Muir Trail backpackers, 43% reported back pain and 46% reported pain related to pack straps. The findings show that discomfort is common, but they do not support a claim that one weight percentage prevents every problem.
Tips for Efficient Packing
A correctly fitted backpack can still feel uncomfortable when its contents are badly placed. The goal is to keep the center of gravity close, prevent movement, and place essential items where you can reach them without unpacking the entire bag.
- Bottom zone: Pack light, bulky items that are usually needed at camp, such as a sleeping bag or sleep clothing.
- Core zone: Place dense items such as food, a stove, or a bear canister close to your spine. REI’s backpack-loading guide recommends the central core for heavier gear.
- Top zone: Store insulation, rain gear, or other items you may need quickly.
- Exterior pockets: Carry water, snacks, navigation tools, sunscreen, and small essentials. Balance side-pocket weight.
- Compression straps: Tighten them enough to stop shifting and sway.
- Waterproofing: Protect sleeping gear and clothing with dry bags or a pack liner rather than assuming the outer fabric is waterproof.
- Outside attachments: Minimize dangling equipment that can swing, catch on branches, or pull the load off-center.
Note: Do not remove navigation, insulation, water treatment, first aid, lighting, or other route-specific safety equipment merely to reach a target weight. The National Park Service recommends planning for the conditions and carrying the essential equipment needed for the trip.
Incorporating Heavy Pack Training Into Daily Life
Training under load can improve confidence and reveal fit problems before a major trip. Begin with a light, stable load on familiar ground. Add weight, distance, or elevation gradually, but avoid increasing all three at the same time.
A practical progression is to start with short walks at a load that does not change your normal gait. When you can complete the route without unusual soreness, hot spots, or loss of balance, make one small increase. Schedule easier days between demanding sessions, especially when you are new to loaded walking.
Daily Commuting With Weights
A short loaded walk can fit into a commute when the route is safe and predictable. Choose sidewalks or smooth paths first, avoid rushing through traffic, and use a load that lets you climb stairs and turn your head without losing balance.
- Begin with a short portion of the commute rather than carrying full trip weight all day.
- Use tightly secured water containers or training weights that cannot roll or develop sharp edges.
- Do not carry a heavy training load while cycling, running through traffic, or using crowded stairs.
- Stop when your posture, foot placement, or breathing becomes difficult to control.
Weekend Training Hikes
Weekend hikes let you practice on terrain similar to the planned trip. Start with moderate distance and elevation, then build toward the expected conditions. REI’s backpacking conditioning guide recommends beginning below anticipated pack weight and adding load progressively.
Use these hikes to test footwear, socks, water access, snack timing, strap adjustments, and rain protection. Keep notes about where pressure develops and which items remain unused. That record makes the next packing decision easier.
Grocery Shopping Load Practice
Walking home with groceries can provide light load practice, but shifting cans, glass containers, and uneven bags can create an unstable load. Pack groceries tightly, protect sharp corners, balance the sides, and avoid using perishable or breakable items for a long training walk.
For planned training, sealed water containers or purpose-made weights are easier to control. Water also lets you reduce the load if necessary, provided you dispose of it responsibly and do not leave yourself without the drinking water needed for the route.
Strength Training Exercises for Backpacking
Strength training supports the legs, hips, trunk, upper back, and shoulders used during loaded walking. Current American College of Sports Medicine guidance emphasizes regular participation and individualized progression rather than one perfect number of sets or repetitions.
For most healthy beginners, two nonconsecutive strength sessions per week can be a practical starting point. Choose resistance that allows controlled movement and leaves you able to complete every repetition with stable form.
| Movement | Beginner Option | Progression |
|---|---|---|
| Squat or sit-to-stand | 1–3 sets of controlled repetitions from a chair | Goblet squat or split squat; jump squats are optional advanced work, not a requirement. |
| Step-up | Use a low, stable step and body weight | Increase step height or add light resistance while keeping the knee aligned. |
| Hip hinge or deadlift | Practice with a dowel or light weight | Add resistance or use a supported single-leg deadlift. |
| Calf raise | Hold a wall and raise both heels slowly | Progress to single-leg raises or a step. |
| Row or band pull | Use a resistance band with a neutral spine | Increase band tension or use a cable or dumbbell row. |
| Press-up | Use a wall, bench, or knees as needed | Lower the support or progress to a floor press-up. |
| Plank or side plank | Use short holds while breathing normally | Extend the hold gradually or add controlled hip dips when basic form is easy. |
Muscle effort is expected, but joint pain, radiating pain, dizziness, or loss of control is a reason to stop. Anyone with a recent injury, significant back or joint condition, balance disorder, or other medical concern should obtain individualized advice from a qualified health professional.
Choosing the Right Footwear for Your Hike
The best footwear is the pair that fits your feet, suits the trail, and provides enough traction and stability for the load. Lightweight trail shoes may work well on maintained paths, while boots can offer more structure, weather protection, or confidence on rough ground. Neither category is automatically safer for every hiker.
- Fit: Your heel should remain secure, and your toes should have room to spread without striking the front on descents.
- Traction: Choose tread that matches loose soil, wet rock, mud, snow, or other expected surfaces.
- Stability: Consider how steady you feel when stepping sideways, descending, and walking with the loaded pack.
- Weather: Balance waterproofing against breathability and drying time.
- Socks: Use well-fitting hiking socks that manage moisture and do not bunch under the foot.
- Testing: Wear the footwear on shorter walks before relying on it for a long or remote hike.
The National Park Service recommends suitable footwear with adequate tread and advises hikers to prepare for the specific conditions of the route. Review the NPS Hike Smart safety guidance before entering unfamiliar terrain.
Products Worth Considering
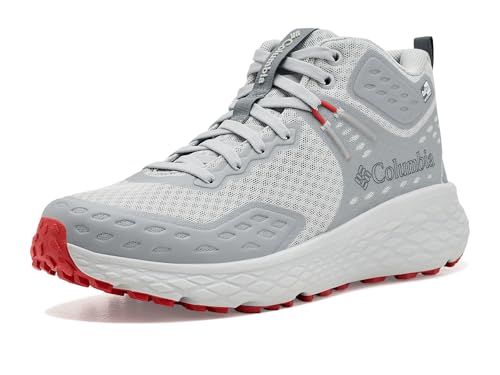
OUTDRY SUPERIOR WATERPROOFING: For moderate to heavy rain or snow. Discover our highest performing, waterproof-breathable footwear, designed with an impenetrable membrane, and bonded construction that seals water out.

OUTDRY SUPERIOR WATERPROOFING: For moderate to heavy rain or snow. Discover our highest performing, waterproof-breathable footwear, designed with an impenetrable membrane, and bonded construction that seals water out.

Excellent Grip:The trail running shoes feature an EVA+RB+TPU outsole with professional traction patterns, delivering superior grip, stability, and flexibility to tackle all terrains effortlessly
Maintaining an Upright Posture While Carrying
A small forward lean can be a normal response to a backpack, especially on an incline. The warning sign is an exaggerated bend, rounded posture, or backward arch that you must maintain just to balance the load. That often points to excessive weight, poor packing, an incorrect torso setting, or loose stabilization straps.
Proper Weight Distribution
- Keep dense items close: Heavy objects placed far from your spine increase backward pull.
- Balance left and right: Uneven water bottles or exterior gear can twist the pack and change your stride.
- Use the hip belt: Position it correctly before tightening the shoulder straps.
- Control vertical movement: Load lifters and compression straps should limit bounce without creating painful tension.
- Repack when needed: A strap adjustment cannot fully correct a badly placed or shifting load.
Core Engagement Techniques
Use gentle trunk tension rather than forcefully pulling your abdomen inward. Stand tall, keep your ribs and pelvis comfortably aligned, and breathe normally. Your arms should swing freely, and your shoulders should remain relaxed instead of being held rigidly toward your ears.
Strength exercises such as planks, side planks, squats, step-ups, and deadlift variations can improve control, but good posture also depends on pack fit and manageable weight. No amount of bracing can make an unstable or excessive load comfortable for long.
Prioritizing Back Health During Your Journey
Check your comfort before small problems become injuries. Use water, snack, map, and clothing stops as opportunities to inspect the straps, hip belt, feet, and skin. Rest based on the terrain, heat, pace, and symptoms rather than following one mandatory interval.
- Reduce the load when your gait or balance changes.
- Loosen or reposition a strap that causes numbness, rubbing, or breathing restriction.
- Treat foot hot spots before they become blisters.
- Eat and drink according to the route, weather, exertion, and your individual needs.
- Slow down when heat, altitude, steep descents, or loose ground increases the effort.
- Keep essential safety equipment even while reducing nonessential weight.
Persistent back pain is not something to “train through.” Stop carrying the pack and seek medical assessment if pain is severe, follows a fall, radiates into an arm or leg, causes weakness, or is accompanied by numbness, bowel or bladder changes, chest pain, or difficulty breathing.
Troubleshooting Common Backpack Discomfort
| Problem | Likely Causes | What to Try |
|---|---|---|
| Heavy shoulder pressure | Hip belt too low or loose, torso setting incorrect, or shoulder straps overtightened | Reset the hip belt over the upper hip bones, loosen the shoulders slightly, and check torso length. |
| Hip bruising or sharp pressure | Hip belt too tight, wrong shape or size, thin clothing, or excessive load | Reposition the belt, reduce the load, inspect clothing seams, and try a different pack if pressure remains concentrated. |
| Pack pulls backward | Dense items too far from the back, loose load lifters, or an oversized pack | Move heavy items toward the spine, tighten compression straps, and adjust load lifters gently. |
| Side-to-side sway | Uneven pockets, loose contents, or insufficient compression | Balance water and equipment, fill empty space, and secure compression straps. |
| Neck rubbing | Harness too high, pack torso too short, or shoulder straps pulled too tightly | Check harness height and torso size; loosen the upper straps and reassess. |
| Numb or tingling arms | Excess shoulder pressure, restrictive sternum strap, or excessive load | Stop immediately, loosen the straps, remove weight, and seek medical advice if sensation does not return promptly. |
Products Worth Considering

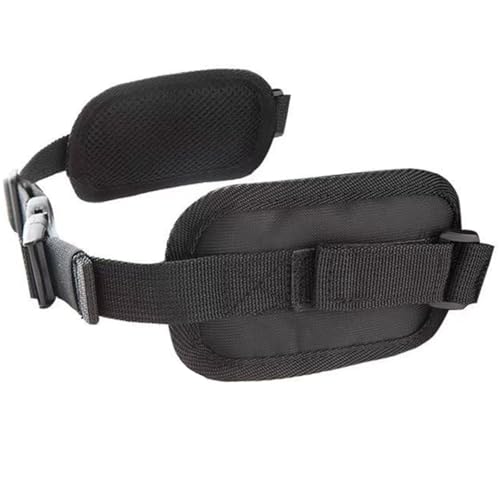
ENHANCED COMFORT FOR LONG RUCKS - The upgraded design features larger, extra-padded belt straps (9.5" x 4.25" x 0.75") and 210D HT CORDURA on the underside, offering superior comfort and preventing skin irritation, even when worn shirtless.
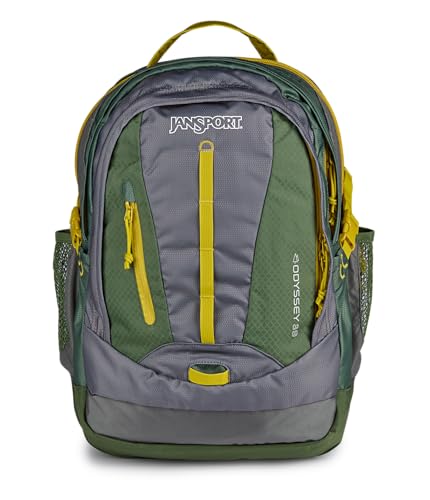
MAXIMUM CAPACITY & ORGANIZATION: Engineered for "heavy-duty hauling," this 39L extra-large backpack features three spacious main compartments. From class essentials to camping gear, stay perfectly indexed with a deluxe utility pocket, internal organizer, and a plush-lined tablet sleeve to protect your smaller electronics.

[SUPERIOR WEIGHT DISTRIBUTION] Effectively redistributes the load from your shoulders to your hips, dramatically reducing strain and fatigue. Carry heavier loads for longer durations with enhanced comfort.
Sources
- REI: How Much Should Your Pack Weigh? — general recreational pack-weight guidance and factors that change a manageable load.
- Osprey: Backpack Size and Fit Guide — torso measurement, hip-belt placement, harness fit, and strap adjustment.
- REI: How to Pack a Backpack — bottom, core, top, and pocket loading zones.
- American Academy of Orthopaedic Surgeons: Lifting and Carrying Luggage — controlled lifting, keeping loads close, and obtaining assistance.
- National Park Service: Hike Smart — trip planning, footwear, essential equipment, pacing, and trail safety.
- American College of Sports Medicine: 2026 Resistance Training Guidelines — evidence-based strength-training frequency, loading, and progression principles.
Frequently Asked Questions
How do I know if my backpack is too heavy?
The load is probably too heavy or poorly fitted if you cannot put it on safely, must lean far forward, lose balance, change your normal gait, or develop sharp pain, numbness, tingling, weakness, or severe pressure. A percentage of body weight is only a starting guide; your posture and symptoms matter more.
Can I use the same backpack for hiking and everyday use?
Yes, provided the capacity and suspension match the load. A simple everyday pack may work for light day hikes, but heavier loads usually benefit from a supportive frame, load-bearing hip belt, adjustable shoulder harness, sternum strap, and compression straps.
What should I do if my backpack causes discomfort?
Stop and identify where the pressure begins. Check the hip-belt position, torso setting, shoulder straps, load lifters, sternum strap, and internal weight placement. Reduce the load if necessary. Do not continue through numbness, weakness, sharp pain, breathing restriction, or symptoms that remain after the pack is removed.
Are certain backpack brands always more comfortable?
No. Osprey, Deuter, Gregory, and other established manufacturers offer adjustable packs, but comfort depends on your torso length, hip shape, shoulder shape, load, and intended use. Try the pack with realistic weight and compare several models rather than buying by brand alone.
How often should I take breaks with a heavy backpack?
Use short, regular breaks based on heat, terrain, elevation, pace, and your symptoms rather than relying on one fixed interval. Check the fit at water, snack, map, and clothing stops. Stop sooner when posture worsens, pressure develops, your feet form hot spots, or balance becomes less reliable.
Should my shoulders carry any backpack weight?
Yes, but they should not bear all of it. A load-bearing hip belt transfers much of the weight to the pelvis, while the shoulder straps keep the pack stable and close. Severe shoulder pressure usually means the hip belt, torso setting, internal packing, or total load needs attention.
Why does my hip belt hurt?
The belt may be too low, too tight, the wrong size or shape, or carrying more weight than it can distribute comfortably. Recenter it over the upper hip bones, reduce the load, smooth clothing seams, and compare another pack if pressure remains sharp or causes bruising.
Conclusion
Carrying a heavy backpack comfortably requires the right pack, a realistic load, careful packing, and regular adjustment. Start with the hip belt over your upper hip bones, stabilize the load with the shoulder straps and load lifters, and keep dense gear close to your spine. Train gradually, choose footwear for the terrain, and respond to discomfort early. A percentage can guide your first weight check, but stable movement and pain-free control are the better tests.
