
Last Updated on July 29, 2026 by Mason Reed
Camping on sand can be comfortable and secure, but beach conditions demand more planning than a typical campground. The safest setup starts with a legal site above the high-tide line, a weather check, sand-specific anchors, and a clear exit route. Add reliable sun protection, careful food storage, and simple sand-control habits for a smoother trip.
Quick Answer
To camp on sand safely, pitch only where overnight camping is allowed and well above the day’s high-tide line. Use broad sand or snow stakes, buried sand anchors, and fully tensioned guylines. Check coastal weather, protect dunes and wildlife, anchor shade gear, and keep food, water, and an evacuation plan ready.
Key Takeaways
- A fixed distance such as 100 feet is not a universal tide-safety rule; camp above the local high-tide line and follow site-specific setbacks.
- Wide sand stakes, snow stakes, or buried sand-filled bags usually hold better in loose sand than short standard stakes.
- Even a freestanding tent must be anchored because strong wind can roll or carry it.
- Check tide predictions, beach-hazard forecasts, storm risk, closures, permits, and fire rules before setting up.
- Protect yourself with shade, clothing, a hat, sunglasses, and broad-spectrum sunscreen used as directed.
At a Glance
| Time Required | About 20–40 minutes for site checks, anchoring, and final tensioning |
| Difficulty | Easy to moderate, depending on wind and sand firmness |
| Tools Needed | Tent, footprint, sand or snow stakes, guylines, anchor bags, small trowel, brush, and weather/tide information |
| Cost | About $20–$80 for specialty anchors, extra cord, and cleanup gear if not already owned |
Disclosure: As an Amazon Associate I earn from qualifying purchases. Some links on this page are affiliate links, at no extra cost to you.
Choosing the Right Campsite
Start by confirming that overnight camping is legal at the beach. Check permits, seasonal closures, parking rules, quiet hours, pet restrictions, vehicle access, sanitation requirements, and campfire rules with the agency that manages the site. Some beach campgrounds close during coastal flooding or wildlife nesting periods.
Do not rely on the original rule to camp “at least 100 feet from the water.” A distance can be a useful buffer, but it does not account for the beach slope, unusually high tides, storm surge, wave run-up, or local regulations. Use NOAA Tide Predictions or the official local tide table, identify the visible high-tide or debris line, and place your tent well landward of it in an approved camping area.
Warning: Tide tables predict astronomical tides, not storm surge or wave run-up. Move to higher ground or leave the beach when coastal flooding, large surf, severe thunderstorms, or strong onshore winds are forecast.
Set up on bare, durable sand or an established pad. Stay off dunes, dune grass, tide pools, posted nesting areas, and other sensitive habitat. Avoid drift lines with fresh seaweed and debris, which may mark recent wave reach and can attract insects or wildlife.
The original claim that “mile marker 4 often provides better beach access and safety compared to mile marker 2” is not a general rule. Mile markers are location-specific. Use current signs, ranger guidance, access conditions, and the official campsite map rather than assuming one number is safer.
Also consider wind direction and your escape route. Point the lowest or strongest end of the tent into the prevailing wind when the tent manufacturer recommends it, keep the door away from blowing sand, and do not block vehicle lanes, emergency access, or routes used by other campers.
Pre-Trip Site Checklist
- Camping permit or reservation confirmed
- High-tide times and water levels checked for the full stay
- National Weather Service beach hazards, wind, lightning, heat, and surf conditions reviewed
- Wildlife, dune, pet, vehicle, toilet, and fire rules reviewed
- Primary exit route and backup higher-ground location identified
- Reliable water supply and communication plan confirmed
Essential Beach-Specific Gear
The right beach gear reduces setup problems, blowing sand, sun exposure, and salt damage. Pack for the actual forecast and the site’s rules rather than assuming a calm, dry beach.
Must-Have Beach Supplies
Use this list as a starting point:
| Item | Purpose |
|---|---|
| Wide sand or snow stakes | Create more holding area in loose sand than short, narrow stakes |
| Anchor bags or spare stuff sacks | Hold sand for buried deadman anchors without using sharp debris |
| Extra guylines and tensioners | Reach buried anchors and retension the shelter as wind changes |
| Dustpan, soft brush, and mat | Remove sand before it enters zippers, bedding, and storage bags |
| Tent footprint or fitted tarp | Reduce abrasion; keep every edge tucked under the tent floor |
| Anchored sun shelter | Provide shade when wind conditions and local rules allow |
| Lidded food containers and cooking tools | Limit sand contamination and wildlife access; they cannot guarantee a sand-free meal |
| Trash and sanitation bags | Pack out waste according to local requirements |
Pro Tip: Use a footprint that is slightly smaller than the tent floor. A tarp edge sticking out can collect rain or spray and funnel water underneath the tent.
Essential Sun Protection Items
Beach sun can be intense because there may be little natural shade. Bring a wide-brimmed hat, UV-protective clothing, sunglasses, and a stable shade shelter. Use broad-spectrum sunscreen and follow its label. The U.S. Food and Drug Administration advises applying sunscreen before sun exposure and reapplying at least every two hours, or more often after swimming, sweating, or towel drying.
- Beach umbrella: Useful for shade only when fully anchored and within its wind rating. Lower or pack it away when gusts rise.
- Broad-spectrum sunscreen: SPF 30 is a practical beach choice; apply generously to exposed skin and do not use sunscreen as your only protection.
- Collapsible sun shelter: Helpful for meals and breaks, but it must be anchored like a tent and should not block emergency routes or nesting areas.
- Hydration and cooling: Carry enough drinking water, electrolytes when appropriate, and a plan for shade during the hottest part of the day.
Tent Setup Techniques for Sand
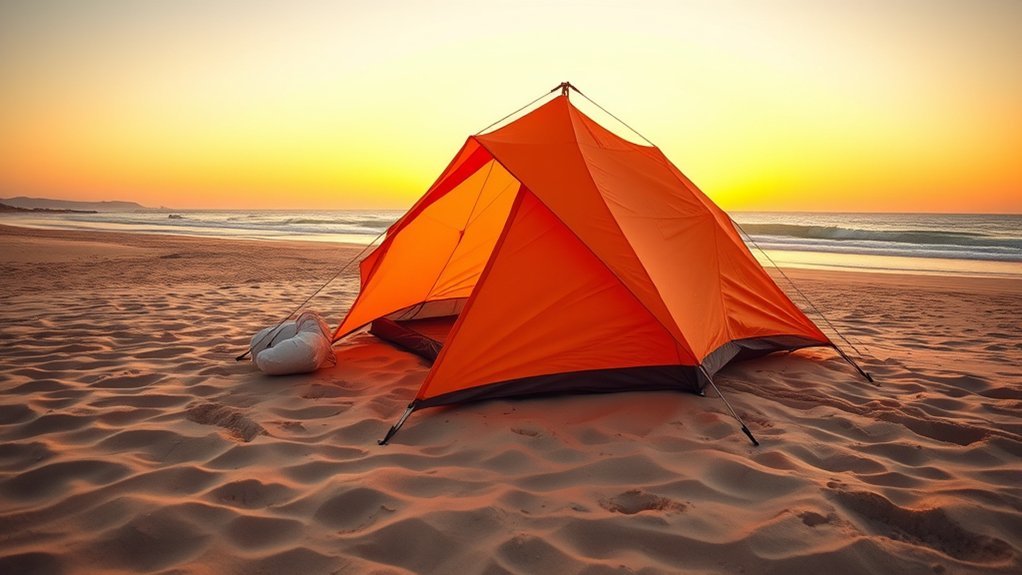
Set up in a deliberate order so the tent never becomes a sail. A freestanding frame makes positioning easier, but it does not remove the need for anchors.
- Confirm the site: Recheck the high-tide line, wind exposure, overhead hazards, drainage, closures, and exit route.
- Prepare the surface: Remove sharp shells, glass, hooks, and debris by hand. Do not level dunes or dig major trenches.
- Lay the footprint: Keep it fully under the tent floor so it cannot collect water.
- Control the tent body: In wind, connect one upwind corner to an anchor before unfolding the rest.
- Build the frame: Assemble poles carefully and attach the rainfly according to the manufacturer’s instructions.
- Anchor every required point: Use broad sand stakes or buried sand-filled bags at corners, vestibules, and primary guy-out points.
- Tension evenly: Remove slack without pulling the tent out of shape. Retension after the fabric settles.
- Test the system: Pull firmly on each line in the expected wind direction. Rebuild any anchor that moves.
Anchoring Methods for Stability
Choose an anchor method that matches the sand:
- Wide sand or snow stakes: Best for many loose-sand sites because their broad profile resists pullout better than narrow pegs.
- Deadman anchors: Fill a purpose-made anchor bag or sturdy stuff sack with sand, attach the guyline, bury it horizontally in firm sand, and pack the sand down.
- Rock-assisted anchors: Use only where collecting or moving rocks is allowed. Keep heavy rocks low and stable so they cannot roll, become trip hazards, or damage the tent.
- Driftwood: Do not build furniture or remove protected natural material. Where local rules allow its use, avoid sharp pieces and restore the area when you leave.
Best Tent Stakes
The best stake depends on sand firmness. Wide aluminum or plastic sand stakes and broad snow stakes are usually better choices for deep, dry sand. Standard Y-shaped stakes such as MSR Groundhog stakes may work in damp or compacted sand, but calling them the top choice for all sandy beaches is too broad. Short basic stakes can loosen quickly as dry sand shifts.
Use longer anchors when needed, but do not treat “36-inch guylines” as a universal requirement. The correct line length is the length that lets you place the anchor far enough away for a low, stable pull angle while keeping the line visible and out of walkways.
Guyline Setup Techniques
Attach guylines only to the tent’s designed guy-out points. Run each line in the direction it is meant to resist, then use the built-in tensioner or a secure adjustable knot. Keep lines taut, not guitar-string tight.
- Low-stretch guyline: Reflective tent cord is easier to see and usually easier to retension than general-purpose 550 paracord. Paracord can work in a pinch but may stretch or sag.
- Longer reach: Carry extra cord so you can reach a buried anchor without placing it too close to the tent.
- Trip control: Keep lines out of paths, add reflective markers, and avoid creating hazards near neighboring sites.
- Final check: Retension after sunset, rain, or a wind shift because fabric and sand can settle.
How to Build and Test Deadman Anchors
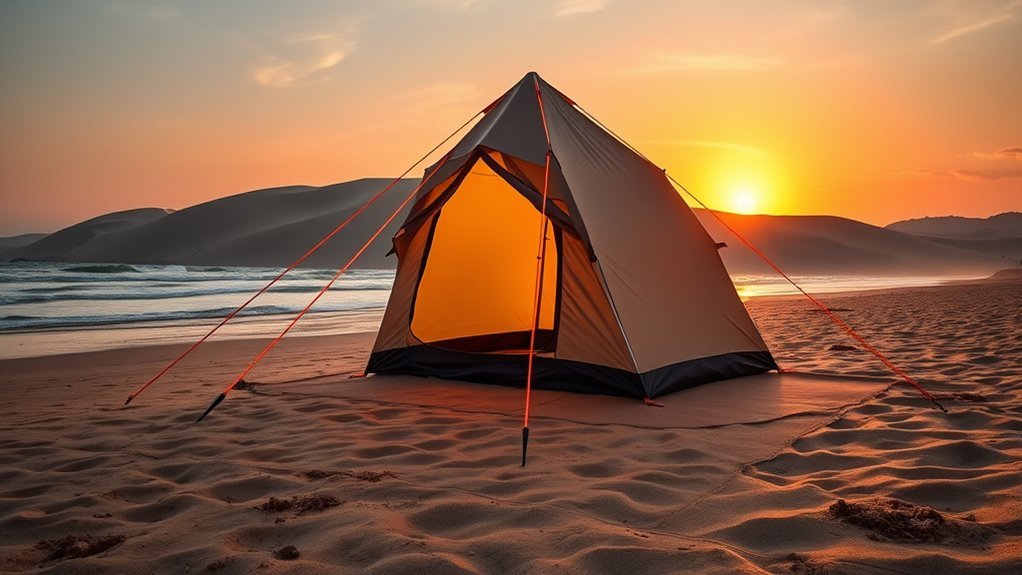
A deadman anchor spreads the load across a buried object instead of depending on a narrow stake. A fixed 12-inch depth is not reliable for every beach; dry powdery sand, wet compact sand, anchor size, tent size, and wind all affect holding power.
- Fill an anchor bag or tough stuff sack with sand and close it securely.
- Attach the guyline to the bag’s strong attachment point, not a weak drawcord alone.
- Dig a trench perpendicular to the direction of pull and deep enough to reach firmer sand.
- Lay the bag horizontally in the trench with the line exiting toward the tent.
- Bury the bag, pack the sand firmly, and smooth the surface.
- Load the line gradually. If the anchor shifts, make it larger, deeper, or farther from the tent.
Note: Count your anchors before setup and after takedown. Remove every bag, cord, stake, and buried object so nothing remains as litter or a hazard.
Selecting the Best Tent Stakes
Match the anchor to the surface instead of choosing by brand name alone.
On loose beach sand, anchor surface area and a well-packed placement matter more than a lightweight stake’s popularity.
- Deep, dry sand: Use broad sand stakes, snow stakes, screw-style sand anchors where permitted, or buried anchor bags.
- Damp, firm sand: Long Y- or V-profile stakes may hold if fully seated and tested.
- Mixed shell or hardpan: Bring more than one anchor style and avoid forcing a stake against buried rock.
- Large family tents or shade shelters: Use more anchor area and all manufacturer-specified guy points because wind load rises with exposed surface area.
Fabric sand pockets attached to guylines can work well when filled completely, buried where appropriate, and checked often. No stake or anchor is fail-safe, so inspect the system whenever wind increases.
Effective Guyline Usage
Guylines stabilize the frame, reduce fabric flapping, and share wind load with the corner anchors. Set them in line with the tent’s reinforced attachment points and avoid sharp bends around rocks.
| Technique | How It Works | Best Use |
|---|---|---|
| Wide sand stake | Creates broad resistance in loose sand | Routine corner and guy-out anchoring |
| Deadman anchor | Uses a buried sand-filled bag or approved object | Very loose sand or failed standard stakes |
| Rock-assisted line | Adds low, stable mass where resource rules allow | Firm sites with safe, permitted rocks |
| Extended guyline | Reaches a more secure anchor and reduces pull angle | Large tents, soft sand, or offset anchor points |
Freestanding vs. Non-Freestanding Tents
Both styles can work on sand, but neither is automatically safer or easier.
- Freestanding tents: The pole structure can stand before staking, making the tent easier to reposition. It still needs corner anchors and guylines because wind can roll or carry it.
- Non-freestanding tents: These shelters can be lighter, but their shape depends on reliable tension and anchor placement. Loose sand can make setup harder, not easier.
- Minimalist shelters: Models such as the Mountain Laurel Designs Duomid or Zpacks Hexamid Pocket Tarp reduce packed weight, but they require suitable anchors and skillful tensioning.
Choose a low-profile tent with adequate ventilation and a rainfly that can be fully secured. Large vertical walls catch more wind. Practice the exact pitch at home before relying on it at an exposed beach.
Managing Tides and Coastal Conditions
Check conditions before leaving home, again before setup, and throughout the stay. Tide predictions are only one part of the decision.
| Action | Purpose | Practical Check |
|---|---|---|
| Check official tide predictions | Estimate normal high-water timing and height | Review the entire overnight period, not just arrival time |
| Choose a site above the high-tide line | Reduce normal tidal flooding risk | Look for wrack, drift debris, wet-sand limits, and posted markers |
| Monitor coastal weather and surf | Anticipate wind, waves, heat, lightning, and flooding | Leave early when warnings or unsafe conditions develop |
| Secure gear above water reach | Prevent loss to waves or rising water | Do not leave boats, coolers, or shoes at the waterline overnight |
Setting up at low tide can make the safe high-water boundary harder to judge. Use the predicted high tide and visible shore evidence rather than assuming a low-tide setup is safe. Conditions can also change faster than an app refreshes, so watch the water and weather directly.
Wind, Lightning, and Water Safety
Beach hazards include dangerous currents, heat, lightning, strong wind, and large waves. A tent or open-sided sun shelter is not safe lightning protection. If thunder is heard, move promptly to a substantial enclosed building or a hard-topped vehicle and follow official local guidance.
Do not swim alone or enter rough surf merely because the campsite appears calm. Review rip-current and surf statements, use guarded swimming areas when available, and keep children within close reach around water.
Sun Protection Strategies
Combine several forms of protection rather than depending on sunscreen alone:
- Plan strenuous activities for morning or late afternoon when practical.
- Use anchored shade and take cooling breaks.
- Wear a wide-brimmed hat, sunglasses, and tightly woven or UV-rated clothing.
- Apply broad-spectrum sunscreen to exposed skin before sun exposure and reapply according to the label.
- Drink water regularly and watch for headache, dizziness, nausea, confusion, or unusual weakness.
Warning: An unsecured umbrella or canopy can become airborne. Take it down when wind rises or when the manufacturer’s limits are exceeded.
Food, Water, Wildlife, and Sanitation
Beach camping can attract gulls, raccoons, rodents, insects, and larger wildlife. Store food, trash, scented toiletries, and cooking gear in the container required by the local managing agency. Never feed wildlife, and do not leave coolers or trash unattended.
- Water: Carry a reliable supply unless the site confirms potable water. Saltwater is not suitable for drinking or routine cooking.
- Cooking: Cook away from the tent and dry vegetation, shield food from blowing sand, and use stoves only where permitted.
- Trash: Pack out food scraps, foil, fishing line, hooks, and micro-trash. Extra-large freezer bags can help contain wet or sandy waste, but use tougher outer bags for sharp items.
- Human waste: Follow the site’s exact toilet or pack-out rule. Many beaches prohibit digging catholes because of tides, shallow groundwater, or heavy use.
Managing Sand, Moisture, and Salt
Sand control starts outside the tent. Place a mat at the entrance, brush feet and gear before entering, and keep shoes in the vestibule or a covered bin. Store clean sleep clothes and the sleeping bag in closed sacks until bedtime.
- Shake blankets and clothing downwind and away from neighboring camps.
- Keep zippers free of grit; brush them gently rather than forcing them.
- Vent the tent to reduce condensation, even when the air feels damp.
- After the trip, rinse salt from poles, stakes, and hardware with fresh water, then dry everything fully before storage.
- Do not pack a wet or salty tent for long-term storage because moisture and residue can damage coatings and hardware.
Environmental Considerations for Beach Camping
Use durable bare sand or established sites and stay off sand dunes and vegetation. Dune plants help hold fragile coastal landforms together, and open beach areas may contain well-camouflaged nests or chicks. Follow posted closures and give wildlife a wide buffer.
The Leave No Trace on-and-nearshore guidance recommends concentrating use on durable surfaces, avoiding vegetated dunes and sensitive habitats, and not camping below the high-tide mark.
Pack out all waste, minimize single-use plastics, and leave shells, driftwood, rocks, and natural features where you found them unless local rules clearly allow their use. Keep artificial light low near nesting areas and never disturb marked nests.
Campfires are site-specific. Some beaches prohibit them; others limit fuel, location, season, or fire size. When fires are allowed, keep them small, use an existing fire area when required, extinguish with water, and do not bury hot coals under sand. Buried coals can remain hot and burn people or wildlife.
Troubleshooting Common Beach Camping Problems
| Problem | Likely Cause | Fix |
|---|---|---|
| Stake keeps pulling out | Anchor is too small, shallow, or close to the tent | Use a broader stake or larger buried anchor, extend the guyline, repack, and retest |
| Tent wall collapses in gusts | Poor orientation, missing guylines, or uneven tension | Reorient if safe, use every main guy point, and tension opposite sides evenly |
| Water collects under tent | Low site or footprint extends beyond floor | Move to approved higher ground and tuck the footprint fully underneath |
| Sand gets into bedding | Open gear and no entry routine | Use a mat and brush, keep sleep gear sealed, and change into clean clothes inside |
| Wind exceeds the setup | Forecast worsened or exposure is too high | Lower shade gear, pack loose items, and relocate or evacuate before conditions become dangerous |
Frequently Asked Questions
How do I keep sand out of my sleeping bag?
Use a fitted footprint under the tent, place a mat and brush at the door, clean feet and clothing before entering, and keep the sleeping bag sealed until bedtime. Change into clean sleep clothes inside the tent and store sandy shoes in the vestibule or a covered container.
What food should I bring for beach camping?
Choose simple meals that stay protected in sealed containers, such as wraps, shelf-stable pouches, oatmeal, fruit, trail mix, and easy one-pot meals. Keep perishable food at a safe temperature, store all food as local wildlife rules require, and pack out scraps.
Can I use a campfire on the beach?
Only when the managing agency permits it. Rules may limit the season, location, fuel, container, or size. Keep the fire small, monitor it continuously, extinguish it with water, and never bury hot coals in sand. Use a stove when fires are banned or conditions are windy.
What are the best activities for beach camping?
Good options include walking, wildlife viewing from a respectful distance, beach games, photography, paddling, and swimming in designated areas when conditions are safe. Check surf, rip-current, wind, tide, and lightning information before water activities.
How do I clean up after camping on sand?
Brush and shake gear away from other campers, collect every stake and buried anchor, pack out all waste, and restore filled holes. At home, rinse salt from poles and hardware with fresh water, clean zippers gently, and dry the tent completely before storage.
How far should a tent be from the ocean?
There is no universal safe distance. Camp only in the approved zone and well above the local high-tide line, then add extra margin for the forecast, beach slope, waves, and storm surge. Follow any posted setback even when it is greater than your estimated buffer.
What is the best way to anchor a tent in loose sand?
Use broad sand or snow stakes, or bury sand-filled anchor bags horizontally in firmer sand. Extend and tension guylines in the direction of expected wind, then test every anchor. Increase anchor size or depth if anything moves.
Conclusion
Camping on sand is enjoyable when you plan for tides, wind, sun, wildlife, and fragile coastal habitat. Choose a legal site above the high-tide line, use anchors designed for loose ground, tension every guyline, and stay ready to move if conditions worsen. With thoughtful gear, a clean campsite, and respect for local rules, the beach can be a comfortable and memorable place to camp.
Sources
- NOAA Tide Predictions — official tide predictions and station data.
- National Weather Service: Beach Hazards and Safety — coastal risks including dangerous currents, heat, lightning, and waves.
- U.S. Food and Drug Administration: Sunscreen Safety — application and reapplication guidance.
- National Park Service: Shi Shi Beach Safety and Camping — high-tide-line camping, wildlife-resistant food storage, and coastal fire considerations.
- Leave No Trace: On and Nearshore Reference Card — durable surfaces, high-tide placement, dunes, and sensitive habitat.
- REI Expert Advice: How to Set Up a Tent — sand anchors, snow stakes, guylines, and windy setup practices.
