
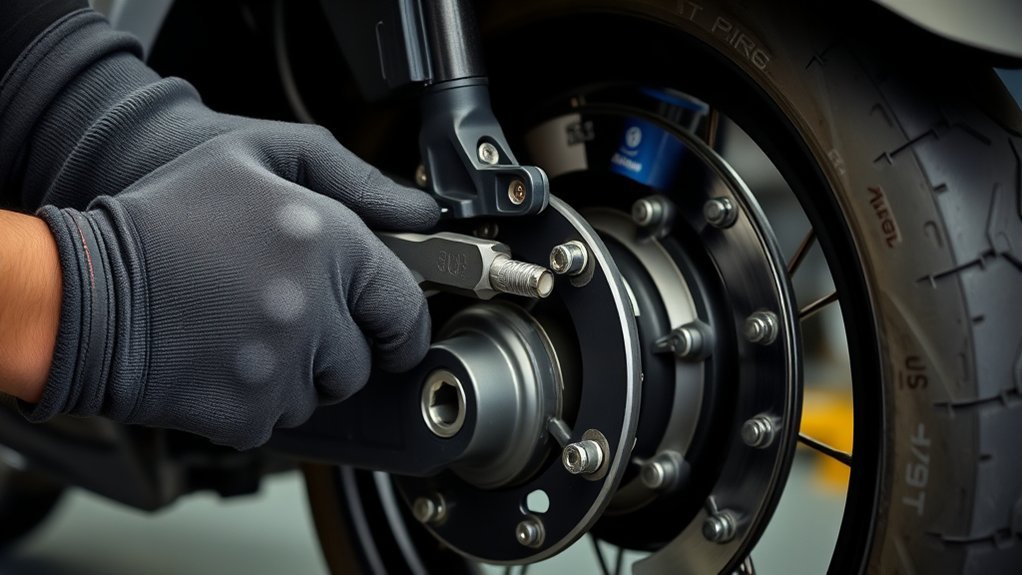
Last Updated on July 23, 2026 by Caleb Warren
Adjusting an electric scooter disc brake is usually a matter of inspecting the pads and rotor, centering the caliper, setting the correct pad clearance, and removing cable slack. The exact method depends on whether your scooter uses a cable-operated mechanical brake, a hydraulic brake, or a combined mechanical and electronic system. Check the model manual before loosening any fastener.
Quick Answer
Power off and stabilize the scooter, inspect the pads and rotor, then loosen the caliper mounting bolts slightly. Center the caliper using the method specified for your brake design, tighten the bolts to the scooter maker’s torque, adjust pad clearance, remove cable slack only if it is a mechanical brake, and test at walking speed.
Key Takeaways
- There is no universal 1 mm pad-wear limit or 1 mm clearance setting. Use the specification for your caliper and pad model.
- A barrel adjuster removes cable slack; it should not be used as the main way to compensate for worn pads.
- Mechanical, dual-piston mechanical, and hydraulic calipers do not all center in the same way.
- Replace oil-contaminated pads and stop riding if the lever reaches the grip, the brake leaks, the rotor is badly bent, or braking remains weak.
At a Glance
| Time Required | About 20–40 minutes for inspection, alignment, and testing |
| Difficulty | Beginner to intermediate for a cable brake; professional service is safer for leaks, bleeding, damaged rotors, or uncertain torque specifications |
| Tools Needed | Scooter manual, correct hex or Torx bits, torque wrench, flashlight, clean lint-free cloth, approved rotor cleaner, and a ruler or caliper; mechanical brakes may also need a cable wrench |
| Cost | No parts are needed for basic alignment; replacement pads, rotors, cables, and professional labor vary by scooter model |
Warning: Switch the scooter off, unplug the charger, let the brake cool, and support the scooter securely before working. Keep fingers, clothing, and tools away from a spinning wheel. Do not ride until both the mechanical brake and any electronic brake cut-off function pass a low-speed test.
Disclosure: As an Amazon Associate I earn from qualifying purchases. Some links on this page are affiliate links, at no extra cost to you.
Why Scooter Disc Brakes Need Adjustment
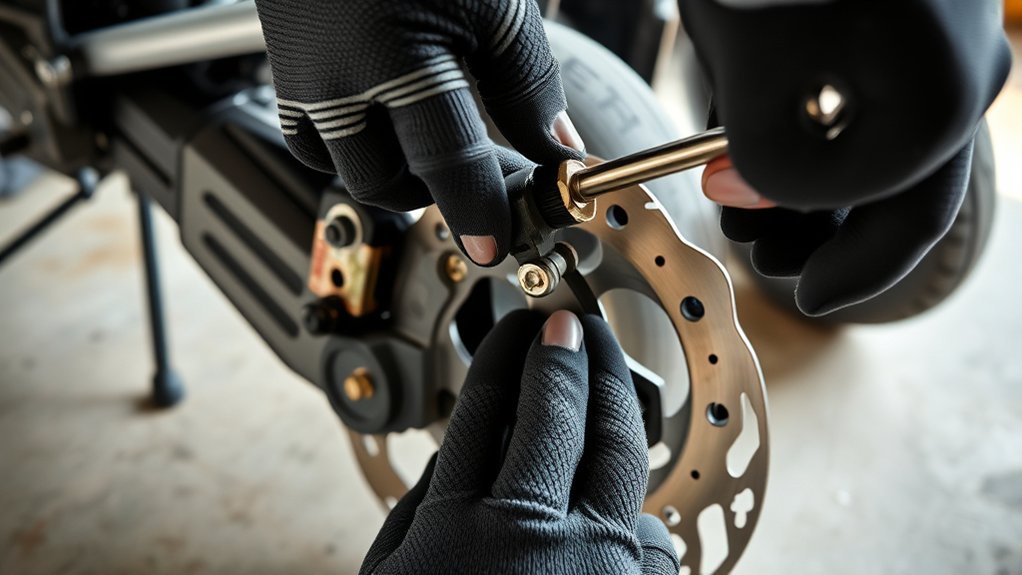
Scooter disc brakes can lose their best feel as pads wear, cables and housings settle, mounting bolts shift, or the wheel is removed and reinstalled. A misaligned caliper may cause rubbing, noise, uneven pad wear, or weak braking. A cable-operated brake may also feel loose if the cable stretches or the housing is not seated correctly.
Adjustment cannot correct every problem. A badly bent or worn rotor, contaminated pads, damaged cable housing, hydraulic fluid leak, loose wheel bearing, or faulty electronic brake needs repair or replacement. Segway’s maintenance guidance also treats abnormal shaking, noise, loose parts, and poor brake operation as reasons to stop riding and inspect the scooter before further use.
Identify Your Scooter Brake Type First
Look at the caliper and the line running from the brake lever before you begin. The adjustment method changes with the brake type.
| Brake type | How to recognize it | Main adjustment |
|---|---|---|
| Mechanical disc | A steel cable pulls an external arm on the caliper | Caliper position, pad adjusters, cable condition, and cable slack |
| Hydraulic disc | A sealed hose enters the caliper and there is no exposed cable arm | Caliper centering and piston function; a soft lever or leak may require bleeding or service |
| Mechanical plus electronic braking | The lever operates a cable brake and also signals the controller or brake light | Mechanical adjustment plus a check that motor cut-off or regenerative braking still works |
This guide focuses mainly on cable-operated disc brakes. For a hydraulic system, do not look for a cable-tension adjuster, open the hose, or add fluid unless you have the correct service procedure and fluid for that exact brake.
Tools for Scooter Disc Brake Adjustment
Use the sizes listed in your scooter or caliper manual. A 4 mm hex key is common on some calipers, but other scooters use 3 mm or 5 mm hex bolts, Torx fasteners, or an open-ended wrench. A torque wrench matters because scooter brake and wheel fasteners can have model-specific torque values.
| Tool | Use | Benefit |
|---|---|---|
| Correct hex or Torx bits | Caliper, pad, cable, or rotor fasteners | Reduces the risk of stripped bolts |
| Torque wrench | Final tightening | Matches the scooter maker’s specification |
| Flashlight and white card | Backlighting the pad gaps | Makes small clearances easier to see |
| Lint-free cloth and approved cleaner | Cleaning the rotor | Removes residue without adding oil |
| Plastic pad spacer or piston tool | Holding hydraulic pistons apart when the wheel is removed | Avoids using a sharp metal screwdriver on pads or pistons |
Also keep the scooter manual nearby. It should identify the fastener sizes, torque settings, pad wear limit, rotor wear limit, and whether the brake lever includes an electronic motor cut-off sensor.
Check the Pads and Rotor First
Before adjusting the caliper, inspect the wheel, pads, rotor, cable, and fasteners. Seat the wheel fully in its mounts and check for side-to-side play. A loose axle or bearing can make the rotor appear misaligned even when the caliper is correctly positioned.
- Check pad thickness. Measure the pad as your manufacturer directs. Do not use a universal “replace below 1 mm” rule. For example, Tektro’s current mechanical brake manual specifies replacement below 2.2 mm total thickness for the pad and backing plate on the covered models, while SRAM specifies 3 mm or less for certain pads. Those figures are examples, not interchangeable standards.
- Check for contamination. Oil, grease, hydraulic fluid, and some sprays can ruin friction material. Replace contaminated pads rather than trying to burn, soak, or heavily sand them.
- Check the rotor. Spin the wheel and watch the rotor through the caliper. Constant contact usually points to caliper or pad clearance. Contact at one point per revolution often suggests a bent rotor.
- Check rotor thickness and damage. Use the minimum stamped on the rotor or listed in the manual. Deep grooves, cracks, heat discoloration, looseness, or thickness below the limit require replacement or professional inspection.
- Check the cable and housing. On a mechanical brake, replace frayed, kinked, rusty, or sticky parts. Confirm every housing end is fully seated.
Note: Pad and rotor limits vary widely. Tektro’s 2026 hydraulic manual, for example, covers both 1.8 mm and 2.3 mm rotors and gives different replacement limits. The correct number is the one for your exact part.
Clean the Rotor and Loosen the Caliper
Let the brake cool. Clean the braking track with the method approved by the brake maker. A lint-free cloth with high-purity isopropyl alcohol is commonly used for disc rotors, while some manufacturers specify a mild detergent solution followed by a thorough rinse and complete drying. Do not spray cleaner near the caliper, tire, bearings, deck, or electrical parts, and do not touch the cleaned braking track with bare fingers.
Next, identify the two caliper mounting bolts. Loosen them only enough for the caliper body to move sideways. Do not remove them. Use the correct bit rather than assuming every scooter takes a 4 mm hex key.
Pro Tip: Place a white card behind the caliper and shine a flashlight at it. The bright background makes the small gaps between the rotor and pads much easier to compare.
Center the Caliper Over the Rotor
The familiar “loosen, squeeze, and tighten” method works well for many hydraulic and dual-moving-pad calipers, but it is not universal. A single-piston mechanical brake pushes the rotor toward a fixed inner pad, so you may need to position that fixed pad first instead of relying only on lever pressure.
Loosen Caliper Mounts
Confirm the wheel is seated squarely and the rotor is between the pads. Loosen both mounting bolts until the caliper can float slightly but cannot fall or twist freely.
- Keep any original washers, spacers, and adapters in their installed order.
- Do not loosen the rotor bolts when you only need to align the caliper.
- If the rotor swings because the wheel or hub is loose, repair that problem first.
Squeeze Lever to Center
For a hydraulic caliper, a dual-arm mechanical caliper, or a design whose manual calls for self-centering, squeeze and hold the brake lever while the mounting bolts are loose. The pads clamp the rotor and help position the caliper. Keep the lever held while you snug the bolts in alternating steps.
For a single-moving-pad mechanical caliper, turn the fixed inner pad adjuster toward the rotor until it supports or lightly locks the rotor, align the caliper body, snug the mounting bolts, and then back the pad away by the amount specified in the manual. Park Tool’s design-specific guidance shows why different mechanical calipers require different sequences.
Warning: Do not remove the caliper and push between installed pads with a flathead screwdriver. If hydraulic pistons must be reset, remove the pads as directed and use a clean, non-sharp piston tool or the maker’s spacer. Never squeeze a hydraulic lever with the wheel removed unless a bleed block or pad spacer is installed.
Tighten Evenly and Check
Snug the upper and lower mounting bolts in small, alternating turns so the caliper does not twist. Release the lever, spin the wheel, and compare the gaps. Make tiny side-to-side corrections if one pad still touches.
- Tighten the mounting bolts to the torque in the scooter or brake manual.
- Do not copy a generic torque value from another scooter.
- After final tightening, squeeze the lever several times and check alignment again.
Adjust Pad Clearance and Cable Tension
Set pad clearance with the caliper’s pad adjusters whenever the design provides them. The goal is a rotor that turns freely, pads that sit parallel to the braking track, and a lever that engages well before it reaches the handlebar. There is no universal 1 mm gap. Some Tektro mechanical models specify about 0.3 mm on each side, while other calipers use different clearances and unequal inner and outer gaps.
Set the Pad Clearance
- Turn the fixed inner pad adjuster toward the rotor in a small increment.
- Set the moving outer pad according to the caliper design.
- Spin the wheel after each change.
- Back off the pad that rubs until the wheel turns freely.
- Squeeze the lever and confirm both pads contact the rotor squarely.
If one side has no adjuster, move the caliper body slightly to create the correct gap. Do not bend the caliper mount or add washers that were not designed for the brake.
Set Mechanical Cable Tension
Use the barrel adjuster only to remove small amounts of cable slack or compensate for cable and housing settling. It should not become the main pad-wear adjustment. Excessive barrel adjustment can hold the caliper arm partly applied or let the arm bottom out before the pads grip the rotor.
- Thread the barrel adjuster inward if it is extended too far.
- Make sure the caliper actuator arm returns fully to its rest position.
- If there is still excess slack, loosen the cable pinch bolt, pull the cable just taut without moving the arm, and tighten the bolt to the specified torque.
- Use the barrel adjuster in small increments for final lever feel.
- Check that the lever does not touch the grip and that the wheel is not dragging.
Replace a frayed cable or sticky housing instead of adding more tension. A damaged cable can fail even when the brake feels acceptable during a quick stand test.
Stop Brake Drag and Rubbing
First identify the rubbing pattern. Constant rubbing, once-per-revolution rubbing, and rubbing only after the lever is pulled usually have different causes.
Check Caliper Alignment
Spin the wheel and look through the caliper. If one pad touches along the full rotation, loosen the mounting bolts and shift the caliper slightly away from that side. If the pad faces are not parallel to the rotor, repeat the centering process and confirm all original conical washers or adapters are seated correctly.
- Check that the rotor is centered in the caliper opening.
- Confirm the wheel and axle have no looseness.
- Retighten each fastener to the model specification.
Adjust Cable Tension
If the lever feels loose but the pads still have useful material, remove only the cable slack. Turn the barrel adjuster in a small increment, squeeze the lever several times, and test the wheel again. If the caliper arm no longer returns fully, reduce the cable tension and adjust the pads instead.
If the lever suddenly becomes loose, inspect the cable anchor, housing ends, lever, and caliper arm before riding. A slipped cable or loose fastener needs correction, not repeated barrel adjustment.
Eliminate Rotor Rubbing
If rubbing occurs at one point during each wheel rotation, inspect the rotor from above and behind. A small lateral bend may require careful truing with the correct tool, but a cracked, deeply scored, badly warped, overheated, loose, or undersized rotor should be replaced. Rotor truing is easy to overdo, so professional service is the safer choice when the bend is large or the rotor is thin.
- Set the fixed pad and moving pad according to the caliper design.
- Use the manufacturer’s clearance, not a universal 1 mm target.
- Check rotor thickness, wheel seating, axle tightness, and bearing play.
Disc Brake Troubleshooting Table
| Symptom | Likely cause | What to do |
|---|---|---|
| Constant light rub | Caliper off-center or pad too close | Recenter the caliper and reset the affected pad |
| Rub once per wheel turn | Bent rotor, loose wheel, or bearing play | Seat the wheel, inspect the hub, and true or replace the rotor |
| Lever reaches the grip | Cable slack, worn pads, leak, air, or incorrect adjustment | Stop riding; inspect the system and service the correct cause |
| Squeal with weak braking | Contamination, glazing, or poor bedding-in | Clean or replace parts as directed and bed in new pads |
| Brake stays applied | Too much cable tension, sticky cable, sticky piston, or damaged caliper | Release excess tension and service the cable or caliper |
Test the Brakes and Fine-Tune
Complete a static test before riding. Power the scooter off, squeeze the brake firmly, and try to push it forward. The braked wheel should resist movement, the lever should feel predictable, and no fastener should shift. Spin the wheel after releasing the lever and check that it turns without heavy drag.
- Power on the scooter in a clear, flat area.
- Walk beside it and test the brake at walking speed.
- Ride at very low speed and apply the brake gently.
- Repeat with firmer pressure while keeping enough space to stop.
- Confirm the brake light, motor cut-off, or regenerative braking works if your model includes it.
- Recheck the mounting bolts, cable anchor, pad gaps, and wheel spin after the test.
New pads need bedding-in before they reach full performance. Follow the pad maker’s procedure. Tektro states that some new pads need about 20–30 full stops, followed by another pad adjustment if needed. Perform bedding-in in a safe, traffic-free area without overheating the brake.
A brake adjustment is complete only when the wheel spins freely, the lever engages before the grip, every fastener is tightened to the correct specification, and the scooter stops predictably during a low-speed test.
When to Stop and Get Professional Help
Do not ride the scooter until a qualified technician checks it when any of these conditions remain:
- The lever touches the handlebar or suddenly loses resistance.
- Hydraulic fluid is leaking, the hose is damaged, or the lever feels spongy after normal centering.
- The rotor is cracked, badly bent, loose, deeply scored, overheated, or below its minimum thickness.
- The pads are contaminated, unevenly worn, loose, or below the model’s replacement limit.
- The wheel, axle, stem, folding joint, headset, or bearings have play.
- The brake rubs heavily, grabs unpredictably, or remains weak after correct adjustment.
- The electronic brake, motor cut-off, brake light, or dashboard shows a fault.
Frequently Asked Questions
How do you adjust disc brakes on an electric scooter?
Power off and support the scooter, inspect the wheel, pads, rotor, cable, and fasteners, then loosen the caliper mounts slightly. Center the caliper using the method for that brake design, tighten it to the specified torque, set the pad clearance, remove cable slack if it is mechanical, and test at low speed.
How do you unlock the speed limit on an electric scooter?
Use only the manufacturer-approved riding modes and settings available for your exact model and region. Do not use hidden codes, third-party firmware, controller wiring changes, or unofficial apps to defeat a limiter. Those changes can breach local law, affect braking and thermal limits, disable safety functions, and void warranty coverage.
Can disc brakes be adjusted?
Yes. You can usually adjust caliper alignment, mechanical pad position, cable slack, and lever reach when the brake provides those adjustments. Worn, contaminated, leaking, cracked, or badly bent parts must be repaired or replaced rather than adjusted.
How do you stop death wobble on an electric scooter?
Reduce speed smoothly, keep both hands on the handlebar, avoid sudden steering inputs, and stop in a safe place. Do not continue riding until the tires, wheel axles, bearings, headset, stem, folding latch, suspension, and frame have been inspected. Randomly tightening parts without the model’s torque values can cause further damage.
Why does the brake still rub after centering the caliper?
The rotor may be bent, the wheel may not be seated correctly, the hub may have play, a piston or cable may be sticking, or one pad may be too close. Watch whether the rubbing is constant or occurs once per wheel turn, then correct that specific cause.
How much pad gap should a scooter disc brake have?
Use the caliper manufacturer’s specification. There is no universal 1 mm gap. Some mechanical calipers use a much smaller clearance, and some single-piston systems need a different gap on the fixed and moving sides.
Sources
- Tektro Mechanical Disc Brake Installation Instruction — model-specific pad thickness, clearance, contamination, alignment, and torque guidance
- Tektro Hydraulic Disc Brake Owner’s Manual — hydraulic centering, pad and rotor limits, contamination warnings, and bleeding cautions
- Park Tool Mechanical Disc Brake Alignment — design-specific mechanical caliper alignment, pad adjustment, cable slack, and rubbing diagnosis
- Park Tool Disc Brake Rotor Removal and Installation — rotor cleaning, wear inspection, and manufacturer-specific minimum thickness
- Segway KickScooter P100S Important Information — pre-ride brake checks, maintenance safety, abnormal-shaking guidance, and model-specific inspection procedures
Conclusion
Safe scooter disc brake adjustment starts with identifying the brake type and checking the model manual. Inspect the pads, rotor, wheel, cable, and fasteners before moving the caliper. Center the caliper with the correct method, set the manufacturer’s pad clearance, use the barrel adjuster only for cable slack, and tighten every bolt to the listed torque. Finish with a static check and a low-speed ride test. If braking remains weak, inconsistent, noisy, or unstable, stop riding and have the scooter professionally inspected.
