Last Updated on September 10, 2026 by Daniel Globe
Your electric scooter won’t hold a charge when the battery is worn out, the charger or cable is faulty, or the charging path is interrupted by loose wiring, a blown fuse, or a dirty port. Deep discharges and age reduce lithium-ion capacity, while corroded or loose connections raise resistance and cut charging efficiency. If the pack charges but dies quickly, the cells may be sagging under load, and the sections below show how to narrow it down safely.
Quick Answer
An electric scooter usually won’t hold a charge because of an aging battery, a failing charger or cable, loose or corroded connections, a blown fuse, or a battery management system cutting charge for safety. Test the charger and battery voltage separately with a multimeter to isolate which part is failing before you replace anything.
Key Takeaways
- Test the charger and battery separately with a multimeter — a green light doesn’t prove the pack is actually charging.
- Li-ion cells typically lose meaningful capacity after roughly 2–3 years or 300–500 full charge cycles of regular use.
- Keep daily charge roughly between 20% and 80%; if storing the scooter for weeks, charge to 40–60% instead of leaving it full or empty.
- Only use the manufacturer’s charger — mismatched “universal” chargers are a documented fire risk.
- Never leave a charging scooter unattended or charging overnight while sleeping.
Disclosure: As an Amazon Associate I earn from qualifying purchases. Some links on this page are affiliate links, at no extra cost to you.
Why Your Electric Scooter Won’t Hold a Charge
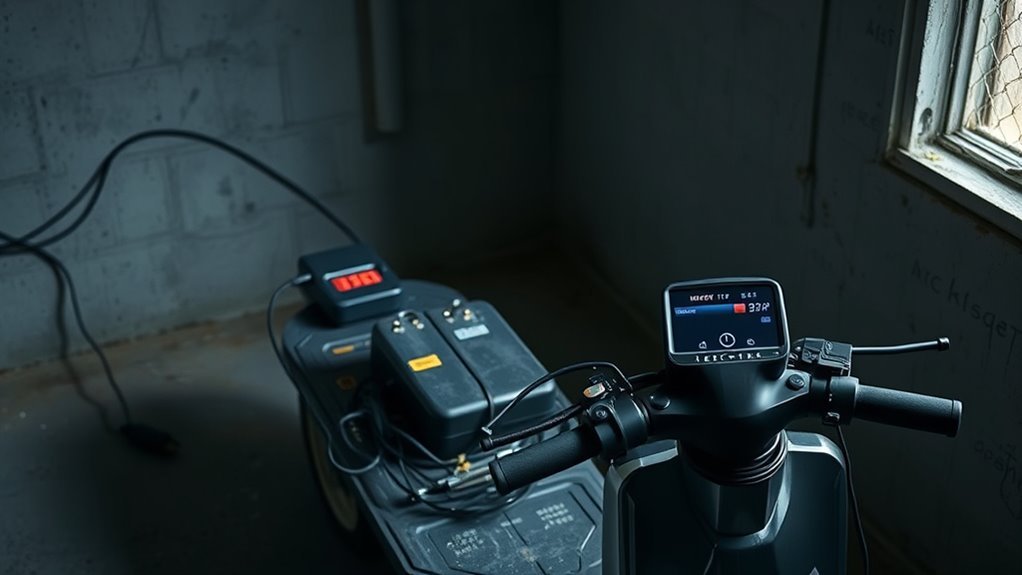
If your electric scooter won’t hold a charge, the cause is usually one of a few technical faults: battery degradation, a defective charger or cable, poor electrical connections, or a malfunctioning battery management system (BMS). Start by evaluating battery lifespan: repeated deep discharges and age reduce capacity, so the pack may no longer store enough energy for practical use — consumer lithium-ion cells are typically rated for around 300 to 500 full discharge/charge cycles before capacity drops off noticeably, according to Battery University. Next, test the charger and cable with a known-good unit, since a weak adapter can mask the real problem. Then inspect terminals, wiring, and the charge port for looseness or corrosion, because resistance can block current flow. If those checks pass, the BMS may be misreading voltage or interrupting charge control, and diagnostic testing is needed before replacement. Regular maintenance — clean connectors, secure hardware, and periodic inspection — helps prevent avoidable charging failures.
Warning: Damaged wiring, a failing charger, or a swollen battery aren’t just performance problems — they’re fire risks. The U.S. Consumer Product Safety Commission (CPSC) has recorded hundreds of micromobility battery fire and thermal incidents. Always charge on a hard, non-flammable surface, stay present while charging, and never charge overnight while sleeping or while you’re away from home.
Common Causes of Charging Failure
Once you’ve ruled out general charging problems, the most common causes of charging failure are a faulty charger or cable, battery degradation, loose connections, contamination in the charge port, and a defective battery management system. Isolate each fault with disciplined troubleshooting and watch the charging indicators for irregular behavior.
- Check for power loss in the charger path.
- Inspect battery age and thermal history.
- Verify tight, stable terminal contact.
- Clean corrosion or debris from the port.
- Escalate suspect BMS failures for service.
Aging cells lose capacity, especially after heat exposure or poor charge habits, so the scooter may accept power but store little. Loose contacts interrupt current flow, creating stop-start charging. Dirt or oxidation in the port blocks conductivity and weakens the connection. If the battery management system misreads voltage or temperature, it can halt charging on purpose to protect the pack — that’s a safety feature, not always a fault.
Signs of a Bad Charger or Cable
A bad charger or cable often shows itself through physical damage or unstable connections: frayed cords, bent plugs, loose fittings, or intermittent contact can all interrupt power delivery. Inspect the entire path from wall outlet to charging port, since small defects can reduce current transfer even when the setup looks usable. If you see scorch marks, cracked insulation, or a plug that sits crooked, treat it as a fault, not a cosmetic issue — replace it rather than continuing to use it. Test the charger with a multimeter; low voltage output points to a failing unit. Compare it against a genuine replacement to isolate the problem quickly.
Use only the charger that shipped with your scooter or a replacement explicitly approved by the manufacturer. The CPSC has specifically warned manufacturers and consumers about fire incidents tied to mismatched “universal” chargers used with incompatible battery packs — a cheap generic charger that “fits” the port is not the same as a compatible one.
Battery Wear, Deep Discharge, and Cell Failure
Even when the charger is working properly, the battery itself can lose performance as lithium-ion cells age — capacity typically starts dropping off after roughly two to three years of regular use. You’ll usually notice weaker runtime and lower charging efficiency first. For day-to-day use, aim to recharge once the pack drops to around 20%, rather than letting it fully drain, and avoid habitually charging all the way to 100% every single time. Deep discharge below the battery’s safe voltage floor can permanently reduce storage capacity through irreversible chemical changes. Cell failure can also arise from manufacturing defects, heat exposure, or overcharging, and may show up as swelling or leakage — either is a sign to stop using the battery immediately. Use a multimeter to track voltage and catch degradation early.
The CPSC has tied hundreds of documented micromobility battery fire and thermal-runaway incidents — including dozens of deaths — to damaged, mismatched, or poorly maintained lithium-ion charging systems.
- Watch runtime decline.
- Avoid complete discharges.
- Keep daily charge roughly between 20–80%.
- Measure voltage regularly.
- Replace damaged or swollen cells promptly.
Loose Connections and Dirty Charging Ports
Loose connections at the battery terminals or charging port can break the electrical path and stop your scooter from charging reliably. Tight, clean contacts restore full conductivity. During inspection, check for dust, lint, and bent pins; even small debris can block current transfer. Connector corrosion also raises resistance, causing heat, voltage drop, and intermittent charging.
| Issue | Effect | Action |
|---|---|---|
| Loose plug | Power loss | Reseat firmly |
| Dust/debris | Poor contact | Blow out with compressed air |
| Corrosion | High resistance | Clean or replace |
Check the port and cable ends regularly, and keep them free of grime. A clear, undamaged connector lets electricity flow without interruption, improving charging reliability and extending battery life.
How to Test the Charger and Battery
Once you’ve ruled out dirty ports and loose plugs, test the charger and battery directly with a multimeter. Set it to DC volts, probe the charger plug, and compare the reading to the charger’s rated output. If it’s considerably low, the charger’s likely defective. Measure the battery terminals next; a voltage below spec suggests over-discharge or cell failure.
- Check the charger plug at DC volts
- Compare output to the label
- Read the battery voltage directly
- Confirm the port path has continuity
- Note that a green LED isn’t proof of charging
If the charger shows green but the pack won’t accept charge, suspect BMS limits or internal wiring faults. Use the meter to confirm continuity between the charger port and battery path, so you know whether power can move cleanly.
Pro Tip: Test voltage after the battery has rested for at least 20–30 minutes off the charger and off the road. Readings taken immediately after riding or charging are skewed by surface charge and won’t reflect the battery’s true resting voltage.
Check the Wiring, Fuse, and Controller
Trace the power path next: inspect the wiring, fuse, and controller for anything that interrupts charging. Start with the harness and battery leads. Look for frayed insulation, loose terminals, shorts, and burnt or melted connectors. Check wire bundles in daylight so hidden abrasion or heat damage doesn’t stay concealed. If a connector feels soft, discolored, or intermittent under light movement, replace it before you chase deeper faults.
Then check the fuse near the battery. A blown fuse cuts power and blocks charging entirely, so confirm continuity and replace it only with the correct rating — never bypass a fuse, since it’s protecting the pack and you.
Finally, assess the controller. If it isn’t regulating charge correctly, the battery won’t receive stable power. Verify plugs, pins, and check for signs of overheating. Clean, secure connections and a healthy controller keep energy moving reliably.
Charger Certification and Safety Standards
Before you buy a replacement charger or battery pack, check for third-party safety certification. Scooter electrical systems are commonly evaluated against UL 2272 (electrical systems for personal e-mobility devices) and UL 2271 (batteries for light electric vehicles). The CPSC has directly urged manufacturers and consumers to use only devices certified to these standards, after tracing dozens of fire and injury incidents to non-compliant products. Look for the certification mark on the battery or charger label, buy replacement parts from the original manufacturer or an authorized retailer, and avoid generic “fits most scooters” chargers — a charger that physically plugs in isn’t necessarily voltage- or current-matched to your pack.
When the Scooter Charges but Dies Fast
If the wiring, fuse, controller, and connectors check out, but your scooter still charges and then dies fast, the problem usually shifts to battery health or charge management. You’re likely seeing reduced battery longevity from repeated deep discharges or overcharging. A weak battery management system can also break normal charge and discharge cycling, so the pack looks full but collapses under load.
- Check battery terminals for looseness.
- Clean corrosion from the charge port.
- Test pack voltage with a multimeter.
- Watch for a large voltage drop under load.
- Replace a battery that can’t hold rated voltage.
If voltage falls sharply during acceleration, the cells can’t deliver usable current. Excessive charging frequency can worsen wear, but the clearest signal is performance under load: a healthy pack holds voltage steadily, while a failing one sags fast.
How to Prevent Future Charging Problems
You can prevent most future charging problems with a few consistent habits: unplug the charger once the battery reaches full charge, avoid letting daily charge fall much below 20%, and inspect the cable, port, battery, and charger regularly for wear, corrosion, or abnormal voltage output. Store the scooter in a cool, dry environment to reduce degradation and preserve charging performance.
Proper Charging Habits
Proper charging habits prevent many scooter battery problems before they start. For daily riding, keep charge roughly between 20% and 80% rather than habitually running it to empty or leaving it topped off at 100% for long periods.
- Unplug at full charge; don’t let the pack sit topped off for extended periods.
- Use the original or manufacturer-approved charger to match voltage and current.
- If you won’t ride for weeks, store the battery at 40–60% charge rather than full or empty.
- Inspect and clean the charging port and connectors to preserve contact.
- Never charge unattended or while sleeping, and stop charging if you notice heat, odor, or swelling.
These habits reduce stress on the cells and slow degradation, giving you more reliable range over time.
Routine Battery Care
Routine battery care starts with keeping the charge in a healthy middle range: recharge when it drops to around 20% instead of letting it fully drain, since deep discharge can permanently reduce cell capacity. For storage of 3–6 months or longer, charge the pack to 40–60%, per general lithium-ion storage guidance from battery manufacturers such as Renogy, and keep it away from heat and freezing cold, since temperature extremes accelerate degradation. Inspect terminals and connectors regularly, and follow the manufacturer’s specific service limits and storage specs.
When to Replace the Battery or Charger
Battery and charger replacement becomes necessary when diagnostics show clear performance failure rather than a minor charging issue. Replace the battery when it won’t hold a full cycle, drains rapidly, or drops well below capacity shortly after a full charge. Inspect the pack for swelling or leaking — either defect means the cell chemistry is compromised and unsafe to keep using.
- Persistent rapid drainage signals internal degradation.
- Swelling or leakage means immediate replacement — stop using the battery.
- A green charger light with no real charging points to failure.
- Overheating or unusual noise means the charger’s malfunctioning.
- Verify certification and compatibility (UL 2272/2271) before buying a replacement.
If the charger claims “full” but never restores range, replace it. Testing each component separately — instead of guessing — is how you find the actual point of failure and restore safe, reliable power delivery.
Frequently Asked Questions
Why is my electric scooter battery draining so fast?
Fast drainage usually comes from aging cells, habitual over-discharging, heat exposure, a faulty charger, or poor connections reducing effective capacity. Tighten up charging habits and test voltage under load to confirm whether the pack itself is failing.
Why is my electric scooter not holding a charge?
A scooter battery usually won’t hold a charge because of cell degradation, chronic over-discharging, a failing charger, or loose and corroded connections interrupting power storage. Inspect terminals, test voltage with a multimeter, and confirm the charger’s actual output before assuming the battery is dead.
How long do 2 bars last on an electric scooter?
It varies by model, but two bars commonly translates to roughly 5–15 miles of range, depending on terrain, rider weight, and speed. Cold weather and hills can cut that range noticeably, so treat it as a rough estimate rather than a fixed number.
What is the main problem in electric scooters?
The most common underlying issue is battery degradation, often accelerated by poor charging habits — deep discharges, habitual 100% charging, and heat exposure. Disciplined charging, regular wiring checks, and a reliable, certified charger extend performance the most.
Is it safe to charge an electric scooter overnight?
The CPSC specifically advises against it. Charge your scooter while you’re present and awake, on a hard non-flammable surface, and unplug it once it reaches full charge rather than leaving it connected overnight or while you’re away from home.
Conclusion
If your scooter won’t hold a charge, don’t guess — diagnose. Check the charger, cable, port, wiring, fuse, and controller, then test the battery for voltage sag, deep discharge, or cell failure. One weak link can make the whole system fail. Maintain clean connections, avoid fully draining the pack, and use only a certified, manufacturer-approved charger to extend battery life and charge safely. If charging remains unstable or you notice heat, swelling, or odor, stop using the battery and replace it before damage spreads.
Sources
- U.S. Consumer Product Safety Commission — Micromobility Battery Charging Safety PSA — supervised charging, charger compatibility, and overnight-charging guidance
- CPSC — Safety Standards for Battery-Powered Micromobility Products — UL 2272/2271 certification and fire-incident data
- Battery University — How to Prolong Lithium-Based Batteries — cycle life and capacity degradation
- Renogy — How to Store Lithium Batteries Safely — long-term storage charge-level guidance