
Last Updated on August 25, 2026 by Caleb Warren
An electric scooter squeaks when road vibrations loosen hardware, brake surfaces become contaminated or misaligned, suspension pivots run dry, or the folding stem mechanism develops metal-on-metal friction. Diagnosing the exact noise source requires isolating the sound while stationary and during a low-speed roll. Most squeaks can be resolved at home within 15 to 30 minutes using basic metric hex keys, isopropyl alcohol, and dedicated silicone or PTFE lubricant.
Quick Answer
To silence an electric scooter squeak, identify the source by isolating the brakes, folding stem, suspension, or wheels. Tighten loose structural bolts with medium threadlocker, realign rubbing brake calipers, clean rotors with 90%+ isopropyl alcohol, and lubricate dry suspension pivot points with pure silicone or PTFE spray.
Key Takeaways
- Stem & Folding Latch: The most common source of creaking caused by leverage against the folding hinge joint.
- Brake Contamination: Dirt, oil, and misaligned calipers cause high-pitched squeals; clean with isopropyl alcohol, never petroleum solvents.
- Suspension & Bearings: Dry pivot joints require silicone or PTFE lube; gritty or loose wheel bearings need immediate replacement.
- Fastener Maintenance: Vibration loosens deck and axle bolts; secure with blue threadlocker (Loctite 242).
At a Glance
| Time Required | 15–45 minutes |
| Difficulty | Beginner to Intermediate |
| Tools Needed | Metric Allen keys (3–8mm), adjustable wrench, tire pressure gauge, lint-free microfiber cloth |
| Materials Needed | 90%+ Isopropyl alcohol, silicone shock oil or PTFE spray, medium removable threadlocker (Blue Loctite 242) |
| Estimated Cost | $0–$25 (DIY maintenance) |
Disclosure: As an Amazon Associate I earn from qualifying purchases. Some links on this page are affiliate links, at no extra cost to you.
How to Find the Source of Electric Scooter Squeaking
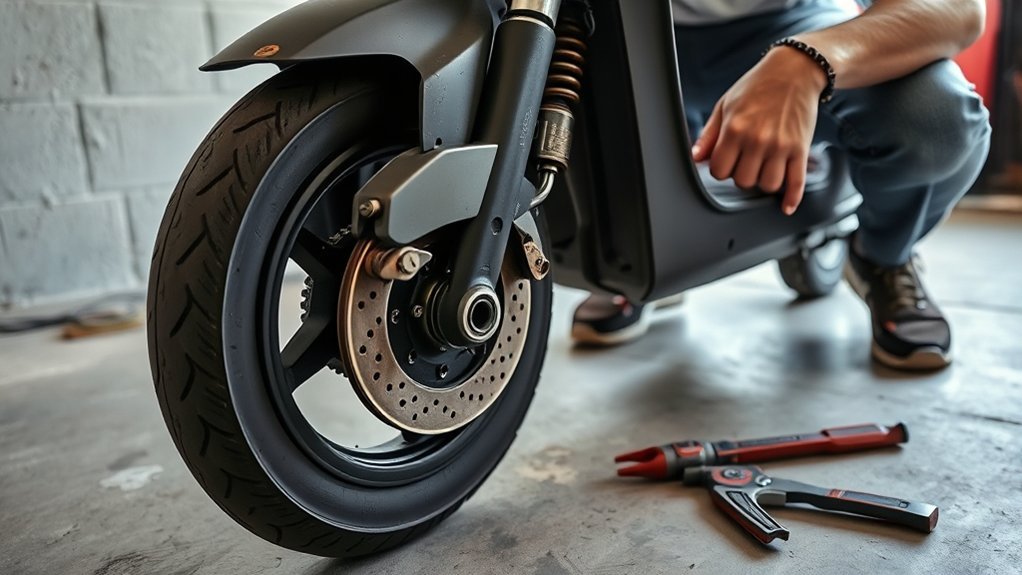
Electric scooter frames amplify noise. A creak from the folding joint can resonate through the aluminum stem, sounding like a front wheel issue. Isolating the component before loosening any fasteners prevents misdiagnosis.
Follow this systematic four-step noise isolation test:
- Stationary Bounce Test: Stand on the deck with the motor off. Bounce gently up and down while holding the brakes. If you hear a creak, the culprit is the suspension pivot bushings or deck-to-frame mounting bolts.
- Handlebar Push-Pull Test: Keep the scooter stationary, hold the front brake, and rock the handlebars forward and backward. A squeak or click points directly to the folding latch hinge, stem clamp, or headset bearings.
- Elevated Wheel Spin Test: Lift the scooter on a stand or crate. Spin each wheel by hand. A rhythmic metal chirp indicates a rubbing brake pad or warped rotor, while a dull grinding sound indicates dry wheel bearings.
- Slow Coasting Test: Ride at 3–5 mph on smooth pavement. Coast without applying brakes, then apply light braking pressure. If the squeak occurs only while slowing down, the brake friction surface requires service.
Stem, Folding Mechanism, and Headset Creaks
The folding mechanism experiences high mechanical leverage during acceleration and braking. Micro-movements between the metal contact plates of the folding latch create a persistent, high-pitched creaking sound while riding.
To eliminate stem and headset noise:
- Clean the Joint: Unfold the stem and thoroughly wipe dirt, grit, and road grime from the hinge faces and locking latch using a microfiber cloth.
- Adjust Latch Tension: Most folding latches use an internal adjustment bolt. Tighten this bolt in quarter-turn increments until the latch closes with firm mechanical resistance, eliminating all stem play.
- Apply Dry Film Lubricant: Apply a small drop of dry PTFE lubricant or silicone grease to the metal-on-metal hinge pins. Avoid sticky greases that attract road dirt.
- Install a Rubber Damper: On popular commuters like Xiaomi or Segway models, install a small silicone or rubber folding damper pad inside the hinge cavity to cushion metal contact.
Pro Tip: If the creak persists when steering from side to side, loosen the stem clamp, adjust the central headset compression bolt to remove play without binding, and re-torque the clamp bolts evenly.
Check Loose Bolts and Screws First
Single-track vehicles subject hardware to continuous vibration. Fasteners on the deck, kickstand, folding mechanism, and wheel dropouts naturally back out over time, causing structural creaking under rider load.
Inspect Visible Fasteners
Perform a thorough fastener check across all primary load-bearing points using quality metric hex keys that seat fully into bolt heads:
- Handlebars and Grips: Check stem faceplate bolts and brake lever collar clamps (typically 3mm or 4mm hex).
- Folding Assembly: Inspect the lower folding base, hinge pivot pins, and locking collar screws.
- Deck and Frame: Check bottom deck screws, battery access panel fasteners, and kickstand mounting bolts.
- Wheel Axle Nuts / Bolts: Ensure front and rear axle nuts are fully seated and tight.
- Brake Caliper Mounts: Verify caliper adapter bolts are rigidly secured to the fork and rear swingarm.
Tighten with Correct Torque and Threadlocker
Over-tightening small M4 and M5 steel screws into soft cast-aluminum scooter frames will strip the threads. Use a disciplined approach:
- Tighten paired bolts in an alternating pattern (half-turn on one, half-turn on the other) to distribute clamping force evenly.
- Remove recurring loose fasteners, apply a drop of medium-strength blue threadlocker (Loctite 242) to the threads, and re-torque.
- Never use permanent red threadlocker, which requires heat tools to break free during future maintenance.
Wheel and Tire Problems That Make Noise
Squeaks originating around the wheels typically stem from improper tire inflation, rim-to-tire bead friction, or failing internal ball bearings.
Wheel Alignment and Axle Truing
If the wheel axle sits cocked in the dropouts, the tire or brake disc will drag continuously against frame stays or brake pads. Lift the scooter, spin the wheel, and verify that the rim spins true along the center axis of the fork or swingarm. If offset, loosen axle nuts, center the wheel squarely within the dropouts, and torque down both sides evenly.
Worn or Contaminated Bearings
Most electric scooters use standard sealed cartridge bearings (such as 6000 or 6001 series). Water ingress, road salt, and pressure washing wash away internal factory grease, leading to high-pitched chirping followed by harsh grinding.
- Check for Play: Grasp the top of the tire and push/pull laterally. Any noticeable clicking or side-to-side play means the bearing races are shot.
- Spin by Hand: A healthy bearing spins quietly with mild hydraulic resistance. If it spins freely like a fidget spinner or feels gritty, replace the bearing pair immediately.
Tire Pressure Problems
Pneumatic scooter tires operate at higher pressures (typically 45–50 PSI) than bicycle tires due to their small air volume. Low tire pressure causes the rubber sidewall and inner tube to squirm and rub against the split-rim edge, generating an audible squeaking or rhythmic thumping sound on every rotation.
| Tire Condition | Audible Symptom | Immediate Remedy |
|---|---|---|
| Low Pressure (< 35 PSI) | Rhythmic thumping, rubber squeak on turns | Inflate to manufacturer spec (45–50 PSI) |
| Over-Inflation (> 55 PSI) | Harsh road slap, high-pitched tire scrub | Bleed air down to sidewall rating |
| Unseated Tire Bead | Wobble squeak against mudguard/fender | Deflate, massage bead into rim groove, re-inflate |
Brake Problems That Cause Squeaking
Brakes represent the single most common cause of piercing squeals on electric scooters. Noise indicates friction irregularities caused by glazed pad material, surface oils, or caliper misalignment.
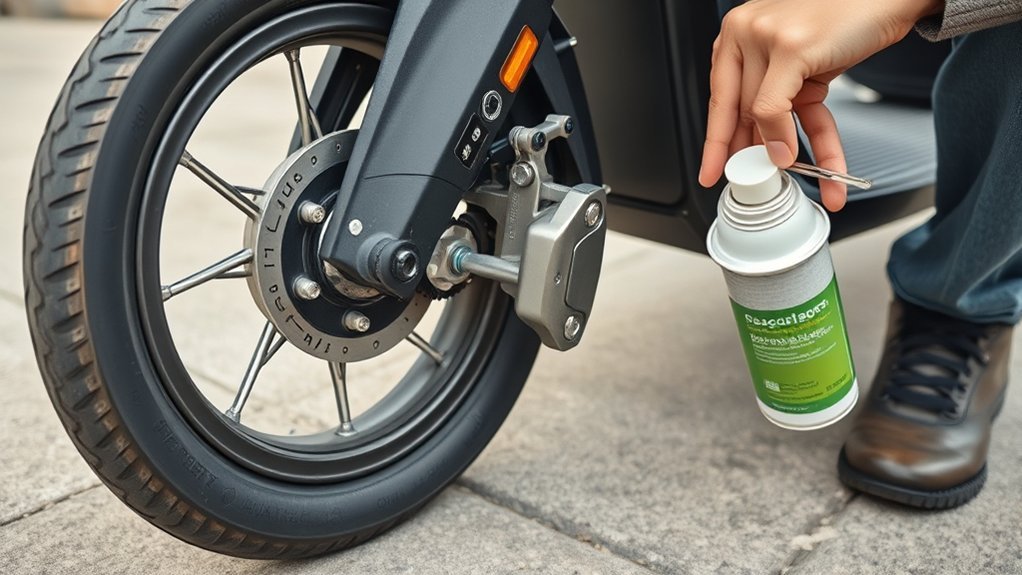
Warning: Never spray WD-40, silicone oil, or general lubricants anywhere near brake pads, rotors, or drums. Contaminating friction material destroys stopping power and creates severe safety hazards. Clean brakes only with dedicated brake cleaner or 90%+ isopropyl alcohol.
| Root Cause | Mechanical Impact | Recommended Fix |
|---|---|---|
| Road Dust & Oil Contamination | Glazed friction surface, continuous squeal | Decontaminate with 90%+ isopropyl alcohol; lightly sand pads |
| Worn Brake Pads (< 1mm material) | Metal backing plate contacts rotor directly | Install new semi-metallic or resin replacement pads |
| Misaligned Brake Caliper | Pad rubs rotor edge while coasting | Loosen caliper bolts, center caliper over rotor, re-torque |
| Warped Brake Rotor | Rhythmic chirp once per wheel revolution | True rotor using a rotor fork or replace if deviation > 1mm |
What Brakes Does Your Scooter Have?
Brake systems dictate the exact adjustment method required to stop squeaking:
- Drum Brakes (Enclosed Hub): Found on commuter scooters like the Segway Ninebot Max and VSETT 8. The shoes are sealed inside the wheel hub, protecting them from rain and grit, but requiring cable tension adjustments to silence rubbing.
- Mechanical Disc Brakes (Cable-Actuated): Common on entry to mid-range scooters. A steel cable pulls a single moving caliper piston that flexes the rotor against a stationary inner pad. Requires periodic pad gap adjustment.
- Hydraulic Disc Brakes: Found on high-performance scooters. Mineral oil or DOT fluid pushes dual opposing pistons simultaneously for balanced pad contact, self-centering, and stronger heat dissipation.
- Electronic / Regenerative Brakes: Motor-based magnetic braking integrated into the hub. These operate completely silently; if an electronic brake creates mechanical noise, the hub motor bearings or axle mounts are loose.
How to Fix Squeaky Drum Brakes
Drum brake squeaking is almost always caused by improper cable tension causing the internal brake shoes to lightly drag inside the hub drum, or internal brake dust buildup.
- Adjust the Barrel Adjuster: Locate the threaded cable barrel adjuster at the wheel hub or brake lever. Turn the adjuster clockwise (inward) to add cable slack if the pads are dragging, or counter-clockwise (outward) to take up excess play if the lever pulls all the way to the grip.
- Reset the Cable Pinch Bolt: If the barrel adjuster runs out of threads, screw it all the way in, loosen the cable pinch bolt on the drum actuation arm, pull the cable snug by hand, and retighten the pinch bolt.
- Clear Brake Dust: If squeaking continues during braking, remove the wheel and slide off the drum cover. Spray the internal friction ring with isopropyl alcohol and wipe away accumulated black brake dust.
- De-Glaze Drum Shoes: Lightly scuff the curved brake shoe linings with 120-grit sandpaper to remove shiny glaze, wipe clean, and reinstall.
How to Fix Squeaky Disc Brakes
Eliminating disc brake squeal requires clean friction surfaces and precise caliper alignment so the pads sit perfectly parallel to the rotor.
- Clean Rotor and Pads: Saturate a clean microfiber towel with 90%+ isopropyl alcohol and thoroughly scrub both sides of the disc rotor. If pads are contaminated with road oil, remove them and rub the friction material in a figure-eight pattern on 180-grit sandpaper until fresh, unglazed material is exposed.
- Center the Caliper: Loosen the two caliper mounting bolts slightly so the caliper can float side-to-side. Squeeze and hold the brake lever firmly to clamp the caliper centered over the rotor. While maintaining lever pressure, tighten both caliper bolts evenly in increments.
- True a Warped Rotor: Spin the wheel and sight down the caliper slot. If the rotor wobbles at one spot, gently bend it true using a clean rotor truing fork or an adjustable wrench wiped with alcohol.
- Bed In the Brakes: After cleaning or replacing pads, perform 10–15 moderate stops from 12 mph down to a walking pace without locking the wheels. This transfers an even layer of pad material onto the rotor tracks for quiet, vibration-free stopping.
Suspension Noises and When to Lubricate Them
Electric scooter suspension linkages utilize coil springs, hydraulic dampening cartridges, and polyurethane or rubber swingarm bushings. When road water washes away factory grease, the moving pivot pins and spring seats emit loud squeaks over bumps.
Apply targeted lubrication based on the suspension type:
- Rubber and Polyurethane Bushings: Use 100% pure silicone spray. Never use petroleum-based lubricants or penetrating oils on rubber bushings, as petroleum degrades rubber compounds and accelerates cracking.
- Exposed Metal Coil Springs & Pivot Pins: Apply PTFE dry lubricant or white lithium grease directly onto the upper and lower spring retention perches and pivot bolt sleeves.
- Hydraulic Shock Shafts: Wipe the piston stanchion clean of road grit and apply 2–3 drops of pure silicone shock oil onto the shaft seal, cycling the suspension several times to distribute the film.
Note: If suspension squeaking returns within a few days of lubrication, check the swingarm pivot bolts for lateral play. Worn internal pivot sleeve bushings must be replaced to restore quiet handling and ride stability.
Frequently Asked Questions
How to Fix Squeaky E-Scooter?
To fix a squeaky electric scooter, isolate the noise through a bounce and spin test. Clean brake rotors and pads with 90%+ isopropyl alcohol, realign misaligned calipers, tighten loose frame and folding latch bolts with blue threadlocker (Loctite 242), and lubricate suspension pivot joints with pure silicone or dry PTFE spray.
Can I Fix Squeaky Suspension Myself?
Yes. You can fix squeaky suspension at home by cleaning off road grime and applying pure silicone oil to rubber bushings or white lithium grease to metal coil spring seats. If the noise persists after lubrication, inspect the pivot sleeves and shock bolts for structural wear or damage that requires hardware replacement.
What Happens if I Ignore Squeaking Sounds?
Ignoring squeaks allows minor issues to escalate into hazardous component failures. Dry wheel bearings can seize mid-ride, vibrating bolts can back out completely from the steering stem or wheel dropouts, and misaligned brake pads will wear unevenly, reducing stopping power and damaging the brake rotor.
Why Is My Scooter Making a Squealing Sound?
A high-pitched squealing sound almost always indicates brake friction contamination, glazed brake pads, or a misaligned caliper rubbing against the rotor. It can also be caused by severely under-inflated tires scrubbing against the wheel rim during sharp turns.
Conclusion
A squeaking electric scooter is a diagnostic signal that hardware requires attention. By methodically isolating the noise between the folding stem, brake assembly, suspension pivots, and wheel bearings, you can pinpoint the exact cause in minutes. Routine cleaning with isopropyl alcohol, proper fastener torquing with blue threadlocker, and targeted lubrication with silicone or PTFE will eliminate unwanted noises, protect critical components, and ensure safe, quiet rides.
Sources
- Park Tool Disc Brake Service Guide — Authoritative standards for disc brake rotor truing, pad de-glazing, and caliper alignment protocols.
- Segway Official Support & Maintenance Manuals — Manufacturer guidelines for electric scooter fastener maintenance, tire pressures, and folding mechanism tensioning.
- U.S. Consumer Product Safety Commission (CPSC) Micromobility Center — Safety standards and mechanical inspection protocols for personal electric mobility devices.
