
Last Updated on July 30, 2026 by Caleb Warren
Packing for a backpacking trip starts with the route, not the gear closet. Your distance, elevation, expected weather, overnight temperature, water sources, wildlife rules, and trip length determine what belongs in your pack. The goal is not to reach one magic weight. It is to carry the lightest setup that still keeps you sheltered, hydrated, fed, warm, oriented, and prepared for delays.
Quick Answer
Pack a fitted backpack, weather-ready shelter, sleeping bag or quilt, insulated pad, food, stove or no-cook meals, water containers and treatment, layered clothing, navigation tools, headlamp, first aid, hygiene supplies, repair items, and emergency gear. Adjust every item for the route, forecast, regulations, and reliable water access.
Key Takeaways
- Check permits, weather, water sources, fire restrictions, trail conditions, and food-storage rules before choosing gear.
- Treat pack weight as trip-specific. Separate base weight from food, water, and fuel rather than chasing a universal 15-pound total.
- Choose your sleeping bag and pad for the lowest expected temperature, not the daytime forecast.
- Do not assume a filter or hanging dry bag meets every water-treatment or wildlife-storage requirement.
- Test your equipment, carry paper navigation, and leave a detailed trip plan with someone who will notice if you are overdue.
At a Glance
| Time Required | 30–90 minutes to check conditions, build the checklist, pack, and test the loaded backpack |
| Difficulty | Moderate; more planning is required for remote, cold, high-altitude, desert, or bear-country routes |
| Tools Needed | Trip checklist, weather and land-manager information, scale, fitted backpack, waterproof pack liner, and your complete gear setup |
| Cost | Varies widely; use, borrow, or rent suitable gear before buying an entirely new kit |
Disclosure: As an Amazon Associate I earn from qualifying purchases. Some links on this page are affiliate links, at no extra cost to you.
Plan the Trip Before You Pack
Before laying out equipment, write down the conditions your gear must handle. Check the responsible park, forest, or other land manager’s website shortly before departure because permits, closures, fire restrictions, water availability, and food-storage rules can change.
- Route: Record the distance, elevation gain, terrain, trail junctions, campsites, bailout points, and expected pace.
- Weather: Check the full forecast, overnight low, wind, precipitation, heat, lightning, and recent conditions at the route’s elevation.
- Water: Mark dependable sources, seasonal sources, dry stretches, and the maximum amount you may need to carry.
- Regulations: Confirm permits, campsite rules, group-size limits, fire restrictions, sanitation requirements, and approved wildlife-food storage.
- Emergency plan: Choose turnaround criteria, identify the nearest help or exit route, and leave your itinerary with a responsible contact.
Note: This checklist is general guidance. Local rules, current conditions, your health, and the needs of your group take priority over any generic packing list.
Essential Gear for Backpacking
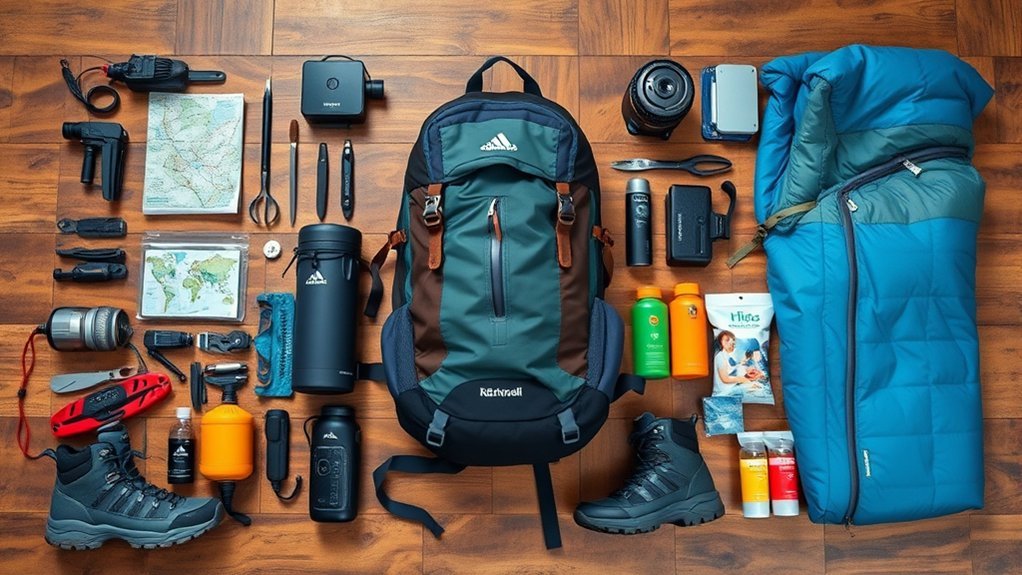
A safe backpacking kit covers the National Park Service Ten Essentials along with overnight shelter, sleeping equipment, food, and sanitation supplies. The exact models matter less than whether the equipment fits, works together, and matches the trip.
| Category | What to Pack |
|---|---|
| Backpack and waterproofing | Properly fitted backpack, waterproof pack liner, and optional dry bags for gear organization |
| Shelter | Tent, tarp, or other suitable shelter with stakes, poles, guylines, and a small repair item |
| Sleep system | Sleeping bag or quilt, insulated sleeping pad, dry sleep clothing, and optional pillow |
| Food and cooking | Meals, extra food, snacks, stove and fuel when allowed, lighter or igniter, pot, spoon, and approved food-storage system |
| Water | Enough carrying capacity for the longest dry stretch, treatment system, and backup treatment method |
| Clothing | Base layer, insulation, rain protection, hiking clothing, spare socks, hat, gloves when needed, and sleep layers |
| Navigation | Printed map, compass, downloaded offline map, and optional GPS or satellite communicator |
| Light and emergency | Headlamp, spare batteries or power, whistle, fire starter where legal, and emergency shelter |
| First aid and protection | Personal first-aid kit, prescription medication, blister care, sunscreen, sunglasses, and insect protection |
| Hygiene and repair | Hand-cleaning supplies, toilet kit, waste bags, menstrual supplies if needed, knife or multi-tool, tape, cord, and gear-specific patches |
Products Worth Considering

6-pack of lightweight, durable, and versatile camping and backpacking tent stakes that stay put

Bring this lightweight kit, which includes a reflective guyline (50 ft) with 4 Mini Line Tensioners, and quickly secure tents and tarps at camp

✔️ FAST & EASY TO USE - Our cord tensioners are incredibly quick to set up and use. Easily adjust your tent guylines with one one hand in an instant.
Understand Base Weight and Total Pack Weight
Base weight is your backpack and non-consumable equipment without food, water, or stove fuel. Total pack weight is everything on your back at the trailhead. A 15-pound total may work for a short trip with frequent water, mild weather, and an experienced ultralight hiker, but it is not a sensible universal target.
As a rough starting point, a loaded backpacking pack is often kept below about 20% of body weight, but that is not a guarantee of comfort or safety. Your physical condition, pack fit, terrain, required water, food-storage equipment, and essential cold-weather gear all matter. Never remove necessary water, insulation, medication, or emergency equipment simply to reach a number.
Choose and Fit the Backpack
Select capacity after you know the volume of the required gear. Measure torso length, choose the correct frame size, and adjust the hip belt so it wraps the top of the hip bones. Tighten the shoulder straps and load lifters without pulling the shoulder harness painfully upward. The pack should remain stable when you turn, step up, or lean forward.
Take a short walk with the complete load before leaving home. Pressure points, swaying, numbness, or a hip belt that slides down are signs that the fit or loading needs attention.
How to Load a Backpack
- Line the main compartment. Use a waterproof pack liner to protect the equipment that must remain dry.
- Pack soft, less-accessed items at the bottom. A sleeping bag and dry sleep clothing usually fit well here when protected by the liner.
- Place dense weight near your back. Food, a compact cooking system, and other heavy items should sit close to the spine around the middle of the pack rather than pulling backward.
- Fill empty spaces. Use clothing, the tent body, or other soft equipment to prevent the dense items from shifting.
- Keep frequent-use gear near the top. Place the rain jacket, insulation, lunch, water treatment, first aid, and toilet kit where you can reach them quickly.
- Use pockets deliberately. Carry the map, compass, headlamp, snacks, sunscreen, and small essentials in consistent locations.
- Balance both sides. Distribute water and other dense items so one shoulder or hip does not carry noticeably more weight.
- Minimize dangling gear. Secure tent poles or other long items firmly and keep equipment from catching vegetation or affecting balance.
Pro Tip: Pack the bag completely, climb stairs, bend, and walk for at least 20 minutes. Repack anything that shifts, pokes your back, blocks access, or makes the load pull to one side.
Lightweight Shelter Options
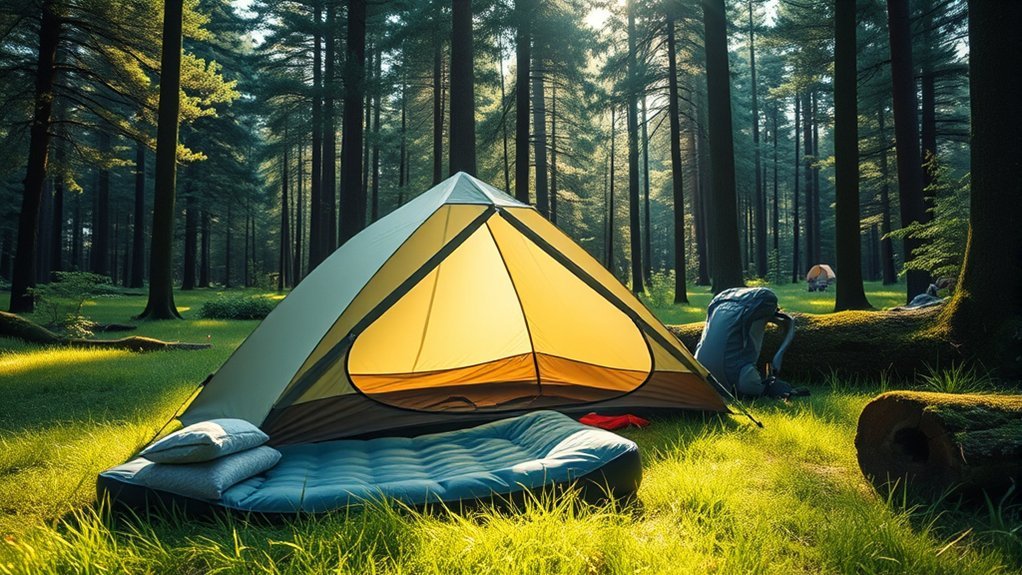
Your shelter must match the expected wind, rain, insects, temperature, campsite surface, and your setup skill. Weight matters, but a shelter that cannot handle the route’s conditions is not a useful weight saving.
Products Worth Considering
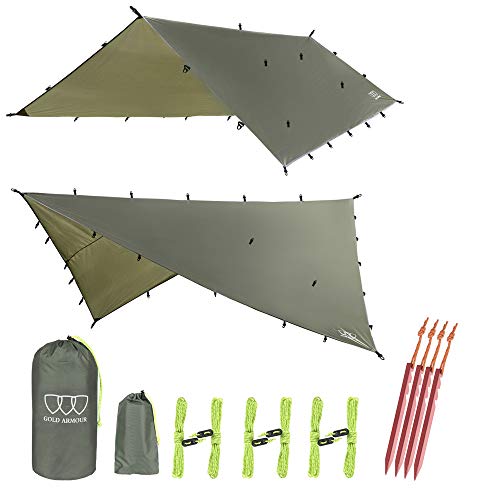
✔ HIGH QUALITY & DURABLE RAINFLY TARP - The Gold Armour Rainfly Tarp will keep you dry and comfortable with unparalleled weather protection and water shedding capability with 5,000mm waterproof rating

Best protection: The JAICOM Camping Tarp is made from 210T tear-resistant polyester fabric that is highly abrasion resistant. The seams are all press-glued and the fabric has a waterproof coating, making our tarp highly waterproof. It gives you strong protection no matter how extreme the weather is

Versatile 10×10ft Tarp Shelter: this rugged waterproof tarp is designed for ultimate versatility. Use it as a bushcraft survival shelter, a hammock rain tarp, or pair it with an inner mesh tent for a complete camping setup. Perfect for hammock camping, tent camping, backpacking, and outdoor adventures in any season.
Tent Types Overview
| Shelter Type | Main Benefits | Tradeoffs |
|---|---|---|
| Freestanding tent | Easy to move before staking and practical on many surfaces | Often heavier; still needs stakes and guylines for wind and weather |
| Semi-freestanding tent | Lower weight with familiar tent protection | Requires staking at specific points to reach full shape and interior space |
| Non-freestanding tent | Can provide an excellent space-to-weight ratio | Needs secure anchors and careful pitching; performance depends on site selection |
| Ultralight tarp | Compact, adaptable, and potentially very light | Less insect and splash protection unless paired with a bivy, net, or groundsheet |
| Two-person tent | Shared weight and more room for two hikers or one hiker’s gear | Larger footprint can make campsite selection harder |
| Single-person tent | Compact footprint and no need to divide components | Less room for wet clothing, changing, or storing gear |
Practice setting up the shelter before the trip, including in wind or fading light. Carry every required pole, stake, guyline, connector, and repair sleeve. A footprint or groundsheet may protect the floor, but it should not extend beyond the shelter where it can collect rainwater.
Ultralight Tarp Benefits
Tarps made from lightweight coated fabrics or composite materials can pack very small and support several pitch configurations. They are most useful when the user understands anchor selection, runoff direction, wind exposure, ventilation, and site drainage. Trekking poles can replace dedicated poles in compatible setups.
A tarp’s listed weight may not include stakes, guylines, a groundsheet, bug protection, or the trekking poles needed to pitch it. Compare the weight of the complete system rather than the tarp fabric alone.
Choosing a Shelter and Sleep System Together
Consider shelter and sleep equipment as one system. A breezy tarp may require better wind protection from the sleeping bag, bivy, or clothing. A fully enclosed tent may reduce wind but can collect condensation when poorly ventilated. Leave enough room to prevent the sleeping bag from pressing against wet shelter walls.
Sleep System Considerations
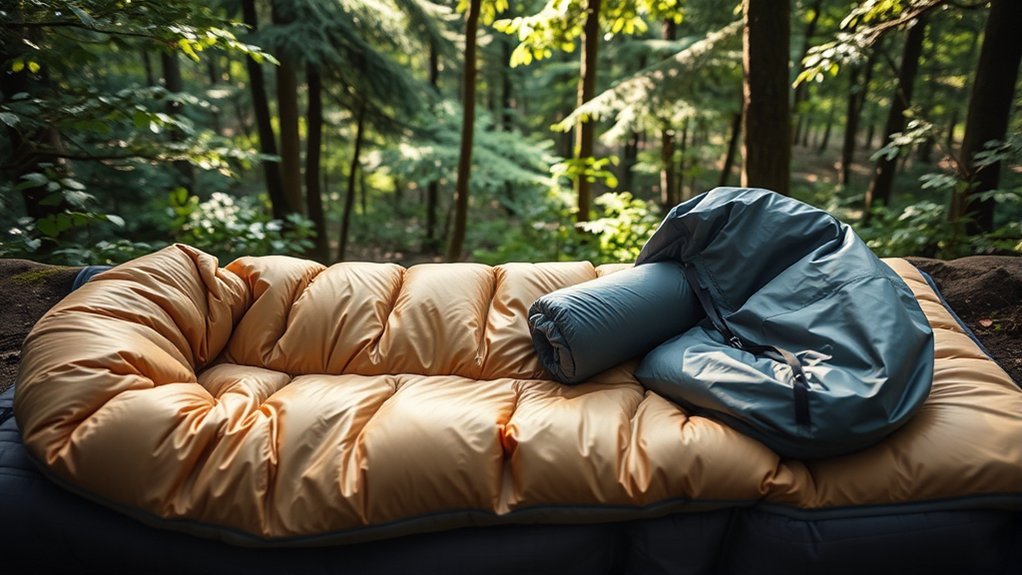
A sleep system includes the sleeping bag or quilt, sleeping pad, sleep clothing, shelter, and the person using them. Choose it for the lowest realistic overnight temperature, including elevation and wind exposure—not the daytime high.
- Sleeping bag or quilt: Check the applicable tested temperature ratings, fit, hood or draft-control features, insulation type, and moisture protection.
- Sleeping pad: Compare the R-value, dimensions, surface durability, inflation method, and included repair kit. A higher R-value provides more resistance to heat loss into the ground.
- Sleep clothing: Keep one dry base layer and dry socks protected inside the pack liner.
- Pillow: A compressible pillow adds comfort but is optional; a soft clothing bag can serve the same purpose.
Examples such as the NEMO Disco 15 sleeping bag, NEMO Hornet OSMO tent, and NEMO Tensor All-Season pad illustrate the categories in a complete system. They are not one fixed-weight kit. Exact weight, warmth, capacity, and dimensions vary by current model and selected size, so verify each manufacturer specification before totaling the system.
Note: Protect the sleeping bag and dry sleep clothing inside the waterproof pack liner. A wet insulation layer can become a serious problem when temperatures drop.
Products Worth Considering

QUICK SETUP: Built-in foot pump with Insta-Pump Technology inflates pad in under 60 seconds, no extra inflation gear needed

【Upgraded Support & 4" Thick Sleep Support】 The Pretyw self-inflating camping sleeping pad is made with durable outdoor materials, suitable for all weather conditions. Measuring 79×27.5 inches and inflating to 4 inches thick, it provides superior support and cushioning whether you sleep on your back or on your side, ensuring a restful night outdoors. The built-in pillow adds comfort and convenience, keeping you comfortably off the ground for great sleep.

𝐀 𝐒𝐢𝐳𝐞 𝐨𝐟 𝐚 𝐖𝐚𝐭𝐞𝐫 𝐛𝐨𝐭𝐭𝐥𝐞 𝐘𝐞𝐭 𝐁𝐢𝐠 𝐨𝐧 𝐂𝐨𝐦𝐟𝐨𝐫𝐭: Packs small 8.6” Height × 3.1” Diameter at a weight of only 17.5 oz, same as a water bottle. When inflated it goes as large as 76” x 25” with ErgoCushion contours—3.35” at the edges tapering to 2.36” in the center. The easy-to-inflate lightweight backpacking sleeping pad can hold up to 440lb. It doubles as a sleep mat and bed roll, with unmatched comfort and portability for any outdoor adventure—𝑬𝒓𝒈𝒐𝒏𝒐𝒎𝒊𝒄 𝑪𝒐𝒎𝒇𝒐𝒓𝒕, 𝑩𝒐𝒕𝒕𝒍𝒆-𝑺𝒊𝒛𝒆𝒅 𝑷𝒐𝒓𝒕𝒂𝒃𝒊𝒍𝒊𝒕𝒚.
Cooking and Food Preparation
Choose meals by trip length, expected exertion, dietary needs, cooking time, fuel use, and food-storage volume. Dehydrated meals are convenient, but ordinary foods such as tortillas, nut butter, hard cheese suited to the conditions, tuna packets, couscous, instant potatoes, oats, dried fruit, and snack bars can also work.
A compact canister stove system such as a Jetboil MiniMo or a separate lightweight stove and pot can heat water efficiently. Carry the correct fuel, a reliable ignition method, and enough fuel for the expected water temperature, wind, altitude, number of boils, and group size. Include at least one meal or snack that can be eaten without a stove in case the stove fails or use is restricted.
Warning: Check current fire restrictions before carrying or using a stove. Never cook inside a closed tent, vestibule, vehicle, or other poorly ventilated shelter. Flames, hot fuel, and carbon monoxide can cause fire, burns, poisoning, or death.
Plan Enough Food
Many backpackers begin planning around 1.5–2.5 pounds of food per person per day, then adjust for body size, trip intensity, temperature, appetite, and the energy density of the selected food. Pack an extra meal or a reserve of high-energy food for delays.
Use a consistent food inventory so breakfast, lunch, dinner, snacks, drink mixes, and emergency food are counted once. Repackage bulky boxes at home, but retain preparation instructions and ingredient information when needed.
Store Food and Odorous Items Correctly
Food, trash, cookware, toothpaste, scented toiletries, and other odorous items must be secured according to the destination’s rules. Depending on the location, that may mean a designated locker, an approved hard-sided bear canister, an approved soft-sided bear-resistant container, or a permitted hang.
Warning: A normal dry bag is not bear-resistant. Do not assume hanging is legal or effective at your destination. Verify the approved storage method with the land manager before the trip.
Keep food storage separate from sleep equipment, clean spills promptly, and pack out all wrappers, scraps, and trash. Do not leave food unattended at camp.
Hydration Solutions
Plan water around the longest distance between dependable sources. Soft bottles are light and compress as they empty, while rigid bottles are easier to fill from some shallow sources. A hydration reservoir allows frequent sipping but can be harder to monitor, refill, and protect from leaks. Many hikers combine bottle types.
About half a liter per hour can be a reasonable first estimate during moderate activity in moderate weather, but it is not a fixed requirement. Heat, humidity, altitude, sun exposure, pace, body size, and pack weight can increase needs. Cold conditions can also reduce the urge to drink. Carry enough capacity for the route rather than assuming the next marked source is flowing.
Treat Backcountry Water
Water that looks clear can still contain disease-causing organisms. According to the CDC’s backcountry water-treatment guidance, boiling is the most reliable way to kill germs. When boiling is not practical, filtering and then disinfecting the filtered water provides broader protection than relying on an ordinary filter alone.
A Sawyer filter can be a compact component of a treatment plan, but follow the exact product instructions, understand what the model does and does not remove, protect it from freezing, and carry a backup such as compatible chemical treatment. Avoid water near obvious sewage, mining discharge, heavy algae, chemical contamination, or dense livestock use when a safer source is available.
Warning: Filtration does not remove every virus, chemical, toxin, or dissolved contaminant. Treatment cannot make every polluted source safe.
Personal Hygiene and First Aid
A compact bathroom kit may include a Vargo Dig Dig Tool or another lightweight trowel, sealable odor-resistant bags such as Smelly Proof bags, a bottle-cap bidet, toilet paper, hand-cleaning supplies, and a reusable antimicrobial cloth such as a Kula Cloth. Pack wipes and hygiene products out, even when the label calls them biodegradable.
Where catholes are allowed, Leave No Trace guidance generally recommends placing them 200 feet from water, camps, and trails and digging them 6–8 inches deep. Some deserts, alpine zones, river corridors, caves, snow-covered areas, and heavily used destinations require all solid human waste to be packed out. Follow the local rule.
Clean hands after toileting and before handling food. A small amount of biodegradable soap should still be used away from lakes and streams; “biodegradable” does not mean it belongs in natural water.
Build a Personal First-Aid Kit
Start with the injuries and health needs most likely for your route and group. A practical kit may include:
- Adhesive bandages and sterile gauze
- Medical tape and elastic wrap
- Antiseptic or wound-cleaning supplies
- Blister tape, hydrocolloid dressings, or other proven hotspot treatment
- Tweezers and small trauma shears
- Personal prescription medicine and necessary emergency medication
- Any over-the-counter medicine you know how to use safely
- Nitrile gloves and a compact first-aid reference
Wilderness First Aid training provides more value than carrying unfamiliar supplies. Know how to recognize when an injury, allergic reaction, illness, heat problem, or cold injury requires evacuation.
Prevent Blisters
Wear footwear that fits while descending and carrying a loaded pack. Choose socks that manage moisture, trim toenails, remove grit, and stop as soon as you feel rubbing or a warm spot. Dry the area and apply your preferred tape or dressing before a blister becomes large.
Clothing and Footwear Choices
Pack clothing as a layered system that can handle the forecast plus a reasonable margin for delay or changing conditions.
- Base layer: Choose a moisture-managing synthetic or wool layer appropriate for the temperature.
- Insulating layer: Carry fleece, synthetic insulation, down, or a suitable combination for the expected overnight low.
- Weather protection: Pack a waterproof or weather-resistant shell and rain pants when the conditions warrant them.
- Hiking clothing: Select durable, quick-drying garments that protect against sun, insects, brush, and temperature changes.
- Dry camp clothing: Keep sleep layers and at least one pair of socks dry inside the pack liner.
A down jacket offers an excellent warmth-to-weight ratio when kept dry. Synthetic insulation may retain more useful warmth when damp. Choose based on the forecast, shelter, trip length, and likelihood of sustained wet weather.
Choose Footwear for the Route
Trail-running shoes such as the Topo Athletic Pursuit can suit hikers who prefer a lighter, flexible, zero-drop design and have adapted to that geometry. They are not automatically better than hiking shoes or boots. Consider:
- Foot shape and secure heel fit
- Terrain, mud, snow, loose rock, and off-trail travel
- Total pack weight
- Ankle or foot-support needs
- Drying time and water resistance
- Experience with the shoe’s heel-to-toe drop
Do not begin a demanding trip in footwear that has not been tested on similar terrain. Carry an extra pair of socks and address fit problems before departure.
Navigation and Safety Gear
Navigation should not depend on one battery. Carry a printed topographic map and a compass, know the planned route, and download an offline map before leaving coverage. A phone or GPS can improve efficiency, but it remains a backupable electronic tool rather than a replacement for route awareness.
Essential Navigation Tools
- Printed map: Protect it from water and mark the route, campsites, water, exits, and major junctions.
- Compass: Carry one and practice orienting the map and taking a basic bearing before the trip.
- Offline electronic map: Download the correct region and verify that it opens with the phone in airplane mode.
- GPS or satellite communicator: Test it outside, update it, charge it, and understand the service plan and operating limits.
A Garmin inReach Mini or another current satellite communicator can support tracking, messaging, and SOS functions when properly activated and used. Satellite communication generally requires an active subscription, a functioning charged device, and a usable view of the sky. It does not guarantee instant contact or rescue.
Emergency Safety Equipment
- Headlamp with spare batteries or reliable backup power
- Whistle and visible signaling item
- Emergency bivy, blanket, or other emergency shelter
- Knife or multi-tool
- Repair tape, cord, tent-pole splint, and pad patches
- Fire starter when legal and appropriate
- Extra food and a margin of water-treatment capacity
- First-aid supplies and personal medication
Learn the local wildlife guidance before departure. Bear spray may be recommended in some areas, prohibited in others, and ineffective when carried where it cannot be reached. Know how the land manager instructs visitors to respond to the animals present on the route.
The lightest safe pack is not the pack with the fewest items. It is the pack that removes duplication and unnecessary comfort gear without removing the equipment required for the route’s real hazards.
Final Pre-Trip Check
Complete this check with the pack fully loaded:
- Permit, campsite, parking, and access requirements are confirmed.
- Current weather, trail conditions, closures, water reports, and fire restrictions are checked.
- The shelter has been pitched and inspected.
- The stove has been tested outdoors, and the correct fuel is packed.
- The water treatment system works, and a backup method is included.
- The required wildlife-food storage fits all food, trash, and odorous items.
- The sleeping bag, pad, and clothing match the expected overnight low.
- The first-aid kit includes personal medication and supplies you know how to use.
- The map is printed, offline maps are downloaded, and electronics are charged.
- The loaded pack fits without swaying, numbness, or painful pressure points.
- A responsible contact has the route, vehicle information, group names, expected return time, and instructions for what to do if you are overdue.
For a first trip or a major equipment change, complete a short shakedown hike or one-night trip close to an easy exit. That test can reveal missing stakes, leaking pads, inadequate insulation, poor pack fit, and unrealistic food or water assumptions before they become remote problems.
Sources
- National Park Service — Ten Essentials — navigation, emergency shelter, water, lighting, first aid, and general preparedness
- Centers for Disease Control and Prevention — Backcountry Water Treatment — boiling, filtration, and disinfection guidance
- Leave No Trace — Dispose of Waste Properly — catholes, toilet paper, wipes, and hygiene waste
- Yellowstone National Park — Backcountry Safety — food storage, wildlife, and backcountry precautions
- REI Expert Advice — Backpacking Pack Weight — base weight, total weight, food estimates, and general load guidance
- Garmin — inReach Satellite Communicators — satellite-messaging features and subscription limitations
Frequently Asked Questions
How do I choose the right backpack size?
Choose capacity after assembling the gear required for the route. Short warm-weather trips may fit in a smaller pack, while cold weather, long food carries, or a bear canister require more room. Measure your torso, select the correct frame size, and test the pack with the complete load.
What are the best lightweight cooking tools?
A compact stove, suitable fuel, stable pot, lid, long-handled spoon, lighter, and wind protection approved for the stove are enough for many trips. Choose the setup by group size and meal plan. Always carry food that can be eaten without cooking.
How can I minimize my pack weight further?
Weigh every item, remove unnecessary duplicates, share group equipment, repackage bulky food, and focus first on the backpack, shelter, sleeping bag, and pad. Do not cut required water capacity, weather protection, insulation, medication, navigation, or emergency supplies.
What snacks are best for energy on the trail?
Choose foods you will eat while moving, such as nuts, dried fruit, bars, nut-butter packets, crackers, jerky, or other calorie-dense options suited to your diet. Pack a balance of carbohydrates, fat, protein, and salty foods rather than relying on one snack.
How do I prevent blisters while hiking?
Use tested footwear and moisture-managing socks, keep grit out, adjust laces when your feet swell, and stop at the first warm or rubbing spot. Dry the skin and apply tape or your preferred hotspot dressing before a large blister forms.
How much water should I carry backpacking?
Carry enough for the longest distance between dependable sources plus an appropriate reserve. About half a liter per hour may be an initial estimate in moderate conditions, but heat, altitude, pace, exposure, and source reliability can change the amount substantially.
What should I avoid packing?
Avoid unnecessary duplicates, oversized packaging, untested gadgets, heavy clothing that serves the same purpose as another layer, and food you are unlikely to eat. Do not remove required safety equipment simply because it is heavy.
Conclusion
A good backpacking packing list is built around the actual trip. Confirm the route and regulations, protect your sleep system, carry enough water capacity and effective treatment, secure food correctly, and keep navigation and emergency gear accessible. Once the full pack is ready, test it under load and remove only the items that are truly unnecessary. Careful preparation gives you a lighter, more comfortable pack without trading away the equipment you may need when conditions change.
