
Last Updated on September 10, 2026 by Daniel Globe
Winter hiking is much more comfortable when your clothing works as a system instead of relying on one heavy coat. The goal is to stay warm without getting soaked in sweat, then protect that warmth from wind, snow, and rain. A good winter outfit uses moisture-managing layers, adjustable insulation, weather protection, suitable footwear, and warm accessories that you can add or remove as conditions change.
Quick Answer
For winter hiking, wear a wool or synthetic base layer, an insulating fleece or puffy layer, and a wind- and water-resistant outer shell. Add weather-appropriate pants, wool or synthetic socks, waterproof boots, gloves or mittens, a warm hat, and traction when trails are icy. Carry dry backup layers and adjust clothing before you become sweaty.
Key Takeaways
- Use a moisture-managing base layer, adjustable insulation, and a protective outer shell rather than depending on one bulky garment.
- Choose outerwear that blocks the wind and, when wet weather is possible, provides dependable rain and snow protection.
- Wear waterproof footwear with enough room for your toes and socks, and use suitable traction when packed snow or ice makes the trail slippery.
- Carry a hat, gloves or mittens, a neck gaiter, and dry backup clothing so exposed skin and wet gear do not become a problem.
- Control sweat by slowing down, opening vents, or removing a layer before your clothing becomes saturated.
- Protect your head, ears, hands, face, and eyes from cold, wind, and reflected sunlight.
- Heated clothing, GPS devices, and newer insulation technologies can be useful additions, but they should not replace a dependable clothing system or basic navigation skills.
- Wash, dry, and restore waterproof gear according to its manufacturer’s care instructions so it continues to perform properly.
Winter Hiking Outfit at a Glance
| Base Layer | Merino wool or quick-drying synthetic top; add matching bottoms when conditions warrant them. |
| Insulating Layer | Fleece, synthetic insulation, down, or a combination selected for your activity level and weather. |
| Outer Layer | Wind-resistant shell; use a waterproof shell when rain, wet snow, or sustained moisture is possible. |
| Legs | Quick-drying hiking pants, with thermal base-layer bottoms and shell pants added when needed. |
| Feet | Wool or synthetic hiking socks with waterproof, well-fitting boots; insulation depends on expected conditions. |
| Head and Hands | Warm hat, gloves or mittens, neck gaiter or balaclava, plus a dry spare pair of gloves when practical. |
| Snow and Ice | Gaiters for snow entry, suitable over-the-shoe traction for hard-packed snow or ice, and snowshoes when deep soft snow requires flotation. |
| Backup Clothing | Dry insulation, socks, and gloves protected inside your pack from snow and moisture. |
Disclosure: As an Amazon Associate I earn from qualifying purchases. Some links on this page are affiliate links, at no extra cost to you.
How to Layer Clothing for Winter Hiking
Layering is the foundation of winter hiking clothing because it lets you adjust insulation as your body temperature, activity level, wind, and precipitation change. The familiar three-part system consists of a base layer next to the skin, an insulating layer, and an outer layer that protects you from the weather.
The important part is not simply wearing all three layers as heavily as possible. Winter hiking can generate a surprising amount of heat. If you become sweaty on a climb and then stop in a cold wind, wet clothing can make it much harder to stay warm. The National Park Service winter hiking guidance recommends layered clothing and extra dry clothing for winter outings.
Base layer: manage moisture next to your skin
Your base layer should move moisture away from your skin and dry relatively quickly. Merino wool and synthetic fabrics such as polyester are common choices. A lightweight or midweight long-sleeve base layer can work well because it provides some warmth without trapping as much moisture as an absorbent cotton shirt.
Cotton is a poor choice for a next-to-skin winter layer when you expect cold, sweat, rain, or snow because it absorbs moisture and stays wet longer than wool or many synthetic alternatives. This does not mean cotton is dangerous in every possible outdoor situation, but it is a weak choice for a cold-weather clothing system where staying dry matters.
Insulating layer: retain warmth without trapping too much sweat
The insulating layer creates loft that slows heat loss. Fleece jackets, synthetic insulated jackets, down jackets, and vests can all fill this role. There is no single material or thickness that is automatically correct for every winter hike.
A breathable fleece can work well while you are moving. A warmer puffy layer may be useful during breaks, on exposed ridges, or when temperatures fall. Down provides excellent warmth for its weight when it stays dry, while synthetic insulation can be a practical option in damp conditions. Many hikers carry more insulation than they wear while actively climbing so they have a warm layer ready when they stop.
Pro Tip: Adjust your layers before you are soaked with sweat. Open a zipper, remove your hat, slow your pace, or take off an insulating layer as soon as you start getting too warm. It is easier to prevent excessive moisture buildup than to dry wet clothing in freezing conditions.
Outer layer: block wind and precipitation
The outer layer protects the layers underneath from wind, rain, sleet, and snow. A wind-resistant shell may be enough in dry conditions, while a waterproof shell is more appropriate when sustained precipitation or wet snow is possible.
Waterproof-breathable fabrics can help limit outside moisture while allowing some water vapor to move outward, but no jacket can guarantee that you will remain completely dry inside during hard exertion. Your pace, venting, humidity, clothing underneath, and the condition of the garment all affect comfort.
Choosing the Right Outerwear for Protection Against the Elements
Winter outerwear should match the conditions you are actually likely to encounter. A shell’s main job is weather protection; the insulating layers underneath usually provide most of the warmth.
Waterproof-breathable materials such as GORE-TEX and comparable membranes are common in winter shells. A well-designed shell can keep rain and wet snow from reaching your insulation while providing vents and breathable construction that help release heat and moisture.
Look for practical features such as an adjustable hood, cuffs that close securely, a hem that can be tightened, and zippers that are easy to operate while wearing gloves. Pit zips or other vents can be especially valuable during steep climbs. A longer hem can add coverage while bending, sitting, or wearing a backpack.
Pockets should remain reasonably accessible while your pack’s hip belt is fastened. Before buying a shell, try moving your arms, bending, and wearing it over the insulating layers you expect to use. An outer layer that is too tight can compress insulation and restrict movement.
What to Wear on Your Legs
Lower-body clothing deserves the same attention as your jacket system. For relatively mild, dry winter conditions, quick-drying hiking pants may be enough while you are moving. As temperatures fall, you can add wool or synthetic base-layer bottoms underneath them.
If you expect strong wind, wet snow, rain, or prolonged contact with snow, add wind-resistant or waterproof shell pants. Full-length or side zippers can make shell pants easier to put on without removing your boots and can also provide ventilation.
Avoid choosing heavily insulated pants simply because the air temperature looks cold. Your legs generate substantial heat while climbing. Clothing that is too warm can leave your base layers soaked in sweat, which becomes a problem when you slow down.
Selecting the Best Footwear for Traction and Insulation
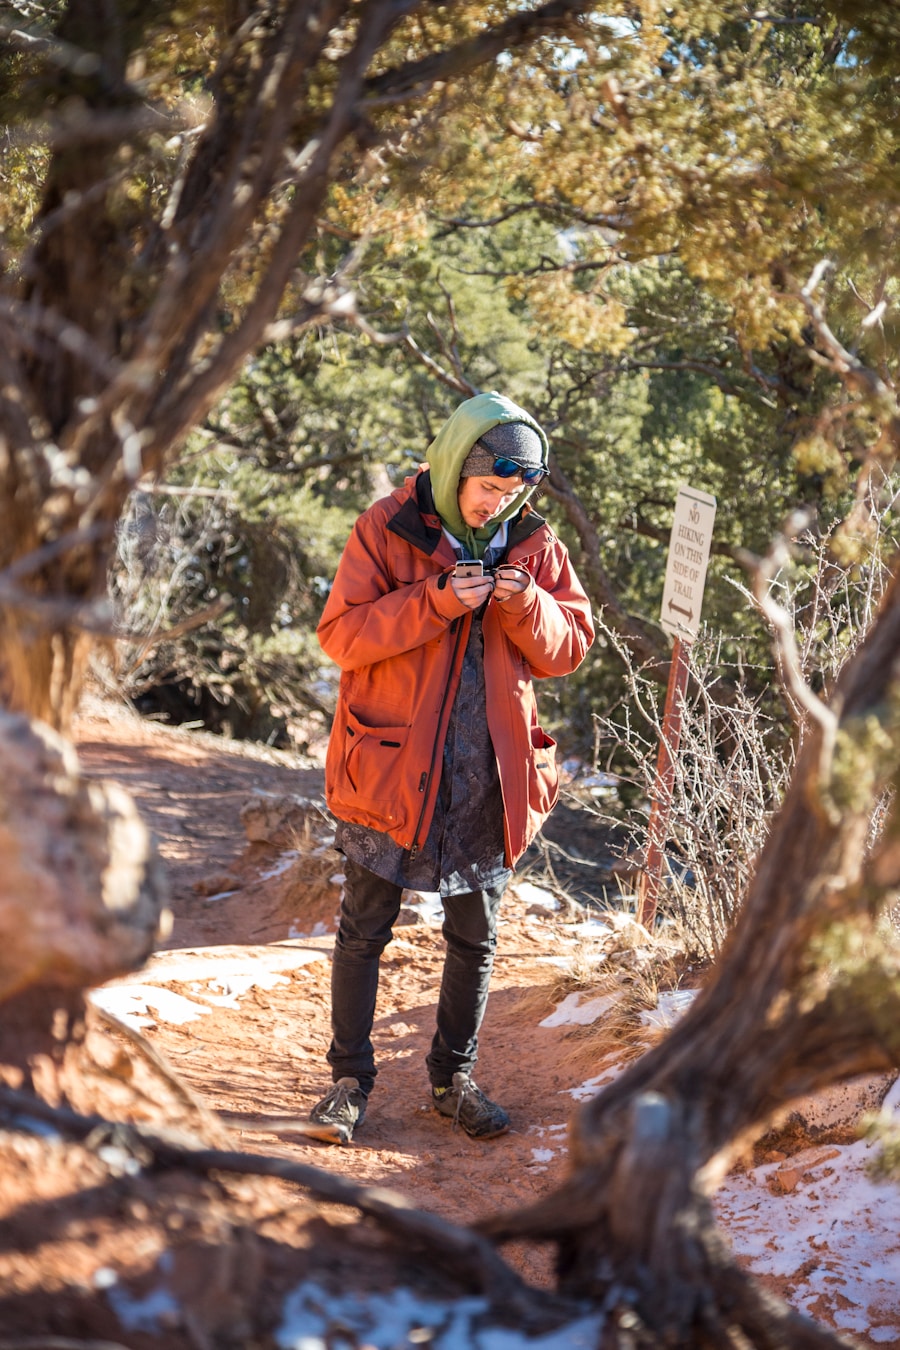
Footwear is one of the most important parts of a winter hiking system because cold, wet feet can quickly make a trip uncomfortable. Waterproof boots are useful when you expect snow, slush, or wet ground. Depending on the temperature and duration of your trip, insulated hiking boots may provide additional warmth.
Synthetic insulation, including materials such as Thinsulate in some footwear, is one way manufacturers add warmth without relying on extremely bulky construction. However, an insulation label alone does not tell you whether a boot will be warm enough for a particular person or trip. Activity level, wind, time outdoors, sock choice, moisture, circulation, and fit all matter.
Make sure your boots fit with your winter socks
Your winter boots should have enough room for your toes to move without allowing your heel to slide excessively. Test them while wearing the socks you plan to hike in. Stuffing thick socks into a boot that is already tight can reduce comfort and leave little room for warm air around the foot.
Wool or synthetic hiking socks are usually better choices than cotton socks in cold and wet conditions. Carrying a dry spare pair can be valuable if your feet become wet.
Use the right traction for the trail
An aggressive outsole helps on loose snow and mixed terrain, but rubber tread alone should not be treated as reliable ice protection. The National Park Service recommends traction devices on hard-packed snow and icy trails.
Conditions determine the right equipment:
- Hard-packed snow or ordinary icy trail sections: over-the-shoe traction devices can improve grip.
- Deep, soft snow: snowshoes provide flotation and are often more useful than small traction devices.
- Steep or technical ice: mountaineering crampons and appropriate skills may be necessary; ordinary hiking traction should not be assumed to make technical terrain safe.
Trekking poles can also provide additional balance, but they do not replace suitable footwear or traction.
Warning: Snow and ice conditions can change within the same hike. Do not assume that a trail is safe because your boots have deep tread. Carry traction when conditions call for it, know how to use it, and turn around when the terrain exceeds your equipment or experience.
Essential Accessories for Winter Hiking
| Accessory | Why It Matters |
| Insulated Jacket | Provides a warm layer for cold conditions, breaks, exposed terrain, or unexpected temperature drops. |
| Waterproof Boots | Help keep feet dry when hiking through snow, slush, and wet ground. |
| Wool or Synthetic Socks | Provide insulation while managing moisture better than cotton socks in cold and wet conditions. |
| Gloves or Mittens | Protect hands from cold and wind. Mittens often feel warmer because the fingers share a common insulated space. |
| Beanie or Warm Hat | Covers the head and ears, which are otherwise exposed to wind and cold. |
| Gaiters | Help keep snow, mud, and debris from entering the tops of your boots or soaking the lower legs of your pants. |
Gloves and mittens deserve special attention because cold fingers lose dexterity, making it harder to adjust pack straps, open food, use navigation equipment, or handle traction devices. A thin liner glove underneath a warmer glove or mitten can make short tasks easier without leaving your skin fully exposed.
A warm hat should cover your ears. A neck gaiter or balaclava can protect your neck, cheeks, and face when the wind picks up. On severe days, carrying a dry spare pair of gloves or mittens is worthwhile because handwear can become wet from snow and sweat.
Winter sun protection matters too. Snow can reflect bright sunlight toward your eyes, so bring sunglasses or other suitable eye protection on exposed snowy terrain. Sunscreen and lip protection are also useful even when the air is cold. The National Park Service includes sunglasses and sunscreen among its recommended winter-hiking items.
Tips for Staying Dry and Avoiding Moisture Buildup
Staying dry is not only about stopping rain and snow from getting through your jacket. Moisture produced by your own body can also leave you chilled when your activity level drops.
Choose wool or synthetic fabrics for next-to-skin layers and socks. Mid layers should allow heat and moisture to escape reasonably well, and your shell should provide ventilation appropriate to the activity. Cotton absorbs and holds moisture, so it is generally a poor choice for cold, wet hiking.
Pay attention to your temperature before you become noticeably sweaty. Jackets with pit zips and other vents can release heat without requiring you to remove the entire shell. On a steep uphill section, opening vents or removing an insulating layer may be enough to keep your base layer from becoming saturated.
When you stop for a break, add insulation before you become cold. If a layer becomes genuinely wet, change into a dry one when you can do so safely. Store backup clothing in a dry bag, waterproof pack liner, or another moisture-resistant container.
Note: There is no single winter outfit that is correct for a particular temperature. Wind, sunshine, precipitation, elevation, pace, body size, fitness, trip duration, and individual cold tolerance can change how much insulation you need.
Understanding Proper Head and Hand Protection
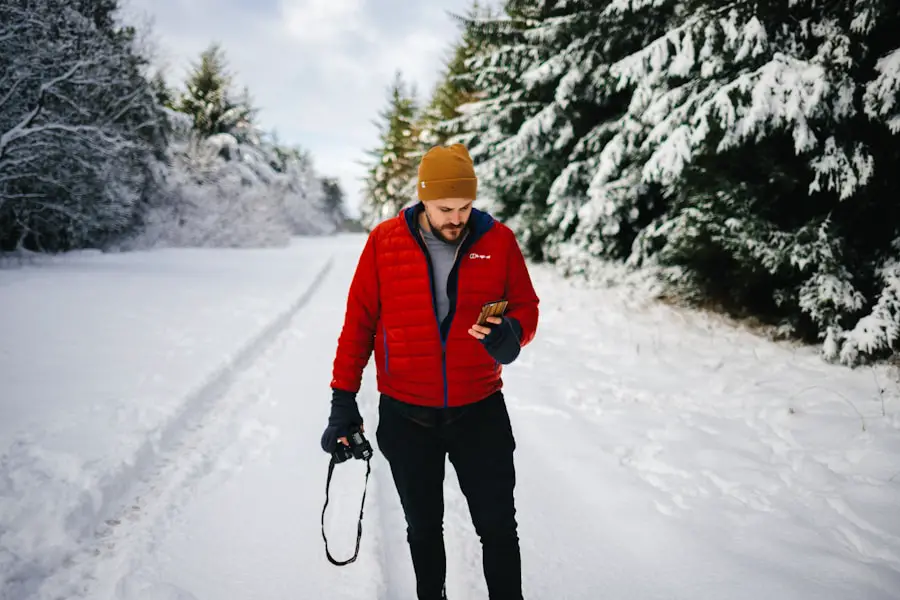
Your head, ears, hands, and face are frequently exposed during a hike, so protecting them can make a major difference in comfort and cold-weather safety. Choose a hat that covers your ears and fits comfortably under a hood when necessary. Wool and synthetic materials are both common options because they provide insulation without relying on absorbent cotton.
The often-repeated idea that everyone loses a fixed large percentage of total body heat specifically through the head is misleading. Heat escapes through exposed and poorly insulated areas of the body. A hat remains valuable because your head and ears may otherwise be directly exposed to wind and cold.
For your hands, choose insulated gloves or mittens according to the expected weather and the amount of dexterity you need. Mittens can be particularly warm because your fingers share an insulated space, while gloves are easier for manipulating equipment. A liner-glove-plus-mitten system can provide both options.
If your gloves become soaked, replace them with a dry pair when possible. Cold hands are not merely uncomfortable; numbness and poor dexterity can make simple trail tasks much harder.
Know the Signs of Hypothermia and Frostbite
Winter clothing is a safety system as well as a comfort system. According to the Centers for Disease Control and Prevention, hypothermia can occur even at temperatures above 40°F when a person becomes chilled by rain, sweat, or cold-water exposure.
Warning signs in adults include:
- persistent or intense shivering
- unusual exhaustion or drowsiness
- confusion or poor judgment
- fumbling hands and loss of coordination
- memory problems
- slurred speech
Frostbite most often threatens exposed areas and extremities such as the fingers, toes, nose, ears, and cheeks. Numbness, unusual skin color, or loss of normal sensation in extreme cold should never be ignored.
Warning: Hypothermia is a medical emergency. If someone shows concerning signs, move out of the cold, replace wet clothing with dry insulation when possible, and seek emergency medical help. The National Weather Service also advises taking immediate action when frostbite or hypothermia is suspected.
Check Conditions Before Choosing Your Winter Hiking Clothes
The weather at the trailhead does not always represent conditions farther up the trail. Elevation, exposed ridges, shade, wind, approaching precipitation, and an early winter sunset can all change the amount of protection you need.
Before leaving, check the weather forecast, trail conditions, closures, and local safety information. In mountain areas where avalanche terrain is possible, check the appropriate current avalanche forecast and avoid terrain beyond your training and equipment.
The National Park Service also recommends being willing to turn around because winter weather and trail conditions can change quickly. Do not rely only on a phone for navigation; carry an appropriate map, compass, GPS device, or combination that you know how to use.
Incorporating Technology and Innovation Into Winter Hiking Attire
Technology can add convenience and comfort to a winter clothing system, but it should remain a supplement rather than the foundation of your safety plan.
Battery-powered heated jackets, vests, socks, and gloves allow users to add heat when needed. They can be especially comfortable during low-activity periods, but you should still carry enough conventional insulation to remain safe if a powered garment stops heating.
Some newer or niche garments use advanced insulation materials, including aerogel-derived components, in an effort to provide high insulation with less bulk. Sensor-equipped textiles and temperature-monitoring garments also exist, but performance, durability, battery dependence, and usefulness vary widely by product.
Navigation technology is often more useful than clothing technology. A dedicated GPS device, GPS watch, or offline mapping system can help on snow-covered routes where the trail is difficult to see. However, electronics should not replace basic navigation knowledge or appropriate backup equipment.
Proper Care and Maintenance of Your Winter Hiking Gear
Winter clothing performs better and lasts longer when it is cleaned and maintained according to the manufacturer’s instructions. Dirt, body oils, smoke, sunscreen, and detergent residue can all affect technical garments.
Always check the care label before washing a waterproof shell. For GORE-TEX outerwear, the manufacturer’s current care instructions recommend washing at 105°F/40°C with a small amount of liquid detergent, rinsing thoroughly, and avoiding powder detergent, fabric softener, stain remover, and bleach. Other fabrics may have different requirements, so their own labels take priority.
Durable water repellent, or DWR, is the treatment that helps water bead on a shell’s outer face fabric. It does not last forever. When water stops beading properly, follow the garment manufacturer’s directions for heat reactivation or DWR reapplication rather than repeatedly adding waterproofing products without checking the care instructions.
Boots also need regular care. Remove dirt and debris after a hike and let wet footwear dry thoroughly before storage. Avoid damaging levels of direct heat unless the footwear manufacturer specifically permits it. Waterproof footwear treatments should be selected for the boot’s materials and applied according to the manufacturer’s directions.
Before each winter season, inspect jackets, pants, boots, gaiters, gloves, traction devices, and pack straps for tears, worn components, broken fasteners, or other damage. Finding a problem at home is much better than discovering it several miles into a snowy trail.
For Overnight Winter Trips: Do Not Forget Your Sleep System
Clothing is only one part of staying warm on an overnight winter trip. Backpackers also need a sleeping bag and sleeping pad suited to the expected conditions. A properly selected sleeping system gives you insulation while you are no longer generating the same heat you produce while hiking.
For more information about choosing one, see this guide to the best sleeping bag for backpacking travel. A sleeping bag is not normally part of a simple winter day-hiking outfit, but it becomes a major consideration when you intentionally plan to spend the night outdoors.
Frequently Asked Questions
What should I wear for winter hiking?
Start with a wool or synthetic base layer, add fleece or another insulating layer, and carry a wind- and weather-resistant shell. Wear quick-drying pants or thermal bottoms with shell pants when needed, plus wool or synthetic socks, waterproof boots, gloves or mittens, a warm hat, and a neck gaiter. Carry dry backup clothing and suitable traction when trails are icy.
What materials are best for winter hiking clothing?
Merino wool and quick-drying synthetic materials are good choices for base layers because they manage moisture better than cotton in cold and wet conditions. Fleece, synthetic insulation, and down can all work as insulating layers. For the outer layer, choose a wind-resistant shell and, when precipitation is expected, a waterproof or waterproof-breathable material suited to the conditions.
How should I layer my clothing for winter hiking?
Use a base layer to manage sweat, a mid layer to provide adjustable insulation, and an outer shell to block wind and precipitation. You do not need to wear every layer at maximum warmth all the time. Remove insulation or open vents during hard climbs, then add a warm layer promptly when you stop.
What type of footwear is best for winter hiking?
Choose waterproof hiking boots that fit comfortably with your winter socks and provide enough toe room without excessive heel movement. Insulated boots can be useful in colder conditions. Deep tread improves grip on snow and loose terrain, but use suitable over-the-shoe traction when packed snow or ice makes ordinary boot tread inadequate.
What accessories are essential for winter hiking?
Useful winter accessories include gloves or mittens, a warm hat, a neck gaiter or balaclava, gaiters, sunglasses, trekking poles, and appropriate traction. Extra socks and dry gloves are valuable backups. On longer or more remote trips, also carry appropriate navigation equipment, a headlamp, food, water, and basic emergency gear.
Should I wear one pair of thick socks or two pairs for winter hiking?
The best setup is the one that keeps your feet warm without making your boots tight. One properly fitted wool or synthetic hiking sock is often enough. A liner-and-outer-sock system can work when the boot has sufficient room, but adding layers that compress your toes or make the boot noticeably tighter can reduce comfort. Always test the full sock-and-boot combination before a long hike.
Do I need microspikes, crampons, or snowshoes?
It depends on trail conditions. Over-the-shoe traction devices are useful on ordinary hard-packed snow and ice. Snowshoes provide flotation in deeper, softer snow. Mountaineering crampons are intended for steeper or more technical icy terrain and require appropriate footwear, skills, and judgment. Check local trail conditions before choosing your equipment.
Sources
- National Park Service — Winter Hiking Tips — winter clothing, waterproof boots, gaiters, traction, dry backup clothing, sunglasses, navigation, and trip planning.
- National Park Service — Hiking With Traction Devices — traction for hard-packed snow and ice and the distinction between traction devices and snowshoes.
- Centers for Disease Control and Prevention — Preventing Hypothermia — hypothermia risks, warning signs, and emergency guidance.
- National Weather Service — During Extremely Cold Weather — layering, exposed-skin protection, frostbite, hypothermia, and changing out of wet clothes.
- GORE-TEX — Product Care Instructions — washing, drying, and restoring durable water repellency on technical outerwear and footwear.

