
Last Updated on September 10, 2026 by Daniel Globe
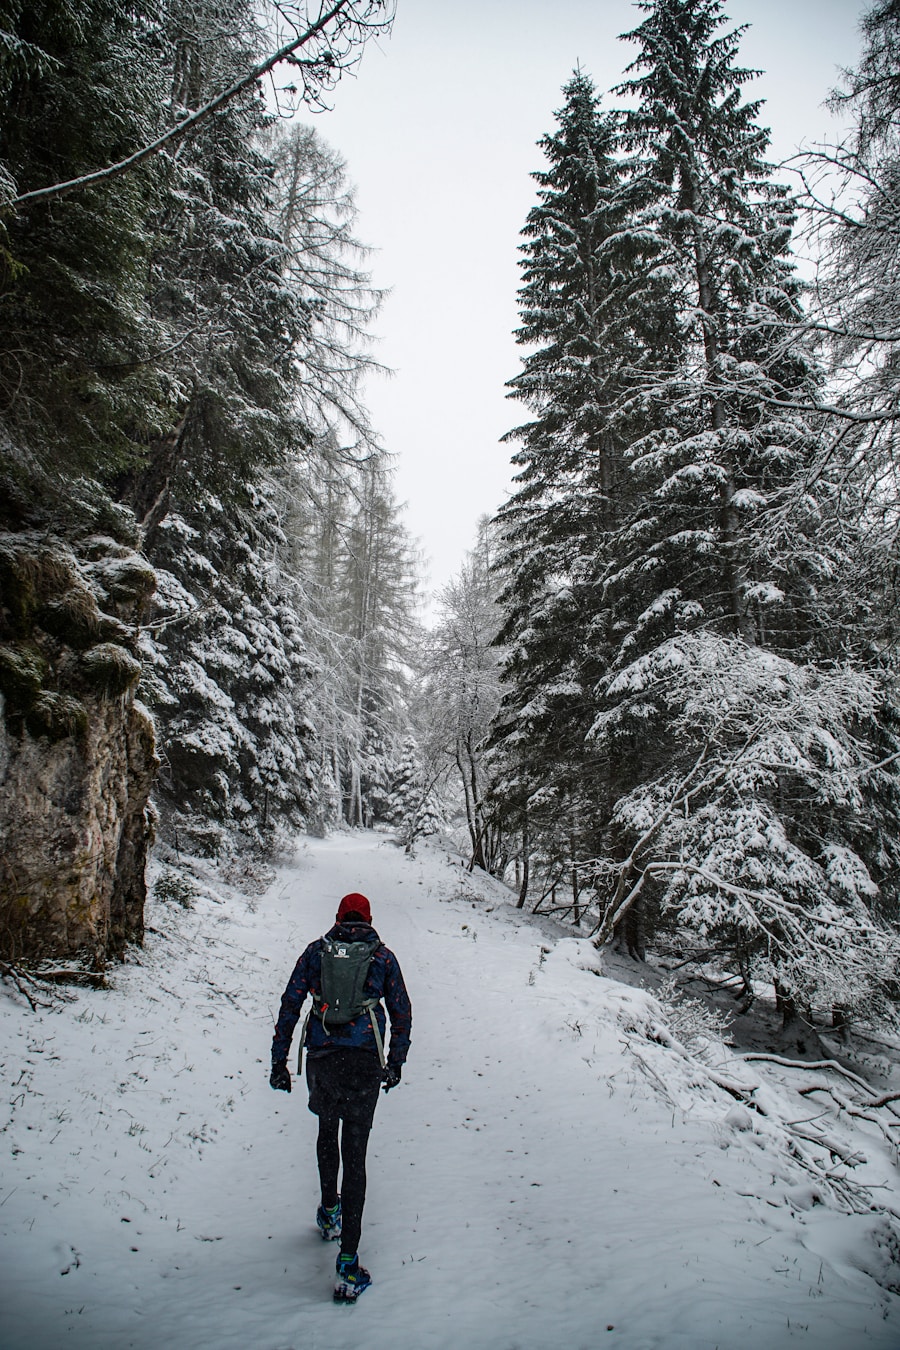
Winter hiking can be comfortable and rewarding when your clothing works as a system rather than as one oversized coat. The goal is to stay warm without becoming sweaty, protect yourself from wind and snow, keep your feet secure on changing surfaces, and carry enough backup gear to handle colder or slower conditions than expected.
Quick Answer
For winter hiking, wear a moisture-wicking synthetic or merino-wool base layer, an adjustable fleece or insulated midlayer, and a windproof, weather-resistant shell. Add warm socks, waterproof hiking boots, a hat, gloves or mittens, and a neck gaiter. Carry extra insulation, dry clothing, and traction suited to the trail.
Key Takeaways
- Use three adjustable layers: a moisture-managing base layer, an insulating midlayer, and a protective shell.
- Avoid getting sweaty. Open vents or remove a layer before you overheat, then add insulation again when you stop.
- Choose waterproof or water-resistant winter footwear with enough room for your socks without squeezing your toes.
- Carry traction devices for packed snow or ice; deep, soft snow may require snowshoes.
- Check weather, trail conditions, daylight, closures, and avalanche forecasts where relevant, and be willing to turn around.
- Carry navigation, food, water, a headlamp, first aid, emergency shelter, and spare dry layers in addition to what you wear.
Disclosure: As an Amazon Associate I earn from qualifying purchases. Some links on this page are affiliate links, at no extra cost to you.
How to Layer Clothes for Winter Hiking
The most useful winter hiking clothing system has three basic parts: a base layer, an insulating layer, and an outer shell. Each does a different job, and the combination can be adjusted as your activity level and the weather change.
1. Base Layer: Move Moisture Away From Your Skin
Your base layer sits against your skin. Choose merino wool or a synthetic fabric such as polyester that can move moisture and dry more effectively than cotton. A close but comfortable fit helps the fabric manage sweat without restricting movement.
Avoid cotton shirts, cotton thermal underwear, and jeans for cold, wet hikes. Cotton absorbs moisture and dries slowly, which can leave you chilled when your pace slows or the temperature drops. The National Park Service specifically recommends wool or synthetic clothing for winter conditions.
2. Insulating Layer: Hold Warm Air
Your middle layer provides insulation. Fleece, wool, synthetic insulated jackets, and down jackets are common options. The amount of insulation should depend on the temperature, wind, your pace, and whether you tend to run warm or cold.
For steady uphill hiking, a light fleece or breathable synthetic layer may be enough. A warmer puffy jacket is especially useful during breaks, at exposed viewpoints, or when an unexpected delay forces you to remain still.
Pro Tip: Adjust layers before you become sweaty. The CDC advises removing one or more layers when you start sweating in very cold weather because wet clothing increases heat loss. Open pit zips, remove your hat briefly, or take off a midlayer before a climb rather than waiting until your clothes are damp.
3. Outer Layer: Block Wind, Rain, and Snow
The outer layer protects the insulation underneath it. In wet snow, sleet, strong wind, or storms, a waterproof and wind-resistant shell is usually the most protective choice. Look for a shell that fits over your other layers without compressing them or limiting arm movement.
Useful features include an adjustable hood, cuffs and hem, along with ventilation zippers that let excess heat escape. A shell that traps too much heat can leave you wet from sweat even when no water enters from outside.
Fit matters throughout the system. Layers should not be so tight that they restrict movement or circulation, but they also should not hang so loosely that drafts easily enter around the waist, wrists, or neck.
The best winter layering system is adjustable: stay comfortably warm while moving, then add insulation quickly when you stop.
Choosing the Right Winter Hiking Outerwear
Your shell should match the conditions you expect rather than simply being the thickest jacket available. During active winter hiking, moisture management can matter as much as insulation.
For wet snow or prolonged precipitation, prioritize a waterproof shell with sealed seams and a hood. In cold but comparatively dry conditions, a breathable wind-resistant layer may feel more comfortable during high-output hiking, provided you still carry adequate weather protection for changing conditions.
Look for adjustable cuffs and hems that reduce drafts while still fitting over gloves and other layers. Underarm vents can be especially useful on long climbs because they release heat without forcing you to remove the shell completely.
For your legs, combine a synthetic or wool base layer with hiking pants suited to the temperature and precipitation. Waterproof shell pants are useful in wet snow, strong wind, or deep powder. Heavily insulated pants can be too warm for strenuous hiking, so choose them according to conditions rather than assuming more insulation is always better.
Bright colors or reflective details can also make a hiker easier to see in low light, snowfall, or an emergency.
Footwear Options for Winter Hiking
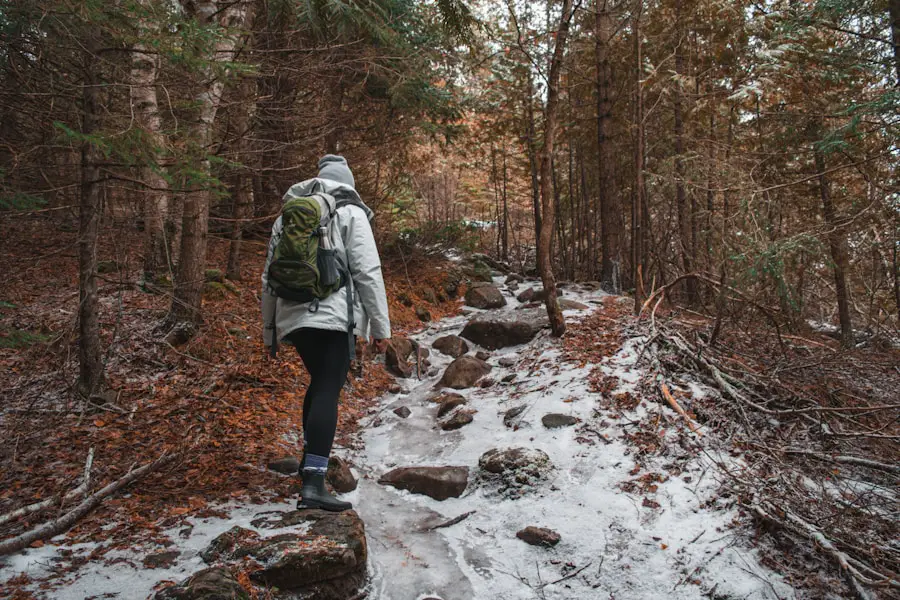
Winter hiking footwear should provide traction, weather protection, secure fit, and enough warmth for the actual conditions. Waterproof or highly water-resistant hiking boots are particularly useful when snow is deep, slushy, or melting.
Insulated boots can provide additional warmth, but there is no single insulation weight that works for every hiker or temperature. Activity level, wind, snow depth, circulation, sock thickness, moisture, and time spent standing still all affect how warm your feet remain.
Choose boots with enough room to wear your intended hiking socks without crushing your toes. Overly tight boots or overly thick socks can reduce comfort and restrict circulation. Your heel should remain secure, and your toes should not hit the front of the boot on descents.
Wear wool or synthetic hiking socks rather than cotton. Carrying a dry spare pair is worthwhile on longer or wetter winter hikes.
Note: A boot’s tread alone may not provide enough grip on hard-packed snow or ice. Winter traction often requires a separate device that attaches over the footwear.
Traction Devices, Snowshoes, and Hiking Poles
Snow conditions can change dramatically during the same hike. A trail may be soft at the trailhead, icy in shaded areas, and covered with deep snow higher up.
- Hard-packed snow and ice: Over-the-shoe traction devices can improve grip and reduce slips.
- Deep, soft snow: Snowshoes help spread your weight over the surface and reduce post-holing.
- Steep technical terrain: Mountaineering crampons, ice axes, and similar equipment require terrain-specific skills and should not be treated as simple substitutes for ordinary hiking traction.
- Variable winter trails: Trekking poles can improve balance and provide extra points of contact on slippery surfaces.
The National Park Service guidance on winter traction recommends traction devices for hard-packed snow and ice and notes that deeper, softer snow may call for snowshoes.
Accessories for Staying Warm
| Accessory | Useful Materials | Main Purpose | What to Look For |
|---|---|---|---|
| Beanie or Winter Hat | Wool, fleece, or synthetic | Protects the head and ears | Comfortable fit under a hood; enough ear coverage |
| Neck Gaiter or Scarf | Wool, fleece, or quick-drying synthetic | Protects the neck and exposed facial skin | Easy to raise, lower, and dry |
| Gloves or Mittens | Insulated synthetic or wool with weather-resistant shell | Keeps hands warm while protecting them from wind and snow | Warmth, dexterity, secure cuffs, and a spare dry pair |
| Ear Protection | Fleece, wool, or synthetic | Covers exposed ears | Low-profile fit that works with your hat or hood |
A warm hat matters because any exposed skin loses heat in cold conditions. There is no need to rely on claims that a fixed percentage of body heat escapes through the head; the practical rule is simply to protect exposed areas when conditions demand it.
For your hands, gloves offer dexterity while mittens generally conserve more warmth because the fingers share heat. A layered system can work well: thin liner gloves for dexterity plus insulated waterproof gloves or mittens for colder conditions. Carrying a second dry pair is valuable if your first pair becomes wet.
A neck gaiter or balaclava can protect your neck, cheeks, chin, and nose from wind. It is easy to pull down when you begin to overheat and raise again when conditions become colder.
Thermal socks should fit without constricting your feet. Wool and synthetic blends are better suited to winter hiking than cotton because they manage moisture more effectively.
Sunglasses or goggles are also important. Snow reflects sunlight and can make glare intense even on cold days, so pack appropriate eye protection and sunscreen.
Safety Considerations for Winter Hiking
Winter turns ordinary hiking problems into more serious ones. Snow can hide the trail, ice can make easy slopes dangerous, batteries can drain faster in the cold, and a delay near sunset can leave you traveling in darkness and falling temperatures.
Check Conditions Before You Leave
Check the forecast for the actual trail area and elevation, not just the nearest town. Review trail conditions, road access, closures, recent snowfall, expected wind, and sunset time. The National Park Service winter hiking guidance also recommends checking current conditions, carrying navigation equipment, sharing your plans, and remaining willing to turn around.
If the National Weather Service has issued a significant winter warning for your area, reconsider whether the hike should proceed. Wind can accelerate heat loss from exposed skin, and poor visibility can make navigation far harder.
Do Not Depend on Your Phone Alone
Carry a map and compass, dedicated GPS, or another navigation backup and know how to use it. Cell service may disappear in valleys and remote areas, and cold weather can reduce battery performance. Store electronics close to your body when practical and carry backup power for important devices.
Leave a Trip Plan
Tell a reliable person your route, destination, vehicle location, expected return time, and when they should take action if you have not checked in. Update them if your plan changes before you lose service.
Be Avalanche Aware
If your route enters or passes beneath avalanche terrain, clothing alone cannot make the trip safe. Check the applicable avalanche forecast before leaving. In the United States, Avalanche.org can direct users to regional forecasts.
Warning: Do not enter avalanche terrain simply because a forecast appears favorable. Avalanche travel requires appropriate education, terrain judgment, companion-rescue skills, and equipment. When you lack that training, choose a route that stays out of avalanche terrain and away from slopes that can release onto your path.
Know When to Turn Around
Turn back when weather deteriorates, visibility drops, snow becomes deeper than expected, traction is inadequate, navigation becomes uncertain, a member of the group is becoming unusually cold or exhausted, or the remaining daylight no longer provides a safe margin.
Reaching the planned destination is optional. Returning safely is the priority.
Recognizing Hypothermia and Frostbite
Cold injuries deserve immediate attention because judgment and coordination can deteriorate as a person becomes hypothermic.
According to the CDC’s hypothermia guidance, warning signs can include intense or persistent shivering, exhaustion, confusion, memory problems, fumbling hands, slurred speech, and drowsiness. A person with suspected hypothermia needs prompt emergency medical attention.
The CDC’s frostbite guidance lists numbness, unusually firm or waxy skin, and white or grayish-yellow skin among warning signs. Protect affected tissue from further cold and seek medical care. Do not rub or massage frostbitten tissue.
Warning: Confusion, slurred speech, severe loss of coordination, unusual drowsiness, or other signs of hypothermia are not signals to “push through.” Stop the hike, protect the person from further heat loss, and seek emergency help.
Tips for Staying Dry in the Snow
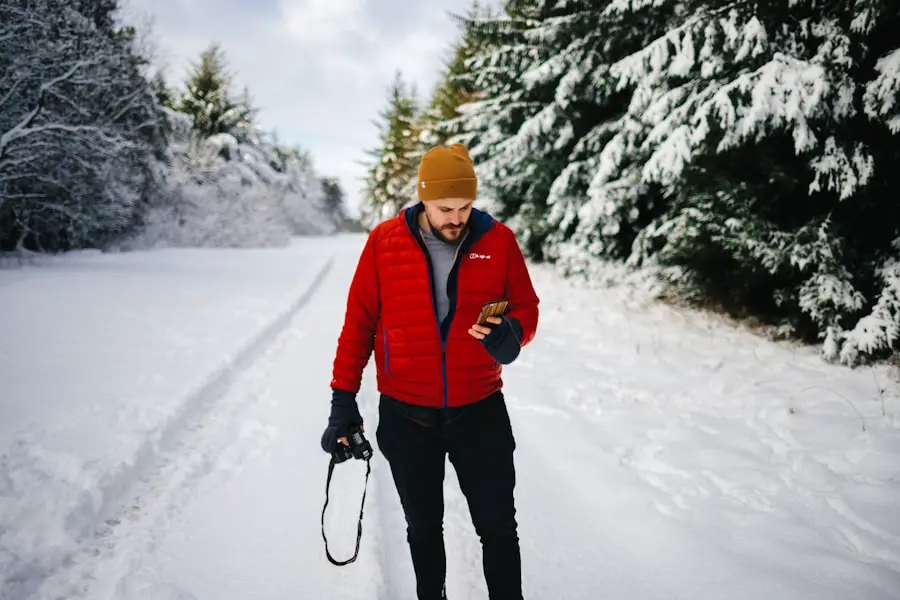
Staying dry during winter hikes improves both comfort and safety because wet clothing can accelerate heat loss. Start with moisture-managing base layers made from wool or synthetic fabrics and avoid cotton for clothing that may become wet.
For snowfall, sleet, or wet brush, choose an outer jacket and pants that provide adequate weather protection. Sealed seams, protected zippers, adjustable cuffs, and a secure hood can help limit water and snow entry.
Gaiters fit over the top of your boots and lower legs and can help keep snow from entering your footwear, particularly in deep powder or when post-holing.
Do not wait until you are soaked with sweat to regulate your temperature. Open vents, loosen your shell, remove a hat or midlayer, or slow your pace before moisture builds up inside your clothing.
During breaks, add insulation promptly. A body that felt hot while climbing can cool quickly once movement stops.
How to Protect Yourself From the Wind
Wind speeds heat loss from exposed skin and can make cold conditions much more dangerous. Check the National Weather Service winter safety information when severe cold or wind is expected.
A wind-resistant outer layer is your main defense. Close cuffs and hems, raise the hood when necessary, and cover exposed areas of your face with a gaiter or balaclava when conditions become severe.
Your insulating layer should still have enough room to loft beneath the shell. Crushing insulation with an excessively tight outer jacket reduces its effectiveness.
Route choice also matters. Tree cover and terrain can reduce exposure, while ridges, summits, open lakeshores, and alpine areas may be dramatically windier than sheltered trailheads.
Use the forecast wind chill as a planning tool, but remember that it describes the cooling effect on exposed skin rather than changing the actual air temperature.
What to Pack in Your Winter Hiking Backpack
Your backpack should contain more than snacks and an extra jacket. Winter conditions can slow travel and turn a small navigation or injury problem into an unexpected night outside.
Winter Hiking Packing Checklist
- Navigation: map, compass, GPS, or another appropriate backup to your phone
- Sun protection: sunglasses or goggles, sunscreen, and lip protection
- Extra insulation: warm puffy jacket or other layer that can be added during stops
- Dry clothing: spare gloves or mittens, socks, and an extra dry layer when conditions warrant
- Illumination: headlamp plus spare batteries or backup light
- First aid: supplies for common injuries, blisters, and personal medical needs
- Emergency shelter: bivy, emergency blanket, tarp, or another shelter appropriate to the trip
- Fire or emergency warmth: fire-starting equipment where appropriate and legally permitted
- Repair tools: multi-tool, tape, or small repair kit suited to your equipment
- Food: high-energy snacks plus extra food for an unexpected delay
- Water: enough for the trip plus a suitable treatment method when relying on natural water sources
- Traction: over-the-shoe traction devices when hard-packed snow or ice may be present
- Snow travel equipment: snowshoes when deep soft snow is expected
- Trekking poles: useful for balance on snow and ice
- Signaling: whistle, signal mirror, satellite communicator, or other suitable emergency signaling device
The National Park Service’s Ten Essentials guidance includes navigation, sun protection, insulation, illumination, first aid, fire, repair equipment, food, hydration, and emergency shelter. Winter hikes often require additional traction, warm clothing, and snow-specific equipment.
Food and Water in Cold Weather
Pack foods that remain easy to eat when cold and do not require complicated preparation. Trail mix, bars, nuts, sandwiches, and similar energy-dense foods can be easier to manage during short stops.
Continue drinking even when cold weather reduces your desire to drink. Keep bottles where they remain accessible, and in very cold conditions take steps to reduce freezing. An insulated bottle or thermos containing a warm nonalcoholic drink can also make rest stops more comfortable.
Carry a Headlamp Even for a Day Hike
Winter days are short, and snow can reduce your speed. A headlamp gives you a safer margin if the hike takes longer than expected. Do not assume your phone flashlight is an adequate substitute for dedicated illumination.
Note: The colder, more remote, and more technical the route becomes, the more conservative your clothing and emergency plan should be. Gear that is adequate for a short forest walk near town may be inadequate above treeline or far from help.
When preparing for a winter hike, start with a moisture-managing base layer, add adjustable insulation, and finish with weather protection suited to the forecast. Then match your footwear and traction to the trail rather than assuming one boot or snow device works everywhere. For additional trip-planning guidance, review the National Park Service winter hiking tips before heading out.
Frequently Asked Questions
What should I wear when hiking in the winter?
Wear a synthetic or merino-wool base layer, an adjustable insulating layer, and a wind- and weather-resistant outer layer. Add suitable hiking pants, warm socks, waterproof footwear, a hat, gloves or mittens, and a neck gaiter. Carry extra insulation and dry clothing rather than relying only on what you start the hike wearing.
What type of base layer is best for winter hiking?
Merino wool and moisture-managing synthetic fabrics are good choices. The base layer should fit comfortably against your skin and help move perspiration away. Avoid cotton because it holds moisture and dries slowly.
What kind of insulating layer should I wear when hiking in winter?
Fleece, wool, synthetic insulation, and down can all work. A breathable fleece is useful while moving, while a warmer puffy jacket is valuable during breaks and emergencies. Choose insulation according to temperature, wind, pace, and how easily you become cold.
What should I look for in a waterproof and windproof outer layer?
Look for enough room to fit over your insulating layers, effective weather protection, an adjustable hood, cuffs and hem, and useful ventilation. For wet snow or prolonged precipitation, sealed seams are particularly helpful.
What type of pants are best for winter hiking?
The best pants depend on temperature and precipitation. Quick-drying hiking pants over a wool or synthetic base layer work for many active hikes. Add wind-resistant or waterproof shell pants when conditions are cold, wet, windy, or snowy. Heavy insulation is not necessary for every hike and can cause overheating.
What kind of footwear is suitable for winter hiking?
Choose supportive hiking boots that fit securely, resist water, and provide enough warmth for your conditions. Wear wool or synthetic socks and leave enough room so the socks do not squeeze your feet. On packed snow or ice, add appropriate over-the-shoe traction rather than relying on the boot tread alone.
What accessories should I bring for winter hiking?
Bring a warm hat, gloves or mittens, neck gaiter or balaclava, wool or synthetic socks, sunglasses or goggles, and sunscreen. Gaiters are useful in deeper snow, and a spare pair of dry gloves and socks can be valuable if your first pair becomes wet.
Should I wear cotton while winter hiking?
Cotton is a poor choice for clothing likely to become wet with sweat, snow, or rain because it absorbs moisture and dries slowly. Wool and synthetic fabrics are generally more suitable for winter hiking layers.
Do I need traction devices or snowshoes for winter hiking?
It depends on the snow surface. Over-the-shoe traction devices are useful on hard-packed snow and ice, while snowshoes are better for deep, soft snow. Check current trail reports before leaving because conditions can change quickly with elevation, sun exposure, snowfall, and freeze-thaw cycles.
Sources
- U.S. National Park Service — Winter Hiking Tips — winter preparation, navigation, traction, clothing, water, and turnaround guidance.
- U.S. National Park Service — Hiking With Traction Devices — traction for hard-packed snow and ice and snowshoe use in deeper snow.
- Centers for Disease Control and Prevention — Preventing Hypothermia — hypothermia risks and warning signs.
- Centers for Disease Control and Prevention — Preventing Frostbite — frostbite symptoms and first-response guidance.
- Avalanche.org — Get the Forecast — avalanche forecasts and risk-management guidance.
- National Weather Service — Winter Weather Safety — wind chill, cold exposure, frostbite, hypothermia, and severe-weather planning.

