

Last Updated on July 29, 2026 by Mason Reed
A cracked, split, or snapped tent pole can quickly turn a comfortable campsite into an unstable shelter. The safest field repair is usually a properly sized pole-repair sleeve secured with heavy-duty tape. Once you return home, replace the damaged section or shock cord with parts that match your tent model, then test the complete pole before your next trip.
Quick Answer
To repair a broken tent pole in the field, align the damaged section, center a correctly sized repair sleeve over the break, and tape both ends of the sleeve so it cannot slide. Treat this as temporary. At home, replace the damaged pole section or worn shock cord with compatible parts.
Key Takeaways
- A metal pole-repair sleeve or splint provides the structural support; tape mainly keeps the splint from moving.
- A tent stake can work as a temporary side splint when no repair sleeve is available.
- Order a replacement section that matches the tent model, pole diameter, length, ferrules, prebends, hubs, and end fittings.
- Label every pole section before disassembly and replace shock cord that is frayed, slack, cut, or overstretched.
- Do not rely on a temporary pole repair during severe wind, heavy snow, or other conditions that could collapse the shelter.
At a Glance
| Time Required | 5–15 minutes for a field splint; about 30–60 minutes for a basic section or shock-cord replacement |
| Difficulty | Easy for a temporary splint; easy to moderate for a straight replacement section |
| Tools Needed | Repair sleeve, heavy-duty tape, replacement section or shock cord, scissors, marker or labels, clamp, gloves, and eye protection |
| Cost | $0 if a repair sleeve came with the tent; commonly about $10–$40 for basic repair parts, with proprietary pole sets costing more |
Disclosure: As an Amazon Associate I earn from qualifying purchases. Some links on this page are affiliate links, at no extra cost to you.
Common Issues With Tent Poles

Tent poles can fail from wind, accidental impact, forcing a pole through a sleeve, transporting it without protection, or bending it before every joint is fully seated. Vango also identifies pitching damage, transport impacts, dropped poles, storage, and incorrectly seated ferrules as common causes of pole failure.
Inspect the entire pole before deciding how to repair it. The damage type determines whether you need a temporary splint, a replacement section, new shock cord, or professional service.
| Damage | Best Response |
|---|---|
| Minor bend or kink | Gently straighten only enough to fit a repair sleeve, then splint it. Replace the section at home. |
| Split or snapped section | Center a repair sleeve over the break and secure both sleeve ends with heavy-duty tape. |
| Cracked ferrule or joint | Splint the connected sections together temporarily. The pole may no longer fold until the section is replaced. |
| Loose or broken shock cord | Carefully assemble the loose sections for temporary use, then replace the cord at home. |
| Broken hub, tip, or proprietary connector | Contact the manufacturer or a professional repair service. Do not force an improvised part into the connection. |
Check the Pole Material
Aluminum poles may bend, kink, crack, or split near a joint. Fiberglass poles often split lengthwise and can release sharp fibers. Some lightweight tents use composite, carbon, prebent, or multi-diameter sections that require model-specific parts.
Warning: Wear gloves and eye protection when handling shattered fiberglass or sharp metal. Cover exposed fibers or edges with tape until the damaged section can be removed. Do not use open flame or high heat to straighten a pole.
Effective Emergency Repair Method for a Broken Tent Pole
The quickest reliable field repair is a pole-repair sleeve, sometimes called a splint. It should be slightly wider than the pole so it can slide over the damaged area without excessive movement. Manufacturers including MSR and NEMO recommend securing the sleeve over the break with duct tape or repair tape.
| Step | Action |
|---|---|
| 1. Remove the load | Support or lower the tent so the damaged pole is not under tension while you work. |
| 2. Align the damage | Line up the broken ends. If the pole is only bent, straighten it gently and only as much as needed for the sleeve to pass over it. |
| 3. Position the sleeve | Slide the repair sleeve over the pole and center it across the break, split, or kink. |
| 4. Secure both ends | Wrap heavy-duty duct tape or repair tape around each end of the sleeve. The tape should prevent sliding without crushing the pole. |
| 5. Test gradually | Reapply tension slowly. Confirm that the sleeve stays centered and does not create a sharp edge against the tent fabric. |
Pro Tip: Keep the repair sleeve inside the pole bag or stake bag with a small roll of duct tape. Check that the sleeve fits your pole diameter before leaving home.
What if the Sleeve Will Not Slide Over the Break?
A sharply kinked aluminum pole or splayed broken end may block the sleeve. Remove pressure from the pole first. Wearing gloves and eye protection, gently compress or straighten only the protruding pieces needed to slide the sleeve into place. Do not repeatedly bend the metal, because that can enlarge the crack.
If the break is at a joint, slide the sleeve over both connected sections and tape them together. The repair may prevent that part of the pole from folding when you take the tent down.
Use a Tent Stake as a Backup Splint
If you do not have a repair sleeve, REI’s field-repair guidance recommends placing a tent stake beside the damaged section as a temporary splint. Center the stake across the break and wrap tape firmly around the pole and stake at both ends.
A stake splint is bulkier and less stable than a fitted sleeve. Check it often and prevent sharp stake edges from rubbing against the tent fabric.
Note: Electrical or insulation tape can help hold a splint when no stronger tape is available, but it should not be treated as the structural repair. Tape wrapped around an unsupported break may flex, slide, or tear under load.
Warning: A field splint is temporary. Do not rely on it in severe wind, heavy snow, exposed alpine terrain, or any situation where another pole failure could endanger occupants. Lower the tent, move to a sheltered site, or leave the area when conditions exceed the repair’s limits.
Steps for Permanent Tent Pole Repairs

A splint can help you finish a trip, but replacing the damaged section is the better long-term repair. Begin by finding the tent’s brand, model, size, approximate year, and pole position. Contact the manufacturer or its approved parts supplier for a matching section or pole diagram.
For a Vango tent, use a compatible Vango or approved replacement part. Vango confirms that broken or split poles can be repaired or replaced, but that does not make a Vango section suitable for another brand. NEMO similarly uses model-specific pole charts to identify the correct replacement section.
1. Obtain the Correct Replacement Section
Match all relevant features:
- Outside diameter and wall thickness
- Finished section length
- Ferrule diameter and insertion depth
- Straight or prebent shape
- Section color and orientation
- Hub, clip, tip, or end-fitting compatibility
Do not substitute a straight universal tube for a prebent or hubbed section unless the manufacturer confirms that it is compatible.
2. Record the Pole Layout
Assemble the pole on a clean, flat surface. Photograph the full layout, hubs, pole tips, color coding, and the direction of every prebent section. Number the sections with masking tape or place them beside numbered pieces of paper.
The order and orientation of tent-pole sections matter. Labeling them before the shock cord is released prevents one of the most common reassembly mistakes.
3. Release the Shock Cord
Start from the removable pole tip closest to the damaged section. Depending on the design, unscrew or pull out the tip, expose the shock cord, and untie the end loop or knot. Hold the cord securely so it cannot snap back into the pole.
Inspect the cord as it comes out. Replace it if it is frayed, cut, hardened, overstretched, or too loose to draw the assembled sections together.
4. Remove and Replace the Damaged Section
Slide the pole sections off the cord one at a time, keeping them in their labeled order. Remove the damaged section and install the matching replacement in the same position and orientation.
If a universal replacement must be trimmed, cut it only when the pole manufacturer or parts supplier allows it. Mark the finished length carefully, secure the section, wear gloves and eye protection, use an appropriate fine-tooth saw, and smooth every cut edge so it cannot damage the shock cord or adjoining ferrule.
Warning: Do not cut or reshape a proprietary hub, carbon or composite section, factory-prebent section, pole tip, or complex connector unless the manufacturer provides instructions. An incorrect modification can weaken the frame or make the pole impossible to assemble.
Reassembling Your Tent Pole
Thread the shock cord through the replacement section and every removed section in the original order. Keep the labels visible until the entire pole has been checked.
- Anchor one end: Tie the shock cord to the first pole tip or attachment point using the same arrangement shown in the manufacturer’s instructions.
- Feed the sections: Pass the cord through each labeled section without twisting a hub or reversing a prebent tube.
- Hold the tension: Stretch the cord enough to reach the final section, then use a clamp or locking pliers over a protective cloth to prevent it from retracting.
- Secure the final end: Reattach the last pole tip or tie the required loop or knot.
- Release the clamp: Let the tension return gradually and confirm that the joints pull together without excessive force.
Shock-cord tension should draw the sections together and keep them organized, but it should not be so tight that folding the pole becomes difficult. If the cord remains loose, shorten it in small increments rather than removing a large amount at once.
Replacing Worn or Broken Shock Cord
If the pole sections are undamaged but the internal elastic has failed, you can replace the cord without replacing the pole.
- Lay the assembled pole straight and label every section.
- Remove a pole tip and cut or untie the old cord.
- Lay the old cord beside the new cord as a starting measurement.
- If the old cord is badly stretched, use the manufacturer’s recommended length rather than copying it exactly.
- Tie the new cord to one end fitting and feed it through all but the final section.
- Stretch and clamp the cord, thread the last section, and secure the second end.
- Release the clamp and check that every joint seats firmly.
- Fold the pole from the middle outward to distribute tension more evenly during storage.
Hubbed pole systems may use clips or hidden cord anchors. Follow the tent manufacturer’s diagram rather than forcing the cord through a hub that does not open normally.
How to Test the Repair
Do not wait until the next campsite to discover that a section is backward, the cord is loose, or a ferrule does not seat fully.
- Assemble the pole on a flat surface and check every joint for full insertion.
- Look for gaps, sharp edges, new cracks, reversed prebends, and cord caught between ferrules.
- Flex the pole gradually by hand without forcing it into a tighter curve than the tent requires.
- Pitch the tent in calm weather close to home.
- Attach clips or feed sleeves slowly while watching the repaired area.
- Leave the tent standing briefly, then recheck every connection and the shock-cord tension.
- Pack a repair sleeve even after completing the permanent repair.
Stop testing if a joint slips, a crack spreads, the replacement bows differently from the matching pole, or the tent body places unusual tension on one point.
Tips for Successful Repairs
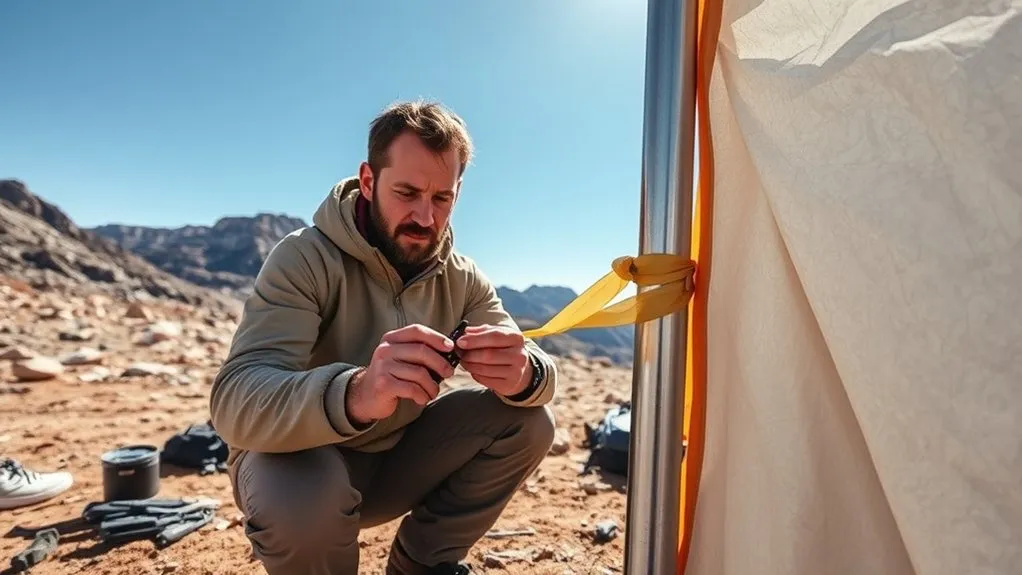
A small repair kit and careful setup habits can prevent a damaged pole from ending a trip. Keep the tools together and inspect the pole whenever it has been exposed to strong wind, impact, or rough transport.
| Tip | Why It Helps |
|---|---|
| Carry a fitted repair sleeve | It bridges a damaged section more reliably than tape alone. |
| Pack heavy-duty tape | Duct tape or repair tape keeps the splint centered and can cover sharp fragments. |
| Seat every joint fully | A partly inserted ferrule concentrates bending force at the joint and can cause a split. |
| Address damage promptly | A small crack or loose joint can grow when the pole is bent under tent tension. |
| Keep repair parts organized | A labeled bag prevents the sleeve, spare cord, clamp, or pole tip from being left at home. |
How to Prevent Tent Pole Damage
- Seat each ferrule completely: Check every joint before bending the pole into the tent’s shape.
- Do not force the pole: Stop if a sleeve, clip, grommet, or hub is misaligned.
- Push through fabric sleeves: Pulling can separate joints inside the sleeve and place stress on an unsupported ferrule.
- Support the pole during takedown: Release tent tension before removing the pole tips from their grommets.
- Fold from the middle: This helps distribute shock-cord tension instead of repeatedly stretching one end.
- Remove dirt and grit: Wipe pole joints before storage so abrasive debris does not score ferrules.
- Protect poles in transport: Keep them in their pole bag and avoid placing heavy objects on top.
- Store everything dry: Follow the manufacturer’s care guidance and keep the tent and components in a cool, dry place.
When to Replace the Pole or Get Professional Help
Stop using the pole and contact the tent manufacturer or a qualified repair service when:
- A hub, molded connector, pole tip, or proprietary fitting is cracked.
- Several sections are damaged or no longer follow the intended curve.
- A crack continues spreading after the section is splinted.
- The replacement section does not match the original diameter, ferrule, prebend, or length.
- The same area fails repeatedly.
- The pole places uneven tension on the tent body after reassembly.
- A temporary repair would be required in severe or exposed conditions.
Many manufacturers can supply an individual section, which may avoid replacing the full pole set. For discontinued tents or complex hubbed frames, a specialist pole-repair service may be the safer option.
Frequently Asked Questions
How do I know if my tent pole is beyond repair?
A single straight section can often be replaced. Seek professional help or replace the pole set when a hub or proprietary connector is broken, several sections are damaged, the pole no longer follows its intended curve, compatible parts are unavailable, or the repaired frame loads the tent unevenly.
Can I use duct tape instead of insulation tape?
Yes. Heavy-duty duct tape or repair tape is generally better for securing a pole sleeve because it is wider and more resistant to movement. The sleeve or splint supplies the structural support; the tape keeps it in position. Tape alone is only a limited last resort.
What should I carry in my emergency tent repair kit?
Carry a repair sleeve that fits your pole, heavy-duty tape, a multitool, spare shock cord, scissors, a small clamp, gloves, and a spare stake that can serve as a backup splint. A manufacturer-specific spare section is useful on remote trips.
How can I prevent tent pole damage?
Fully seat every joint before bending the pole, push rather than pull poles through fabric sleeves, release tent tension before takedown, keep grit out of the ferrules, protect poles during transport, and store the tent and pole set clean and dry.
Is it safe to use a tent with a temporarily repaired pole?
A centered sleeve that remains secure may allow limited use in calm or moderate conditions. Inspect it often and reduce tension where possible. Do not depend on a temporary repair in severe wind, heavy snow, exposed terrain, or any setting where shelter collapse would create a serious risk.
Can fiberglass and aluminum tent poles be repaired the same way?
Both can be supported temporarily with a correctly sized sleeve, but their damage behaves differently. Aluminum commonly bends or kinks, while fiberglass can split into sharp fibers. Wear gloves around damaged fiberglass and replace the affected section rather than depending on glue or exposed tape.
Can I use a tent pole if only the shock cord is broken?
Usually, yes. The cord organizes the sections but does not provide the pole’s main structural strength. Carefully assemble every section by hand, verify that all ferrules are fully seated, and replace the cord before the next trip so sections are not lost or partly connected.
Conclusion
A broken tent pole does not always mean the trip is over. Center a fitted repair sleeve over the damaged area, secure both ends with heavy-duty tape, and use the shelter only in conditions the temporary repair can safely handle. At home, identify the correct replacement section, preserve the pole order, inspect the shock cord, reassemble the frame carefully, and test it in calm weather before depending on it again.
Sources
- MSR Tent Pole Repair Splints — manufacturer guidance on field-repair sleeves.
- NEMO: How to Fix Your Pole Set — splint use, replacement sections, labeling, hubs, and shock-cord maintenance.
- Hilleberg: My Pole Broke, What Do I Do? — manufacturer pole-repair instructions and sleeve guidance.
- REI Expert Advice: How to Fix a Tent Pole — repair-sleeve, tent-stake splint, and shock-cord procedures.
- Vango Support: Broken or Split Poles — causes of pole damage and replacement-part guidance.
- NEMO: Cleaning, Repairing, and Storing Your Tent — care and long-term storage recommendations.
