
Last Updated on July 30, 2026 by Mason Reed
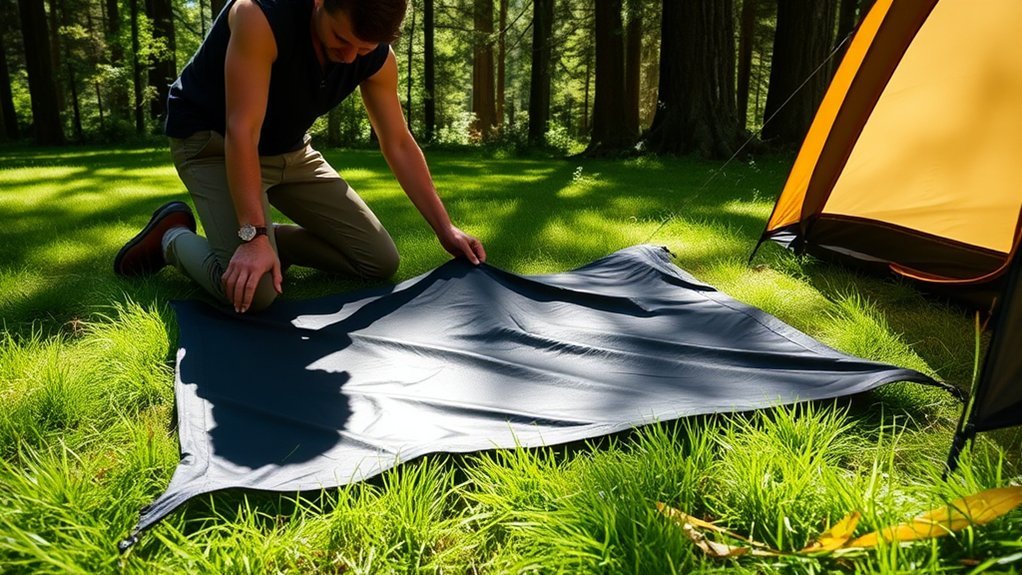
A tent footprint adds a replaceable layer between your tent floor and rough, dirty, or damp ground. Setting it up correctly is simple, but the footprint must match the floor shape, face the right direction, and remain completely beneath the tent so it does not catch rainwater.
Quick Answer
Lay the footprint on a flat, debris-free site with every edge tucked beneath the tent floor. Match the door and corner attachments, place the tent body on top, and secure both according to the model instructions. Use shared stakes when the loops align, then tension the setup evenly without stretching the fabric.
Key Takeaways
- Use a footprint made for your exact tent whenever possible; matching the length alone is not enough if the floor is tapered or asymmetrical.
- No footprint edge should extend past the tent floor because exposed material can collect runoff and direct it underneath the tent.
- Webbing loops, grommets, pins, and buckles work differently, so follow the attachment order in the tent manufacturer’s instructions.
- A fast-fly pitch is a separate, model-specific setup that normally uses the footprint, tent poles, rainfly, and stakes without the inner tent body.
- Dry and inspect the footprint after each trip. It protects against abrasion and dirt, but it cannot make a leaking tent or flood-prone campsite safe.
At a Glance
| Time Required | About 2–5 minutes before pitching the rest of the tent |
| Difficulty | Easy |
| Tools Needed | Compatible footprint, tent, poles, stakes, and the model’s setup instructions; a stake mallet is optional |
| Cost | No setup cost if you already own the footprint; purchase and replacement prices vary by tent model |
Disclosure: As an Amazon Associate I earn from qualifying purchases. Some links on this page are affiliate links, at no extra cost to you.
Verifying Footprint Compatibility

Start by confirming that the footprint is compatible with your exact tent model and, when relevant, its model year. A matching footprint should follow the shape of the floor, including tapered ends, vestibule-side markings, and asymmetrical corners. Approximate length and width measurements may not be enough.
Manufacturers such as ALPS Mountaineering list the intended tent models, fabric, dimensions, and corner-attachment type for their footprints. Check the product page, tent manual, or setup video before your trip, especially if the footprint uses proprietary buckles, pins, or color-coded webbing.
The footprint should normally be slightly smaller than the tent floor. According to REI’s footprint guidance, this smaller fit helps prevent the groundsheet from catching water that runs off the tent. If you use a universal tarp or homemade groundsheet, cut it to size or fold every exposed edge underneath the floor.
Warning: Do not leave any part of the footprint extending beyond the tent floor. The exposed edge can catch rainwater and funnel it beneath the tent. A footprint also cannot protect a tent pitched in a drainage channel, depression, or flood-prone area.
Footprints are commonly made from coated polyester, nylon, or similar waterproof or water-resistant fabrics. The fabric should be free from tears, worn coating, damaged seams, stretched loops, and loose grommets. Never force a pole tip or buckle into hardware that does not align naturally.
Preparing the Campsite
Choose a flat area where water can drain away rather than collect. When camping in a developed or well-used area, select an established campsite and follow Leave No Trace guidance for camping on durable surfaces.
- Look overhead and around the site. Avoid dead branches, unstable trees, rockfall areas, rising water, and obvious drainage channels.
- Check the ground. Remove loose sticks, pine cones, sharp stones, and other movable debris that could puncture the footprint or tent floor.
- Do not excavate the site. Choose a better location instead of digging trenches or making major changes to the ground.
- Check the slope. A small slope may be manageable, but avoid a position that directs runoff toward or beneath the tent.
- Account for wind. Lay out the footprint only when you are ready to secure it so a gust cannot carry it away.
Pro Tip: Find the footprint’s door end before staking anything. Labels, wider corners, colored webbing, buckle colors, or a tapered shape often identify the front. Matching the door first prevents having to rotate the tent after the corners are secured.
Understanding Corner Attachments
Footprints use several attachment systems, and the correct order depends on the tent. The two broad styles covered here are webbing-loop systems and systems that combine grommets, pins, or buckles. Neither style is automatically better or more waterproof than the other.
Webbing Loop Overview
A webbing-loop footprint has a reinforced fabric loop at each corner. Place the matching tent corner over the footprint corner, line up the loops, and secure them as directed by the manufacturer. In many designs, one stake passes through or holds both the footprint loop and the tent-body loop. Some tents also allow the two layers to be staked separately when the ground shape or attachment layout makes that useful.
The loops position the footprint; they do not create the tent’s waterproof barrier. Water management still depends on correct sizing, an appropriate campsite, an intact tent floor, and a properly pitched rainfly.
Grommet, Pin, and Buckle Features
A compatible footprint may have metal grommets or reinforced sockets that accept the tent’s pole tips. Some systems also include buckles that connect directly to matching rainfly hardware. For example, certain ALPS footprints use a grommet and male-buckle arrangement, while other brands use different clips, pins, or color-coded corners.
Follow the model’s setup order. Depending on the tent, the pole tip may pass through the footprint grommet and tent-body attachment in a specific sequence. A buckle on the rainfly should connect to the footprint only when the manufacturer designed the shelter for that configuration.
Note: A grommet does not automatically mean the tent supports a fast-fly pitch. Fast-fly capability must be listed for the exact tent and footprint combination.
Deployment Methods Comparison
| Attachment Type | Typical Connection | What to Check |
|---|---|---|
| Webbing loops | Footprint and tent loops align at each corner and commonly share the same stake. | Keep the footprint centered and do not stretch the loops merely to reach a corner. |
| Grommet, pin, or buckle | Pole tips, pins, and compatible buckles connect in the manufacturer’s specified order. | Confirm the exact tent model, orientation, attachment sequence, and fast-fly compatibility. |
Deploying Footprints With Webbing Loops
Use this general process for a standard tent pitch with webbing-loop corners. The tent manual takes priority if its instructions differ.
- Spread out the footprint. Place it flat on the prepared site and identify its front, rear, and door side.
- Position the tent body. Lay the tent directly on top, matching its shape and door orientation to the footprint.
- Align the corner loops. Match each footprint loop with the corresponding tent-body loop or stake-out point.
- Secure the first corner. Place one stake through or over both compatible loops. Leave a little slack until the opposite corners are aligned.
- Secure the remaining corners. Work diagonally so the layers stay centered. Use separate stakes only when the design permits it or when the site requires a small positioning adjustment.
- Install the poles. Assemble and attach the tent’s pole structure according to the manual.
- Apply even tension. Tighten the corners gradually. The footprint should lie flat without deep wrinkles, but it should not be stretched like a drum.
- Inspect the perimeter. Walk around the tent and tuck in any visible footprint material before adding the rainfly and guylines.
If the footprint loops seem too far from the tent corners, first check whether the footprint is backward, upside down, paired with the wrong model, or designed to align only after the tent has been fully tensioned. Do not pull hard enough to distort the fabric or bend the stakes.
Deploying Footprints With Grommet and Buckle

Standard Tent-Body Setup
- Orient the footprint. Match its front, rear, and colored corners with the tent body.
- Lay the tent body over it. Confirm that all footprint edges remain beneath the floor.
- Align the grommets or pins. Place each footprint corner beside its matching tent-body attachment.
- Insert the pole tips in the specified order. Some systems place the footprint and tent-body hardware on the same pole tip; others use separate pins or sockets.
- Attach compatible buckles. Connect only the hardware shown in the manufacturer’s instructions. Do not force buckles that differ in size, color, or shape.
- Stake and tension the shelter. Secure all required corners, vestibules, and guylines, then check that the footprint remains centered.
Fast-Fly or Fly-Only Setup
A fast-fly pitch leaves the inner tent body behind. On compatible shelters, it normally uses the footprint, the tent’s regular pole set, the rainfly, and the stakes. Big Agnes’ footprint instructions, for example, direct users to stake the footprint, insert the pole tips into its grommets, drape the rainfly over the poles, connect the fly buckles, and secure the vestibules and guylines.
- Stake the compatible footprint on a clear, flat site.
- Assemble the tent’s normal pole set and insert the tips into the designated footprint grommets or sockets.
- Drape the compatible rainfly over the pole structure.
- Connect the rainfly buckles or corner hardware directly to the footprint.
- Stake the vestibules and all required guylines.
- Check the fly tension and confirm that the footprint does not extend beyond the covered area.
Do not attempt a fast-fly setup with mismatched components. The footprint must be designed to hold the pole geometry and connect securely to the rainfly.
Tips for Effective Setup and Troubleshooting
- The footprint is visible around the tent: Recenter it or fold the exposed edge underneath. Do not leave a runoff-catching lip.
- The corners do not align: Check the front and rear orientation, tent model, model year, and color-coded attachments.
- The straps seem too long: Finish staking and tensioning the tent before judging the fit. Some matching footprints look loose until the shelter is fully pitched.
- The footprint falls off when the tent is moved: Reattach it after relocating the tent. Some systems are held in position mainly by outward stake tension.
- The footprint has wrinkles: Loosen the corners, center the fabric, and retension diagonally. Small wrinkles are less serious than overtightening.
- Water collected underneath: Check for exposed groundsheet edges, a low or poorly drained site, damaged floor coating, leaking seams, and runoff traveling beneath the shelter.
- A buckle or pole tip will not fit: Stop. Confirm that the components are compatible instead of forcing the connection.
- The ground will not hold normal stakes: Use stakes or anchors designed for sand, snow, rock, or soft soil and follow the tent’s anchoring instructions.
The simplest rain rule is also the most important: the footprint belongs completely under the tent, never outside its floor perimeter.
Using a Universal Tarp or Homemade Footprint
A universal groundsheet can protect the floor even if it lacks model-specific loops or grommets. Lay the tent over it, trace or estimate the floor shape, and fold or cut the material so it ends slightly inside the floor perimeter. REI’s tent-setup guidance recommends folding a full tarp underneath so no part extends beyond the tent.
A homemade groundsheet will not provide proprietary buckles or structural grommets, so do not use it for a fly-only pitch unless the shelter manufacturer specifically approves that arrangement.
Cleaning and Maintaining the Footprint
- Shake off loose dirt, sand, leaves, and grit after use.
- Spot-clean stubborn dirt with cool water, a soft cloth or sponge, and a small amount of non-detergent soap or tent-safe gear cleaner.
- Avoid bleach, harsh household cleaners, machine washing, and machine drying unless the manufacturer expressly allows them.
- Rinse away cleaner residue and dry both sides completely before storage.
- Inspect the coating, seams, webbing, grommets, buckles, and fabric for wear.
- Store the clean, dry footprint loosely in a cool, dry area rather than leaving it compressed in a hot car or damp storage space.
Customer Support Resources
When the footprint does not align or the hardware is unclear, use the setup instructions for the exact tent rather than relying on generic advice. Record the tent name, size, model year if known, footprint product number, and any color-coded corner details.
ALPS Mountaineering provides product specifications and an official tent footprint setup video showing its attachment styles. Its product pages also identify whether a footprint uses webbing loops or a grommet-and-buckle system.
If support is needed, take clear photographs of the entire pitched tent, each corner attachment, the product labels, and the area that does not align. These details make it easier for the manufacturer to determine whether the setup is incorrect or the footprint is incompatible.
Frequently Asked Questions
Can I use a footprint from a different tent brand?
Yes, if its shape and dimensions fit completely beneath the tent floor. However, its loops, grommets, pins, or buckles may not align with your tent. Treat a mismatched footprint as a basic groundsheet and do not use it for a structural fast-fly pitch unless the manufacturer confirms compatibility.
What materials are tent footprints typically made from?
Many commercial footprints use coated polyester or nylon. Polyurethane or another waterproof coating may be applied to the fabric. Universal groundsheets may use other lightweight materials, but they still need to resist abrasion and fit beneath the tent floor.
How do I clean and maintain my tent footprint?
Brush off loose debris and spot-clean the footprint with cool water, a soft cloth, and non-detergent soap or a tent-safe cleaner. Rinse it, dry both sides completely, inspect the attachments and coating, and store it loosely in a cool, dry place.
Can a footprint be used in extreme weather?
A footprint can continue protecting the floor from abrasion and wet ground, but it does not improve the tent’s structural weather rating. Severe-weather performance depends on the tent, poles, stakes, rainfly, guylines, site drainage, and correct pitching. Never rely on a footprint as flood protection.
Are footprints necessary for all camping tents?
No. A footprint is most useful on abrasive, muddy, gritty, or frequently used sites and when you want to protect an expensive or lightweight floor. Campers may skip it on soft ground when minimizing pack weight, provided the tent manufacturer does not require it for the intended setup.
Should a tent footprint extend beyond the tent?
No. It should end slightly inside the floor perimeter. If a tarp or universal groundsheet is too large, fold the extra material underneath the tent so it cannot collect runoff.
Which side of the footprint faces up?
Follow the manufacturer’s label, printed instructions, corner colors, and attachment layout. Coating placement and recommended orientation can vary. If neither side is marked and the hardware is symmetrical, ask the manufacturer rather than relying only on whether one surface looks shinier.
Conclusion
Setting up a tent footprint correctly begins with matching it to the exact tent, choosing a well-drained campsite, and orienting the corners before staking. Keep every edge under the tent floor, connect webbing loops or grommet hardware only as the manufacturer directs, and apply even tension without stretching the fabric.
A footprint can reduce abrasion, dirt, and direct contact with wet ground, but it is only one part of a weather-ready shelter. Correct campsite selection, an intact tent floor, a properly tensioned rainfly, secure stakes, and complete drying after the trip remain just as important.
Sources
- ALPS Mountaineering — Tent Footprints — compatible models, materials, dimensions, and corner-attachment types.
- ALPS Mountaineering — Tent Footprint Setup — manufacturer demonstration of ALPS footprint attachment systems.
- REI Expert Advice — What Is a Tent Footprint? — footprint purpose, sizing, materials, and when one is useful.
- REI Expert Advice — How to Set Up a Tent — campsite preparation and keeping footprints or tarps within the floor perimeter.
- Big Agnes — Footprint FAQs — shared staking, footprint fit, model compatibility, and fast-fly setup.
- Leave No Trace — Travel and Camp on Durable Surfaces — responsible campsite selection and minimizing ground impact.
