

Last Updated on July 29, 2026 by Mason Reed
Setting up sleeping pads correctly can make a tent feel warmer, more supportive, and far more comfortable. Start with a safe, level campsite, protect the tent floor, choose pads that fit both the sleepers and the tent, and adjust each pad’s firmness after lying on it. In cold weather, pay close attention to insulation rather than thickness alone.
Quick Answer
Set sleeping pads on a clean, level tent floor with the head end slightly uphill. Inflate air pads firmly, lie down, and release small amounts of air until your hips and shoulders feel supported. Keep paired pads aligned with straps or compatible connectors, and use enough R-value for the expected nighttime conditions.
Key Takeaways
- Choose an existing, level campsite rather than trying to rebuild or soften the ground with vegetation.
- Place a fitted footprint beneath the tent, not loosely inside it, and keep every edge under the tent floor.
- Match the pad’s width, length, shape and R-value to the sleeper, tent and expected weather.
- Firmness is adjustable: the best setting supports the body without letting the hips or shoulders touch the ground.
- For cold conditions, place a closed-cell foam pad beneath an inflatable pad to add insulation and puncture protection.
At a Glance
| Time Required | About 5–10 minutes after the tent is pitched |
| Difficulty | Easy |
| Tools Needed | Sleeping pad, fitted footprint or groundsheet, pump sack if required, and a compatible repair kit |
| Cost | $0 with existing gear; approximately $5–$25 for optional straps, nonslip material or repair supplies |
Disclosure: As an Amazon Associate I earn from qualifying purchases. Some links on this page are affiliate links, at no extra cost to you.
Selecting the Right Location for Your Sleeping Pads

Comfort begins before the pads enter the tent. According to the National Park Service’s campsite setup guidance, a tent should be placed on a large, flat area after sticks, rocks, pinecones and other objects have been removed. Avoid low or sunken ground, which may collect water during rain.
Check the site for hazards before pitching the tent. Stay away from ravines that could flood, unstable slopes, cliff edges and dead trees or branches that could fall. When the ground slopes slightly, position the sleeping area so your head is uphill.
Inside the tent, leave enough room around the pads to reach the door and avoid pressing sleeping bags against wet or condensation-covered walls. You do not need a large empty border, but the pads should not distort the tent body or block vents.
Warning: Never pitch in a dry-looking drainage channel, low depression or flood-prone ravine. Do not sleep beneath dead trees or broken overhead branches, even when the weather is calm.
Preparing the Ground for Optimal Comfort
Prepare the tent site carefully, but do not remodel it. Use an established campsite or another durable surface whenever possible. The Leave No Trace Center for Outdoor Ethics advises that good campsites are found rather than made, so avoid digging, cutting plants or collecting leaves and grass to create a mattress.
Clear Debris and Obstacles
Before pitching the tent, pick up loose sticks, pinecones and sharp stones that could create pressure points or puncture the tent floor. Check the area with your hands and knees after removing visible debris. A small object that feels harmless through a shoe may become painful after several hours of body pressure.
Do not scrape away rooted plants, break branches or dig a level platform. When the chosen surface is unsuitable, move to another established or durable spot.
Use Ground Insulation Layers
A tent footprint protects the tent floor from abrasion and helps keep it cleaner. It belongs beneath the tent rather than directly beneath the sleeping pads inside the shelter. A fitted footprint should be slightly smaller than the tent floor. When using a larger tarp, fold every exposed edge underneath so it cannot catch rain and channel water below the tent. This placement follows both NPS guidance and REI’s footprint recommendations.
For extra insulation inside the tent, use a second sleeping pad rather than relying on a thin emergency blanket or ordinary tarp. A closed-cell foam pad placed beneath an inflatable pad adds warmth, protects the inflatable from abrasion and provides backup cushioning if the air pad develops a leak.
Level and Soft Surface
After the tent is pitched, run your hand across the floor and remove any overlooked debris. Lay the pads flat with their head ends on the uphill side. Test the position by lying down before arranging the rest of your gear.
If the ground feels uneven, reposition the tent or sleeping pads rather than gathering natural materials. A thicker pad can improve cushioning, but no pad will fully correct a badly sloped or hazardous campsite.
Choosing Between Inflatable and Foam Sleeping Pads
The best pad depends on how far you will carry it, how much cushioning you need, the expected temperature and how much floor space is available. It is more useful to compare three main categories: air pads, self-inflating pads and closed-cell foam pads.
| Pad Type | Main Strengths | Main Tradeoffs | Best Fit |
|---|---|---|---|
| Air pad | Compact, adjustable and available in thick, highly insulated designs | Can puncture, may feel unstable when too firm and requires inflation | Backpacking, compact packing and sleepers who need deeper cushioning |
| Self-inflating pad | Foam-and-air support, adjustable firmness and good stability | Usually heavier and bulkier than lightweight air or foam pads | Car camping and comfort-focused trips |
| Closed-cell foam pad | Light, affordable, quick to set up and highly resistant to punctures | Bulky when packed, firm and generally less cushioned | Rough terrain, simple setups, backup insulation and budget camping |
Match Pad Size to Your Body and Tent
Measure the tent’s usable floor width before combining wide pads. Two 25-inch pads need at least 50 inches of clear floor space, plus enough room to avoid forcing the tent walls outward. Also check the pad length so your feet do not rest directly on the cold floor.
Side sleepers often benefit from a wider, thicker pad because their weight is concentrated at the shoulders and hips. Back and stomach sleepers may be comfortable on a thinner or firmer surface. Rectangular pads offer more room to move, while tapered pads reduce packed weight and save floor space.
Choose the Right R-Value
A sleeping pad’s R-value measures its resistance to heat loss. A higher number indicates more insulation from the ground. The active standardized test for camping mattresses is ASTM F3340-22, which allows more meaningful comparisons among pads tested under the same method.
The following ranges are practical starting points rather than guarantees because personal warmth, clothing, ground temperature and shelter conditions also matter:
- Below 2: Warm-weather use
- 2–3.9: Cool conditions and many mild three-season trips
- 4–5.4: Cold conditions
- 5.5 or higher: Very cold or winter-oriented use
A sleeping pad has two separate jobs: cushioning your pressure points and slowing heat loss into the ground. Thickness helps with comfort, but R-value is the better measure of insulation.
Arranging Your Sleeping Pads for Maximum Support
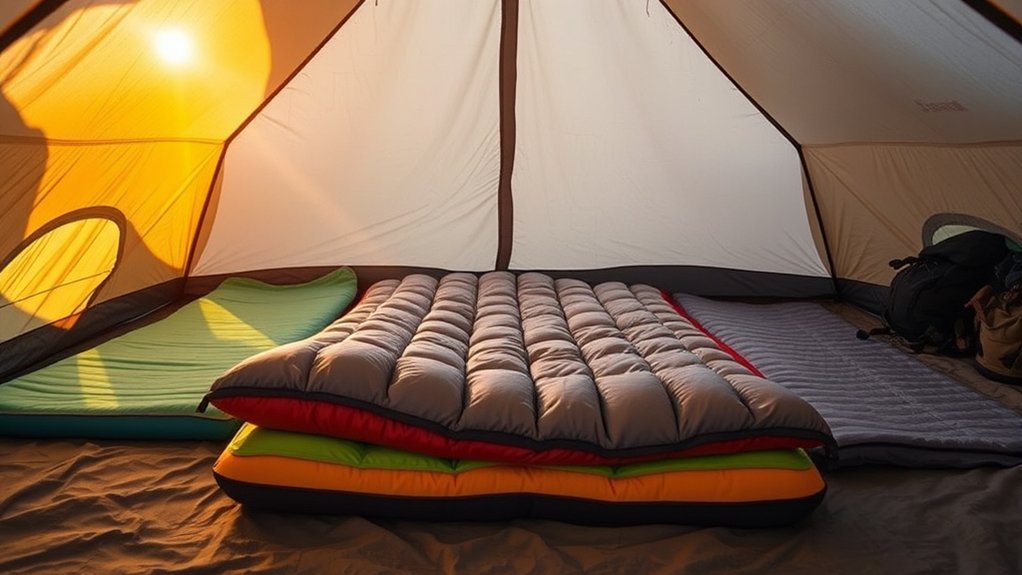
Place each pad lengthwise with the tent and leave a clear path to the door. When two people are sharing the shelter, arrange their pads side by side and align the head and foot ends. Test the layout before unpacking sleeping bags, pillows and clothing.
Fit Pads Without Distorting the Tent
The pads should lie flat rather than curling up the walls. A pad that is too wide may press against condensation, block ventilation or place unnecessary force on the tent fabric. When the combined pads do not fit, use narrower models, rotate the sleeping direction if the tent allows it or choose a larger shelter.
Keep Two Sleeping Pads Together
A small gap between pads can become uncomfortable during the night. Use the manufacturer’s coupling straps, toggles or fitted double-pad cover when available. Soft accessory straps can also work when they do not compress the pads or contain hardware that could damage the tent floor.
A thin, clean nonslip mat designed for indoor or camping use may reduce movement on a slick tent floor. Avoid rough shelf liner, exposed adhesive, pins, clips or sharp fasteners.
Pro Tip: Complete a two-minute test before bedtime. Lie down, roll onto each side, reach toward the tent door and check that the pads stay aligned without touching wet walls or blocking vents.
Ensuring Proper Inflation and Padding
Air pressure changes both comfort and support. A pad that is too soft may let the hips or shoulders touch the ground. A pad that is excessively firm may feel unstable and create pressure at those same points. The goal is controlled support, not maximum pressure.
Optimal Inflation Techniques
- Unroll the pad completely. Check the surface, valve and seams for visible damage.
- Open the correct inflation valve. Follow the pad manufacturer’s valve instructions.
- Use the supplied pump sack when available. It is efficient and limits the moisture introduced by repeated mouth inflation.
- Inflate the pad until firm. Do not use a high-pressure compressor unless the manufacturer specifically permits it.
- Lie down in your normal sleeping position. Make sure the hips, shoulders and torso remain off the ground.
- Release air in small amounts. Stop when the pad supports the body without feeling hard or unstable.
- Close the valve and recheck it. Confirm that the valve cap or seal is fully seated.
Side sleepers may need slightly lower pressure so the shoulders and hips can sink into the pad without bottoming out. Back sleepers often prefer a little more firmness. Adjust one pad at a time because two people with different body weights may need different settings.
Layering for Extra Padding
Layering is useful for cold ground, rough campsites and emergency backup. Place the durable closed-cell foam layer on the bottom and the inflatable or self-inflating pad on top. This protects the air pad and preserves the softer surface next to the sleeper.
| Layer | Suggested Material | Main Benefit |
|---|---|---|
| Bottom layer | Closed-cell foam | Puncture protection, added insulation and backup cushioning |
| Top layer | Air or self-inflating pad | Adjustable support and deeper cushioning |
| Sleep layer | Sleeping bag or camping quilt | Insulation around the sleeper and protection from drafts |
Note: R-values are additive when pads are stacked. For example, a foam pad rated R-2 beneath an air pad rated R-3 provides a combined nominal R-value of about 5. Use this as a comparison tool rather than a guaranteed temperature limit.
Positioning for Support
Align the pad with your full body rather than placing only the torso on it. Your shoulders, hips and feet all need insulation from the ground. When using a short pad to save weight, place an insulated pack or another suitable item beneath the lower legs only if doing so creates a stable, dry surface.
- Keep the head end uphill when the floor slopes.
- Use a wide pad when your arms repeatedly fall off a narrow model.
- Keep stacked pads centered so their edges do not curl.
- Position valves where they can be reached without leaving the sleeping bag.
- Do not overlap two separate inflatable pads unless the manufacturer designed them for that arrangement.
Tips for a Cozy Sleeping Environment
Once the pads are positioned, complete the sleep system with sleeping bags or quilts that match the forecast. Keep dry sleep clothing separate from wet hiking clothes, ventilate the tent according to its instructions and avoid placing damp gear against the sleeping area.
| Cozy Setup Tip | Benefit |
|---|---|
| Adjust rather than overinflate | Balances body support and pressure relief |
| Use a fitted footprint | Protects the tent floor from abrasion and dirt |
| Couple side-by-side pads | Reduces gaps and nighttime separation |
| Keep sleep clothing dry | Improves comfort and helps the sleep system retain warmth |
| Carry the correct patch kit | Allows small punctures to be repaired during a trip |
Troubleshooting a Pad That Softens Overnight
An air pad may feel slightly softer after warm inflation air cools, especially when nighttime temperatures fall quickly. Add a small amount of air once the pad has cooled, then monitor it. A pad that continues losing support may have a loose valve, damaged seal or puncture.
Check that the valve is clean and fully closed. Listen for escaping air near the valve and seams. If no leak is obvious, apply a thin layer of soapy water to sections of the inflated pad and look for growing bubbles. Rinse and dry the pad completely before applying a patch.
Care, Cleaning, Storage and Field Repair
Proper care reduces odor, material damage and preventable leaks. Follow the pad manufacturer’s instructions first because valve designs, adhesives and insulation materials differ.
- Wipe the inflated pad with warm water and mild soap while keeping the valve closed.
- Do not machine wash or machine dry an inflatable or self-inflating pad.
- Rinse away soap and air-dry the pad completely before storage.
- Store it in a cool, dry place with the valve open, preferably flat or loosely rolled rather than tightly compressed.
- Keep the pad away from sharp gear, pets, fuel, harsh chemicals and prolonged direct sunlight.
For a puncture, use the repair kit intended for the pad’s fabric. Clean and dry the damaged area, apply the patch or adhesive exactly as directed and allow the full stated cure time. The NEMO sleeping-pad care and repair guide provides examples of cleaning, leak testing, patching and long-term storage.
Frequently Asked Questions
How do I clean my sleeping pad after use?
Close the valve and wipe the pad with warm water, mild soap and a soft cloth or sponge. Rinse away residue and air-dry it completely. Do not machine wash or machine dry it. For long-term storage, leave the valve open and keep the pad flat or loosely rolled in a cool, dry place.
Can I use a sleeping bag on top of the pads?
Yes. A sleeping bag or camping quilt belongs on top of the pad. The pad insulates you from the ground and cushions your body, while the sleeping bag or quilt limits heat loss to the surrounding air. Both parts must suit the expected weather.
What is the lifespan of an inflatable sleeping pad?
There is no universal lifespan. A well-maintained pad may remain useful for many seasons, while frequent abrasion, UV exposure, moisture, valve damage or poor storage can shorten its life. Replace the pad when seams separate, valves fail repeatedly, coatings peel or repairs no longer hold.
Are there sleeping pads for colder temperatures?
Yes. Choose an insulated pad with an ASTM-tested R-value appropriate for the expected conditions. For cold or winter camping, a closed-cell foam pad can be placed beneath an insulated air or self-inflating pad to increase the combined R-value and provide backup insulation.
How do I repair a punctured inflatable sleeping pad?
Inflate the pad and locate the leak by listening or applying soapy water and watching for bubbles. Mark the spot, rinse away soap and dry the pad. Clean the repair area and apply the manufacturer-approved patch or adhesive. Allow the complete cure time stated in the repair instructions before reinflating.
Why does my sleeping pad feel softer during the night?
Cooling air can make a pad feel softer after temperatures fall. Add a small amount of air after the pad has cooled. If it continues losing firmness, inspect the valve, seams and surface for a slow leak.
How can I stop two sleeping pads from separating?
Use compatible coupling straps, toggles or a fitted double-pad cover. Align both pads before tightening anything and make sure straps do not compress the pads. A thin, clean nonslip layer may also help on a slick tent floor, provided it has no rough edges or adhesive.
Conclusion
A supportive tent bed starts with a safe, level campsite and pads that match the sleepers, shelter and weather. Protect the tent floor, keep groundsheet edges tucked underneath, select an appropriate R-value and adjust air pressure after lying down. When two pads are used together, secure them before bedtime and test the full arrangement while there is still daylight.
These small setup steps reduce pressure points, gaps, sliding and heat loss. They also make it easier to spot a poorly fitting pad or slow leak before it disrupts the night.
Sources
- National Park Service: Finding and Setting Up a Campsite — level-ground selection, debris removal, hazard avoidance and footprint placement
- Leave No Trace: Travel and Camp on Durable Surfaces — low-impact campsite selection and avoiding unnecessary site alteration
- ASTM F3340-22 — standardized thermal-resistance testing for camping mattresses
- REI Sleeping Pad Buying Guide — R-values, pad types, sizing and stacked insulation
- REI Tent Footprint Guide — correct footprint sizing and rainwater management
- NEMO Sleeping Pad Care and Repair Guide — cleaning, drying, leak detection, patching and storage
